No edit summary |
No edit summary |
||
| (20 intermediate revisions by 10 users not shown) | |||
| Line 1: | Line 1: | ||
{{ | {{Locationbox | ||
|headercolor = #a50008 | |headercolor = #a50008 | ||
|headerfontcolor = #a5a2a5 | |headerfontcolor = #a5a2a5 | ||
| Line 6: | Line 6: | ||
|Name = 煉瓦ダンジョン, Renga Danjon, Brick Dungeon | |Name = 煉瓦ダンジョン, Renga Danjon, Brick Dungeon | ||
|Effects = None | |Effects = None | ||
|Wallpapers = WP #69 | |Wallpapers = WP #69, WP #766 | ||
|Events = [[Events#The_Cloning_Room|The Cloning Room]] | |Masks = [[Yume 2kki:Masks/Others|Mini Urotsuki]], [[Yume 2kki:Masks/Others|Giant Urotsuki]], [[Yume 2kki:Masks/Others|Block Person]] | ||
|Events = [[Yume 2kki:Events#The_Cloning_Room|The Cloning Room]] | |||
|NPCS = None | |NPCS = None | ||
|Connections = | |Connections = {{Connection|Toy World}}, {{Connection|French Street}}, {{Connection|Day and Night Towers|one_way_type=NoEntry}}, {{Connection|Monochrome Street|one_way_type=NoEntry}} | ||
|RemovedConnections = | |RemovedConnections = {{Connection|Mini-Maze|is_removed=true}} | ||
|BGM = | |BGM = {{BGM|title=e4|filename=E4.ogg|soundroom=085A}}, {{BGM|title=e4b|filename=E4b.ogg|soundroom=085B}}, {{BGM|title=tiriri|filename=Tiriri.ogg|label=Map}}, {{BGM|title=2_11|filename=2_11.ogg|label=Giant Cloning Room|soundroom=290A}} | ||
|Map ID = 0149, 0195, 0374, 0611 | |Map ID = 0149, 0195, 0374, 0611 | ||
|Primary = | |Primary = kuraud | ||
|VersionAdded = 0.087b | |VersionAdded = 0.087b | ||
|VersionsUpdated = 0.089-++,0.090b-b,0.090h-s+,0.106a patch 1,0.112b patch 4,0.118c patch 3-b | |VersionsUpdated = 0.089-++,0.090b-b,0.090h-s+,0.106a patch 1,0.112b patch 4,0.118c patch 3-b,0.118i patch 1-b, 0.120g | ||
}} | }} | ||
The '''Red Brick Maze''' is an area accessible from [[Yume 2kki:Toy World|Toy World]]. | |||
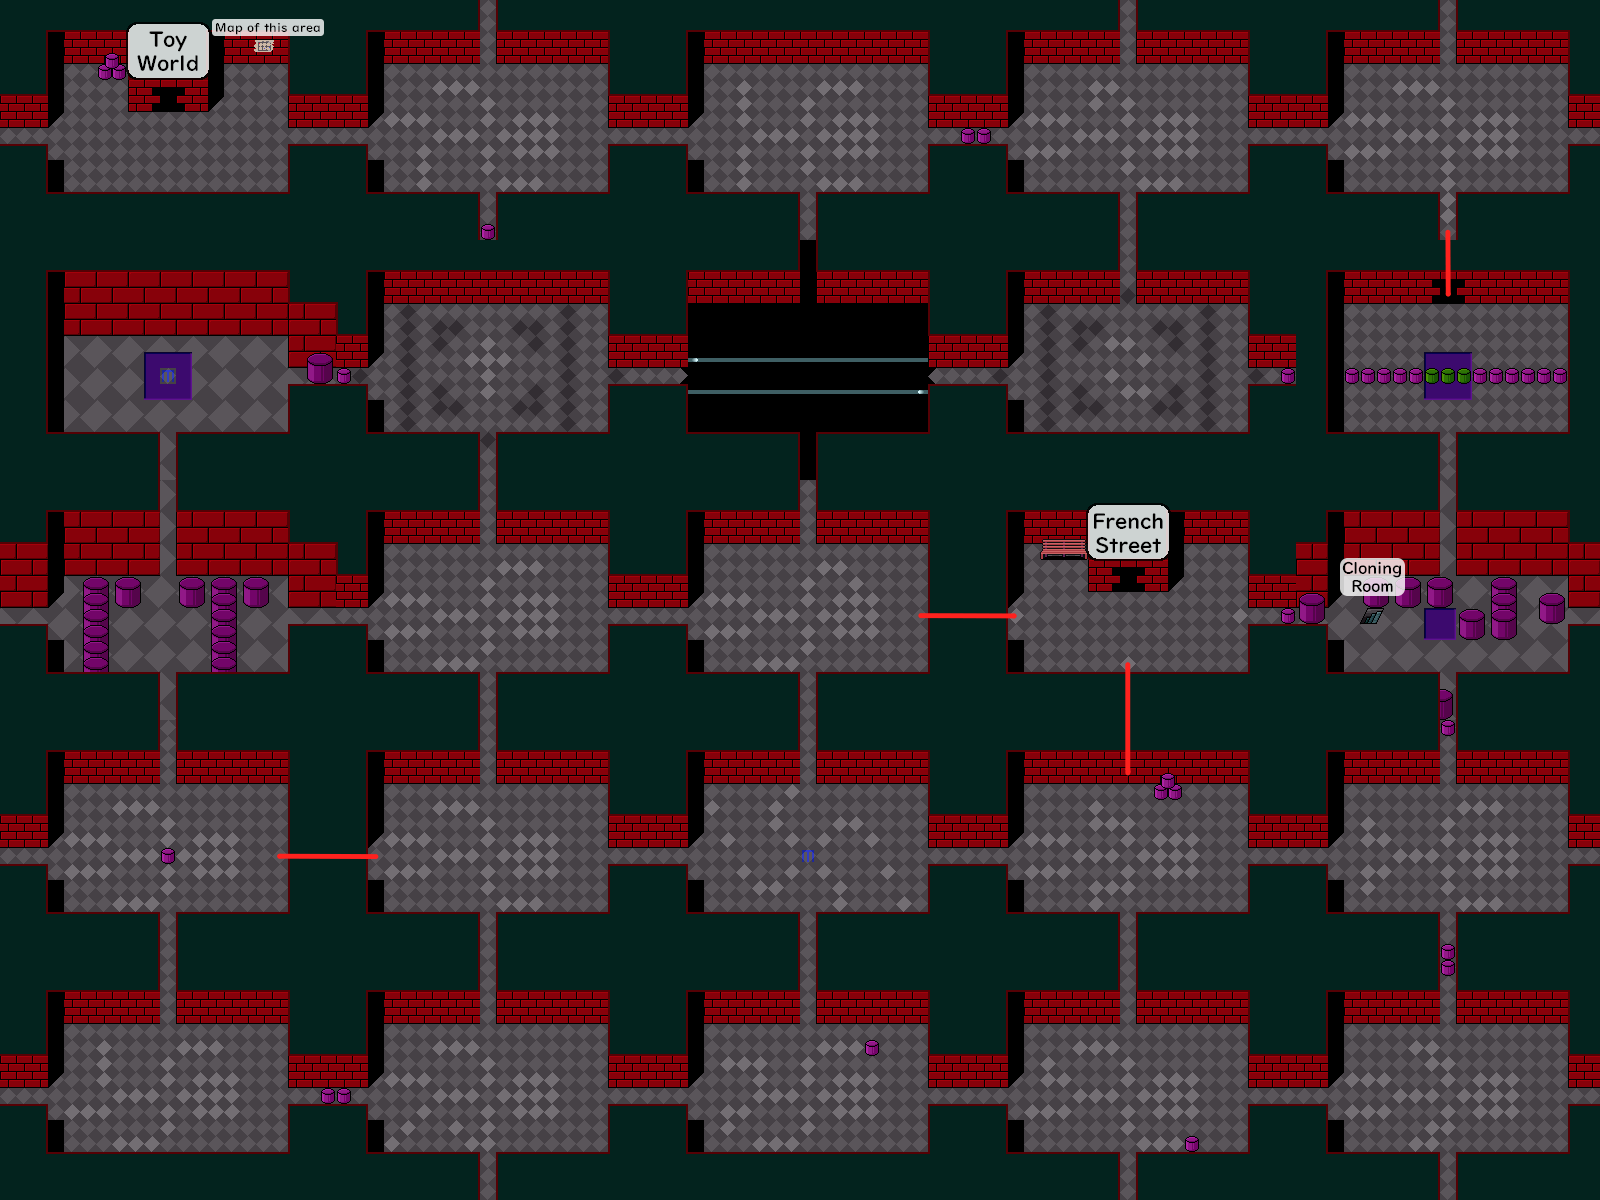
{{LocationMap|filename=redbrickmaze.png|caption=Annotated map of the area.}} | |||
==Features== | ==Features== | ||
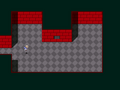
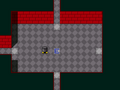
The Red Brick Maze is a wrapping set of 25 rectangular rooms laid out on a grid pattern. Most of the rooms contain nothing except stick figure tile patterns on the floors to aid navigation. The room containing the passage to the main Toy World area has a small map in the upper right corner which will display a full-screen map of the entire maze when interacted with. Traveling two rooms west and then two rooms north will lead you to a room with seemingly just a wall to the north, but you can walk through this wall to reach a portal to the [[French Street]]. | The Red Brick Maze is a wrapping set of 25 rectangular rooms laid out on a grid pattern. Most of the rooms contain nothing except stick figure tile patterns on the floors to aid navigation. The room containing the passage to the main Toy World area has a small map in the upper right corner which will display a full-screen map of the entire maze when interacted with. Traveling two rooms west and then two rooms north will lead you to a room with seemingly just a wall to the north, but equipping the [[Yume 2kki:Effects#Glasses|Glasses]] will reveal that you can walk through this wall to reach a portal to the [[Yume 2kki:French Street|French Street]]. | ||
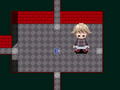
In addition, a couple of rooms contain a single floor tile labeled with a blue letter "E." This tile, when walked upon, will make [[Urotsuki]] equip one of the effects she already possesses at random. Occasionally, it will also transform her into a grey Toy World cylinder, make her grow gigantic, or shrink her dramatically, all of which are purely cosmetic. | In addition, a couple of rooms contain a single floor tile labeled with a blue letter "E." This tile, when walked upon, will make [[Yume 2kki:Urotsuki|Urotsuki]] equip one of the effects she already possesses at random. Occasionally, it will also transform her into a grey Toy World cylinder (also known as a [[Yume 2kki:Masks/Others|Block Person]]), make her grow gigantic (the menu is inaccessible in this state and you can't leave the room), or shrink her dramatically, all of which are purely cosmetic. | ||
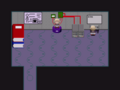
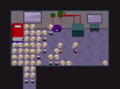
One of the rooms contains a row of three green cylinders inside a purple enclosure. Those cylinders can be pushed out of the way, | One of the rooms contains a row of three green cylinders inside a purple enclosure. Those cylinders can be pushed out of the way if the [[Yume 2kki:Effects#Child|Child]] effect is not equipped. If the Mini Urotsuki mask or Block Person mask (from the "E" tile) is equipped, the cylinders cannot be moved. The room behind them has a small staircase leading to the [[Yume 2kki:Events#The_Cloning_Room|Cloning Room]], a small basement containing what appears to be a clone of Urotsuki wired to some sort of machine and a control panel beneath a large monitor. Interacting with the control panel will net you a wallpaper, make the clone jump off the platform, and begin creating more and more clones of Urotsuki, eventually filling the entire room. | ||
You have a 1/10 chance of being taken to a [[Yume 2kki:Events#Giant_Cloning_Room|Giant Cloning Room]] when walking down the small staircase. The cloning machine at the top of the room essentially works the same way the one in the smaller room does, and once activated will slowly fill the gigantic room with clones of Urotsuki. | |||
The clones can be killed, and as a matter of fact, as there is a limited number of them you can eventually kill all of them- although, if you're a pacifist, using the [[Effects#Eyeball_Bomb|Eyeball Bomb]] or pinching yourself awake the only effective method of escape once the room is packed. The clones will respond to certain effects; equipping the Eyeball Bomb will make them do the same, while equipping [[Effects#Invisible|Invisible]] ''and disappearing'' will make the clones disappear. | The clones can be killed, and as a matter of fact, as there is a limited number of them you can eventually kill all of them- although, if you're a pacifist, using the [[Yume 2kki:Effects#Eyeball_Bomb|Eyeball Bomb]] or pinching yourself awake the only effective method of escape once the room is packed. The clones will respond to certain effects; equipping the Eyeball Bomb will make them do the same and make them stop in place and turn to face the camera, while equipping [[Yume 2kki:Effects#Invisible|Invisible]] ''and disappearing'' will make the clones disappear and stop in place. The clones will also similarly react to [[Yume 2kki:Effects#Wolf|Wolf]] (clones multiply extremely quickly and follow Urotsuki, similar to a wolf pack), [[Yume 2kki:Effects#Penguin|Penguin]] (clones begin to walk in a single-file line back and forth horizontally like their real-life counterpart) and [[Yume 2kki:Effects#Polygon|Polygon]] (clones multiply faster and take on a blocky black with green outlines look). | ||
==Directions== | ==Directions== | ||
Nexus → [[Toy World]] → Red Brick Maze | *The Nexus → [[Yume 2kki:Toy World|Toy World]] → '''Red Brick Maze''' | ||
==Trivia== | ==Trivia== | ||
*The [[Effects#Bat|Bat]] effect was available from the [E] tiles in this area long before it actually made it into the game | *The [[Yume 2kki:Effects#Bat|Bat]] effect was available from the [E] tiles in this area long before it actually made it into the game. | ||
*There used to be three rooms in the maze that were only accessible by getting caught by one of the shadow women at the Day and Night Towers. One of the rooms had an "E" tile, while another featured a tiny gap in the brick wall, which was accessible with the Fairy effect and led to [[Yume 2kki:Painter-kun|Painter-kun's]] room in the [[Yume 2kki:Art Gallery|Art Gallery]]. | |||
*There used to be three rooms in the maze that were only accessible by getting caught by one of the shadow women at the Day | <gallery> | ||
2kki-fairypassage.png|This tiny hole led to the [[Yume 2kki:Art Gallery|Art Gallery]]. | |||
</gallery> | |||
==Gallery== | ==Gallery== | ||
<gallery position="center"> | <gallery position="center"> | ||
2kki-ublocksuki.png|Turned into a block. | 2kki-ublocksuki.png|Turned into a block. | ||
2kki-urothuge.png|Huge and really pixelated and aliased. | 2kki-urothuge.png|Huge and really pixelated and aliased. | ||
| Line 52: | Line 51: | ||
Bigcloningroom_2.png|RUN. | Bigcloningroom_2.png|RUN. | ||
</gallery> | </gallery> | ||
Latest revision as of 04:43, 7 June 2024
| Red Brick Maze | |||||||
|---|---|---|---|---|---|---|---|

| |||||||
| Basic Info | |||||||
| Original Name(s) |
煉瓦ダンジョン | ||||||
| Effects | None | ||||||
| Collectibles |
WP #69 | ||||||
| Masks | Mini Urotsuki, Giant Urotsuki, Block Person | ||||||
| Events | The Cloning Room | ||||||
| Notable NPCs | None | ||||||
| Other | |||||||
| Connecting Areas |
Toy World | ||||||
| Removed Connections | |||||||
| BGM | e4 (No. 085A) e4b (No. 085B) tiriri (Map) 2_11 (Giant Cloning Room) (No. 290A) | ||||||
| Map ID | 0149, 0195, 0374, 0611 | ||||||
| Version Added | 0.087b | ||||||
| Last Updated | 0.120g | ||||||
| Author | kuraud | ||||||
| |||||||
The Red Brick Maze is an area accessible from Toy World.

Features
The Red Brick Maze is a wrapping set of 25 rectangular rooms laid out on a grid pattern. Most of the rooms contain nothing except stick figure tile patterns on the floors to aid navigation. The room containing the passage to the main Toy World area has a small map in the upper right corner which will display a full-screen map of the entire maze when interacted with. Traveling two rooms west and then two rooms north will lead you to a room with seemingly just a wall to the north, but equipping the Glasses will reveal that you can walk through this wall to reach a portal to the French Street.
In addition, a couple of rooms contain a single floor tile labeled with a blue letter "E." This tile, when walked upon, will make Urotsuki equip one of the effects she already possesses at random. Occasionally, it will also transform her into a grey Toy World cylinder (also known as a Block Person), make her grow gigantic (the menu is inaccessible in this state and you can't leave the room), or shrink her dramatically, all of which are purely cosmetic.
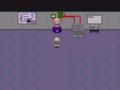
One of the rooms contains a row of three green cylinders inside a purple enclosure. Those cylinders can be pushed out of the way if the Child effect is not equipped. If the Mini Urotsuki mask or Block Person mask (from the "E" tile) is equipped, the cylinders cannot be moved. The room behind them has a small staircase leading to the Cloning Room, a small basement containing what appears to be a clone of Urotsuki wired to some sort of machine and a control panel beneath a large monitor. Interacting with the control panel will net you a wallpaper, make the clone jump off the platform, and begin creating more and more clones of Urotsuki, eventually filling the entire room.
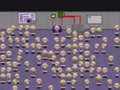
You have a 1/10 chance of being taken to a Giant Cloning Room when walking down the small staircase. The cloning machine at the top of the room essentially works the same way the one in the smaller room does, and once activated will slowly fill the gigantic room with clones of Urotsuki.
The clones can be killed, and as a matter of fact, as there is a limited number of them you can eventually kill all of them- although, if you're a pacifist, using the Eyeball Bomb or pinching yourself awake the only effective method of escape once the room is packed. The clones will respond to certain effects; equipping the Eyeball Bomb will make them do the same and make them stop in place and turn to face the camera, while equipping Invisible and disappearing will make the clones disappear and stop in place. The clones will also similarly react to Wolf (clones multiply extremely quickly and follow Urotsuki, similar to a wolf pack), Penguin (clones begin to walk in a single-file line back and forth horizontally like their real-life counterpart) and Polygon (clones multiply faster and take on a blocky black with green outlines look).
Directions
- The Nexus → Toy World → Red Brick Maze
Trivia
- The Bat effect was available from the [E] tiles in this area long before it actually made it into the game.
- There used to be three rooms in the maze that were only accessible by getting caught by one of the shadow women at the Day and Night Towers. One of the rooms had an "E" tile, while another featured a tiny gap in the brick wall, which was accessible with the Fairy effect and led to Painter-kun's room in the Art Gallery.
This tiny hole led to the Art Gallery.

Gallery
Turned into a block.
Huge and really pixelated and aliased.
The cloning room.
I AM THE ONE TRUE UROTSUKI
Run?
RUN.


- a50008
- a5a2a5