No edit summary Tag: Manual revert |
(Same thing as Starry Docks A. Why are these two separate pages again) |
||
| (3 intermediate revisions by 3 users not shown) | |||
| Line 4: | Line 4: | ||
|image = cu_starry_docks_b.png | |image = cu_starry_docks_b.png | ||
|Effects = | |Effects = | ||
|Collectibles = "[[Collective Unconscious:Menu Themes#Sidereal|Sidereal]]" Menu Theme | |||
|Events = | |Events = | ||
|Wallpapers = | |Wallpapers = | ||
| Line 17: | Line 18: | ||
==Features== | ==Features== | ||
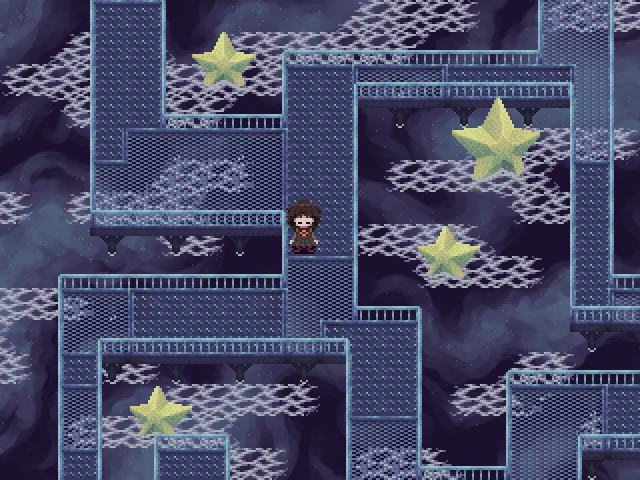
{{Stub}} | {{Stub}}Re-rolled every time the totem in [[Collective Unconscious:Minnatsuki's Room|Minnatsuki's Room]] is activated to enter the spirit realm, Starry Docks B has a 50% chance to contain a blue star node that will teleport [[Collective Unconscious:Minnatsuki|Minnatsuki]] to an isolated platform in the middle of Starry Docks containing the [[Collective Unconscious:Menu Themes#Sidereal|Sidereal]] menu theme. If the node is not located in Starry Docks B, then it will be located in [[Collective Unconscious:Starry Docks A|Starry Docks A]]. The location of the node is persistent through each trip to the spirit realm, and it will only be re-rolled once Minnatsuki returns from the spirit realm and activates the totem again. | ||
==Directions== | ==Directions== | ||
Nexus → [[Collective Unconscious:Obelisks|Obelisks]] → [[Collective Unconscious:Burning Building|Burning Building]] → [[Collective Unconscious:Spiral Purgatory|Spiral Purgatory]] → Starry Docks B | |||
Nexus → [[Collective Unconscious:Spiral Limb Passage|Spiral Limb Passage]] → [[Collective Unconscious:Glass Shards Path|Glass Shards Path]] → [[Collective Unconscious:Spiral Purgatory|Spiral Purgatory]] → Starry Docks B | |||
==Gallery== | ==Gallery== | ||
Latest revision as of 02:25, 30 July 2024
| Starry Docks B | |
|---|---|

| |
| Basic Info | |
| Eidola | None |
| Collectibles |
"Sidereal" Menu Theme |
| Events | None |
| Notable NPCs | None |
| Other | |
| Connecting Areas | |
| BGM | Missing |
| Map ID | 1001 |
| Version Added | 0.1.0 |
| Author | bWF5 |
Starry Docks B is an area accessible from Spiral Purgatory.
Features
| This article is a stub. You can help YumeWiki by expanding it. |
Re-rolled every time the totem in Minnatsuki's Room is activated to enter the spirit realm, Starry Docks B has a 50% chance to contain a blue star node that will teleport Minnatsuki to an isolated platform in the middle of Starry Docks containing the Sidereal menu theme. If the node is not located in Starry Docks B, then it will be located in Starry Docks A. The location of the node is persistent through each trip to the spirit realm, and it will only be re-rolled once Minnatsuki returns from the spirit realm and activates the totem again.
Directions
Nexus → Obelisks → Burning Building → Spiral Purgatory → Starry Docks B
Nexus → Spiral Limb Passage → Glass Shards Path → Spiral Purgatory → Starry Docks B
Gallery
- 393356
- CDCC83