>Bullet731108 No edit summary |
>Bullet731108 (Layout+Picture edit) |
||
| Line 1: | Line 1: | ||
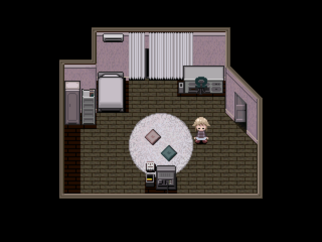
[[File:Dream_House.png|thumb| | [[File:Dream_House.png|thumb|322px|The fake bedroom]] | ||
Urotsuki's Fake House is a world accessible by going through the door between [[Toy World]] and [[Heart World]]. | Urotsuki's Fake House is a world accessible by going through the door between [[Toy World]] and [[Heart World]]. | ||
==Features== | ==Features== | ||
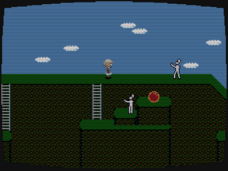
It is nearly identical to your dream room and your real bedroom, except the curtains are drawn and the computer is gone. Interacting with the | It is nearly identical to your dream room and your real bedroom, except the curtains are drawn and the computer is gone. Interacting with the TV causes a number to flash on the screen, the curtain behind you to appear open and [[Urotsuki]]'s face will disappear. Sometimes some [[chasers]] will appear in the room with her. Interacting with the games console transports you [[File:Game2.png|thumb|228px|Penguin GB Game]]into the Penguin GB Game, which will give you the Penguin effect once you turn it on. Going through the open door will take you to the hallway outside the house, instead of ending up back at the hub. | ||
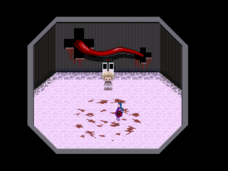
On the second floor is Urotsuki's room and another door. If you go into it, you will see it is completely dark, but if you use the Lantern effect, you will see that there are many Robot Guards like the one in the [[Highway]] with some sort of bath tub in the centre. Because it is so overcrowded, you are [[File:Guardrm.png|thumb|228px|Robot Guard Room]]not able to move. If you exit the door, the lights will come on for a second, showing you the room in color. | |||
Downstairs, the front door is directly south of you after descending the stairs. This leads back to the hub. The hallway directly left leads to a door with [[Minor Characters|Seishonen]] in it and stairs to the basement. In Seishonen's room, there is a portal to the Stone Maze. The hallway north of you has several doors along it. The first two upper doors are locked (these are one way portals to other areas). The first bottom door leads to a small room with the Mother in it, and pink water. Interacting with her [[File:Woman.png|thumb|228px|Mother's Room]]using the Bug effect causes the baby to enlarge inside her womb and she will move towards you. The second bottom door leads to a Trophy Room, with small trophies for each effect you've collected thus far. Other than decoration, they don't appear to have any use. | |||
Downstairs, the front door is directly south of you after descending the stairs. This leads back to the hub. The hallway directly left leads to a door with | |||
== | ==='''Dressing Room'''=== | ||
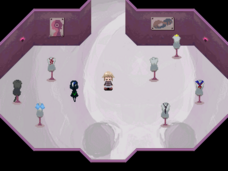
< | <p style="border-top-width: 0px; border-right-width: 0px; border-bottom-width: 0px; border-left-width: 0px; border-style: initial; border-color: initial; font-style: inherit; font-weight: inherit; margin-top: 0.4em; margin-right: 0px; margin-bottom: 0.5em; margin-left: 0px; padding-top: 0px; padding-right: 0px; padding-bottom: 0px; padding-left: 0px; vertical-align: baseline; ">The third upper door on the first floor leads to a dressing room of sorts. Here, several mannequins display outfits that Urotsuki can try on. In the entrance, there's a maid outfit and a business suit. [[File:Outfit.png|thumb|228px|Dressing Room]]You can get two wallpapers by combining the Twintails effect with the maid outfit, and the Glasses effect with the business suit too. In the main room, there's several outfits (From left to right): A black shirt with a white dress, A black shirt with a green vortex pattern on it, A green shirt with checkered design and red shirt, a grey and white outfit, a blue and white checkered shirt, and a generic gray outfit. On the left and right are hallways to other outfits, listed in the photos section below.</p> | ||
Maid.png|Maid | |||
PigtailMaid.PNG|Maid | |||
==='''Gallery'''=== | |||
<gallery widths="135" captionalign="left"> | |||
Maid.png|Maid outfit | |||
PigtailMaid.PNG|Maid outfit with Pigtails | |||
Business.PNG|Business Suit | Business.PNG|Business Suit | ||
GlassesBusiness.PNG|Bespectacled Business Suit | GlassesBusiness.PNG|Bespectacled Business Suit | ||
Peasant.PNG|Brown-ish outfit | |||
BlueJersy.PNG|Short-sleeved (Sabitsuki's outfit from .flow) | |||
Persona4.PNG|Green with Black/White | Persona4.PNG|Green with Black/White | ||
Vortex.PNG|Black with Green Vortex Print | |||
WhiteDress.PNG|Black Shirt White Skirt | |||
</gallery> | </gallery>[[File:Simplest.png|thumb|228px|Simple Street]] | ||
The basement is rather simple, only having two upper doors and one lower door. The door on the right is another locked door, and the door on the left is a room with a girl with long hair in it. She doesn't seem to react to anything. If you go behind the staircase, you will come to Simple Street: a monochrome scrolling area with multiple portals to other worlds in the game.If you use the Glasses effect in this area, you will see an arrow on the floor pointing to a specific door. This will lead you to the Mini-Maze. | |||
==Connections== | |||
[[Stone Maze]] (From Seishonen's Room) | |||
Multiple areas (From Simple Street) | |||
[[Category:Locations]] | |||
Revision as of 09:17, 11 June 2011
Urotsuki's Fake House is a world accessible by going through the door between Toy World and Heart World.
Features
It is nearly identical to your dream room and your real bedroom, except the curtains are drawn and the computer is gone. Interacting with the TV causes a number to flash on the screen, the curtain behind you to appear open and Urotsuki's face will disappear. Sometimes some chasers will appear in the room with her. Interacting with the games console transports you
into the Penguin GB Game, which will give you the Penguin effect once you turn it on. Going through the open door will take you to the hallway outside the house, instead of ending up back at the hub. On the second floor is Urotsuki's room and another door. If you go into it, you will see it is completely dark, but if you use the Lantern effect, you will see that there are many Robot Guards like the one in the Highway with some sort of bath tub in the centre. Because it is so overcrowded, you are
not able to move. If you exit the door, the lights will come on for a second, showing you the room in color. Downstairs, the front door is directly south of you after descending the stairs. This leads back to the hub. The hallway directly left leads to a door with Seishonen in it and stairs to the basement. In Seishonen's room, there is a portal to the Stone Maze. The hallway north of you has several doors along it. The first two upper doors are locked (these are one way portals to other areas). The first bottom door leads to a small room with the Mother in it, and pink water. Interacting with her
using the Bug effect causes the baby to enlarge inside her womb and she will move towards you. The second bottom door leads to a Trophy Room, with small trophies for each effect you've collected thus far. Other than decoration, they don't appear to have any use.
Dressing Room
The third upper door on the first floor leads to a dressing room of sorts. Here, several mannequins display outfits that Urotsuki can try on. In the entrance, there's a maid outfit and a business suit.
You can get two wallpapers by combining the Twintails effect with the maid outfit, and the Glasses effect with the business suit too. In the main room, there's several outfits (From left to right): A black shirt with a white dress, A black shirt with a green vortex pattern on it, A green shirt with checkered design and red shirt, a grey and white outfit, a blue and white checkered shirt, and a generic gray outfit. On the left and right are hallways to other outfits, listed in the photos section below.
Gallery
The basement is rather simple, only having two upper doors and one lower door. The door on the right is another locked door, and the door on the left is a room with a girl with long hair in it. She doesn't seem to react to anything. If you go behind the staircase, you will come to Simple Street: a monochrome scrolling area with multiple portals to other worlds in the game.If you use the Glasses effect in this area, you will see an arrow on the floor pointing to a specific door. This will lead you to the Mini-Maze.
Connections
Stone Maze (From Seishonen's Room)
Multiple areas (From Simple Street)


