The Style Guide has recently been rewritten. Please take a moment to review the new guidelines.
m (→Features) |
(Added annotated map) |
||
| (2 intermediate revisions by 2 users not shown) | |||
| Line 3: | Line 3: | ||
|headerfontcolor = #720000 | |headerfontcolor = #720000 | ||
|image = white_room.png | |image = white_room.png | ||
|Name = | |Name = ''Shiroi Heya'', White Room | ||
|JapaneseName = 白い部屋 | |JapaneseName = 白い部屋 | ||
|Effects = None | |Effects = None | ||
| Line 15: | Line 15: | ||
}} | }} | ||
The '''White Room''' is an area accessible from the [[Dotflow:Connecting Tile Path|Connecting Tile Path]]. | The '''White Room''' is an area accessible from the [[Dotflow:Connecting Tile Path|Connecting Tile Path]]. | ||
{{LocationMap|filename=White Room map.png|caption=Map of White Room.}} | |||
==Features== | ==Features== | ||
| Line 30: | Line 31: | ||
==Gallery== | ==Gallery== | ||
<gallery> | <gallery> | ||
File:Flow white room entrance.png|The entrance. | |||
File:Flow WR Submarine.png|Submarine World entrance. | |||
File:Flow WR Blood Maze.png|Blood Maze entrance. | |||
File:Flow WR Path.png | File:Flow WR Path.png | ||
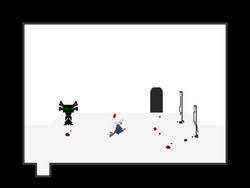
File:Whiteroom1.png|First version. North is the correct path. | File:Whiteroom1.png|First version. North is the correct path. | ||
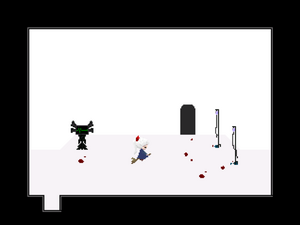
File:Whiteroom2.png|Second version. West is the correct path. | File:Whiteroom2.png|Second version. West is the correct path. | ||
File:Whiteroom3.png|Third version. East is the correct path. | File:Whiteroom3.png|Third version. East is the correct path. | ||
</gallery> | </gallery> | ||
Latest revision as of 01:29, 31 March 2025
| White Room | |
|---|---|

| |
| Basic Info | |
| Regional Name(s) |
白い部屋 |
| Effects | None |
| Events | None |
| Notable NPCs | None |
| Other | |
| Connecting Areas | Connecting Tile Path Blood Maze Submarine World |
| BGM | 🔊 po – To Blood Maze 🔊 po (130% speed) – Entrance 🔊 po (150% speed) – Hallways 🔊 koko – To Submarine World |
| Map ID | 0046, 0047, 0048, 0049, 0050, 0051, 0052 |
The White Room is an area accessible from the Connecting Tile Path.
Features
The White Room is a series of corridors filled with blood splatters and medical equipment. From the entrance, the player will eventually end up in a room with a door. Going through the door will lead to the main, maze-like section of the White Room.
Navigation of this area is technically a puzzle and can be confusing: By consistently taking the path with the most blood, you will eventually end up in a large room. Entering the door surrounded with blood splatters at the very top of this area will lead you to the Blood Maze.
However, if an "incorrect" route is picked three times, you will instead end up in a small hospital room. Interacting with the monitor on the wall in this room will transport Sabitsuki to an isolated area of Submarine World. Entering Submarine World in this way is also the only way to make the monitor in that area take the player to Green Electric World.
Directions
Entrance → Music World → Connecting Tile Path → White Room
Trivia
- The southern path is never the correct one to take. If one wants to consistently trigger the Submarine World link to Green Electric World, the most reliable way to do so is to simply head south three times.
Gallery
- ffffff
- 720000


