| Uncanny World | |||||||||||||
|---|---|---|---|---|---|---|---|---|---|---|---|---|---|

| |||||||||||||
| Basic Info | |||||||||||||
| Eidola | None | ||||||||||||
| Events | Fourth Wall Break | ||||||||||||
| Notable NPCs | Danny | ||||||||||||
| Other | |||||||||||||
| Connecting Areas | Sunset Woods | ||||||||||||
| BGM | 🔊 millieamp_ancestors – Over the Top (No. 0-1) 🔊 millieamp_oops_you_bwoke_it – Development Hell (No. 0-2) | ||||||||||||
| Map ID | 0521, 0522, 0523, 0525, 0526, 0527, 0528, 0529 | ||||||||||||
| Version Added | 0.1.0 | ||||||||||||
| Author | Jetrotal | ||||||||||||
| |||||||||||||
Uncanny World is an area accessible through a hidden path next to a red sign in Sunset Woods.
Features
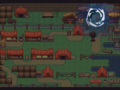
Uncanny World is a world in the style of old RPGs and RPG Maker games. This area consists of one looping room and a tent containing Danny's room. In this room, Minnatsuki can push over Danny and the chairs, and interact with his portrait on the wall. Interacting with the portrait while Danny is on the floor displays the portrait sideways.
Fourth Wall Break Event
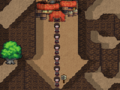
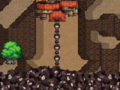
Near the top of the map where it would normally loop, there are four signs with symbols of eyes. Upon entering the map, a random eidolon is assigned to each of these signs with no repeats. If Minnatsuki has the corresponding eidola to a sign, the eye will be open. If all four eyes are open, then upon attempting to move upward, Minnatsuki will stop, and black bars with move in from the top and bottom of the screen, indicating that a cutscene is happening. Minnatsuki will randomly select four eidola, and cast each of them onto the nearby signs, making them close their respective eyes.
Minnatsuki will then attempt to walk upward, but a glowing silhouette of them will fade in before them. Minnatsuki will slow down as they approach the figure, until on contact, Minnatsuki will be pushed backward, and the figure turns into a portal. The area will darken, and the player's menu theme will be forcefully set to Default. Moving away from the portal resets the event, closing the portal, restoring the area's brightness, opening the eyes on the signs, and setting the player's menu theme back to their selection.
Entering the portal is possible, but be warned: this is a one-way unless you complete the event, which can be failed! You will otherwise need to have Minnatsuki return to their room, as their eidola are disabled past the portal. On the other side of the portal is a small area which seems to be overlooking the Nexus. Down in the Nexus-like area are tiny figures in the distance, apparently other Minnatsukis.
Opening and closing the menu has a 5/11 chance to cause one of the distant Minnatsukis to return from the spirit worlds. If no Minnatsukis have returned, including the first time the menu is opened, the game will automatically open the menu again. Opening and closing the menu repeatedly will eventually cause all 17 distant Minnatsukis to return and the music to slowly fade out. Note that 0.6 in-game seconds need to pass between uses of the menu, or else they will not count.
The Main Event:
Be careful, because this is where the event can be failed! After all distant Minnatsukis have returned and the menu has been closed an additional 16 times, there is a 25% chance that opening the menu will reveal it to be "corrupted." If this does not occur within more 16 tries, this will be raised to a 50% chance. On the rare chance the event has still not been activated 50 tries after that, this will be raised again to a 75% chance. DO NOT CLOSE THE MENU, OR THE EVENT WILL BE FAILED, AS THE MENU WILL NOT "CORRUPT" AGAIN UNTIL THE EVENT IS RESTARTED.
The corrupted menu plays garbled music, and visually is slightly torn apart and shifting in a chaotic manner. All text is highly pixelated, making it difficult to read without an intuition of what it says. Minnatsuki is also noticeably off-center in their frame. Additionally, the "Debug" option will be available, regardless is debug mode is enabled or not.
This corrupted menu's options have unique effects related to the corruption:
1. Eidola: Minnatsuki will become corrupted, seeming to resemble a distorted 3D model. This doesn't end the event, but the effect won't persist when the event is continued. Using this option again will restore Minnatsuki's form.
2. Return: Minnatsuki will attempt to return from the spirit world without the menu closing. This happens more quickly than normal, the orb flashes red in addition to the usual cyan, and the sound effect is mangled. Instead of returning to their room, a faint, slightly flashing blue Minnatsuki will be sitting in an empty black void. The garbled music of the corrupted menu can still be heard faintly. Cancelling will return to the corrupted menu.
3. Debug: The menu will fade out, as if trying to transition to another screen, but will fade back to this same menu, though the selection will be reset back to "Effects".
4. To Title: Without confirmation, the player is returned to a corrupted title screen. It appears similar to television interference and old console graphics errors, having chromatic aberration, scanline distortion, and tiles from Uncanny World's tileset randomly appearing and disappearing. A noise of static slowly fades in, eventually becoming very loud. Cancelling will return to the corrupted menu.
Minnatsuki can move in this corrupted menu, moving as the player navigates the menu's options, but gets sent back into their frame after moving. If the player attempts to move their menu selection to the right when it's on "Debug", the selection will erroneously move to the right, and smash the bottom of Minnatsuki's frame out of the way. This allows Minnatsuki to escape the frame and wander around the menu. If they step on any part of the frame's border, Minnatsuki will be sent back inside the frame, and the menu controls will be re-triggered, moving the selection. This most likely means the selection will be moved back into place, along with the bottom of the frame's border, resealing Minnatsuki.
Occasionally, a large square with a hole in it can be seen flashing near the center of the screen. Minnatsuki can walk into where the hole appears, revealing the square to be the O of the YNOProject logo, which they exit from into a black void. Walking far enough away from the door will make it disappear, and garbled text will begin appear near the bottom of the screen, apparently representing player chat messages, although these are accompanied by unintelligible whispering. Plants will begin to sprout at Minnatsuki's feet as they wander, and the text will become more frequent, with the whispers beginning to overlap and become cacophonous. This is furthered by chaotic percussion playing and slowly building intensity. And then faint images of Minnatsukis will appear all around, as the screen slowly dims and fades to black.
Minnatsuki will then find themselves in a room with a giant Minnatsuki with a door in their chest. The large Minnatsuki looks toward yours. Interacting in front of the door will summon a white tendril shooting up toward the large Minnatsuki's head. It'll pulse upward, along with a subtle noise as if pumping a liquid, and the large Minnatsuki's body will slowly disappear, leaving only the head slowly turning into leaves. As this process happens, your Minnatsuki will sit down and watch. The result is a tree with a white trunk, with leaves contoured to appear like Minnatsuki's head.
Suddenly, only the door is visible. Minnatsuki is in this door, and can move downward out of the door. They can only move up or down in this space, and the screen won't follow them, even as they move off-screen. As Minnatsuki walks, a lighthearted tune plays, pausing if they pause. After moving off-screen, Minnatsuki will reappear in the door frame. This can be repeated, with Minnatsuki steadily getting faster. Then more Minnatsukis will appear before Minnatsuki has had a chance to leave the screen. This increases with speed and frequency until its practically a stream of Minnatsukis, making it clear these are not the same Minnatsuki. The void will then fade to an area resembling Uncanny World in theme. At this point, the player is no longer in control. Near the bottom of the screen where the Minnatsukis are exiting is a cliff with a sign with a skull painted on it, suggesting the fall is deadly. As the Minnatsukis continue to pour out and over the cliff, a pile of Minnatsukis will rise up from below the cliff, overtaking the entire screen. A crowd will cheer.
Minnatsuki will then find themselves back in Uncanny World, outside Danny's tent.Spoilers end here.Directions
Nexus → Ornament World → Moonlit Path → Sunset Woods → Uncanny World
Gallery
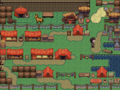
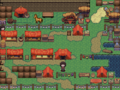
The main village.
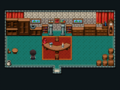
Danny's home, showing the traditional RPG Maker style.
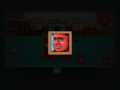
Danny's portrait.
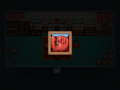
Danny's portrait after Danny is knocked over.
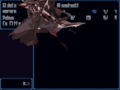
The portal leading to the Nexus overlook.
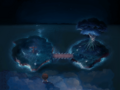
The Nexus overlook.


Fourth Wall Break Event:
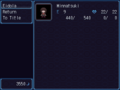
Menu Theme is set to Default.
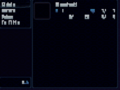
The corrupted menu.
Minnatsuki after the player selects the corrupted "Eidolon" option.

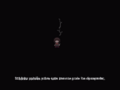
The corrupted return location.
The corrupted title screen.
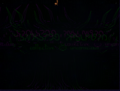
The void after escaping the menu. A garbled player message is visible.
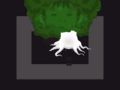
The tree which the large Minnatsuki becomes.
Several Minnatsukis pouring out from the house.
A pile of Minnatsukis rises from the bottom of the cliff.
The pile overtakes the entire screen.
Minnatsuki returns to Uncanny World after the event.


Video of the whole event.
Spoilers end here.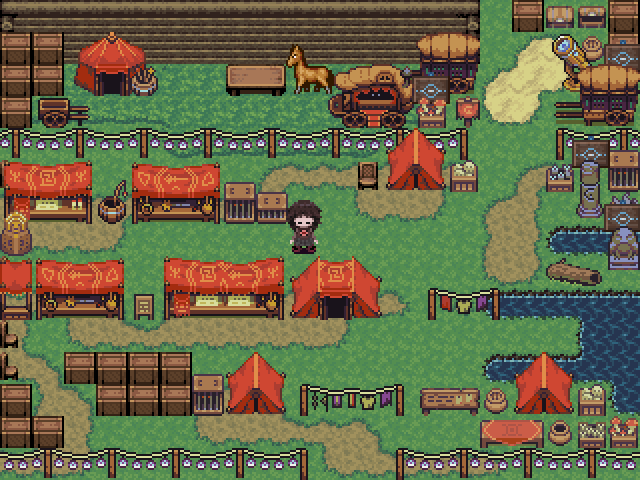
- A32C0F
- 83B06F