(→Don's Advent Event: While the layout of the opening cliffside portion is taken from Don's Adventures, the rest of the content in the event is original) |
Blackberry38 (talk | contribs) No edit summary |
||
| (7 intermediate revisions by 5 users not shown) | |||
| Line 3: | Line 3: | ||
|headerfontcolor = #83B06F | |headerfontcolor = #83B06F | ||
|image = cu_uncanny_world.png | |image = cu_uncanny_world.png | ||
|JapaneseName = 違和感の世界 | |||
|Name = ''Iwakan no Sekai'', Discomfort World | |||
|Effects = | |Effects = | ||
|Collectibles = "[[Collective Unconscious:Book Covers#Loops with friends|Loops with friends]]" Cover, "[[Collective Unconscious:Book Covers#Uncanny Pile Up|Uncanny Pile Up]]" Cover, "[[Collective Unconscious:Book Covers#Am I Even Me?|Am I Even Me?]]" Cover, "[[Collective Unconscious:Visages#RTP Minna|RTP Minna]]" Visage | |||
|Events = Fourth Wall Break, Don's Advent | |Events = Fourth Wall Break, Don's Advent | ||
|NPCS = Danny, Don, Gomez | |||
|NPCS = Danny, Don | |||
|Connections = {{Connection|Sunset Woods}}, {{Connection|Polluted Shore|one_way_type=NoReturn}}, {{Connection|Soapy Baths|one_way_type=NoReturn}} | |Connections = {{Connection|Sunset Woods}}, {{Connection|Polluted Shore|one_way_type=NoReturn}}, {{Connection|Soapy Baths|one_way_type=NoReturn}} | ||
|BGM = {{BGM|title=millieamp_ancestors|filename=CU millieamp ancestors 80.ogg|soundroom=0-1|author=MillieAmp|label=Over the Top|speed=80}} | |BGM = {{BGM|title=millieamp_ancestors|filename=CU millieamp ancestors 80.ogg|soundroom=0-1|author=MillieAmp|label=Over the Top|speed=80}} | ||
| Line 34: | Line 36: | ||
==Features== | ==Features== | ||
Uncanny World is a world in the style of old RPGs and RPG Maker games. | Uncanny World is a world in the style of old RPGs and RPG Maker games. Though it appears small at first glance, the map features multiple unique and elaborate events. | ||
=== Main Area and Tent === | |||
The initial area accessed from Sunset Woods is a single, looping screen; under normal circumstances, leaving through the exit at the top edge of the screen causes [[Collective Unconscious:Minnatsuki|Minnatsuki]] to re-appear at the bottom again. There is also a tent in the middle of the map that can be entered. | |||
Interacting with the computer will display a fake startup screen resembling that of RPG Maker 2000, | Inside of the tent, a red devil-like NPC named Danny can be found. Minnatsuki can interact with Danny to shove him to the ground, and the chairs throughout the tent can be knocked over in the same manner. There is a portrait of Danny on the back wall that can be seen in greater detail by interacting with it. Interacting with the portrait while Danny is on the ground will display the portrait sideways. | ||
There is additionally an opening on the left wall of the tent that is blocked by a chair. The opening is evidenced by a gap in the gold pattern on the carpet, and it can be reached by pushing the chair out of the way. This opening leads to a dark hallway with a computer on a desk. Continuing past the computer and traveling to the end of the hallway will transport Minnatsuki behind a large drainage grate in [[Collective Unconscious:Soapy Baths|Soapy Baths]]. Turning around here will lead back to the computer hallway. Otherwise, this is a one-way connection to Soapy Baths; pounding on the drainage grate using the other movement keys will cause the grate to fall off, and Minnatsuki will automatically drop to the ground below. | |||
Back in the hallway, interacting with the computer will display a fake startup screen resembling that of RPG Maker 2000, followed by a map editor resembling that of the same program. On the map editor screen, the movement keys can be used to move the on-screen cursor, and the interact key can be used to place tiles. Holding shift and using the movement keys will change the currently selected tile, and the 1-5 keys will cycle through different tilesets. Holding the menu key will show an animation of a character "leaving" the program by walking towards an open door, progressing across three white dots; holding the menu key down and allowing the animation to finish will turn off the computer and return to the hallway. | |||
===Fourth Wall Break Event=== | ===Fourth Wall Break Event=== | ||
The Fourth Wall Break event requires Minnatsuki to have each of four [[Collective Unconscious:Eidola|eidola]] that are randomly selected upon entering the map from Sunset Woods. If Minnatsuki already has every eidola, then the event will always trigger when attempting to leave through the top edge of the screen. | |||
Each of the four chosen eidola corresponds to one of the four signs with symbols of eyes near the top of the map. If Minnatsuki has the eidolon corresponding to a sign, then its eye will be open. If all four eyes are open, then a cutscene will be played when attempting to exit the top of the screen: Minnatsuki will equip each of the four eidola and cast each onto the corresponding signs, closing each respective eye. | |||
Minnatsuki will then attempt to walk upward, but a glowing silhouette of them will fade in before them. Minnatsuki will slow down as they approach the figure and be forcefully pushed backwards upon contact, after which the figure turns into a portal. The area will darken, and the player's [[Collective Unconscious:Menu Themes|menu theme]] will be forcefully set to [[Collective Unconscious:Menu Themes#Default|Default]]. Moving away from the portal resets the event in its entirety, and the cutscene will be replayed upon attempting to exit through the top of the screen. Alternatively, pressing the menu key will cause the portal to disappear, allowing Minnatsuki to leave through the top edge of the screen as normal. | |||
Entering the portal will begin the Fourth Wall Break event. ''Note that this event disables all eidola throughout its duration; after entering the portal, leaving is only possible by completing the event or by using the Return command in the menu.'' | |||
On the other side of the portal is a small, grassy cliff that appears to be overlooking the Nexus. Tiny figures - apparently other Minnatsukis - can be seen roaming around the distant nexus. | |||
At this point, opening and closing the menu has a 5/11 chance (with a 0.6-second cooldown after closing the menu) to cause one of the distant Minnatsukis to leave the Nexus (in a manner resembling the Return ability in the menu). The game will initially open the menu automatically until the first Minnatsuki has departed the Nexus. Afterwards, the menu must be manually cycled until all 17 Minnatsukis have left the Nexus, at which point the music will fade out. | |||
After all distant Minnatsukis have departed and the menu has been closed an additional 16 times, there will be a 25% chance that opening the menu will cause it to become "corrupted." If this does not occur within more 16 tries, this will be raised to a 50% chance. On the rare chance the event has still not been activated 50 tries after that, this will be raised again to a 75% chance. Care must be taken to not close the menu after it has become corrupted, or else the distant Minnatsukis will reappear, and the process will have to be repeated. | |||
The corrupted menu plays garbled music and is visually chaotic. All text is difficult to read, and there is now a new "Debug" option available (the third from the top). Each of the menu options on this screen have unique effects related to the corruption: | |||
#Eidola: Minnatsuki will | #Eidola: Minnatsuki will be grotesquely distorted, as though a 3D model. Using this option again will restore Minnatsuki's form. | ||
#Return: Minnatsuki will attempt to return from the spirit world without the menu closing. This happens more quickly than normal, the orb flashes red in addition to the usual cyan, and the sound effect is mangled. Instead of returning to their room, a faint, slightly flashing blue Minnatsuki will be sitting in an empty black void. The garbled music of the corrupted menu can still be heard faintly. | #Return: Minnatsuki will attempt to return from the spirit world without the menu closing. This happens more quickly than normal, the orb flashes red in addition to the usual cyan, and the sound effect is mangled. Instead of returning to their room, a faint, slightly flashing blue Minnatsuki will be sitting in an empty black void. The garbled music of the corrupted menu can still be heard faintly. Pressing the menu button will return to the corrupted menu. | ||
#Debug: The menu will fade out, as if trying to transition to another screen, but will | #Debug: The menu will fade out, as if trying to transition to another screen, but it will simply return to the same menu afterwards. | ||
#To Title: Without confirmation, the player is returned to a corrupted title screen | #To Title: Without confirmation, the player is returned to a corrupted title screen with many visual bugs and audio distortions that increase in volume over time. Pressing the menu button on this screen will return to the corrupted menu. | ||
Minnatsuki | The player has control of Minnatsuki on this screen; they are physically present in their portrait box, and they will move up and down as menu options are cycled through. However, they are trapped in the portrait box, and they will be sent back into the center of the frame after any attempt to move. Pressing right while the third option is highlighted, however, will cause the bottom of the frame to be displaced, allowing Minnatsuki to escape their confinement and wander around the menu. | ||
Occasionally, a large square with a hole in it can be seen flashing near the center of the screen. Minnatsuki can walk into where the hole appears, revealing the square to be the O of the [[YNOproject:YNOproject Wiki|YNOproject]] logo, which | Occasionally, a large square with a hole in it can be seen flashing near the center of the screen. After escaping the frame, Minnatsuki can walk into the spot where the hole appears, revealing the square to be the O of the [[YNOproject:YNOproject Wiki|YNOproject]] logo, from which Minnatsuki exits into an empty black void. Walking far enough away from the door will make it disappear, and garbled text will begin appear near the bottom of the screen, apparently representing player chat messages, although these are accompanied by unintelligible whispering. Plants will begin to sprout at Minnatsuki's feet as they wander, and the text will become more frequent, with the whispers beginning to overlap and become cacophonous. This is furthered by chaotic percussion playing and slowly building intensity. And then faint images of Minnatsukis will appear all around, as the screen slowly dims and fades to black. | ||
Minnatsuki will then find themselves in a room with a giant Minnatsuki with a door in their chest. The large Minnatsuki looks toward yours. Interacting in front of the door will summon a white tendril shooting up toward the large Minnatsuki's head. It'll pulse upward, along with a subtle noise as if pumping a liquid, and the large Minnatsuki's body will slowly disappear, leaving only the head slowly turning into leaves. As this process happens, your Minnatsuki will sit down and watch. The result is a tree with a white trunk, with leaves contoured to appear like Minnatsuki's head. | Minnatsuki will then find themselves in a room with a giant Minnatsuki with a door in their chest. The large Minnatsuki looks toward yours. Interacting in front of the door will summon a white tendril shooting up toward the large Minnatsuki's head. It'll pulse upward, along with a subtle noise as if pumping a liquid, and the large Minnatsuki's body will slowly disappear, leaving only the head slowly turning into leaves. As this process happens, your Minnatsuki will sit down and watch. The result is a tree with a white trunk, with leaves contoured to appear like Minnatsuki's head. | ||
| Line 70: | Line 77: | ||
Suddenly, only the door is visible. Minnatsuki is in this door, and can move downward out of the door. They can only move up or down in this space, and the screen won't follow them, even as they move off-screen. As Minnatsuki walks, a lighthearted tune plays, pausing if they pause. After moving off-screen, Minnatsuki will reappear in the door frame. This can be repeated, with Minnatsuki steadily getting faster. Then more Minnatsukis will appear before Minnatsuki has had a chance to leave the screen. This increases with speed and frequency until its practically a stream of Minnatsukis, making it clear these are not the same Minnatsuki. The void will then fade to an area resembling Uncanny World in theme. At this point, the player is no longer in control. Near the bottom of the screen where the Minnatsukis are exiting is a cliff with a sign with a skull painted on it, suggesting the fall is deadly. As the Minnatsukis continue to pour out and over the cliff, a pile of Minnatsukis will rise up from below the cliff, overtaking the entire screen. A crowd will cheer. | Suddenly, only the door is visible. Minnatsuki is in this door, and can move downward out of the door. They can only move up or down in this space, and the screen won't follow them, even as they move off-screen. As Minnatsuki walks, a lighthearted tune plays, pausing if they pause. After moving off-screen, Minnatsuki will reappear in the door frame. This can be repeated, with Minnatsuki steadily getting faster. Then more Minnatsukis will appear before Minnatsuki has had a chance to leave the screen. This increases with speed and frequency until its practically a stream of Minnatsukis, making it clear these are not the same Minnatsuki. The void will then fade to an area resembling Uncanny World in theme. At this point, the player is no longer in control. Near the bottom of the screen where the Minnatsukis are exiting is a cliff with a sign with a skull painted on it, suggesting the fall is deadly. As the Minnatsukis continue to pour out and over the cliff, a pile of Minnatsukis will rise up from below the cliff, overtaking the entire screen. A crowd will cheer. | ||
Minnatsuki will then find themselves back in Uncanny World, outside Danny's tent. | Minnatsuki will then find themselves back in Uncanny World, outside Danny's tent. | ||
===Don's Advent Event=== | ===Don's Advent Event=== | ||
The Don's Advent event requires Minnatsuki to check the computer in the hallway hidden inside of Danny's tent. When booting up the computer, a number will be visible in the bottom-right corner of the startup screen. Don's Advent can be started if this number is 1, 3, or 5. This number can be re-rolled by leaving the tent, either through its entrance or by walking out the left side of the hallway (taking the Soapy Baths exit) and immediately re-entering the hallway before triggering the one-way transition. If the computer displays the correct number, Don's Advent can be started by returning to the main area and attempting to walk off the top edge of the screen; after the portal opens (i.e. to begin the Fourth Wall Break event), press the menu key to close the portal, and then walk off the top edge of the screen. | |||
On the next screen, Minnatsuki will be transformed into Don, a character in the style of RPG Maker's stock RTP sprites, and they will hop down from a cliff without player input. The screen will now begin to glitch, and Minnatsuki will periodically transform back and forth between their own form and that of Don. Notably, Minnatsuki can only move when in Don's form. Minnatsuki must collect each of three white dots scattered throughout the map (resembling those from the "exit" animation on the hallway computer) to progress to the next map, where they must find a white exit door (resembling the door from the same "exit" animation) that is only visible while Minnatsuki is transforming. | |||
Walking through the door will bring Minnatsuki back to the entrance of Uncanny World, though they will have a new appearance, resembling a stock RPG Maker RTP character. From here, the event can be continued by entering Danny's tent. Interacting with Danny will cause a mouse cursor to appear, pick up Danny, and drag him off the edge of the screen. Afterwards, Danny's portrait must be interacted with. When the portrait is displayed on-screen, clicking on the portrait (that is, with your actual mouse pointer) will cause it to darken ominously until it becomes completely black. An animation of a flying bird will begin to play until a speech bubble with Don's face appears, at which point the event progresses. | |||
Minnatsuki will be joined by two allies, Don and Gomez, in a RPG-styled battle of rock, paper, scissors waged against Danny. Each character has a set, consistent amount of HP, and a timer indicating when they will be able to act. Minnatsuki can be moved up and down during the battle, which freezes their timer and allows them to sacrifice their own health to protect their allies. | |||
Danny's timer progresses rapidly (moreso as the battle progresses and your allies fall), and he will attack a random character each turn. When a party member's timer is complete, the player may choose to play rock, paper, or scissors against Danny; losing will deal very little damage to Danny (or none at all), while winning will deal the most damage. | |||
While awaiting a party member's turn, Danny's next choice will flash extremely rapidly between rock, paper, and scissors; if perceptive enough, taking note of the last option to flash before the player's turn begins will always allow the player to select the winning attack for the most damage. | |||
Minnatsuki | If Minnatsuki dies at any point during the battle, they will be returned to the main area of Uncanny World, and the event will have to be restarted from the very beginning. If the player instead manages to take down Danny, a long sequence will begin wherein Minnatsuki joins Don and Gomez on their ship, going on several adventures (documented in photographs) with a tied-up Danny in tow. The player will eventually be given an opportunity to free Danny, who appears to suggest that not everything is as it appears. Minnatsuki will free Danny and return to their normal appearance, and they will equip and use Soulfire during a scuffle with Gomez to burn him to ash. | ||
Minnatsuki will attempt to leave the ship through another white exit door after interacting with the open book on the upper deck, but Don will triumphantly shoot Minnatsuki down with a cannonball and knock them into the sea. Once Minnatsuki is cast into the sea, they can swim to the top right corner of the screen, past a giant, uncannily photorealistic Danny and towards the sunlight, to reach the [[Collective Unconscious:Polluted Shore|Polluted Shore]]. This concludes the event; Minnatsuki will retain their RTP-inspired appearance and unlock it as a visage for use with the Visage eidolon. | |||
==Directions== | ==Directions== | ||
Nexus → [[Collective Unconscious:Ornament World|Ornament World]] → [[Collective Unconscious:Moonlit Path|Moonlit Path]] → [[Collective Unconscious:Sunset Woods|Sunset Woods]] → Uncanny World | Nexus → [[Collective Unconscious:Ornament World|Ornament World]] → [[Collective Unconscious:Moonlit Path|Moonlit Path]] → [[Collective Unconscious:Sunset Woods|Sunset Woods]] → Uncanny World | ||
== Trivia == | |||
* The RPG world seen during the Don's Advent event is based on ''Don's Adventures'', an RPG Maker 2000 "sample game" created by Don Miguel in 2000 to show off the features of the program. The layout of the cliffs at the start of the event is identical to those seen at the start of ''Don's Adventures''. | |||
==Gallery== | ==Gallery== | ||
| Line 101: | Line 115: | ||
File:Cu exitcomputer.png|Exiting the computer. | File:Cu exitcomputer.png|Exiting the computer. | ||
</gallery> | </gallery> | ||
===Fourth Wall Break Event=== | |||
<gallery> | <gallery> | ||
File:False hub.png|Menu Theme is set to Default. | File:False hub.png|Menu Theme is set to Default. | ||
| Line 116: | Line 131: | ||
</gallery> | </gallery> | ||
== | ===Don's Advent Event=== | ||
<gallery> | |||
File:Cu donsadventstart.png|An oddly familiar cliffside | |||
File:Cu donsadventstart.png|An | |||
File:Cu glitchadvent.png|Back and forth between RPG protagonist and YNFG protagonist | File:Cu glitchadvent.png|Back and forth between RPG protagonist and YNFG protagonist | ||
File:Cu adventgem.png|A white gem | File:Cu adventgem.png|A white gem | ||
| Line 145: | Line 158: | ||
File:Cu_danneye.png|Danny sees right through you | File:Cu_danneye.png|Danny sees right through you | ||
File:Cu_uncannyreveal.png|The liar revealed | File:Cu_uncannyreveal.png|The liar revealed | ||
File:Cu_glitchedfight.png|Fighting | File:Cu_glitchedfight.png|Fighting with Gomez | ||
File:Cu_openthedoor.png|The way out | File:Cu_openthedoor.png|The way out | ||
File:Cu_donslaststand.png|Don stops Minnatsuki with a cannon ball | File:Cu_donslaststand.png|Don stops Minnatsuki with a cannon ball | ||
| Line 151: | Line 164: | ||
File:Cu_bigdanny.png|Now that's uncanny | File:Cu_bigdanny.png|Now that's uncanny | ||
</gallery> | </gallery> | ||
==Video== | |||
{{#ev:youtube|ykcmJrLbGSs|alignment=center|description=Video of the whole event.}} | |||
Latest revision as of 19:45, 27 April 2025
| Uncanny World | |||
|---|---|---|---|

| |||
| Basic Info | |||
| Regional Name(s) |
違和感の世界 | ||
| Eidola | None | ||
| Collectibles |
"Loops with friends" Cover | ||
| Events | Fourth Wall Break, Don's Advent | ||
| Notable NPCs | Danny, Don, Gomez | ||
| Other | |||
| Connecting Areas | Sunset Woods Polluted Shore ➡️ Soapy Baths ➡️ | ||
| BGM | 🔊 millieamp_ancestors – Over the Top (No. 0-1) 🔊 millieamp_oops_you_bwoke_it – Development Hell (No. 0-2) | ||
| Map ID | 0521, 0522, 0523, 0525, 0526, 0527, 0528, 0529, 1331, 1332, 1333, 1334, 1335, 1336, 1337, 1338, 1339, 1340, 1831, 1832, 1833 | ||
| Version Added | 0.1.0 | ||
| Author | Jetrotal | ||
| |||
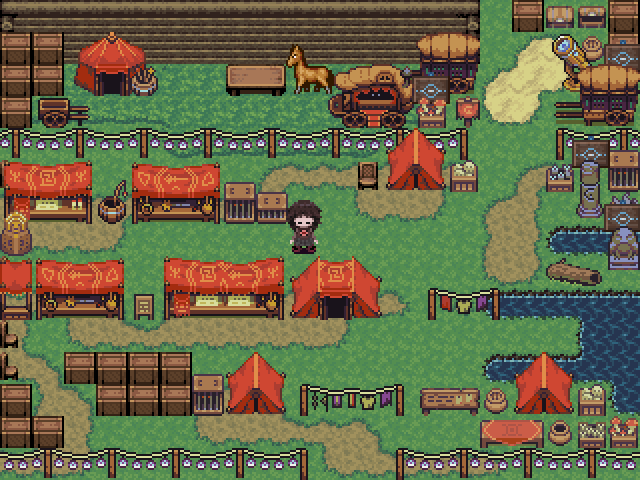
Uncanny World is an area accessible through a hidden path next to a red sign in Sunset Woods.
Features
Uncanny World is a world in the style of old RPGs and RPG Maker games. Though it appears small at first glance, the map features multiple unique and elaborate events.
Main Area and Tent
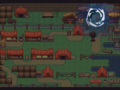
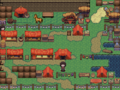
The initial area accessed from Sunset Woods is a single, looping screen; under normal circumstances, leaving through the exit at the top edge of the screen causes Minnatsuki to re-appear at the bottom again. There is also a tent in the middle of the map that can be entered.
Inside of the tent, a red devil-like NPC named Danny can be found. Minnatsuki can interact with Danny to shove him to the ground, and the chairs throughout the tent can be knocked over in the same manner. There is a portrait of Danny on the back wall that can be seen in greater detail by interacting with it. Interacting with the portrait while Danny is on the ground will display the portrait sideways.
There is additionally an opening on the left wall of the tent that is blocked by a chair. The opening is evidenced by a gap in the gold pattern on the carpet, and it can be reached by pushing the chair out of the way. This opening leads to a dark hallway with a computer on a desk. Continuing past the computer and traveling to the end of the hallway will transport Minnatsuki behind a large drainage grate in Soapy Baths. Turning around here will lead back to the computer hallway. Otherwise, this is a one-way connection to Soapy Baths; pounding on the drainage grate using the other movement keys will cause the grate to fall off, and Minnatsuki will automatically drop to the ground below.
Back in the hallway, interacting with the computer will display a fake startup screen resembling that of RPG Maker 2000, followed by a map editor resembling that of the same program. On the map editor screen, the movement keys can be used to move the on-screen cursor, and the interact key can be used to place tiles. Holding shift and using the movement keys will change the currently selected tile, and the 1-5 keys will cycle through different tilesets. Holding the menu key will show an animation of a character "leaving" the program by walking towards an open door, progressing across three white dots; holding the menu key down and allowing the animation to finish will turn off the computer and return to the hallway.
Fourth Wall Break Event
The Fourth Wall Break event requires Minnatsuki to have each of four eidola that are randomly selected upon entering the map from Sunset Woods. If Minnatsuki already has every eidola, then the event will always trigger when attempting to leave through the top edge of the screen.
Each of the four chosen eidola corresponds to one of the four signs with symbols of eyes near the top of the map. If Minnatsuki has the eidolon corresponding to a sign, then its eye will be open. If all four eyes are open, then a cutscene will be played when attempting to exit the top of the screen: Minnatsuki will equip each of the four eidola and cast each onto the corresponding signs, closing each respective eye.
Minnatsuki will then attempt to walk upward, but a glowing silhouette of them will fade in before them. Minnatsuki will slow down as they approach the figure and be forcefully pushed backwards upon contact, after which the figure turns into a portal. The area will darken, and the player's menu theme will be forcefully set to Default. Moving away from the portal resets the event in its entirety, and the cutscene will be replayed upon attempting to exit through the top of the screen. Alternatively, pressing the menu key will cause the portal to disappear, allowing Minnatsuki to leave through the top edge of the screen as normal.
Entering the portal will begin the Fourth Wall Break event. Note that this event disables all eidola throughout its duration; after entering the portal, leaving is only possible by completing the event or by using the Return command in the menu.
On the other side of the portal is a small, grassy cliff that appears to be overlooking the Nexus. Tiny figures - apparently other Minnatsukis - can be seen roaming around the distant nexus.
At this point, opening and closing the menu has a 5/11 chance (with a 0.6-second cooldown after closing the menu) to cause one of the distant Minnatsukis to leave the Nexus (in a manner resembling the Return ability in the menu). The game will initially open the menu automatically until the first Minnatsuki has departed the Nexus. Afterwards, the menu must be manually cycled until all 17 Minnatsukis have left the Nexus, at which point the music will fade out.
After all distant Minnatsukis have departed and the menu has been closed an additional 16 times, there will be a 25% chance that opening the menu will cause it to become "corrupted." If this does not occur within more 16 tries, this will be raised to a 50% chance. On the rare chance the event has still not been activated 50 tries after that, this will be raised again to a 75% chance. Care must be taken to not close the menu after it has become corrupted, or else the distant Minnatsukis will reappear, and the process will have to be repeated.
The corrupted menu plays garbled music and is visually chaotic. All text is difficult to read, and there is now a new "Debug" option available (the third from the top). Each of the menu options on this screen have unique effects related to the corruption:
- Eidola: Minnatsuki will be grotesquely distorted, as though a 3D model. Using this option again will restore Minnatsuki's form.
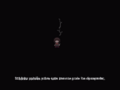
- Return: Minnatsuki will attempt to return from the spirit world without the menu closing. This happens more quickly than normal, the orb flashes red in addition to the usual cyan, and the sound effect is mangled. Instead of returning to their room, a faint, slightly flashing blue Minnatsuki will be sitting in an empty black void. The garbled music of the corrupted menu can still be heard faintly. Pressing the menu button will return to the corrupted menu.
- Debug: The menu will fade out, as if trying to transition to another screen, but it will simply return to the same menu afterwards.
- To Title: Without confirmation, the player is returned to a corrupted title screen with many visual bugs and audio distortions that increase in volume over time. Pressing the menu button on this screen will return to the corrupted menu.
The player has control of Minnatsuki on this screen; they are physically present in their portrait box, and they will move up and down as menu options are cycled through. However, they are trapped in the portrait box, and they will be sent back into the center of the frame after any attempt to move. Pressing right while the third option is highlighted, however, will cause the bottom of the frame to be displaced, allowing Minnatsuki to escape their confinement and wander around the menu.
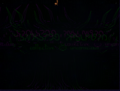
Occasionally, a large square with a hole in it can be seen flashing near the center of the screen. After escaping the frame, Minnatsuki can walk into the spot where the hole appears, revealing the square to be the O of the YNOproject logo, from which Minnatsuki exits into an empty black void. Walking far enough away from the door will make it disappear, and garbled text will begin appear near the bottom of the screen, apparently representing player chat messages, although these are accompanied by unintelligible whispering. Plants will begin to sprout at Minnatsuki's feet as they wander, and the text will become more frequent, with the whispers beginning to overlap and become cacophonous. This is furthered by chaotic percussion playing and slowly building intensity. And then faint images of Minnatsukis will appear all around, as the screen slowly dims and fades to black.
Minnatsuki will then find themselves in a room with a giant Minnatsuki with a door in their chest. The large Minnatsuki looks toward yours. Interacting in front of the door will summon a white tendril shooting up toward the large Minnatsuki's head. It'll pulse upward, along with a subtle noise as if pumping a liquid, and the large Minnatsuki's body will slowly disappear, leaving only the head slowly turning into leaves. As this process happens, your Minnatsuki will sit down and watch. The result is a tree with a white trunk, with leaves contoured to appear like Minnatsuki's head.
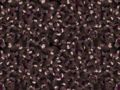
Suddenly, only the door is visible. Minnatsuki is in this door, and can move downward out of the door. They can only move up or down in this space, and the screen won't follow them, even as they move off-screen. As Minnatsuki walks, a lighthearted tune plays, pausing if they pause. After moving off-screen, Minnatsuki will reappear in the door frame. This can be repeated, with Minnatsuki steadily getting faster. Then more Minnatsukis will appear before Minnatsuki has had a chance to leave the screen. This increases with speed and frequency until its practically a stream of Minnatsukis, making it clear these are not the same Minnatsuki. The void will then fade to an area resembling Uncanny World in theme. At this point, the player is no longer in control. Near the bottom of the screen where the Minnatsukis are exiting is a cliff with a sign with a skull painted on it, suggesting the fall is deadly. As the Minnatsukis continue to pour out and over the cliff, a pile of Minnatsukis will rise up from below the cliff, overtaking the entire screen. A crowd will cheer.
Minnatsuki will then find themselves back in Uncanny World, outside Danny's tent.
Don's Advent Event
The Don's Advent event requires Minnatsuki to check the computer in the hallway hidden inside of Danny's tent. When booting up the computer, a number will be visible in the bottom-right corner of the startup screen. Don's Advent can be started if this number is 1, 3, or 5. This number can be re-rolled by leaving the tent, either through its entrance or by walking out the left side of the hallway (taking the Soapy Baths exit) and immediately re-entering the hallway before triggering the one-way transition. If the computer displays the correct number, Don's Advent can be started by returning to the main area and attempting to walk off the top edge of the screen; after the portal opens (i.e. to begin the Fourth Wall Break event), press the menu key to close the portal, and then walk off the top edge of the screen.
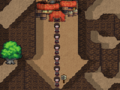
On the next screen, Minnatsuki will be transformed into Don, a character in the style of RPG Maker's stock RTP sprites, and they will hop down from a cliff without player input. The screen will now begin to glitch, and Minnatsuki will periodically transform back and forth between their own form and that of Don. Notably, Minnatsuki can only move when in Don's form. Minnatsuki must collect each of three white dots scattered throughout the map (resembling those from the "exit" animation on the hallway computer) to progress to the next map, where they must find a white exit door (resembling the door from the same "exit" animation) that is only visible while Minnatsuki is transforming.
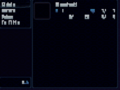
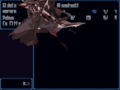
Walking through the door will bring Minnatsuki back to the entrance of Uncanny World, though they will have a new appearance, resembling a stock RPG Maker RTP character. From here, the event can be continued by entering Danny's tent. Interacting with Danny will cause a mouse cursor to appear, pick up Danny, and drag him off the edge of the screen. Afterwards, Danny's portrait must be interacted with. When the portrait is displayed on-screen, clicking on the portrait (that is, with your actual mouse pointer) will cause it to darken ominously until it becomes completely black. An animation of a flying bird will begin to play until a speech bubble with Don's face appears, at which point the event progresses.
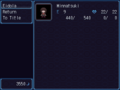
Minnatsuki will be joined by two allies, Don and Gomez, in a RPG-styled battle of rock, paper, scissors waged against Danny. Each character has a set, consistent amount of HP, and a timer indicating when they will be able to act. Minnatsuki can be moved up and down during the battle, which freezes their timer and allows them to sacrifice their own health to protect their allies.
Danny's timer progresses rapidly (moreso as the battle progresses and your allies fall), and he will attack a random character each turn. When a party member's timer is complete, the player may choose to play rock, paper, or scissors against Danny; losing will deal very little damage to Danny (or none at all), while winning will deal the most damage.
While awaiting a party member's turn, Danny's next choice will flash extremely rapidly between rock, paper, and scissors; if perceptive enough, taking note of the last option to flash before the player's turn begins will always allow the player to select the winning attack for the most damage.
If Minnatsuki dies at any point during the battle, they will be returned to the main area of Uncanny World, and the event will have to be restarted from the very beginning. If the player instead manages to take down Danny, a long sequence will begin wherein Minnatsuki joins Don and Gomez on their ship, going on several adventures (documented in photographs) with a tied-up Danny in tow. The player will eventually be given an opportunity to free Danny, who appears to suggest that not everything is as it appears. Minnatsuki will free Danny and return to their normal appearance, and they will equip and use Soulfire during a scuffle with Gomez to burn him to ash.
Minnatsuki will attempt to leave the ship through another white exit door after interacting with the open book on the upper deck, but Don will triumphantly shoot Minnatsuki down with a cannonball and knock them into the sea. Once Minnatsuki is cast into the sea, they can swim to the top right corner of the screen, past a giant, uncannily photorealistic Danny and towards the sunlight, to reach the Polluted Shore. This concludes the event; Minnatsuki will retain their RTP-inspired appearance and unlock it as a visage for use with the Visage eidolon.
Directions
Nexus → Ornament World → Moonlit Path → Sunset Woods → Uncanny World
Trivia
- The RPG world seen during the Don's Advent event is based on Don's Adventures, an RPG Maker 2000 "sample game" created by Don Miguel in 2000 to show off the features of the program. The layout of the cliffs at the start of the event is identical to those seen at the start of Don's Adventures.
Gallery
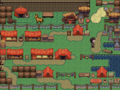
The main village.
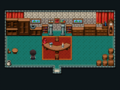
Danny's home, showing the traditional RPG Maker style.
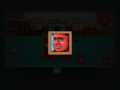
Danny's portrait.
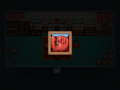
Danny's portrait after Danny is knocked over.
The portal leading to the Nexus overlook.
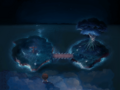
The Nexus overlook.

Danny's computer room.

The startup screen on Danny's computer. Note the number on the bottom right.

A familiar interface.

Exiting the computer.


Fourth Wall Break Event
Menu Theme is set to Default.
The corrupted menu.
Minnatsuki after the player selects the corrupted "Eidolon" option.

The corrupted return location.
The corrupted title screen.
The void after escaping the menu. A garbled player message is visible.
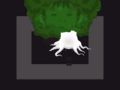
The tree which the large Minnatsuki becomes.
Several Minnatsukis pouring out from the house.
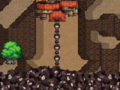
A pile of Minnatsukis rises from the bottom of the cliff.
The pile overtakes the entire screen.
Minnatsuki returns to Uncanny World after the event.


Don's Advent Event

An oddly familiar cliffside

Back and forth between RPG protagonist and YNFG protagonist

A white gem

The door that appears after three gems are found

The same world as before, but Minnatsuki looks different...

Minnatsuki's new (non-functional) menu

Hey, give him back!

Danny's computer has encountered an error

Danny's portrait after being clicked

Danny's portrait after being clicked again

...and again...

...and again...

...and again

A mysterious gull

Suddenly, a boss battle?!

An intense game of rock-paper-scissors

The evil is defeated(?)


A new party member

A deal with the devil

Setting sail

The adventure nears its end

Don prepares to summon the door

Danny sees right through you

The liar revealed

Fighting with Gomez

The way out

Don stops Minnatsuki with a cannon ball

Cast into the sea

Now that's uncanny


Video
- A32C0F
- 83B06F