| Line 80: | Line 80: | ||
===Formatting Copy and Paste=== | ===Formatting Copy and Paste=== | ||
<pre> | <pre> | ||
<div style="float:right ;padding-left: 20px;"><youtube width="320" height="180"> | <div style="float:right ;padding-left: 20px;"><youtube width="320" height="180">url1</youtube> | ||
<div style='max-width: 315px; text-align: center;'> | <div style='max-width: 315px; text-align: center;'>video title 1</div> | ||
<youtube width="320" height="180"> | <youtube width="320" height="180">url2</youtube> | ||
<div style='max-width: 315px; text-align: center;'> | <div style='max-width: 315px; text-align: center;'>video title 2</div> | ||
</div> | </div> | ||
</pre> | </pre> | ||
Revision as of 08:58, 8 July 2023
Guides
Helpful Formatting
Formatting Examples
| Character or Code | Usage |
|---|---|
| ∕ | Appears to be a forward slash. Since it has the same appearance but no function, it can help with presenting HTML. |
| → | Rightwards arrow as one character. Used when listing directions on location pages. |
| ← | Leftwards arrow as one character. |
| <br> | Forces a line break in text. |
| <br clear=all> | Forces a line break, but also blocks all following text from appearing until elements such as images are completely visible. For example, this can stop an image from appearing next to multiple headers by forcing one of the headers to only appear below the full image. |
| <span id="text"></span> | Include anywhere on the page to create an invisible link anchor. For example, using "Blop" for the text will allow you to link to Page#Blop. These links work exactly as normal header links do and can even be placed within a header (inside of the equal signs) to have alternate header links. |
| Formatting Code | Output | Explanation |
|---|---|---|
| <nowiki>text</nowiki> | text | Escapes wiki markup (such as bolding to '''bolding''') and stops formatting code like <pre> from being recognized. |
| <pre>text</pre> | text |
Completely preformats text. All wiki markup, template calls, links, parser functions, HTML codes, and comments are completely ignored and are treated as raw text. |
| <pre style="color: red">text</pre> | text |
You can add HTML styles to preformatted text, like divs. |
| <code>text</code> | text
|
Fixes the width of text (no text wrapping) and applies a background like with the <pre></pre> tags. |
| <big>text</big> | text | Makes text bigger. |
| <span class="spoiler">text</span> | text | Hides text underneath a spoiler. Visible when selecting it on PC or tapping it on mobile. May not work when using certain wiki skins. |
| <div class="toccolours mw-collapsible mw-collapsed">text1<div class="mw-collapsible-content">text2</div></div> | text1
text2 |
Adds a header with a button to reveal a collapsed section. Both the header and section can have other formatting. Remove mw-collapsed to have the section expanded by default.
|
| <div style="-webkit-column-count:2;column-count:2;">text1 text2 text3</div> | text1
text2 text3 |
Formats text into the specified number of columns. |
| <!--text--> | Comments. Completely hidden from the page, but visible when using the source editor. |
Formatting Copy and Paste
<div style="float:right ;padding-left: 20px;"><youtube width="320" height="180">url1</youtube>
<div style='max-width: 315px; text-align: center;'>video title 1</div>
<youtube width="320" height="180">url2</youtube>
<div style='max-width: 315px; text-align: center;'>video title 2</div>
</div>
Template Documentation
This block of text can be inserted into a Template:(name)/doc page to provide a guide on how to fill it out. Since most of the guide notes are in comments they can technically be left in, though that would be really lazy and would bloat the page.
Template Documentation guide (copy and paste)
==Description==
<!--Short summary of what the main function of the template is-->
INSERT_TEXT_HERE
==Syntax==
<!--Explain how the template is included in a page. Best to include the recommended use cases.
For example, in Template:Listloc:
	Copy/Paste the code shown below into a cell on the table then fill in the information.
	<pre>
	{{Listloc
	|name        =
	|image       =
	|aka         = AKA: [Line can be deleted if inapplicable]
	|description = }}
	<∕pre>
Another example, this time from Template:Documentation:
	Add <code><noinclude>{{t|Documentation}}</noinclude></code> at the end of the template page.
	Add <code><noinclude>{{t|Documentation|documentation page}}</noinclude></code> to transclude an alternative page from the /doc subpage.
Basically think of it as a simplified sample.-->
INSERT_TEXT_HERE
==Usage==
<!--How to use. Attempt to answer:
-	What does it present to the reader?
-	Why would an editor choose to use it?
-	What is the recommended use?
-	What does the template require in order to function?
-	What can the template NOT do? (limitations)
-	What are some potential issues that should be kept in mind? (troubleshooting)
It may be helpful to give examples in this section instead of waiting until "Sample".-->
INSERT_TEXT_HERE
==Parameters==
<!--Copy the below texts to build the template parameter table. Spaces surround placeholder names to ease selection - do not include spaces.
This starts the function:
	<templatedata>{	"description": "","params": {
The following is a template with all options listed
DO NOT INCLUDE }, LINE IF USING IT FIRST
REMOVE VERY LAST , AFTER EVERY LAST PROPERTY - NEVER END THE LIST WITH A COMMA
		},
		" parameter ": {
			"label": " Fancy_Name ",
			"aliases": [" Other_Name1 "," Other_Name2 "],
			"type": "Choose one of: number, string, line(no line breaks), content(formatted wikitext), boolean, url(https://example.com), date, wiki-page-name, wiki-file-name, wiki-user-name, wiki-template-name.",
			"description": " Explanation ",
			"example": " Example_Input ",
			"default": " Default_If_Static ",
			"autovalue": " Default_If_Magic_Word ",
			"suggestedvalues": [" Value1 "," Value2 "],
			"required": true
			"suggested": true
			"deprecated": " What_To_Use_Instead ",
			"inherits": "put another parameter name here to copy its properties (gets overwritten by new ones)",
The following is a template with minumum options and less placeholders
DO NOT INCLUDE }, LINE IF USING IT FIRST
REMOVE VERY LAST , AFTER EVERY LAST PROPERTY - NEVER END THE LIST WITH A COMMA
		},
		" parameter ": {
			"label": " Fancy_Name ",
			"type": "Choose one of: number, string, line(single), content(wikitext), wiki-page-name, wiki-file-name, wiki-user-name.",
			"description": " Explanation ",
			"example": " Example_Input ",
			"default": " Default_If_Static ",
This ends the templatedata function:
	}}}</templatedata>
Obviously, only include as many parameters as you need.-->
INSERT_TEXT_HERE
==Sample==
<!--You can use this structure:
	The following input:
	<pre>{{Example|param=value|pa..}}<∕pre>
	Produces:
	{{Example|param=value|pa..}}
Here, copy the exact template call from the preformatted section and use that. If the template is heavy when loading you may want to copy the expected output instead, however this has risk of becoming outdated and should be avoided.
DO NOT COPY THAT <∕pre> YOU SEE IN THIS EXAMPLE, IT WILL NOT WORK
You may want to format the example across multiple lines like in Template:Locationbox/doc-->
INSERT_TEXT_HERE

<noinclude>__NOTOC__ [[Category:Template Documentation]]</noinclude>
<includeonly>__NOEDITSECTION__</includeonly>
Face Any Direction
You can face any direction you want on any tile in Yume Nikki's dream worlds, using the power of glitches. This guide outlines how to face whichever direction you want on any given tile assuming you can't do it manually by walking into it and/or sitting down.
Dream World
- Face DOWN by using Cat or Faceless Ghost.
- Face RIGHT by sitting down with 1 after facing DOWN.
- Face UP by performing the following:
- Equip Frog in the chair
- Go to the tile you wish to face UP on and face DOWN on that tile
- Use the Frog effect
- Wait for Madotsuki to appear sitting down
- Equip any effect
- Face LEFT by equipping the Faceless Ghost effect in the chair then using it.
Using Towel after equipping it in the chair can force you to face UP or LEFT as well, but it's hard to get to a state where you aren't also sitting down, so it's best to use one of the explained methods instead.
FC World
- Face DOWN by using Cat or Faceless Ghost.
- Face RIGHT by sitting down with 1 after facing DOWN.
- Face UP by performing one of the following:
- If you can face LEFT on the tile:
- Equip Frog in the chair
- Go to the tile you wish to face UP on and face LEFT on that tile
- Use the Frog effect
- Wait for Madotsuki to appear sitting down
- Equip any effect
- If you cannot face LEFT on the tile:
- Equip Towel in the chair
- Go to the tile you wish to face UP on
- Spam 1 to use the Towel effect until you somehow end up facing UP (yes, I know this sounds silly, but it works)
- Wait for Madotsuki to appear sitting down
- Equip any effect
- Face LEFT by equipping Towel in the chair then using it on the tile.
Real World
- Face DOWN by pressing 9 to pinch your cheek.
- Face RIGHT by sitting down with 1 after facing DOWN.
- You cannot face UP on every tile in the Real World.
- Face LEFT by performing the following:
- Go to the Dream World
- Perform the Broken Instructions glitch to store the instructions
- Press 9 to wake up with the instructions stored
- Sit down while facing LEFT on any tile
- Press Z and close the instructions
- Move to the tile you wish to face LEFT on (you will have glitched movement)
- Wait for Madotsuki to tilt her head (second sitting down state)
- Press 1 to stand up.
Test Space
ListThumb Tests
Following is a list with images presented in-line and the links next to them, similar to the old DPL output of ListThumb.
Visual List
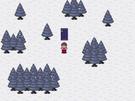
 Snow World
 The Pink Sea
 Witch's Island
 Snow World
 Yume Nikki:Snow World
 Yume Nikki:Snow World
 Yume Nikki:Snow World
 Yume Nikki:Snow World
 Extremely Long Fake Name To Test How Long Names Work
 Yume Nikki:Snow World
 Yume Nikki:Snow World
 Yume Nikki:Snow World
 Yume Nikki:Snow World
 Yume Nikki:Snow World
column test
List with thumbnail images
RecentlyEdited Tests
Testing of what became the RecentlyEdited template (originally was going to be TrendingPages)
Visual List
- [[File:|File:Snowworld.jpg|none|135px|Yume Nikki:Snow World]]Witch's Island
- Duck World
- Flying Fish World
Plan was to recreate the above using a DPL function below, but the above section became a test space for when I was trying to figure out how to format it without ListChar breaking the whole thing (WHY DO THEY PUT THE File: NAMESPACE IN THAT TEMPLATE BUT NO OTHERS???)
DPL testing
Code used
<div class="toccolours mw-collapsible" style='text-align: center;'>
<big>'''Recently Edited'''</big>
<div class="mw-collapsible-content">
{{#dpl:category=Yume Nikki Events{{!}}Yume 2kki Characters|uses=Template:ListChar{{!}}Template:Locationbox{{!}}Template:NPCBox{{!}}Template:Listloc|count=15|include={ListChar}:image,{Locationbox}:image,{NPCBox}:image,{Listloc}:image|format=<div style{{=}}'text-align: center;'><ul>,<li style{{=}}"display: inline-block; vertical-align: bottom; width: 135px;">[[,{{!}}none{{!}}135x101px{{!}}%PAGE%]]<div style{{=}}'max-width: 135px; text-align: center;'>[[%PAGE%{{!}}%TITLE%]]</div></li>\n,</ul></div>|secseparators=,,File:,,,,,|multisecseparators={{!}}aa,,,|dominantsection=1|ordermethod=lastedit|order=descending|cacheperiod=604800}}
</div></div>
Unformatted output
(blanked)
Actual
(blanked)
Claim
Claim Useful Text
Current timestamp 20241123013400
Function 20241123023400
{{#time:Ymdhis|+1 hours}}
20241123023400
0
Refresh
Claim Testing
Countdown
01:34
0134
0
020300
$timestamp = strtotime("20230120171222");


