mNo edit summary |
mNo edit summary |
||
| Line 11: | Line 11: | ||
|BGM = {{BGM|title=nanika_moon1|filename=Nanika_moon1(627A).ogg|soundroom=627}}, | |BGM = {{BGM|title=nanika_moon1|filename=Nanika_moon1(627A).ogg|soundroom=627}}, | ||
{{BGM|title=N3-WeR|label=Infinite Pit|filename=N3-WeRslow90.ogg|soundroom=178F}}, | {{BGM|title=N3-WeR|label=Infinite Pit|filename=N3-WeRslow90.ogg|soundroom=178F}}, | ||
{{BGM|title=海のオルゴール@アノン|label= | {{BGM|title=海のオルゴール@アノン|label=Tiled Abolition|filename=Underseamusicboxslow50.ogg|soundroom=381B}} | ||
|Map ID = 2251, 2252, 2253 | |Map ID = 2251, 2252, 2253 | ||
|Primary = Takikomi | |Primary = Takikomi | ||
| Line 27: | Line 27: | ||
Below the orb and east of the fork in the path, the corridor snakes past a cone blocking a smeared bloodstain. At the end lies a sign on the wall. Walking up to it changes the path behind Urotsuki. This leads to another branching path. The path above ends at a single doorway. Inside | Below the orb and east of the fork in the path, the corridor snakes past a cone blocking a smeared bloodstain. At the end lies a sign on the wall. Walking up to it changes the path behind Urotsuki. This leads to another branching path. The path above ends at a single doorway to '''Tiled Abolition'''. Inside is a large, mysterious pale thing, similar to the yellow polygon in the [[Yume 2kki:Somber Establishment|Somber Establishment]] and the hidden room in Fish Person Shoal's deeper Shoal Caverns. Urotsuki will refuse to go any further. Attempting to go down cuts the screen to black with static noise, then places Urotsuki outside of the room. Heading back, the downwards path loops around to a set of three open doorways. | ||
From here, the leftmost doorway leads to a cone, which can be moved by interacting with it, granting access to the box sector. The second doorway contains a short maze, ending at a small pond. A construction sign blocks the path upwards. The third doorway connects to the path east of the orb. | From here, the leftmost doorway leads to a cone, which can be moved by interacting with it, granting access to the box sector. The second doorway contains a short maze, ending at a small pond. A construction sign blocks the path upwards. The third doorway connects to the path east of the orb. | ||
| Line 51: | Line 51: | ||
*If the connection from [[Yume 2kki:Urotsuki's Dream Apartments|Urotsuki's Dream Apartments]] to [[Yume 2kki:Sugar Road|Sugar Road]] is active and the connection from [[Yume 2kki:Chaos Exhibition|Chaos Exhibition]] to Expanded Corridors is unlocked: | *If the connection from [[Yume 2kki:Urotsuki's Dream Apartments|Urotsuki's Dream Apartments]] to [[Yume 2kki:Sugar Road|Sugar Road]] is active and the connection from [[Yume 2kki:Chaos Exhibition|Chaos Exhibition]] to Expanded Corridors is unlocked: | ||
Nexus → [[Yume 2kki:Urotsuki's Dream Apartments|Urotsuki's Dream Apartments]] → [[Yume 2kki:Sugar Road|Sugar Road]] → [[Yume 2kki:Chaos Exhibition|Chaos Exhibition]] → '''Expanded Corridors''' | Nexus → [[Yume 2kki:Urotsuki's Dream Apartments|Urotsuki's Dream Apartments]] → [[Yume 2kki:Sugar Road|Sugar Road]] → [[Yume 2kki:Chaos Exhibition|Chaos Exhibition]] → '''Expanded Corridors''' | ||
==Gallery== | ==Gallery== | ||
<gallery> | <gallery> | ||
| Line 59: | Line 60: | ||
File:Ec06.png | File:Ec06.png | ||
File:ECpathchangingsign.png|The path-changing sign. | File:ECpathchangingsign.png|The path-changing sign. | ||
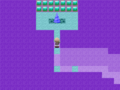
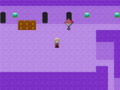
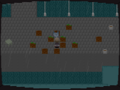
File:Ec14.png| | File:Ec14.png|'''Tiled Abolition'''. | ||
File:ECcone.png|The cone which must be pushed from this side. | File:ECcone.png|The cone which must be pushed from this side. | ||
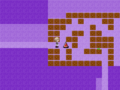
File:Ec15.png|A mini-maze. | File:Ec15.png|A mini-maze. | ||
Revision as of 18:09, 28 November 2023
| Expanded Corridors | |||||||||||
|---|---|---|---|---|---|---|---|---|---|---|---|

| |||||||||||
| Basic Info | |||||||||||
| Regional Name(s) |
焚籠洞窟 | ||||||||||
| Effects | None | ||||||||||
| Events | None | ||||||||||
| Notable NPCs | None | ||||||||||
| Other | |||||||||||
| Connecting Areas | Fish Person Shoal Chaos Exhibition 🔑 Somber Establishment 🚩 | ||||||||||
| BGM | 🔊 nanika_moon1 (No. 627) 🔊 N3-WeR – Infinite Pit (No. 178F) 🔊 海のオルゴール@アノン – Tiled Abolition (No. 381B) | ||||||||||
| Map ID | 2251, 2252, 2253 | ||||||||||
| Version Added | 0.120d patch 8 | ||||||||||
| Author | Takikomi | ||||||||||
| |||||||||||


Expanded Corridors is an area accessible from the gigantic cone in Fish Person Shoal.
Features
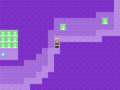
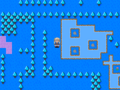
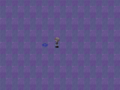
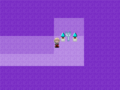
This area is a labyrinthine complex of tight, winding corridors, featuring multiple elements from other worlds by Takikomi. At the entrance is a bench, a construction sign, and an enclosed bunny from Blue Sanctuary. Continuing along the path leads to a trapped orb.
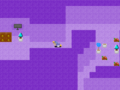
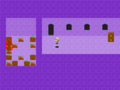
Below the orb and west of the fork in the path is a sector of boxes. A box may be seen moving up and down by itself. One of the boxes blocks the path, backing away if the Chainsaw effect is equipped. If attacked, it screams and drops 100夢. Following the southern path leads Urotsuki past a trapped chaser from the Candlelit Factory, then to branching paths. Taking the western path past the blue trees, the TV, and some boxes leads to a familiar blue cone in a shallow pool of water. Behind it, small paintings of what appears to be the Twin Mountains line the back wall. Interacting with the cone leads to the Chaos Exhibition, unlocking the connection between these areas.
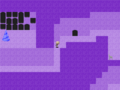
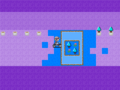
Below the orb and east of the fork in the path, the corridor snakes past a cone blocking a smeared bloodstain. At the end lies a sign on the wall. Walking up to it changes the path behind Urotsuki. This leads to another branching path. The path above ends at a single doorway to Tiled Abolition. Inside is a large, mysterious pale thing, similar to the yellow polygon in the Somber Establishment and the hidden room in Fish Person Shoal's deeper Shoal Caverns. Urotsuki will refuse to go any further. Attempting to go down cuts the screen to black with static noise, then places Urotsuki outside of the room. Heading back, the downwards path loops around to a set of three open doorways.
From here, the leftmost doorway leads to a cone, which can be moved by interacting with it, granting access to the box sector. The second doorway contains a short maze, ending at a small pond. A construction sign blocks the path upwards. The third doorway connects to the path east of the orb.
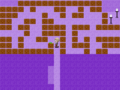
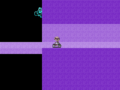
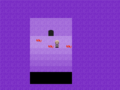
Continuing west past these doorways brings Urotsuki to an unwalled bridge across a void. Strange blue graffiti can be seen above the void. Past this are branching paths. The northern path goes back to the box sector. The southern path ends at a corner with multiple Vending Machines. The western path leads to the Chaos Exhibition.
The path east of the orb leads to a few doorways, with one blocked by a construction sign. The middle one leads back to the set of three open doorways. The eastern corridor is a dead-end.
Within the leftmost doorway is a sprawling corridor. Immediately west is a trapped chaser set ablaze, akin to those in Flamelit Wasteland. This corridor features a tiny doorway, which can be entered using the Child, Dice, or Fairy effect. Inside is a small room with a ledge, splattered with bloodstains. Urotsuki may jump down at her own risk, as it leads to an inescapable, seemingly infinite pit. Navigating through the pillars eventually leads Urotsuki to a warp point, which wakes her up. However, past the small doorway is a box below a smeared bloodstain. From here, the eastern path ends at a small pond. South of the bloodstain is an unwalled web of narrow walkways over nothingness. On the other side is an object blocked by a construction sign to the west and a peculiar cat-like monitor to the east. Interacting with the cat swaps the screen's appearance to a CRT monitor depicting Urotsuki and the cat in the Somber Establishment. Doing any action returns the screen to normal.
Old Images


Directions
Nexus → Garden World → Blue Sanctuary → Candlelit Factory → Fish Person Shoal → Expanded Corridors
- If the connection from Urotsuki's Dream Apartments to Sugar Road is active and the connection from Chaos Exhibition to Expanded Corridors is unlocked:
Nexus → Urotsuki's Dream Apartments → Sugar Road → Chaos Exhibition → Expanded Corridors
Gallery
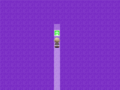
A lone orb.
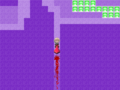
Run!!
Head west to Chaos Exhibition.
The warp to Chaos Exhibition.
The path-changing sign.
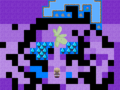
Tiled Abolition.
The cone which must be pushed from this side.
A mini-maze.
Strange graffiti...

The vending machine corner.
One doorway blocked.
The entrance to the pit.
An exit?

A... cat?
After interacting with the cat.


- 660EBB
- BE94E7