Umbrakinetic (talk | contribs) No edit summary |
Umbrakinetic (talk | contribs) No edit summary |
||
| Line 2: | Line 2: | ||
Menu Themes are unlockable themes and colors for the game's menu. Menu Themes can be found throughout the spirit world. Like [[Collective Unconscious:Book Covers|Book Covers]], they are purely cosmetic and have no effect on gameplay. | Menu Themes are unlockable themes and colors for the game's menu. Menu Themes can be found throughout the spirit world. Like [[Collective Unconscious:Book Covers|Book Covers]], they are purely cosmetic and have no effect on gameplay. | ||
{| class="article-table" style="width: 100%;" border="1" cellpadding="0" cellspacing="0" | {| class="article-table" style="width: 100%; text-align:center" border="1" cellpadding="0" cellspacing="0" | ||
| style=" | | style="width:20%;"|'''Name''' | ||
| style=" | | style="width:11%;"|'''Icon''' | ||
| '''Author''' | |||
| '''Location''' | |||
| '''Condition(s)''' | |||
| '''Image''' | |||
|- | |- | ||
| Default | |||
| [[File:Default menu theme.png]] | |||
| Noahrav & Loriesquare | |||
| rowspan="2"; | | rowspan="2"; | None | ||
| rowspan="2"; | | rowspan="2"; | Obtained at the beginning of the game. | ||
| [[File:Defaultmenuthemeingame.png]] | |||
|- | |- | ||
| Classic | |||
| [[File:CU_menutheme_Classic.png]] | |||
| Led | |||
| [[File:CU_menutheme_Classic_ingame.png]] | |||
|- | |- | ||
| Office | |||
| [[File:CU_menutheme_Office.png]] | |||
| maple | |||
| [[Collective Unconscious:Smiling Pen Office|Smiling Pen Office]] | |||
| None | |||
| [[File:CU_menutheme_Office_ingame.png]] | |||
|- | |- | ||
| Sun | |||
| [[File:CU_menutheme_Sun.png]] | |||
| MillieAmp | |||
| [[Collective Unconscious:Burning Building|Burning Building]] | |||
| In Honey & Hotsauce's area, turn on the boombox and sit with Hotsauce, then cross the bridge to the right. | |||
| [[File:CU_menutheme_Sun_ingame.png]] | |||
|- | |- | ||
| Dusk | |||
| [[File:CU_menutheme_Dusk.png]] | |||
| NacreMoon | |||
| [[Collective Unconscious:Dusk World|Dusk World]] | |||
| None | |||
| [[File:CU_menutheme_Dusk_ingame.png]] | |||
|- | |- | ||
| | | | ||
| [[File:CU_menutheme_05.png]] | |||
| | | | ||
| | | | ||
| Line 50: | Line 50: | ||
| | | | ||
|- | |- | ||
| Squids | |||
| [[File:CU_menutheme_Squids.png]] | |||
| NacreMoon | |||
| [[Collective Unconscious:Squid Paradise|Squid Paradise]] | |||
| None | |||
| [[File:CU_menutheme_Squids_ingame.png]] | |||
|- | |- | ||
| Willow | |||
| [[File:CU_menutheme_Willow.png]] | |||
| | | bWF5 | ||
| [[Collective Unconscious:White Lotus Islands|White Lotus Islands]] | |||
| | | | ||
| [[File:CU_menutheme_Willow_ingame.png]] | |||
|- | |- | ||
| | | | ||
| Line 78: | Line 78: | ||
| | | | ||
|- | |- | ||
| Ammolites | |||
| [[File:CU_menutheme_Ammolites.png]] | |||
| NacreMoon | |||
| [[Collective Unconscious:Mollusk World|Mollusk World]] | |||
| None | |||
| [[File:CU_menutheme_Ammolites_ingame.png]] | |||
|- | |- | ||
| | | | ||
| Line 92: | Line 92: | ||
| | | | ||
|- | |- | ||
| Mural | |||
| [[File:CU_menutheme_Mural.png]] | |||
| rowspan="2"; | | rowspan="2"; | rollaby | ||
| rowspan="2"; | | rowspan="2"; | [[Collective Unconscious:Mural Passage|Mural Passage]] | ||
| rowspan="2"; | | rowspan="2"; | Only available in the room past Tusuq Warmi (requires [[Collective Unconscious:Eidola#Soulfire|Soulfire]] eidolon). Obtained simultaneously. | ||
| [[File:CU_menutheme_Mural_ingame.png]] | |||
|- | |- | ||
| Neon Mural | |||
| [[File:CU_menutheme_NeonMural.png]] | |||
| [[File:CU_menutheme_NeonMural_ingame.png]] | |||
|- | |- | ||
|Altered | |||
|[[File:CU_menutheme_Altered.png]] | |||
| | | | ||
|NacreMoon | |||
| | | | ||
| | |[[File:CU_menutheme_Altered_ingame.png]] | ||
|- | |- | ||
|Glowing | |||
|[[File:CU_menutheme_Glowing.png]] | |||
| | | | ||
|orchidmantis | |||
| | | | ||
| | |[[File:CU_menutheme_Glowing_ingame.png]] | ||
|- | |- | ||
| Sunset | |||
| [[File:CU_menutheme_Sunset.png]] | |||
| | | orchidmantis | ||
| [[Collective Unconscious:Sunset Woods|Sunset Woods]] | |||
| None | |||
| [[File:CU_menutheme_Sunset_ingame.png]] | |||
|- | |- | ||
| Celestial | |||
| [[File:CU_menutheme_Celestial.png]] | |||
| | | orchidmantis | ||
| [[Collective Unconscious:Celestial Platforms|Celestial Platforms]] | |||
| None | |||
| [[File:CU_menutheme_Celestial_ingame.png]] | |||
|- | |- | ||
| Blueing Plastic | |||
| [[File:CU_menutheme_BlueingPlastic.png]] | |||
| VoxlAlien | |||
| [[Collective Unconscious:Petscii World|Petscii World]] | |||
| None | |||
| [[File:CU menutheme BlueingPlastic ingame.png]] | |||
|- | |- | ||
| Voidbound | |||
| [[File:CU_menutheme_Voidbound.png]] | |||
| RM824 Somnium | |||
| [[Collective Unconscious:Void Cenotaph|Void Cenotaph]] | |||
| Complete the puzzle in the fountain branch of Void Cenotaph and visit the room with the two flickering statues. | |||
| [[File:CU_menutheme_Voidbound_ingame.png]] | |||
|- | |- | ||
| | | | ||
| Line 152: | Line 152: | ||
| | | | ||
|- | |- | ||
| Sidereal | |||
| [[File:CU_menutheme_Sidereal.png]] | |||
| Delly | |||
| [[Collective Unconscious:Starry Docks B|Starry Docks B]] | |||
| None | |||
| [[File:CU_menutheme_Sidereal_ingame.png]] | |||
|- | |- | ||
| | | | ||
| Line 166: | Line 166: | ||
| | | | ||
|- | |- | ||
|Golfer | |||
|[[File:CU_menutheme_Golfer.png]] | |||
|Dohus | |||
|Mini Golf Maze | |||
| | | | ||
| | |[[File:CU_menutheme_Golfer_ingame.png]] | ||
|- | |- | ||
| | | | ||
| Line 201: | Line 201: | ||
| | | | ||
|- | |- | ||
| Charred | |||
| [[File:CU_menutheme_Charred.png]] | |||
| Delly | |||
| [[Collective Unconscious:Scarlet River|Scarlet River]] | |||
| Enter the ritual room (requires the [[Collective Unconscious:Eidola#Soulfire|Soulfire]] eidolon) and kill Tauros. | |||
| [[File:CU_menutheme_Charred_ingame.png]] | |||
|- | |- | ||
| Chromatic | |||
| [[File:CU_menutheme_Chromatic.png]] | |||
| BlackMamba | |||
| [[Collective Unconscious:Chromatic Slabs World|Chromatic Slabs World]] | |||
| None | |||
| [[File:CU_menutheme_Chromatic_ingame.png]] | |||
|- | |- | ||
| | | | ||
Revision as of 18:06, 14 June 2024
| This page is missing information. You can help YumeWiki by expanding it. Details: Add rest of the pictures for menu themes |
Menu Themes are unlockable themes and colors for the game's menu. Menu Themes can be found throughout the spirit world. Like Book Covers, they are purely cosmetic and have no effect on gameplay.
| Name | Icon | Author | Location | Condition(s) | Image |
| Default | 
|
Noahrav & Loriesquare | None | Obtained at the beginning of the game. | 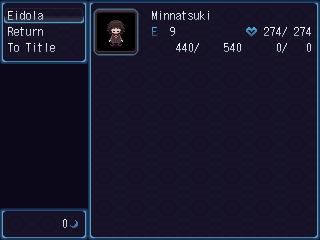
|
| Classic | 
|
Led | 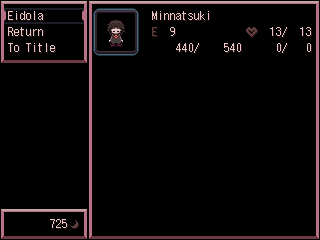
| ||
| Office | 
|
maple | Smiling Pen Office | None | 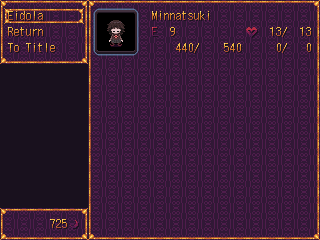
|
| Sun | 
|
MillieAmp | Burning Building | In Honey & Hotsauce's area, turn on the boombox and sit with Hotsauce, then cross the bridge to the right. | 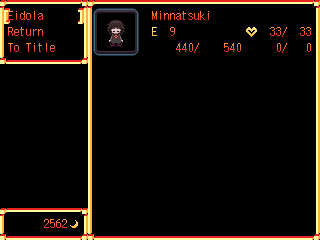
|
| Dusk | 
|
NacreMoon | Dusk World | None | 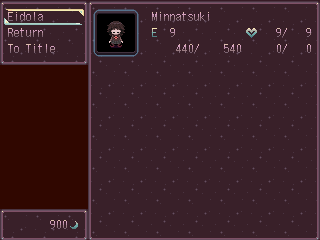
|

|
|||||
| Squids | 
|
NacreMoon | Squid Paradise | None | 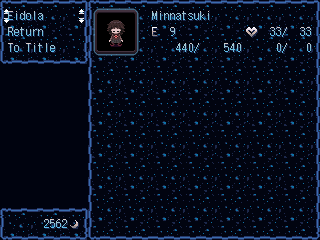
|
| Willow | 
|
bWF5 | White Lotus Islands | 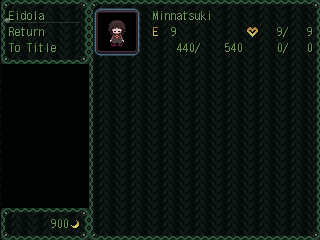
| |
| Ammolites | 
|
NacreMoon | Mollusk World | None | 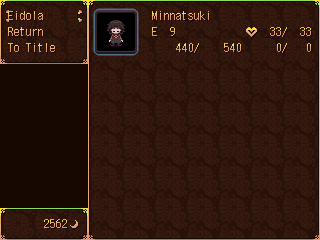
|
| Mural | 
|
rollaby | Mural Passage | Only available in the room past Tusuq Warmi (requires Soulfire eidolon). Obtained simultaneously. | 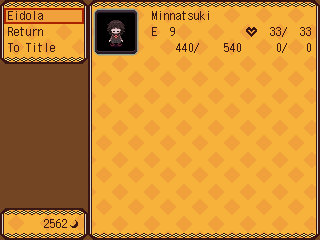
|
| Neon Mural | 
|
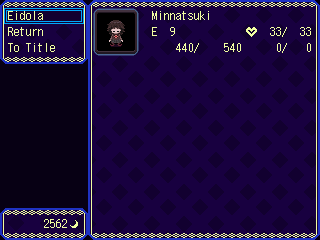
| |||
| Altered | 
|
NacreMoon | 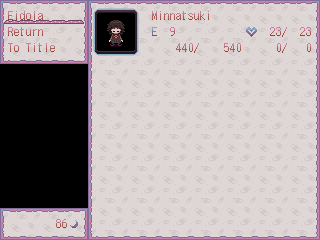
| ||
| Glowing | 
|
orchidmantis | 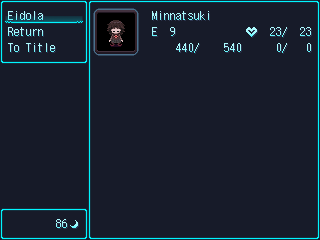
| ||
| Sunset | 
|
orchidmantis | Sunset Woods | None | 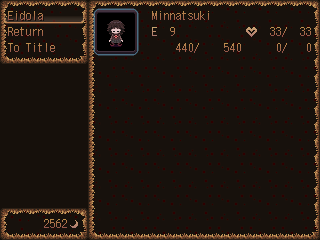
|
| Celestial | 
|
orchidmantis | Celestial Platforms | None | 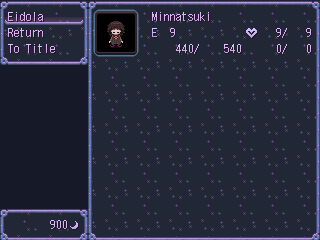
|
| Blueing Plastic | 
|
VoxlAlien | Petscii World | None | 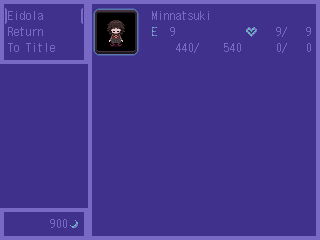
|
| Voidbound | 
|
RM824 Somnium | Void Cenotaph | Complete the puzzle in the fountain branch of Void Cenotaph and visit the room with the two flickering statues. | 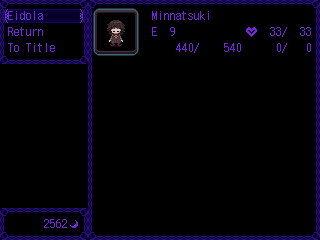
|
| Sidereal | 
|
Delly | Starry Docks B | None | 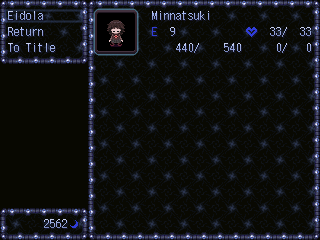
|
| Golfer | 
|
Dohus | Mini Golf Maze | 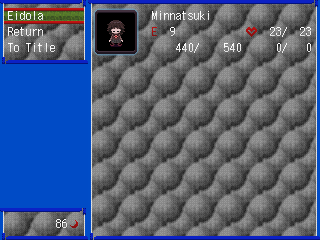
| |
| Charred | 
|
Delly | Scarlet River | Enter the ritual room (requires the Soulfire eidolon) and kill Tauros. | 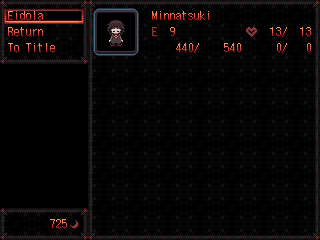
|
| Chromatic | 
|
BlackMamba | Chromatic Slabs World | None | 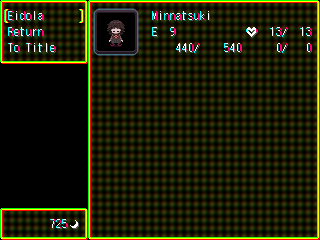
|
