No edit summary |
(added Expanded Corridors to the map) |
||
| (37 intermediate revisions by 17 users not shown) | |||
| Line 3: | Line 3: | ||
|headerfontcolor = #6bb6b5 | |headerfontcolor = #6bb6b5 | ||
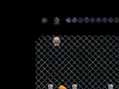
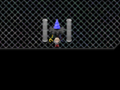
|image = ChaosExhibitionEntrance.PNG | |image = ChaosExhibitionEntrance.PNG | ||
|JapaneseName = | |JapaneseName = 繋皆大成 | ||
|Name = | |Name = ''Keikai taisei'', Accomplishment | ||
|Effects = None | |Effects = None | ||
|Wallpapers = None | |Wallpapers = None | ||
|Events = None | |Events = None | ||
|NPCS = None | |NPCS = None | ||
|Connections = | |Connections = {{Connection|Burial Desert}}, {{Connection|Buried City}}, {{Connection|Dark Warehouse}}, {{Connection|Industrial Towers|one_way_type=NoReturn}}, {{Connection|Mare Tranquillitatis|one_way_type=NoReturn}}, {{Connection|Underground Laboratory|unlock_type=Locked}}, {{Connection|Sugar Road|unlock_type=Locked}}, {{Connection|Ether Caverns|unlock_type=Locked}}, {{Connection|Rainbow Towers|unlock_type=Locked}}, {{Connection|Expanded Corridors|unlock_type=Locked}} | ||
|BGM = | |BGM = {{BGM|title=怪奇工事_Anon|filename=怪奇工事_Anon.ogg|soundroom=223A|speed=100}}, {{BGM|title=SlowDrop_Anon|label=To Industrial Towers|filename=SlowDrop_Anon(307C).ogg|soundroom=307C|speed=60}} | ||
|Map ID = 0734 | |Map ID = 0734 | ||
|Primary = | |Primary = Anon | ||
|Contributing = kuraud, shigurin, 2i9, Lemniscate, Horatsuki, Takikomi | |||
|VersionAdded = 0.105f patch 2 | |VersionAdded = 0.105f patch 2 | ||
|VersionsUpdated = 0.116c patch 1-ef | |VersionsUpdated = 0.105i patch 3, 0.106, 0.106 patch 3, 0.106e, 0.111g, 0.111h patch 1, 0.112 patch 1, 0.116c patch 1-ef, 0.118c, 0.119b patch 5-b, 0.119h patch 1, 0.120d patch 8, 0.120f patch 1 | ||
}} | }} | ||
The '''Chaos Exhibition''' is a strange world accessible from the [[Burial Desert]] and the [[Buried City]]. | The '''Chaos Exhibition''' is a strange world accessible from the [[Yume 2kki:Burial Desert|Burial Desert]] and the [[Yume 2kki:Buried City|Buried City]]. | ||
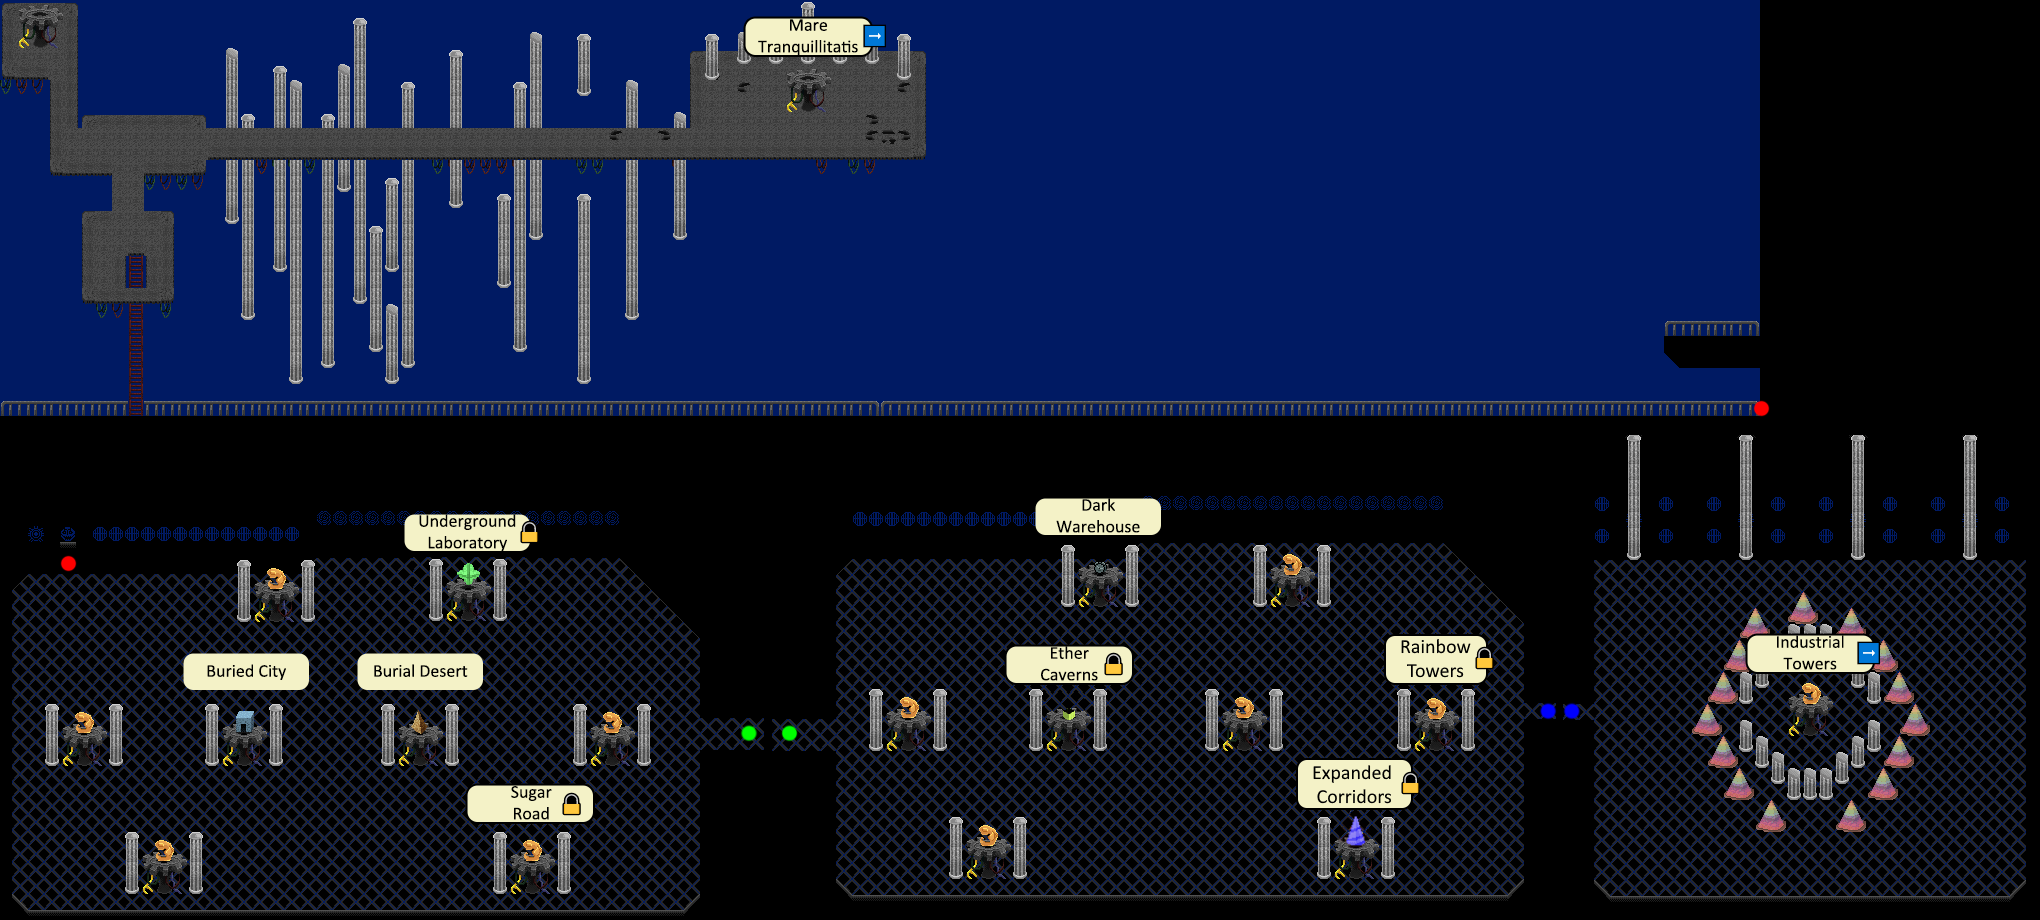
{{LocationMap|filename=2kki Map0734 120d p8.png|caption=Map of the Chaos Exhibition.}} | |||
==Features== | ==Features== | ||
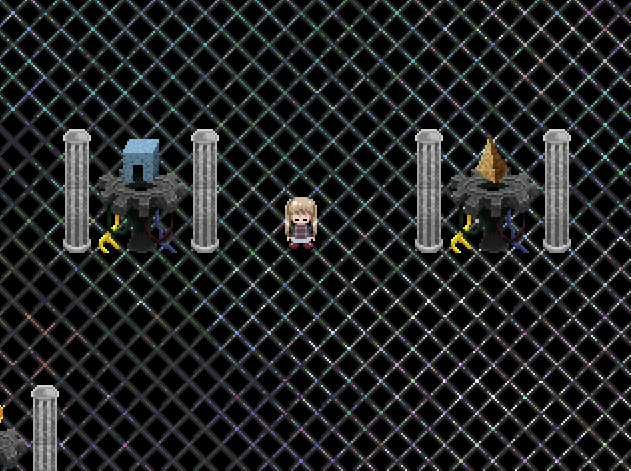
The Chaos Exhibition is a world filled with many strange gear and wire pedestals, each with a statue on top. The two shown in the locationbox's image are the two of five that don't display golden embryos as their content; the one with the blue building leads to the [[Buried City]], and the one with the brown pyramid leads to the Burial Desert. If the player has been sent here from the diamond portal in the [[Underground Laboratory]], the upper-right embryo statue will be replaced with the same diamond portal, allowing two-way access to the aforementioned area. Similarly, if the player has accessed this area via [[Sugar Road]] before, a portal there will also be available on the bottom right of the main room. | The Chaos Exhibition is a world filled with many strange gear and wire pedestals, each with a statue on top. The two shown in the locationbox's image are the two of five that don't display golden embryos as their content; the one with the blue building leads to the [[Yume 2kki:Buried City|Buried City]], and the one with the brown pyramid leads to the Burial Desert. If the player has been sent here from the diamond portal in the [[Yume 2kki:Underground Laboratory|Underground Laboratory]], the upper-right embryo statue will be replaced with the same diamond portal, allowing two-way access to the aforementioned area. Similarly, if the player has accessed this area via [[Yume 2kki:Sugar Road|Sugar Road]] before, a portal there will also be available on the bottom right of the main room. | ||
There are two main paths: north, through a door marked by a strange skull face, and east, through a simple hallway. Going east will simply lead to another room full of fetus statues; in here is a gear pedestal with a clock upon it, that leads to the [[Dark Warehouse]]. There is another hallway, again on the east, that leads to an open-air balcony. Going even further east will then culminate in a room with many rainbow pyramids from the Burial Desert, many of the pillars that surround the gear pedestals, and a single golden embryo statue. Interacting with this embryo statue will lead the player to the [[Industrial Towers]] (this path is one-way). | There are two main paths: north, through a door marked by a strange skull face, and east, through a simple hallway. Going east will simply lead to another room full of fetus statues; in here is a gear pedestal with a clock upon it, that leads to the [[Yume 2kki:Dark Warehouse|Dark Warehouse]]. Alongside that is a UFO that when unlocked from the other side leads to [[Yume 2kki:Rainbow Towers|Rainbow Towers]]. There is another hallway, again on the east, that leads to an open-air balcony. Going even further east will then culminate in a room with many rainbow pyramids from the Burial Desert, many of the pillars that surround the gear pedestals, and a single golden embryo statue. Interacting with this embryo statue will lead the player to the [[Yume 2kki:Industrial Towers|Industrial Towers]] (this path is one-way). | ||
[[ | Going north through the skull door, however, will lead to a balcony area similar to if the player had gone east instead. Continuing to go west here will lead the player to a ladder up to a network of platforms, which contains two empty gear pedestals, one to the north and one to the east. Although the one to the north leads nowhere, interacting with the one to the east will take [[Yume 2kki:Urotsuki|Urotsuki]] to the [[Yume 2kki:Mare Tranquillitatis|Mare Tranquillitatis]]. | ||
==Directions== | |||
*The Nexus → [[Yume 2kki:Pudding World|Pudding World]] → [[Yume 2kki:Pillar Ark|Pillar Ark]] → [[Yume 2kki:Sands of Self|Sands of Self]] → [[Yume 2kki:Burial Depths|Burial Depths]] → [[Yume 2kki:Burial Desert|Burial Desert]] → '''Chaos Exhibition''' | |||
With the [[Yume 2kki:Effects#Eyeball Bomb|Eyeball Bomb]] and [[Yume 2kki:Effects#Chainsaw|Chainsaw]] effects: | |||
*The Nexus → [[Yume 2kki:Geometry World|Geometry World]] → [[Yume 2kki:Broken Faces Area|Broken Faces Area]] → [[Yume 2kki:Vase World|Vase World]] → [[Yume 2kki:Burial Desert|Burial Desert]] → '''Chaos Exhibition''' | |||
If the connection from [[Yume 2kki:Urotsuki's Dream Apartments|Urotsuki's Dream Apartments]] to [[Yume 2kki:Sugar Road|Sugar Road]] is active: | |||
*The Nexus → [[Yume 2kki:Urotsuki's Dream Apartments|Urotsuki's Dream Apartments]] → [[Yume 2kki:Sugar Road|Sugar Road]] → '''Chaos Exhibition''' | |||
==Trivia== | ==Trivia== | ||
*This world's map is ''extremely'' large, but almost all of it went unused. Whether or not it will be eventually filled in or if it will be merely an anomaly associated with this world, only time will tell. | |||
* This world's map is ''extremely'' large, but almost all of it went unused. Whether or not it will be eventually filled in or if it will be merely an anomaly associated with this world, only time will tell. | |||
==Gallery== | ==Gallery== | ||
| Line 40: | Line 45: | ||
chaosExhibitionStrolling.PNG|just strolling by, admiring all the pillars, with the perfect view of the infinite void of iridescent egg crate foam... | chaosExhibitionStrolling.PNG|just strolling by, admiring all the pillars, with the perfect view of the infinite void of iridescent egg crate foam... | ||
chaosExhibitionEmbryo.PNG|ok, before anyone tries to correct me by saying this is a fetus, no, this is not a fetus. this is an embryo. embryos come between a zygote and a fetus, and all chordates have embryos that look the same. | chaosExhibitionEmbryo.PNG|ok, before anyone tries to correct me by saying this is a fetus, no, this is not a fetus. this is an embryo. embryos come between a zygote and a fetus, and all chordates have embryos that look the same. | ||
giganticconeconnection.png|[[Yume 2kki:Expanded Corridors|Expanded Corridors]], it has to be unlocked from the opposite side | |||
</gallery> | </gallery> | ||
[[Category: | [[Category:Yume 2kki In Development]] | ||
[[Category: | [[Category:Yume 2kki Hub Worlds]] | ||
Latest revision as of 22:31, 2 October 2024
| Chaos Exhibition | |
|---|---|

| |
| Basic Info | |
| Japanese Name(s) |
繋皆大成 |
| Effects | None |
| Events | None |
| Notable NPCs | None |
| Other | |
| Connecting Areas | Burial Desert Buried City Dark Warehouse Industrial Towers ➡️ Mare Tranquillitatis ➡️ Underground Laboratory 🔒 Sugar Road 🔒 Ether Caverns 🔒 Rainbow Towers 🔒 Expanded Corridors 🔒 |
| BGM | 🔊 怪奇工事_Anon (No. 223A) 🔊 SlowDrop_Anon – To Industrial Towers (No. 307C) |
| Map ID | 0734 |
| Version Added | 0.105f patch 2 |
| Last Updated | 0.120f patch 1 |
| Primary Author | Anon |
| Contributing Author(s) | kuraud, shigurin, 2i9, Lemniscate, Horatsuki, Takikomi |
The Chaos Exhibition is a strange world accessible from the Burial Desert and the Buried City.

Features
The Chaos Exhibition is a world filled with many strange gear and wire pedestals, each with a statue on top. The two shown in the locationbox's image are the two of five that don't display golden embryos as their content; the one with the blue building leads to the Buried City, and the one with the brown pyramid leads to the Burial Desert. If the player has been sent here from the diamond portal in the Underground Laboratory, the upper-right embryo statue will be replaced with the same diamond portal, allowing two-way access to the aforementioned area. Similarly, if the player has accessed this area via Sugar Road before, a portal there will also be available on the bottom right of the main room.
There are two main paths: north, through a door marked by a strange skull face, and east, through a simple hallway. Going east will simply lead to another room full of fetus statues; in here is a gear pedestal with a clock upon it, that leads to the Dark Warehouse. Alongside that is a UFO that when unlocked from the other side leads to Rainbow Towers. There is another hallway, again on the east, that leads to an open-air balcony. Going even further east will then culminate in a room with many rainbow pyramids from the Burial Desert, many of the pillars that surround the gear pedestals, and a single golden embryo statue. Interacting with this embryo statue will lead the player to the Industrial Towers (this path is one-way).
Going north through the skull door, however, will lead to a balcony area similar to if the player had gone east instead. Continuing to go west here will lead the player to a ladder up to a network of platforms, which contains two empty gear pedestals, one to the north and one to the east. Although the one to the north leads nowhere, interacting with the one to the east will take Urotsuki to the Mare Tranquillitatis.
Directions
- The Nexus → Pudding World → Pillar Ark → Sands of Self → Burial Depths → Burial Desert → Chaos Exhibition
With the Eyeball Bomb and Chainsaw effects:
- The Nexus → Geometry World → Broken Faces Area → Vase World → Burial Desert → Chaos Exhibition
If the connection from Urotsuki's Dream Apartments to Sugar Road is active:
- The Nexus → Urotsuki's Dream Apartments → Sugar Road → Chaos Exhibition
Trivia
- This world's map is extremely large, but almost all of it went unused. Whether or not it will be eventually filled in or if it will be merely an anomaly associated with this world, only time will tell.
Gallery
This looks promising. (Sarcasm)
This looks promising. (Not sarcasm)
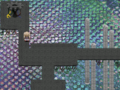
just strolling by, admiring all the pillars, with the perfect view of the infinite void of iridescent egg crate foam...
ok, before anyone tries to correct me by saying this is a fetus, no, this is not a fetus. this is an embryo. embryos come between a zygote and a fetus, and all chordates have embryos that look the same.
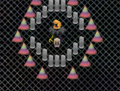
Expanded Corridors, it has to be unlocked from the opposite side


- 000000
- 6bb6b5