| Puzzle Chamber | |||||||||||
|---|---|---|---|---|---|---|---|---|---|---|---|

| |||||||||||
| Basic Info | |||||||||||
| Memories | Glove | ||||||||||
| Collectibles |
Coin | ||||||||||
| Events | None | ||||||||||
| Notable NPCs | None | ||||||||||
| Other | |||||||||||
| Connecting Areas | Owl Swamp Glowing Meadow R-Maze 🍀 | ||||||||||
| BGM | 🔊 Muma_vent – Before Puzzle 🔊 Boucle1 – Puzzle Basics 🔊 encore_une_fois | ||||||||||
| Map ID | 0008, 0011, 0054 | ||||||||||
| |||||||||||
The Puzzle Chamber is an area accessible from the Owl Swamp.
Features
The Puzzle Chamber is a set of rooms containing colored tiles, levers, conveyor belts, and barriers that form a confusing puzzle-like structure. It is initially a very unexciting area, consisting of only a crossroad made of blue striped flooring with two buildings made of green irregularly-shaped bricks at the to.
The crossroad's western branch leads to a yellow platform featuring a ladder to the Glowing Meadow, while following the southern branch and going between the two tan blocks will take you to the Owl Swamp. Entering the northern building through the small doorway will take you inside to the Puzzle Basics.
Puzzle Basics
This is essentially a tutorial on the puzzle's mechanics. Levers will turn yellow X-blocks into conveyor belts while also activating electrical barriers atop brown tiles that Muma can not cross. Muma is also able to jump over one-tile gaps in the ground and can walk over the round ends of ledges. The chamber also contains various colored blocks which are activated by moving tiles corresponding to each block's color, which can be either red, blue, yellow, or green. Two other moving tiles, black and white, will deactivate and activate all tiles, respectively. Once the tutorial is complete, Muma will be able to go to the main puzzle, which consists of all of these elements formed into one large room.
Chamber Switches and Coin Tutorial
Within the Puzzle Chamber's main puzzle room is a single Memory and a coin. To obtain the Puzzle Chamber's Memory, two switches in the room's southern portion must be flipped, which will deactivate four blocks that barricade the section it is in. Obtaining the Memory and the coin requires activating and deactivating buttons and levers found around the chamber, which can become confusing.
Chamber Switch 1
This switch is located in the southeastern part of the Puzzle Chamber and unlocks the bottom row blocking the Memory.
- Turn on the lever to the right of the entrance, turning on the conveyor belts.
- Move across the conveyor belt to the right of the just-activated lever, hopping over an empty red tile in the process.
- Activate the blue button to the right of the conveyor belt's end.
- To the left of the blue button, activate the nearby yellow button surrounded by deactivated green blocks.
- Above the just-activated yellow button, step on the green button surrounded by conveyor belts. By now, all of the colors except red should be activated.
- Backtrack to where the blue button was located and go on the conveyor belt below it, now traversable due to the blue and green blocks.
- Go over the nearby ledge and turn off the lever just below it.
- Head west of the just-deactivated lever. The Puzzle Chamber's first switch should now be accessible.
Chamber Switch 2
This switch is located in the southwestern part of the Puzzle Chamber and unlocks the top row blocking the Memory. This switch's instructions are a continuation of the instructions for the first switch.
- After activating the first switch, return to the previously deactivated lever and turn it back on.
- Head into the small area to the left of the lever with the green and red buttons. Only touch the green button to deactivate it.
- Go upward and then left from the area with the green and red buttons. You should pass over two yellow tiles and a line of four deactivated red blocks into a room with two nearby rabbits on conveyor belts.
- Step on the yellow button to deactivate the tiles and hop over the gap bridged by two blue tiles.
- Once over the gap, activate the red button and hop across the bridge with two yellow tile gaps in it to the left of the button.
- Move around the ledges and cross the deactivated green and yellow blocks. The conveyor belt below them will lead to the Puzzle Chamber's second switch.
Coin
The coin found in this area is located in a small northeastern portion, blocked by electric barriers. After all of the colored tiles are reset/turned off, follow the steps for the first switch until Step 7, where the lever will remain on instead.
- Backtrack to the lever to the right of the chamber's entrance. No other colored tiles need to be activated to get back here.
- Turn the lever off, head left and then down, and step on the red button. All colors will now be activated.
- Return to the lever that was previously turned off, turn it back on and ride the conveyor belt to the right of it.
- The gap in the ground is now replaced with a red tile, which can be crossed with some accompanying blue tiles.
- Above the red and blue tiles should be a bridge of green and yellow tiles leading to a lever. Flipping this lever off will deactivate the electric barriers blocking the coin.
Directions
Memory Room →First Steps → Retro Dungeon → Owl Swamp → Puzzle Chamber
Gallery
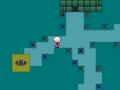
The hallway and the ladder to Glowing Meadow

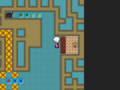
The tutorial portion
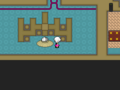
The Coin after solving the puzzle
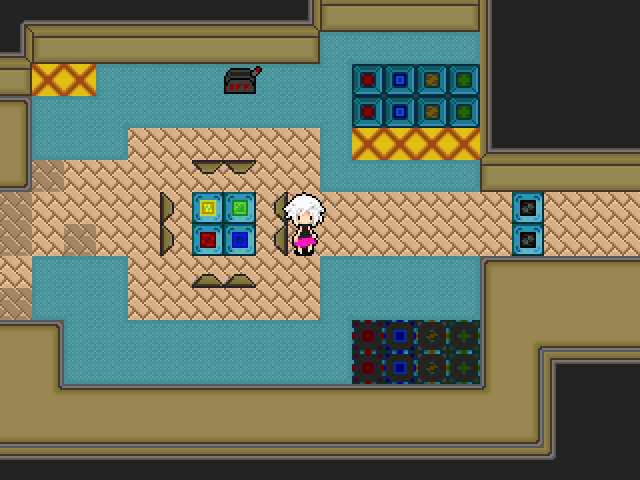
The Glove memory, after solving the puzzle


- 027575
- 45bdcf