No edit summary |
Oh0kaYthen86 (talk | contribs) (rewrote most content on page, added missing details) |
||
| Line 23: | Line 23: | ||
The white door is locked at first, but killing the chef with the [[Yume 2kki:Effects#Chainsaw|Chainsaw]] unlocks it. Going through it, Urotsuki ends up in a dark corridor with the red cook at the end of it. Coming close to him will make Urotsuki move away from him, after which he will start chasing her. Getting caught by him plays the animation of getting a key, after which Urotsuki gets teleported back to the main room, with the door locked and the chef still gone. However, if you manage to escape during the chase, a short cutscene will play, in which Urotsuki hides under one of the tables and the cook tried to find her, fails to do so and goes out of the restaurant. | The white door is locked at first, but killing the chef with the [[Yume 2kki:Effects#Chainsaw|Chainsaw]] unlocks it. Going through it, Urotsuki ends up in a dark corridor with the red cook at the end of it. Coming close to him will make Urotsuki move away from him, after which he will start chasing her. Getting caught by him plays the animation of getting a key, after which Urotsuki gets teleported back to the main room, with the door locked and the chef still gone. However, if you manage to escape during the chase, a short cutscene will play, in which Urotsuki hides under one of the tables and the cook tried to find her, fails to do so and goes out of the restaurant. | ||
The red door, however, is always open, and going through it Urotsuki ends up in a long corridor with numbered doors. If you've given at least | The red door, however, is always open, and going through it Urotsuki ends up in a long corridor with numbered doors. If you've given at least 6000[[Yume 2kki:Money|夢]] to the box in Room 12, at the bottom of the corridor there will be two creatures: one in the beginning of the corridor, and one at the end of it. Interacting with them teleports Urotsuki between each other. | ||
===Corridor Rooms=== | |||
'''Room 1''' contains a creature and a control panel. Pressing the buttons on the control panel allows you to change the creature's color, sound, behavior, speed, and animation. | |||
'''Room 2''' is full of red and blue presents whose contents are determined randomly. Opening one of these presents can result in a variety of things, such as: | |||
* '''Room | *Giving Urotsuki 1夢, 100夢 or 300夢. | ||
*Playing a laughing sound and taking 200夢 or 300夢 from the player. | |||
*Transforming into a moving cloud of red and green particles, where interacting with these will change the BGM and the appearance of both the room and Urotsuki. In this state, Urotsuki can't leave the room through the door but can still open the menu and open presents. | |||
*Disappearing, sometimes with a screen transition. | |||
*Transforming into a floating grey creature with an open mouth, which doesn't react to any effect. | |||
*Spawning a red creature identical to the one in '''Room 1'''. | |||
*Spawning a sane Shadow Lady. | |||
*Changing the screen tint. | |||
*Spawning a small vending machine, which gives drinks that cost 100夢. | |||
* Making Urotsuki wear a red cap. | |||
* Spawning a transparent creature with no legs which follows Urotsuki around. | |||
: | '''Room 3''' has two characters: a brother and a sister, which both change their appearance depending on Urotsuki's equipped effect. Killing either one of them causes the screen to fade to black and the chainsaw sound effect to play a second time. When the screen returns to normal, the sibling who was left alive can be seen with a chainsaw in their hands, and after a few seconds Urotsuki wakes up. | ||
'''Room 4''' houses a red blob with an open mouth. Killing this blob with the [[Yume 2kki:Effects#Chainsaw|Chainsaw]] effect gives 10夢, and it will replenish itself each time it is killed. | |||
'''Room 5''' has an eye, a nose and a mouth in the bottom left corner. Interacting with each one several times makes different versions of the respective body part hover above Urotsuki, allowing her to create different faces. | |||
: | '''Room 6''' has a giant crowned stick figure looking out of the window, who is known as the False King. Attempting to kill him will tint the screen red and change the appearance of the area entirely. Going back to the main hallway after chainsawing the figure, you will that the numbers on all of the doors have been replaced with eyes, and the appearance and behaviour of the NPCs in other rooms have been altered: | ||
*'''Room 1''' now has a brain instead of the creature that was there before, and the control panel is unresponsive. | |||
*Opening any of the presents in '''Room 2''' transforms it into a pool of blood. | |||
*'''Room 3''' now has two huge humanoid creatures instead of the brother and sister. | |||
* '''Room 4''''s blob grins upon chainsawing it and doesn't reward any money. | |||
* Interacting with the body parts in '''Room 5''' now makes a hollow face appear. | |||
*'''Rooms 7''''','' '''8''''', and'' '''13''' are now locked. | |||
*In '''Room 9''', a deformed object with blood pouring out its holes is now blocking Urotsuki's path, so she can only go back to the hallway. | |||
*In '''Room 10''', the display is now blank, with the buttons being filled with static. They will now only play a sound effect upon try to interact with them. | |||
*In '''Room 11''', all of the hats are replaced with one stand with a brain on it, which Urotsuki also can wear. | |||
*In '''Room 12''', the box's screen is now black with two red dots on it, and no hole or door is present. | |||
Additionally, going back to the restaurant in this state reveals that it has also been deformed, with holes in the tables and the area's residents being petrified into a mass of decaying flesh. In this state, the white door cannot be opened even after killing the chef, and the door leading to [[Yume 2kki:Blue House Road|Blue House Road]] is locked. | |||
'''Room 7''' is a first-person platformer house, with colorful cubes of varying heights that Urotsuki can jump on by pressing the spacebar, a window overlooking a flooded cave, and a friendly white creature behind the table that you can interact with to make him giggle for a random length of time. You cannot use the menu in this area, and going through the bottom door will lead to the [[Yume 2kki:Underground Lake|Underground Lake]]. | |||
'''Room 8''' is a monochrome path with a hole at the end, with similar paths and a yellow-haired creature seen in the background. Going up the path and interacting with the hole will de-equip any effect Urotsuki has equipped, and show 10 different tiles to be stepped on through various areas in the dream world. They must be visited in the following order: | |||
: | 1. [[Yume 2kki:T-Folk World|T-Folk World]], to the left of a red T-Folk found in a cluster north and slightly west of the entrance. | ||
: | 2. The trap in [[Yume 2kki:Crazed Faces Maze|Crazed Faces Maze]], just over the crack in the ground. | ||
3. Crazed Faces Maze, just below the face sticking its tongue out on the easternmost path in the area. | |||
: | 4. [[Yume 2kki:Red Monastery|Red Monastery]], just beside the lemon in the northernmost part of the western branch. | ||
: | 5. [[Yume 2kki:Fused Faces World|Fused Faces World]], in the middle of the white plant field directly south of the entrance. | ||
6. [[Yume 2kki:Experimentation Building|Experimentation Building]], south of the eastern part of the railing on the floor with a balcony. | |||
7. [[Yume 2kki:Tetrad Biome|Tetrad Biome]], in the southeastern corner of the Valentine's Day section. | |||
8. [[Yume 2kki:Blue House Road|Blue House Road]], at the rightmost corner of the street that the car dealership can be found on. | |||
9. [[Yume 2kki:Ice Cream Islands|Ice Cream Islands]], on one of the waffle cone spots on a ice cream platform southeast of the entrance. | |||
10. [[Yume 2kki:Flooded Buildings|Flooded Buildings]], at the top of a dock found by heading west from the ladder to the lower part of the area. | |||
Stepping on all the tiles shown will unlock [[Yume 2kki:Menu Themes|Menu Theme #50]]. | |||
'''Room 9''' is another first-person room, having a fenced-off passageway with various creatures looking at Urotsuki and a locked door at the end. | |||
'''Room 10''' has a display and 11 buttons with numbers 0-9 and a green checkmark. Entering the code 2547829 and interacting with the green checkmark will make a red door appear, which leads to the [[Yume 2kki:Red Monastery|Red Monastery]] and unlocks the connection from the opposite side. | |||
'''Room 11''' has five different hats on stands which Urotsuki can wear, but only while in this room. | |||
'''Room 12''' has a box with a computer screen and a hole on the right, which takes 500夢 from you upon interaction. Continuously doing so will make a face appear on screen which gets progressively more happier as more money is inserted. After 10000夢 has been deposited in total, a white door apears on the left which takes you to a gray area. From here, there is a door styled like an open mouth which takes you to a closed-off elevator-like area, and three potions on a table. Drinking each one has different effects on Urotsuki and the player: | |||
*The left one makes Urotsuki move randomly very fast for a short time. | |||
*The middle one shows different screen transitions and plays different sound effects. | |||
* The right one makes the screen shake. | |||
'''Room 13''' is filled with various cycloptic egg creatures of different style and eye colors. They move randomly and do not normally react to any effect, including the Chainsaw and Railroad Crossing, and each of them can only be killed by interacting with them while having their corresponding effect equipped. The effect needed depends on the egg's appearance: | |||
*Small eggs: Child | |||
*Red eggs with stripes: Drum | |||
*Grey eggs with a yellow X across their body: Railroad Crossing | |||
*Light grey eggs with a red bottom: Chainsaw | |||
*Yellow eggs: Trombone | |||
*Rainbow eggs: Rainbow | |||
*Orange eggs: Haniwa | |||
* Pale blue eggs with a pink eye: Boy | |||
*Light blue eggs with three stripes across their front side: Tissue | |||
*Light blue eggs with a single while stripe down their eye: Penguin | |||
*Black eggs with three white dots and a yellow eye: School Boy | |||
*Black egg with two white stripes going across them: Spring | |||
*Dark grey eggs with a red eye: Eyeball Bomb | |||
*Brown eggs with a pink square across their eye: Polygon | |||
*White egg with a bleeding red eye: Marginal | |||
After killing every creature, Urotsuki will be able to sleep in the green bed in the room and watch one of the events that is needed to access the [[Yume 2kki:Horror Maze|Horror Maze]]. | |||
::'' | ==Directions== | ||
Nexus → [[Yume 2kki:Purple World|Purple World]] → [[Yume 2kki:Onyx Tile World|Onyx Tile World]] → [[Yume 2kki:Fused Faces World|Fused Faces World]] → [[Yume 2kki:Crazed Faces Maze|Crazed Faces Maze]] → [[Yume 2kki:Blue House Road|Blue House Road]] → '''Blue Restaurant''' | |||
Nexus → [[Yume 2kki:Garden World|Garden World]] → [[Yume 2kki:Blue Forest|Blue Forest]] → [[Yume 2kki:Exhibition|Exhibition]] → [[Yume 2kki:Sandy Plains|Sandy Plains]] → [[Yume 2kki:Aquamarine Cave|Aquamarine Cave]] → [[Yume 2kki:Underground Lake|Underground Lake]] → '''Blue Restaurant''' | |||
If the connection to the [[Yume 2kki:Red Monastery|Red Monastery]] from the '''Blue Restaurant''' has been unlocked: | |||
Nexus → [[Yume 2kki:Purple World|Purple World]] → [[Yume 2kki:Red Monastery|Red Monastery]] → '''Blue Restaurant''' | |||
==Gallery== | ==Gallery== | ||
Revision as of 01:10, 26 February 2023
| Blue Restaurant | |
|---|---|

| |
| Basic Info | |
| Japanese Name(s) |
restaurant |
| Effects | None |
| Events | None |
| Notable NPCs | None |
| Other | |
| Connecting Areas | Blue House Road Underground Lake Red Monastery 🔑 |
| BGM | tonny02soundc_2 (Room 1)n3-SaP (Room 2)2_45 (Room 2 after the event)yumenikkig_uljp00129 no name 2-169 (Room 3)yumenikkig_uljp00129 no name 2-169 (slowed) (Room 3 after the event)sound3e (Room 4)n3-RtH (Room 5)sniperbob1 (After the event in Room 6)sk2-cookware (Room 7)2_21 (Room 8)qs0UrDFJ-bgm054 (Room 9)rec2 (Room 10)zaza (Room 11)kappa_01_2 (Room 12)kikai004 (Room 13)kappa_13 (Bed Event)bgm1 (Potions Room)Nuls_04-dgtmn (Elevator) |
| Map ID | 1442, 1378 |
| Version Added | 0.120 |
| Author | sniperbob |
Blue Restaurant is an area accessible from the Blue House Road and the Underground Lake.
Features
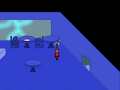
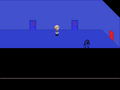
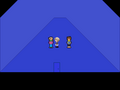
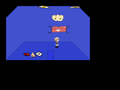
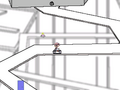
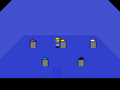
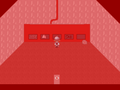
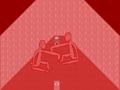
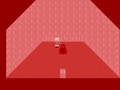
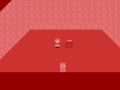
When coming from Blue House Road, Urotsuki ends up in a small restaurant room with several creatures sitting behind the tables on the top and bottom of the room. Behind the bar there are two humans with blue skins: a white one with a chef hat and a red one with a regular hat. There are also two doors with same colours.
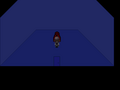
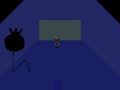
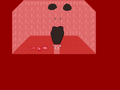
The white door is locked at first, but killing the chef with the Chainsaw unlocks it. Going through it, Urotsuki ends up in a dark corridor with the red cook at the end of it. Coming close to him will make Urotsuki move away from him, after which he will start chasing her. Getting caught by him plays the animation of getting a key, after which Urotsuki gets teleported back to the main room, with the door locked and the chef still gone. However, if you manage to escape during the chase, a short cutscene will play, in which Urotsuki hides under one of the tables and the cook tried to find her, fails to do so and goes out of the restaurant.
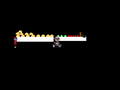
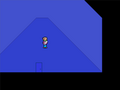
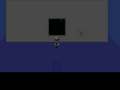
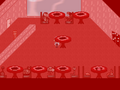
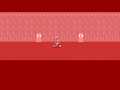
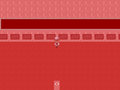
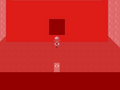
The red door, however, is always open, and going through it Urotsuki ends up in a long corridor with numbered doors. If you've given at least 6000夢 to the box in Room 12, at the bottom of the corridor there will be two creatures: one in the beginning of the corridor, and one at the end of it. Interacting with them teleports Urotsuki between each other.
Corridor Rooms
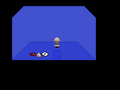
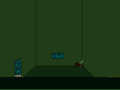
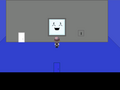
Room 1 contains a creature and a control panel. Pressing the buttons on the control panel allows you to change the creature's color, sound, behavior, speed, and animation.
Room 2 is full of red and blue presents whose contents are determined randomly. Opening one of these presents can result in a variety of things, such as:
- Giving Urotsuki 1夢, 100夢 or 300夢.
- Playing a laughing sound and taking 200夢 or 300夢 from the player.
- Transforming into a moving cloud of red and green particles, where interacting with these will change the BGM and the appearance of both the room and Urotsuki. In this state, Urotsuki can't leave the room through the door but can still open the menu and open presents.
- Disappearing, sometimes with a screen transition.
- Transforming into a floating grey creature with an open mouth, which doesn't react to any effect.
- Spawning a red creature identical to the one in Room 1.
- Spawning a sane Shadow Lady.
- Changing the screen tint.
- Spawning a small vending machine, which gives drinks that cost 100夢.
- Making Urotsuki wear a red cap.
- Spawning a transparent creature with no legs which follows Urotsuki around.
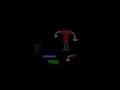
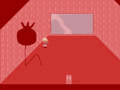
Room 3 has two characters: a brother and a sister, which both change their appearance depending on Urotsuki's equipped effect. Killing either one of them causes the screen to fade to black and the chainsaw sound effect to play a second time. When the screen returns to normal, the sibling who was left alive can be seen with a chainsaw in their hands, and after a few seconds Urotsuki wakes up.
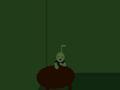
Room 4 houses a red blob with an open mouth. Killing this blob with the Chainsaw effect gives 10夢, and it will replenish itself each time it is killed.
Room 5 has an eye, a nose and a mouth in the bottom left corner. Interacting with each one several times makes different versions of the respective body part hover above Urotsuki, allowing her to create different faces.
Room 6 has a giant crowned stick figure looking out of the window, who is known as the False King. Attempting to kill him will tint the screen red and change the appearance of the area entirely. Going back to the main hallway after chainsawing the figure, you will that the numbers on all of the doors have been replaced with eyes, and the appearance and behaviour of the NPCs in other rooms have been altered:
- Room 1 now has a brain instead of the creature that was there before, and the control panel is unresponsive.
- Opening any of the presents in Room 2 transforms it into a pool of blood.
- Room 3 now has two huge humanoid creatures instead of the brother and sister.
- Room 4's blob grins upon chainsawing it and doesn't reward any money.
- Interacting with the body parts in Room 5 now makes a hollow face appear.
- Rooms 7, 8, and 13 are now locked.
- In Room 9, a deformed object with blood pouring out its holes is now blocking Urotsuki's path, so she can only go back to the hallway.
- In Room 10, the display is now blank, with the buttons being filled with static. They will now only play a sound effect upon try to interact with them.
- In Room 11, all of the hats are replaced with one stand with a brain on it, which Urotsuki also can wear.
- In Room 12, the box's screen is now black with two red dots on it, and no hole or door is present.
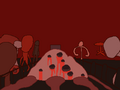
Additionally, going back to the restaurant in this state reveals that it has also been deformed, with holes in the tables and the area's residents being petrified into a mass of decaying flesh. In this state, the white door cannot be opened even after killing the chef, and the door leading to Blue House Road is locked.
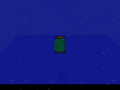
Room 7 is a first-person platformer house, with colorful cubes of varying heights that Urotsuki can jump on by pressing the spacebar, a window overlooking a flooded cave, and a friendly white creature behind the table that you can interact with to make him giggle for a random length of time. You cannot use the menu in this area, and going through the bottom door will lead to the Underground Lake.
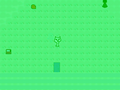
Room 8 is a monochrome path with a hole at the end, with similar paths and a yellow-haired creature seen in the background. Going up the path and interacting with the hole will de-equip any effect Urotsuki has equipped, and show 10 different tiles to be stepped on through various areas in the dream world. They must be visited in the following order:
1. T-Folk World, to the left of a red T-Folk found in a cluster north and slightly west of the entrance.
2. The trap in Crazed Faces Maze, just over the crack in the ground.
3. Crazed Faces Maze, just below the face sticking its tongue out on the easternmost path in the area.
4. Red Monastery, just beside the lemon in the northernmost part of the western branch.
5. Fused Faces World, in the middle of the white plant field directly south of the entrance.
6. Experimentation Building, south of the eastern part of the railing on the floor with a balcony.
7. Tetrad Biome, in the southeastern corner of the Valentine's Day section.
8. Blue House Road, at the rightmost corner of the street that the car dealership can be found on.
9. Ice Cream Islands, on one of the waffle cone spots on a ice cream platform southeast of the entrance. 10. Flooded Buildings, at the top of a dock found by heading west from the ladder to the lower part of the area. Stepping on all the tiles shown will unlock Menu Theme #50.
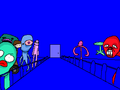
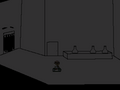
Room 9 is another first-person room, having a fenced-off passageway with various creatures looking at Urotsuki and a locked door at the end.
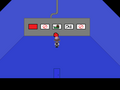
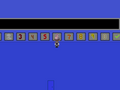
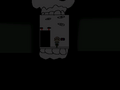
Room 10 has a display and 11 buttons with numbers 0-9 and a green checkmark. Entering the code 2547829 and interacting with the green checkmark will make a red door appear, which leads to the Red Monastery and unlocks the connection from the opposite side.
Room 11 has five different hats on stands which Urotsuki can wear, but only while in this room.
Room 12 has a box with a computer screen and a hole on the right, which takes 500夢 from you upon interaction. Continuously doing so will make a face appear on screen which gets progressively more happier as more money is inserted. After 10000夢 has been deposited in total, a white door apears on the left which takes you to a gray area. From here, there is a door styled like an open mouth which takes you to a closed-off elevator-like area, and three potions on a table. Drinking each one has different effects on Urotsuki and the player:
- The left one makes Urotsuki move randomly very fast for a short time.
- The middle one shows different screen transitions and plays different sound effects.
- The right one makes the screen shake.
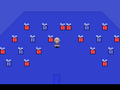
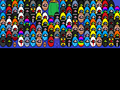
Room 13 is filled with various cycloptic egg creatures of different style and eye colors. They move randomly and do not normally react to any effect, including the Chainsaw and Railroad Crossing, and each of them can only be killed by interacting with them while having their corresponding effect equipped. The effect needed depends on the egg's appearance:
- Small eggs: Child
- Red eggs with stripes: Drum
- Grey eggs with a yellow X across their body: Railroad Crossing
- Light grey eggs with a red bottom: Chainsaw
- Yellow eggs: Trombone
- Rainbow eggs: Rainbow
- Orange eggs: Haniwa
- Pale blue eggs with a pink eye: Boy
- Light blue eggs with three stripes across their front side: Tissue
- Light blue eggs with a single while stripe down their eye: Penguin
- Black eggs with three white dots and a yellow eye: School Boy
- Black egg with two white stripes going across them: Spring
- Dark grey eggs with a red eye: Eyeball Bomb
- Brown eggs with a pink square across their eye: Polygon
- White egg with a bleeding red eye: Marginal
After killing every creature, Urotsuki will be able to sleep in the green bed in the room and watch one of the events that is needed to access the Horror Maze.
Directions
Nexus → Purple World → Onyx Tile World → Fused Faces World → Crazed Faces Maze → Blue House Road → Blue Restaurant
Nexus → Garden World → Blue Forest → Exhibition → Sandy Plains → Aquamarine Cave → Underground Lake → Blue Restaurant
If the connection to the Red Monastery from the Blue Restaurant has been unlocked: Nexus → Purple World → Red Monastery → Blue Restaurant
Gallery
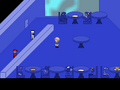
Main area
What is he doing here?
Oh...
Where is she????
The hallway
Room 1
Room 2
Room 2 after interacting with a cloud of particles.
Room 3
That's what you get for killing my brother!
Room 4
Room 5
Such a weird character selection menu...
Room 6
Room 7
Hello! :)
Room 8
After interacting with the hole.
Room 9
Room 10
Room 11
Room 12 when entering for the first time
After spending the money
After going through the white door
Room 13 when entering for the first time
Sleeping peacefully at the crime place.
Room 6 after chainsawing the figure
The restaurant after the event in Room 6
The hallway after the event in Room 6
Room 1 after the event in Room 6

Room 2 after the event in Room 6
Room 3 after the event in Room 6
Room 4 after the event in Room 6
Room 5 after the event in Room 6
Room 9 after the event in Room 6
Room 10 after the event in Room 6
Room 11 after the event in Room 6
Room 12 after the event in Room 6


- 0711C4
- 00C6B9