m (fixed versions updated) |
mNo edit summary |
||
| Line 1: | Line 1: | ||
{{Locationbox | {{Locationbox | ||
|headercolor = #115b71 | |headercolor = #115b71 | ||
| Line 42: | Line 41: | ||
The second, deeper area has many narrow paths surrounded by deep water, with small islands and purple constructions scattered around it. One small island has an apparition of one of the rabbits from [[Yume 2kki:Blue Sanctuary|Blue Sanctuary]] on it, which disappears after interacting with or moving into it | The second, deeper area has many narrow paths surrounded by deep water, with small islands and purple constructions scattered around it. One small island has an apparition of one of the rabbits from [[Yume 2kki:Blue Sanctuary|Blue Sanctuary]] on it, which disappears after interacting with or moving into it. | ||
The Shoal Caverns ladder will not be present if the player travels to the deeper shoal from Flamelit Wasteland and Hell Caverns. The ladder will reappear if the player enters the deeper shoal, returns to Hell Caverns, and immediately goes back to the deeper shoal. | |||
To the west of the | A ladder can be found on another larger island to the northeast; it leads up to [[Yume 2kki:Flamelit Wasteland#Hell Caverns|Hell Caverns]] if that world has been visited at least once. | ||
The ghost snowman can be found again on the isolated small island just above the Shoal Caverns ladder, which can only be seen using the [[Yume 2kki:Effects#Glasses|Glasses]] effect. | |||
Southeast of the Shoal Caverns ladder is an island containing a tiny blue object that rings upon interaction, then glitches out and teleports Urotsuki to a weird room. It resembles the deeper shoal and the [[Yume 2kki:Somber Establishment|Somber Establishment]], with purple pillars lining the path to a door from the latter. A large, strange blue thing resides at the center. Urotsuki will refuse to go any further, and moving south will play a sound before placing her back at the tiny object. | |||
To the west of the Shoal Caverns ladder is a small island featuring a teleporter that brings the player to a platform with a ladder, which itself leads up to a short path ending in a gigantic blue cone. The cone's entrance will lead to [[Yume 2kki:Expanded Corridors|Expanded Corridors]] once the barricades have been removed, which will need to be done every visit. | |||
'''To remove the cone's barricades''', you must enter Flamelit Wasteland and travel through the Hell Caverns. If you came from Expanded Corridors, you may immediately step back into the cone, but if you step past the barriers and want to go back, there are a few options. One is to go through Shoal Caverns and use the room behind the Polar Bear to reach Hell Caverns and then the gigantic cone. Another option is going through Hell Caverns, entering Flamelit Wasteland, and immediately going back through Hell Caverns to the gigantic cone. | '''To remove the cone's barricades''', you must enter Flamelit Wasteland and travel through the Hell Caverns. If you came from Expanded Corridors, you may immediately step back into the cone, but if you step past the barriers and want to go back, there are a few options. One is to go through Shoal Caverns and use the room behind the Polar Bear to reach Hell Caverns and then the gigantic cone. Another option is going through Hell Caverns, entering Flamelit Wasteland, and immediately going back through Hell Caverns to the gigantic cone. | ||
Revision as of 19:07, 20 February 2024
| Fish Person Shoal | |
|---|---|

| |
| Basic Info | |
| Regional Name(s) |
雨降る浅瀬 |
| Effects | None |
| Collectibles | |
| Events | None |
| Notable NPCs | Fish People, Angry Fish Person |
| Other | |
| Connecting Areas | Candlelit Factory 🔐 🚩 Flamelit Wasteland 🔐 Expanded Corridors 🔐 Glacial Geyser Grounds |
| BGM | 🔊 水底の思い出@アノン (No. 614) 🔊 n3-HRiS – Bear's room (No. 313F) 🔊 152-woo – Cone room (No. 492B) 🔊 partz@anon – Shoal Caverns (No. 279B) 🔊 yumepo1 – Shoal Caverns: Deeper area (No. 017C) 🔊 sound3g – Gigantic cone area (No. 368C) 🔊 985_m_3 – Weird Room (No. 354B) |
| Map ID | 2216, 2218, 2219, 2251, 2254, 2255 |
| Version Added | 0.120d patch 4 |
| Last Updated | 0.122e |
| Author | Takikomi |
Fish Person Shoal is an area accessible from Candlelit Factory by floating over the clover and interacting with the octopus.


Features
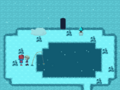
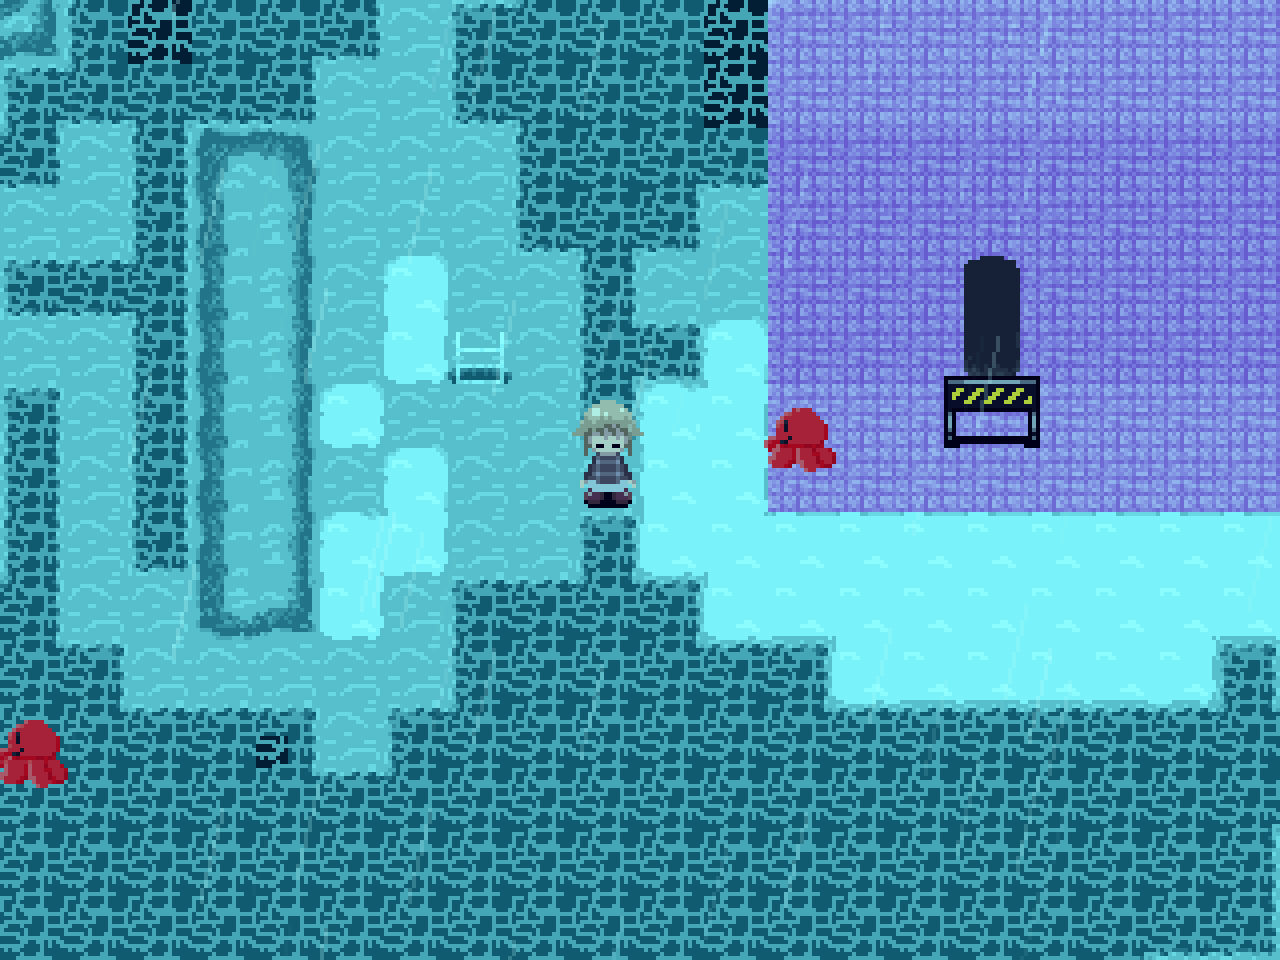
Fish Person Shoal is a teal area filled with water, with large striped indigo cones as well as purple pillars and tiles dotting the area. The area is also inhabited by Fish People and small red octopuses, which make different noises upon interaction. An isolated purple structure can be found here, similar to the one in Flamelit Wasteland; using the Glasses effect reveals the ghost of the snowman from the back room of the Candlelit Factory walking around.
The Candlelit Factory entrance is a stationary octopus, which only leads to the clover connecting to Flamelit Wasteland. This connection only appears after the light switch event in the Candlelit Factory has been viewed once. The clover does not need to be interacted with to unlock the connection; however, this is only helpful if the player does not have the required effects to interact with it at that time, which is unlikely. The octopus mainly serves as one option to visit Flamelit Wasteland, especially if you first choose to enter Fish Person Shoal from the Candlelit Factory.
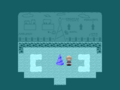
East of the stationary octopus is a building with a sign next to its door. A little octopus can sometimes be seen sleeping on top of the building. The doorway leads to a snowy room with a polar bear fishing in a small pool of water, a doorway in the back, and a potted plant to the right of it. The room behind the doorway contains a small indigo cone that brings the player to a corresponding room in Flamelit Wasteland if they've been there at least once. The polar bear may occasionally be seen sleeping (1/2 chance each time the world is entered). This will allow Urotsuki to interact with the fishing pole. Doing this causes an angry fish person to be fished up and subsequently leave the room. Interacting with the angry fish person after this unlocks Menu Theme #56.
East of the Polar Bear's Pond is an island containing a pale, two-legged geyser emitting mist. Interacting with it makes a dice-rolling noise and transports Urotsuki to Glacial Geyser Grounds.
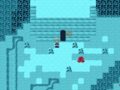
North of both the geyser and the Polar Bear's Pond is a tiled building with its entrance barricaded; next to it is a ladder leading down to Shoal Caverns.
Shoal Caverns
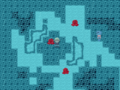
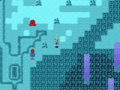
The Shoal Caverns are a small, somewhat dark maze that cannot be brightened with the Lantern effect. A lone fairy orb wanders in the northeastern section. Another ladder can be found at the end of this area; it leads down to an even deeper area.
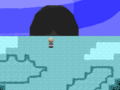
The second, deeper area has many narrow paths surrounded by deep water, with small islands and purple constructions scattered around it. One small island has an apparition of one of the rabbits from Blue Sanctuary on it, which disappears after interacting with or moving into it.
The Shoal Caverns ladder will not be present if the player travels to the deeper shoal from Flamelit Wasteland and Hell Caverns. The ladder will reappear if the player enters the deeper shoal, returns to Hell Caverns, and immediately goes back to the deeper shoal.
A ladder can be found on another larger island to the northeast; it leads up to Hell Caverns if that world has been visited at least once.
The ghost snowman can be found again on the isolated small island just above the Shoal Caverns ladder, which can only be seen using the Glasses effect.
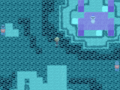
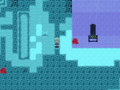
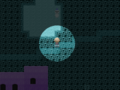
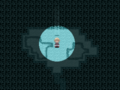
Southeast of the Shoal Caverns ladder is an island containing a tiny blue object that rings upon interaction, then glitches out and teleports Urotsuki to a weird room. It resembles the deeper shoal and the Somber Establishment, with purple pillars lining the path to a door from the latter. A large, strange blue thing resides at the center. Urotsuki will refuse to go any further, and moving south will play a sound before placing her back at the tiny object.
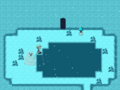
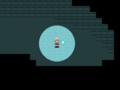
To the west of the Shoal Caverns ladder is a small island featuring a teleporter that brings the player to a platform with a ladder, which itself leads up to a short path ending in a gigantic blue cone. The cone's entrance will lead to Expanded Corridors once the barricades have been removed, which will need to be done every visit.
To remove the cone's barricades, you must enter Flamelit Wasteland and travel through the Hell Caverns. If you came from Expanded Corridors, you may immediately step back into the cone, but if you step past the barriers and want to go back, there are a few options. One is to go through Shoal Caverns and use the room behind the Polar Bear to reach Hell Caverns and then the gigantic cone. Another option is going through Hell Caverns, entering Flamelit Wasteland, and immediately going back through Hell Caverns to the gigantic cone.
Directions
- The Nexus → Garden World → Blue Sanctuary → Candlelit Factory → Fish Person Shoal
- The Nexus → Urotsuki's Dream Apartments → Butcher Hollow → Glacial Geyser Grounds → Fish Person Shoal
If the connection from Urotsuki's Dream Apartments to Sugar Road is active and the connection from Chaos Exhibition to Expanded Corridors is unlocked:
- The Nexus → Urotsuki's Dream Apartments → Sugar Road → Chaos Exhibition → Expanded Corridors → Fish Person Shoal
After unlocking the connection from Expanded Corridors to Miso Soup Dungeon:
- The Nexus → Bacteria World → Miso Soup Dungeon → Expanded Corridors → Fish Person Shoal
Trivia
- The weird room in the deeper Shoal Caverns is similar to the rooms with other large, mysterious objects in Expanded Corridors and the Somber Establishment.
- If the in-game season is currently winter, it will be snowing instead of raining in the main area.
- In the Polar Bear's Pond, the angry fish can sometimes fly out of the water, even if the polar bear is fishing there, and proceed to slap nothing. They will then walk into Urotsuki, who is blocking the doorway, and the game will be softlocked, with no way to save or leave without exiting the game.
Old Images

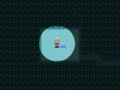
The Gigantic Cone as it was before anything connected to it.

Gallery
The octopus that leads back to the transitional hall in Candlelit Factory.
Entrance to the Polar Bear's Pond.

My turn to go fishing!
The cone that takes you to the Black Bear's Pond.
Interacting with the angry fish person will give you Menu Theme #56.
The ladder that leads down to the Shoal Caverns.

The ladder that takes you to Shoal Caverns.

The Gigantic Cone teleporter.
The Gigantic Cone that takes you to Expanded Corridors.
The ladder that takes you to Hell Caverns.
The teleport to the weird room.


 (Map of the Shoal Caverns., https://yume.wiki/images/0/07/ShoalCavernsMap.png) + and ? (?, ?) +
- 115b71
- 7af2f9