The rewritten Style Guide has an open discussion of the spoiler policy. The current policy will be used if no new consensus is reached. Discuss it here.
(add category) |
(finally got another one) |
||
| (24 intermediate revisions by 8 users not shown) | |||
| Line 1: | Line 1: | ||
Menu Themes | Scattered throughout the spirit realm are a number of '''Menu Themes''' that players can use to change the look of in-game menus. The selected menu theme will also change the appearance of the YNO website where ''Collective Unconscious'' is played. Most notably, a player's username (in the game's text chat) and nameplate (in the game's user list) will be colored according to that player's selected menu theme. | ||
Menu themes can be selected in the 5 tab of the journal in [[Collective Unconscious:Minnatsuki's Room|Minnatsuki's Room]]. Like [[Collective Unconscious:Book Covers|Book Covers]], menu themes are purely cosmetic and have no effect on gameplay. | |||
{| class="article-table" style="width: 100%; text-align:center" border="1" cellpadding="0" cellspacing="0" | {| class="article-table" style="width: 100%; text-align:center" border="1" cellpadding="0" cellspacing="0" | ||
| Line 16: | Line 18: | ||
| [[File:Defaultmenuthemeingame.png]] | | [[File:Defaultmenuthemeingame.png]] | ||
|- | |- | ||
| Classic | | <span id="Classic">Classic</span> | ||
| [[File:CU_menutheme_Classic.png]] | | [[File:CU_menutheme_Classic.png]] | ||
| Led | | Led | ||
| [[File:CU_menutheme_Classic_ingame.png]] | | [[File:CU_menutheme_Classic_ingame.png]] | ||
|- | |- | ||
| Office | | <span id="Office">Office</span> | ||
| [[File:CU_menutheme_Office.png]] | | [[File:CU_menutheme_Office.png]] | ||
| maple | | maple | ||
| Line 28: | Line 30: | ||
| [[File:CU_menutheme_Office_ingame.png]] | | [[File:CU_menutheme_Office_ingame.png]] | ||
|- | |- | ||
| Sun | | <span id="Sun">Sun</span> | ||
| [[File:CU_menutheme_Sun.png]] | | [[File:CU_menutheme_Sun.png]] | ||
| MillieAmp | | MillieAmp | ||
| [[Collective Unconscious:Burning Building|Burning Building]] | | [[Collective Unconscious:Burning Building|Burning Building]] | ||
| In Honey | | In the annex area where [[Collective Unconscious:Minor Characters#Honey|Honey]] and [[Collective Unconscious:Minor Characters#Hotsauce|Hotsauce]] sit together, interact with the DJ table and sit on Hotsauce, then cross the bridge that appears to the east. | ||
| [[File:CU_menutheme_Sun_ingame.png]] | | [[File:CU_menutheme_Sun_ingame.png]] | ||
|- | |- | ||
| Dusk | | <span id="Dusk">Dusk</span> | ||
| [[File:CU_menutheme_Dusk.png]] | | [[File:CU_menutheme_Dusk.png]] | ||
| NacreMoon | | NacreMoon | ||
| Line 42: | Line 44: | ||
| [[File:CU_menutheme_Dusk_ingame.png]] | | [[File:CU_menutheme_Dusk_ingame.png]] | ||
|- | |- | ||
| Vague Memory | | <span id="Vague Memory">Vague Memory</span> | ||
| [[File:CU_menutheme_VagueMemory.png]] | | [[File:CU_menutheme_VagueMemory.png]] | ||
| NacreMoon | | NacreMoon | ||
| [[Collective Unconscious:A Long Journey|A Long Journey]] | | [[Collective Unconscious:A Long Journey|A Long Journey]] | ||
| Interact with the Girl at the Crossroads | | Interact with the [[Collective Unconscious:Minor Characters#Girl at the Crossroads|Girl at the Crossroads]] to cause her to begin to walk around and slowly fade away, remaining within the area long enough for her to disappear completely. Alternatively, kill her using the Soulfire eidolon. Then, return to the western end of the world. | ||
| [[File:CU_menutheme_VagueMemory_ingame.png]] | | [[File:CU_menutheme_VagueMemory_ingame.png]] | ||
|- | |- | ||
| Squids | | <span id="Squids">Squids</span> | ||
| [[File:CU_menutheme_Squids.png]] | | [[File:CU_menutheme_Squids.png]] | ||
| NacreMoon | | NacreMoon | ||
| Line 56: | Line 58: | ||
| [[File:CU_menutheme_Squids_ingame.png]] | | [[File:CU_menutheme_Squids_ingame.png]] | ||
|- | |- | ||
| Willow | | <span id="Willow">Willow</span> | ||
| [[File:CU_menutheme_Willow.png]] | | [[File:CU_menutheme_Willow.png]] | ||
| bWF5 | | bWF5 | ||
| Line 63: | Line 65: | ||
| [[File:CU_menutheme_Willow_ingame.png]] | | [[File:CU_menutheme_Willow_ingame.png]] | ||
|- | |- | ||
| Vibrant Blue | | <span id="Vibrant Blue">Vibrant Blue</span> | ||
| [[File:CU_menutheme_VibrantBlue.png]] | | [[File:CU_menutheme_VibrantBlue.png]] | ||
| Delly | | Delly | ||
| Line 70: | Line 72: | ||
| [[File:CU_menutheme_VibrantBlue_ingame.png]] | | [[File:CU_menutheme_VibrantBlue_ingame.png]] | ||
|- | |- | ||
| Glitched Static | | <span id="Glitched Static">Glitched Static</span> | ||
| [[File:CU_menutheme_GlitchedStatic.png]] | | [[File:CU_menutheme_GlitchedStatic.png]] | ||
| Delly | | Delly | ||
| [[Collective Unconscious:RGB Sewers|RGB Sewers]] | | [[Collective Unconscious:RGB Sewers|RGB Sewers]] | ||
| | | There is a 1/5 chance for the entrance to the room the menu theme is in to be present (rolled every time RGB Sewers is entered). | ||
| [[File:CU_menutheme_GlitchedStatic_ingame.png]] | | [[File:CU_menutheme_GlitchedStatic_ingame.png]] | ||
|- | |- | ||
| Ammolites | | <span id="Ammolites">Ammolites</span> | ||
| [[File:CU_menutheme_Ammolites.png]] | | [[File:CU_menutheme_Ammolites.png]] | ||
| NacreMoon | | NacreMoon | ||
| Line 83: | Line 85: | ||
| None | | None | ||
| [[File:CU_menutheme_Ammolites_ingame.png]] | | [[File:CU_menutheme_Ammolites_ingame.png]] | ||
|- | |- | ||
| Box Office | | <span id="Box Office">Box Office</span> | ||
| [[File:CU_menutheme_BoxOffice.png]] | | [[File:CU_menutheme_BoxOffice.png]] | ||
| Roninnozlo | | Roninnozlo | ||
| [[Collective Unconscious:Box Office|Box Office]] | | [[Collective Unconscious:Box Office|Box Office]] | ||
| Complete all the Box Office puzzles and interact with the | | Complete all the Box Office puzzles and interact with the [[Collective Unconscious:Minor Characters#Ludovico Minnatsukis|Ludovico Minnatsuki]] at the end. | ||
| [[File:CU_menutheme_BoxOffice_ingame.png]] | | [[File:CU_menutheme_BoxOffice_ingame.png]] | ||
|- | |- | ||
| Mural | | <span id="Mural">Mural</span> | ||
| [[File:CU_menutheme_Mural.png]] | | [[File:CU_menutheme_Mural.png]] | ||
| rowspan="2"; | rollaby | | rowspan="2"; | rollaby | ||
| rowspan="2"; | [[Collective Unconscious:Mural Passage|Mural Passage]] | | rowspan="2"; | [[Collective Unconscious:Mural Passage|Mural Passage]] | ||
| rowspan="2"; | | | rowspan="2"; | Kill [[Collective Unconscious:Minor Characters#Tusuq Warmi|Tusuq Warmi]] (requires the [[Collective Unconscious:Eidola#Soulfire|Soulfire]] eidolon) and activate the switch in the room behind them while the lights are off. Both menu themes are obtained simultaneously. | ||
| [[File:CU_menutheme_Mural_ingame.png]] | | [[File:CU_menutheme_Mural_ingame.png]] | ||
|- | |- | ||
| Neon Mural | | <span id="Neon Mural">Neon Mural</span> | ||
| [[File:CU_menutheme_NeonMural.png]] | | [[File:CU_menutheme_NeonMural.png]] | ||
| [[File:CU_menutheme_NeonMural_ingame.png]] | | [[File:CU_menutheme_NeonMural_ingame.png]] | ||
|- | |- | ||
| Altered | | <span id="Altered">Altered</span> | ||
| [[File:CU_menutheme_Altered.png]] | | [[File:CU_menutheme_Altered.png]] | ||
| NacreMoon | | NacreMoon | ||
| Line 109: | Line 111: | ||
| [[File:CU_menutheme_Altered_ingame.png]] | | [[File:CU_menutheme_Altered_ingame.png]] | ||
|- | |- | ||
| Glowing | | <span id="Glowing">Glowing</span> | ||
| [[File:CU_menutheme_Glowing.png]] | | [[File:CU_menutheme_Glowing.png]] | ||
| orchidmantis | | orchidmantis | ||
| Line 116: | Line 118: | ||
| [[File:CU_menutheme_Glowing_ingame.png]] | | [[File:CU_menutheme_Glowing_ingame.png]] | ||
|- | |- | ||
| Sunset | | <span id="Sunset">Sunset</span> | ||
| [[File:CU_menutheme_Sunset.png]] | | [[File:CU_menutheme_Sunset.png]] | ||
| orchidmantis | | orchidmantis | ||
| Line 123: | Line 125: | ||
| [[File:CU_menutheme_Sunset_ingame.png]] | | [[File:CU_menutheme_Sunset_ingame.png]] | ||
|- | |- | ||
| Celestial | | <span id="Celestial">Celestial</span> | ||
| [[File:CU_menutheme_Celestial.png]] | | [[File:CU_menutheme_Celestial.png]] | ||
| orchidmantis | | orchidmantis | ||
| Line 130: | Line 132: | ||
| [[File:CU_menutheme_Celestial_ingame.png]] | | [[File:CU_menutheme_Celestial_ingame.png]] | ||
|- | |- | ||
| Sweet | | <span id="Sweet">Sweet</span> | ||
| [[File:CU Sweet menu theme.png]] | | [[File:CU Sweet menu theme.png]] | ||
| Proton | | Proton | ||
| [[Collective Unconscious:Sweets Circus|Sweets Circus]] | | [[Collective Unconscious:Sweets Circus|Sweets Circus]] | ||
| | | The entrance to backstage has a 50% chance of being present (determined every time the totem in [[Collective Unconscious:Minnatsuki's Room|Minnatsuki's Room]] is activated to enter the spirit realm). With this entrance present, get all six [[Collective Unconscious:Minor Characters#The Sugarcube Troupe|Sugarcube Troupe]] performers on the stage, access backstage (through the mouth to the left of the stage), equip the costume, interact with the stage, and return backstage. | ||
| [[File:CU Sweet menu theme ingame.png]] | | [[File:CU Sweet menu theme ingame.png]] | ||
|- | |- | ||
| Blueing Plastic | | <span id="Blueing Plastic">Blueing Plastic</span> | ||
| [[File:CU_menutheme_BlueingPlastic.png]] | | [[File:CU_menutheme_BlueingPlastic.png]] | ||
| VoxlAlien | | VoxlAlien | ||
| Line 144: | Line 146: | ||
| [[File:CU menutheme BlueingPlastic ingame.png]] | | [[File:CU menutheme BlueingPlastic ingame.png]] | ||
|- | |- | ||
| Voidbound | | <span id="Voidbound">Voidbound</span> | ||
| [[File:CU_menutheme_Voidbound.png]] | | [[File:CU_menutheme_Voidbound.png]] | ||
| RM824 Somnium | | RM824 Somnium | ||
| [[Collective Unconscious:Void Cenotaph|Void Cenotaph]] | | [[Collective Unconscious:Void Cenotaph|Void Cenotaph]] | ||
| | | Solve the puzzle in the fountain branch of Void Cenotaph and visit the room with the two flickering statues. | ||
| [[File:CU_menutheme_Voidbound_ingame.png]] | | [[File:CU_menutheme_Voidbound_ingame.png]] | ||
|- | |- | ||
| Handheld | | <span id="Handheld">Handheld</span> | ||
| [[File:CU_menutheme_Handheld.png]] | | [[File:CU_menutheme_Handheld.png]] | ||
| Mooncaller | | Mooncaller | ||
| [[Collective Unconscious:GBC Village|GBC Village]] | | [[Collective Unconscious:GBC Village|GBC Village]] | ||
| | | None (located in a secret passage) | ||
| [[File:CU_menutheme_Handheld_ingame.png]] | | [[File:CU_menutheme_Handheld_ingame.png]] | ||
|- | |- | ||
| Sidereal | | <span id="Sidereal">Sidereal</span> | ||
| [[File:CU_menutheme_Sidereal.png]] | | [[File:CU_menutheme_Sidereal.png]] | ||
| Delly | | Delly | ||
| [[Collective Unconscious:Starry Docks A|Starry Docks A]] OR [[Collective Unconscious:Starry Docks B|Starry Docks B]] | | [[Collective Unconscious:Starry Docks A|Starry Docks A]] (Variable 30 < 128) | ||
| The menu theme is randomly found in one of two | |||
OR | |||
[[Collective Unconscious:Starry Docks B|Starry Docks B]] (Variable 30 ≥ 128) | |||
| The blue star node granting access to the menu theme is randomly found in one of the two areas of Starry Docks (chosen every time the totem in Minnatsuki's Room is activated to enter the spirit realm). | |||
| [[File:CU_menutheme_Sidereal_ingame.png]] | | [[File:CU_menutheme_Sidereal_ingame.png]] | ||
|- | |- | ||
| Golfer | | <span id="Golfer">Golfer</span> | ||
| [[File:CU_menutheme_Golfer.png]] | | [[File:CU_menutheme_Golfer.png]] | ||
| Dohus | | Dohus | ||
| [[Collective Unconscious:Mini Golf Maze|Mini Golf Maze]] | | [[Collective Unconscious:Mini Golf Maze|Mini Golf Maze]] | ||
| Complete the golf | | Complete the mini golf course. | ||
| [[File:CU_menutheme_Golfer_ingame.png]] | | [[File:CU_menutheme_Golfer_ingame.png]] | ||
|- | |- | ||
| Virtual | | <span id="Virtual">Virtual</span> | ||
| [[File:CU_menutheme_Virtual.png]] | | [[File:CU_menutheme_Virtual.png]] | ||
| Delly | | Delly | ||
| [[Collective Unconscious:Virtual Nightmare|Virtual Nightmare]] | | [[Collective Unconscious:Virtual Nightmare|Virtual Nightmare]] | ||
| | | None (located in a secret passage) | ||
| [[File:CU_menutheme_Virtual_ingame.png]] | | [[File:CU_menutheme_Virtual_ingame.png]] | ||
|- | |- | ||
| Orchid | | <span id="Orchid">Orchid</span> | ||
| [[File:CU_menutheme_Orchid.png]] | | [[File:CU_menutheme_Orchid.png]] | ||
| rowspan="3"; | orchidmantis | | rowspan="3"; | orchidmantis | ||
| rowspan="3"; | [[Collective Unconscious:Streetlight Path|Streetlight Path]] | | rowspan="3"; | [[Collective Unconscious:Streetlight Path|Streetlight Path]] | ||
| rowspan="3"; | | | rowspan="3"; | Purchase from the [[Collective Unconscious:Minor Characters#Menu Theme Seller|Menu Theme Seller]] (requires 500 [[Collective Unconscious:Luna|Luna]] each). | ||
| [[File:CU_menutheme_Orchid_ingame.png]] | | [[File:CU_menutheme_Orchid_ingame.png]] | ||
|- | |- | ||
| Streetlight | | <span id="Streetlight">Streetlight</span> | ||
| [[File:CU_menutheme_Streetlight.png]] | | [[File:CU_menutheme_Streetlight.png]] | ||
| [[File:CU_menutheme_Streetlight_ingame.png]] | | [[File:CU_menutheme_Streetlight_ingame.png]] | ||
|- | |- | ||
| Basalt | | <span id="Basalt">Basalt</span> | ||
| [[File:CU_menutheme_Basalt.png]] | | [[File:CU_menutheme_Basalt.png]] | ||
| [[File:CU_menutheme_Basalt_ingame.png]] | | [[File:CU_menutheme_Basalt_ingame.png]] | ||
|- | |- | ||
| Metal | | <span id="Metal">Metal</span> | ||
| [[File:CU_menutheme_Metal.png]] | | [[File:CU_menutheme_Metal.png]] | ||
| Delly | | Delly | ||
| [[Collective Unconscious:Cave|Cave]] | | [[Collective Unconscious:Cave|Cave]] | ||
| Purchase from the Ghost Clown | | Purchase from the shop while the [[Collective Unconscious:Minor Characters#Ghost Clown|Ghost Clown]] is running it (requires either the [[Collective Unconscious:Eidola|Spectral]] or [[Collective Unconscious:Eidola#Youth|Youth]] eidola to access and 1000 Luna to purchase). Soulfire or [[Collective Unconscious:Eidola#Lumen|Lumen]] eidola recommended for visibility in this world. | ||
| [[File:CU_menutheme_Metal_ingame.png]] | | [[File:CU_menutheme_Metal_ingame.png]] | ||
|- | |- | ||
| Charred | | <span id="Charred">Charred</span> | ||
| [[File:CU_menutheme_Charred.png]] | | [[File:CU_menutheme_Charred.png]] | ||
| Delly | | Delly | ||
| [[Collective Unconscious:Scarlet River|Scarlet River]] | | [[Collective Unconscious:Scarlet River|Scarlet River]] | ||
| Enter the ritual room | | Enter the ritual room and kill [[Collective Unconscious:Minor Characters#Tauros|Tauros]] (requires the Soulfire eidolon). | ||
| [[File:CU_menutheme_Charred_ingame.png]] | | [[File:CU_menutheme_Charred_ingame.png]] | ||
|- | |- | ||
| Chromatic | | <span id="Chromatic">Chromatic</span> | ||
| [[File:CU_menutheme_Chromatic.png]] | | [[File:CU_menutheme_Chromatic.png]] | ||
| BlackMamba | | BlackMamba | ||
| Line 215: | Line 221: | ||
| [[File:CU_menutheme_Chromatic_ingame.png]] | | [[File:CU_menutheme_Chromatic_ingame.png]] | ||
|- | |- | ||
| Mossy Lab | | <span id="Mossy Lab">Mossy Lab</span> | ||
| [[File:CU_menutheme_MossyLab.png]] | | [[File:CU_menutheme_MossyLab.png]] | ||
| NacreMoon | | NacreMoon | ||
| Line 221: | Line 227: | ||
| None | | None | ||
| [[File:CU_menutheme_MossyLab_ingame.png]] | | [[File:CU_menutheme_MossyLab_ingame.png]] | ||
|- | |||
| <span id="Crystal">Crystal</span> | |||
| [[File:CU_menutheme_crystal.png]] | |||
| Claemon | |||
| [[Collective Unconscious:Crystal Complex|Crystal Complex]] | |||
| None | |||
| [[File:CU_menutheme_crystal_ingame.png]] | |||
|- | |||
| <span id="Metallic Moth">Metallic Moth</span> | |||
| [[File:CU_menutheme_metallic_moth.png]] | |||
| Delly | |||
| [[Collective Unconscious:Moth Garden|Moth Garden]] | |||
| Use the [[Collective Unconscious:Eidola#Imago|Imago]] eidolon. | |||
| [[File:CU_menutheme_metallic_moth_ingame.png]] | |||
|- | |||
| <span id="Tooth Decay">Tooth Decay</span> | |||
| [[File:CU_menutheme_tooth_decay.png]] | |||
| CicadaP | |||
| [[Collective Unconscious:Sickly Sweet|Sickly Sweet]] | |||
| TBA | |||
| [[File:CU_menutheme_tooth_decay_ingame.png]] | |||
|- | |||
| <span id="Premium Roast">Premium Roast</span> | |||
| [[File:CU_menutheme_premium_roast.png]] | |||
| Umbrakinetic | |||
| [[Collective Unconscious:Coffee Maze|Coffee Maze]] | |||
| Requires [[Collective Unconscious:Eidola#Rodentia|Rodentia]]. | |||
| [[File:CU_menutheme_premium_roast_ingame.png]] | |||
|- | |||
| <span id="Aztec">Aztec</span> | |||
| [[File:CU_menutheme_aztec.png]] | |||
| Claemon | |||
| [[Collective Unconscious:Neo Aztec Club|Neo Aztec Club]] | |||
| None | |||
| [[File:CU_menutheme_aztec_ingame.png]] | |||
|- | |||
| <span id="Gradient">Gradient</span> | |||
| [[File:CU_menutheme_gradient.png]] | |||
| Delly | |||
| [[Collective Unconscious:Gradient City|Gradient City]] | |||
| None | |||
| [[File:CU_menutheme_gradient_ingame.png]] | |||
|- | |||
| <span id="Oracle">Oracle</span> | |||
| [[File:CU_menutheme_oracle.png]] | |||
| Dohus | |||
| [[Collective Unconscious:Optical Offices|Optical Offices]] | |||
| Complete the three chessboard puzzles. | |||
| [[File:CU_menutheme_oracle_ingame.png]] | |||
|- | |||
| <span id="Vacation">Vacation</span> | |||
| [[File:CU_menutheme_vacation.png]] | |||
| Delly | |||
| [[Collective Unconscious:Sandstone Resort|Sandstone Resort]] | |||
| None | |||
| [[File:CU_menutheme_vacation_ingame.png]] | |||
|- | |||
| <span id="Brass Moon">Brass Moon</span> | |||
| [[File:CU_menutheme_brass_moon.png]] | |||
| Delly | |||
| [[Collective Unconscious:Clockwork Backstage|Clockwork Backstage]] | |||
| None | |||
| [[File:CU_menutheme_brass_moon_ingame.png]] | |||
|- | |||
| <span id="Sleepy Mouse Polka">Sleepy Mouse Polka</span> | |||
| [[File:CU_menutheme_sleepy_mouse_polka.png]] | |||
| Delly | |||
| [[Collective Unconscious:Monster Manuscripts|Monster Manuscripts]] | |||
| None | |||
| [[File:CU_menutheme_sleepy_mouse_polka_ingame.png]] | |||
|- | |||
| <span id="Picnic A">Picnic A</span> | |||
| [[File:CU_menutheme_picnic_a.png]] | |||
| Carson | |||
| [[Collective Unconscious:September|September]] | |||
| None | |||
| [[File:CU_menutheme_picnic_a_ingame.png]] | |||
|- | |||
| <span id="Picnic B">Picnic B</span> | |||
| [[File:CU_menutheme_picnic_b.png]] | |||
| Carson | |||
| [[Collective Unconscious:April|April]] | |||
| None | |||
| [[File:CU_menutheme_picnic_b_ingame.png]] | |||
|- | |||
| <span id="Flame Pattern">Flame Pattern</span> | |||
| [[File:CU_menutheme_flame_pattern.png]] | |||
| Raptarr8 | |||
| TBA | |||
| TBA | |||
| [[File:CU_menutheme_flame_pattern_ingame.png]] | |||
|- | |||
| <span id="Butterfly">Butterfly</span> | |||
| [[File:CU_menutheme_butterfly.png]] | |||
| Takofuusen | |||
| [[Collective Unconscious:Wisteria Grove|Wisteria Grove]] | |||
| See the [[Collective Unconscious:Minor Characters#Drain Girl|Drain Girl]] with both her eyes open and her eyes closed. | |||
| [[File:CU_menutheme_butterfly_ingame.png]] | |||
|- | |||
| <span id="Chromatic Apparation">Chromatic Apparation</span> | |||
| [[File:CU_menutheme_chromatic_apparation.png]] | |||
| bas.real | |||
| [[Collective Unconscious:Undergrowth|Undergrowth]] | |||
| None | |||
| [[File:CU_menutheme_chromatic_apparation_ingame.png]] | |||
|- | |||
| <span id="Hyper Sigils">Hyper Sigils</span> | |||
| [[File:CU_menutheme_hyper_sigils.png]] | |||
| eviled | |||
| [[Collective Unconscious:Hyper Road Maze|Hyper Road Maze]] | |||
| Solve the puzzle with the four sigils throughout the map, then interact with the last reminaing sigil. | |||
| [[File:CU_menutheme_hyper_sigils_ingame.png]] | |||
|- | |||
| <span id="Shambling">Shambling</span> | |||
| [[File:CU_menutheme_shambling.png]] | |||
| maple | |||
| [[Collective Unconscious:Shambling Mass|Shambling Mass]] | |||
| Requires interacting with the three glowing wall decorations for the menu theme to appear | |||
| [[File:CU_menutheme_shambling_ingame.png]] | |||
|- | |||
| <span id="Chess">Chess</span> | |||
| [[File:CU_menutheme_chess.png]] | |||
| rollaby | |||
| [[Collective Unconscious:Twisted Chess Void|Twisted Chess Void]] | |||
| None | |||
| [[File:CU_menutheme_chess_ingame.png]] | |||
|- | |||
| <span id="Ecstasy">Ecstasy</span> | |||
| [[File:CU_menutheme_ecstasy.png]] | |||
| witblos | |||
| [[Collective Unconscious:Hostile Love Abyss|Hostile Love Abyss]] | |||
| Survive for three minutes during the night, then interact with the red glow behind a sign. The menu theme can be collected at any time after it appears. | |||
| [[File:CU_menutheme_ecstasy_ingame.png]] | |||
|} | |} | ||
[[Category:Collective Unconscious Collectables]] | [[Category:Collective Unconscious Collectables]] | ||
[[Category:Collective Unconscious Guides]] | [[Category:Collective Unconscious Guides]] | ||
[[Category:Game Collectables]] | |||
Revision as of 20:17, 3 April 2025
Scattered throughout the spirit realm are a number of Menu Themes that players can use to change the look of in-game menus. The selected menu theme will also change the appearance of the YNO website where Collective Unconscious is played. Most notably, a player's username (in the game's text chat) and nameplate (in the game's user list) will be colored according to that player's selected menu theme.
Menu themes can be selected in the 5 tab of the journal in Minnatsuki's Room. Like Book Covers, menu themes are purely cosmetic and have no effect on gameplay.
| Name | Icon | Author | Location | Condition(s) | Image |
| Default | 
|
Noahrav & Loriesquare | None | Unlocked by default. | 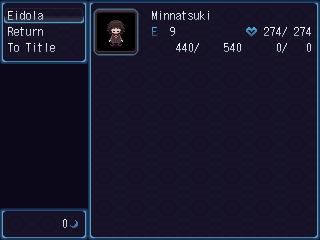
|
| Classic | 
|
Led | 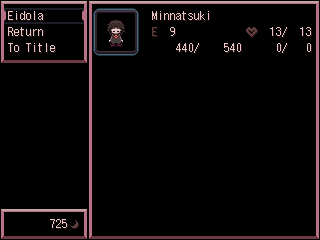
| ||
| Office | 
|
maple | Smiling Pen Office | None | 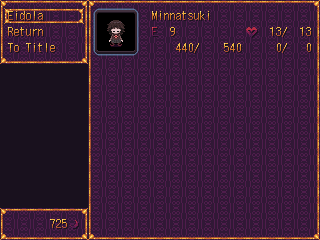
|
| Sun | 
|
MillieAmp | Burning Building | In the annex area where Honey and Hotsauce sit together, interact with the DJ table and sit on Hotsauce, then cross the bridge that appears to the east. | 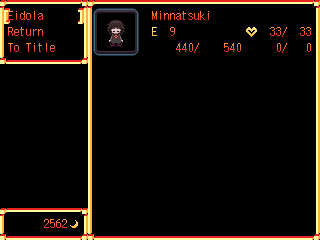
|
| Dusk | 
|
NacreMoon | Dusk World | None | 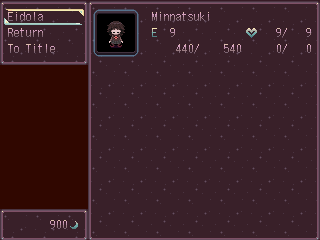
|
| Vague Memory | 
|
NacreMoon | A Long Journey | Interact with the Girl at the Crossroads to cause her to begin to walk around and slowly fade away, remaining within the area long enough for her to disappear completely. Alternatively, kill her using the Soulfire eidolon. Then, return to the western end of the world. | 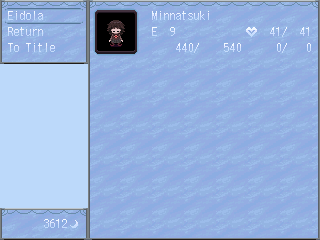
|
| Squids | 
|
NacreMoon | Squid Paradise | None | 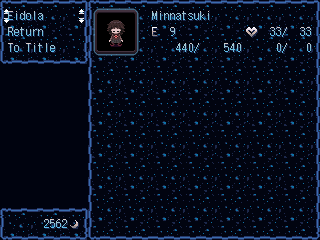
|
| Willow | 
|
bWF5 | White Lotus Islands | None | 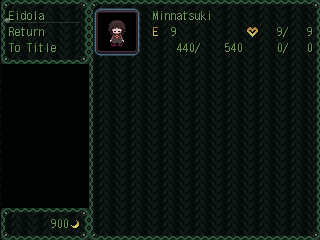
|
| Vibrant Blue | 
|
Delly | RGB Sewers | None | 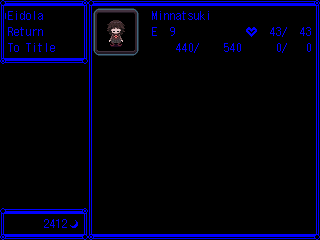
|
| Glitched Static | 
|
Delly | RGB Sewers | There is a 1/5 chance for the entrance to the room the menu theme is in to be present (rolled every time RGB Sewers is entered). | 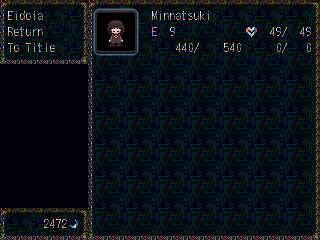
|
| Ammolites | 
|
NacreMoon | Mollusk World | None | 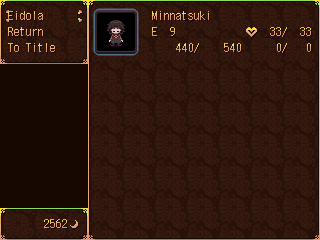
|
| Box Office | 
|
Roninnozlo | Box Office | Complete all the Box Office puzzles and interact with the Ludovico Minnatsuki at the end. | 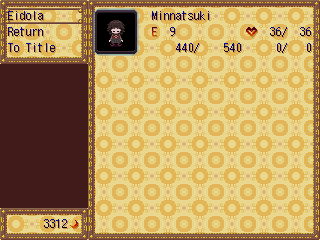
|
| Mural | 
|
rollaby | Mural Passage | Kill Tusuq Warmi (requires the Soulfire eidolon) and activate the switch in the room behind them while the lights are off. Both menu themes are obtained simultaneously. | 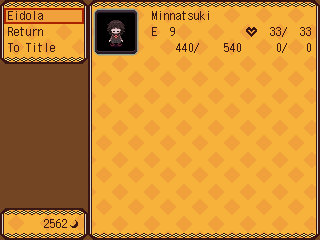
|
| Neon Mural | 
|
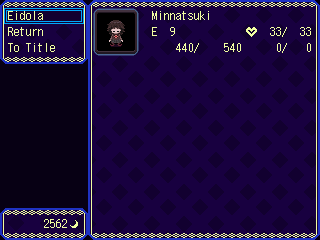
| |||
| Altered | 
|
NacreMoon | Altered Plains | None | 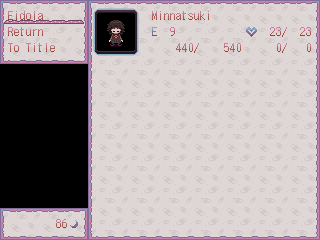
|
| Glowing | 
|
orchidmantis | Glowing Path | None | 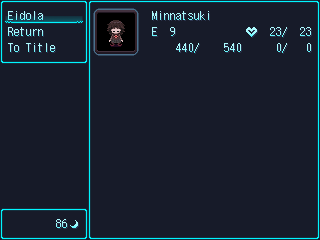
|
| Sunset | 
|
orchidmantis | Sunset Woods | None | 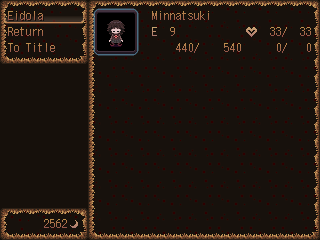
|
| Celestial | 
|
orchidmantis | Celestial Platforms | None | 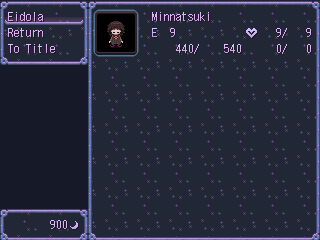
|
| Sweet | 
|
Proton | Sweets Circus | The entrance to backstage has a 50% chance of being present (determined every time the totem in Minnatsuki's Room is activated to enter the spirit realm). With this entrance present, get all six Sugarcube Troupe performers on the stage, access backstage (through the mouth to the left of the stage), equip the costume, interact with the stage, and return backstage. | 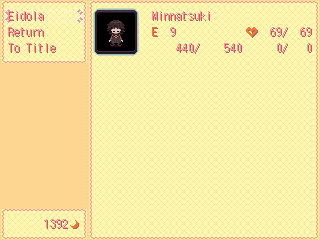
|
| Blueing Plastic | 
|
VoxlAlien | Petscii World | None | 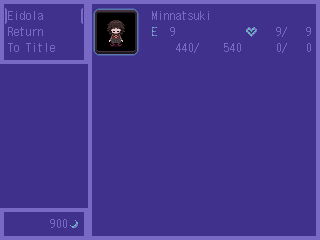
|
| Voidbound | 
|
RM824 Somnium | Void Cenotaph | Solve the puzzle in the fountain branch of Void Cenotaph and visit the room with the two flickering statues. | 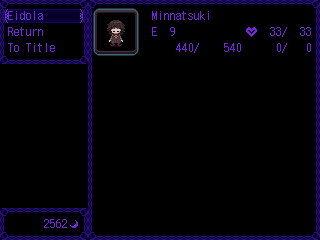
|
| Handheld | 
|
Mooncaller | GBC Village | None (located in a secret passage) | 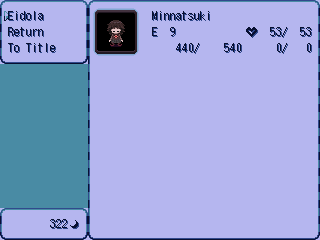
|
| Sidereal | 
|
Delly | Starry Docks A (Variable 30 < 128)
OR Starry Docks B (Variable 30 ≥ 128) |
The blue star node granting access to the menu theme is randomly found in one of the two areas of Starry Docks (chosen every time the totem in Minnatsuki's Room is activated to enter the spirit realm). | 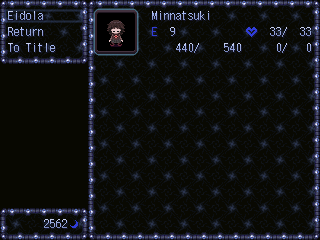
|
| Golfer | 
|
Dohus | Mini Golf Maze | Complete the mini golf course. | 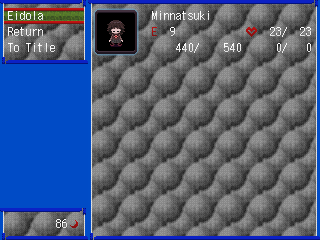
|
| Virtual | 
|
Delly | Virtual Nightmare | None (located in a secret passage) | 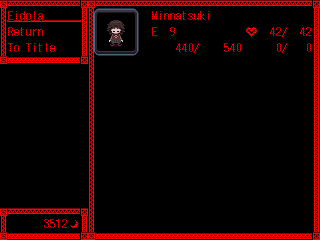
|
| Orchid | 
|
orchidmantis | Streetlight Path | Purchase from the Menu Theme Seller (requires 500 Luna each). | 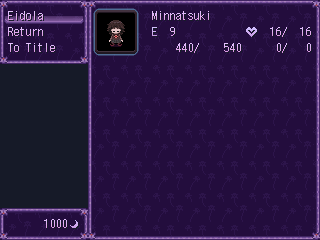
|
| Streetlight | 
|
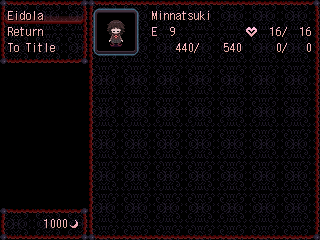
| |||
| Basalt | 
|
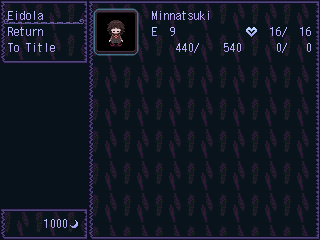
| |||
| Metal | 
|
Delly | Cave | Purchase from the shop while the Ghost Clown is running it (requires either the Spectral or Youth eidola to access and 1000 Luna to purchase). Soulfire or Lumen eidola recommended for visibility in this world. | 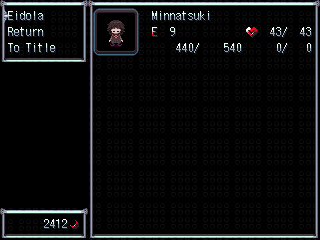
|
| Charred | 
|
Delly | Scarlet River | Enter the ritual room and kill Tauros (requires the Soulfire eidolon). | 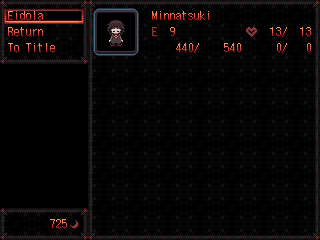
|
| Chromatic | 
|
BlackMamba | Chromatic Slabs World | None | 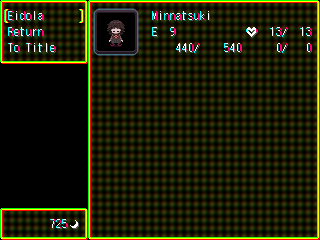
|
| Mossy Lab | 
|
NacreMoon | Mossy Lab | None | 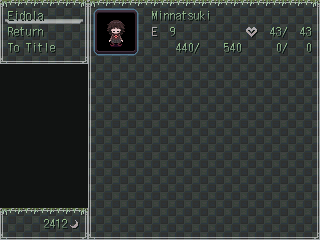
|
| Crystal | 
|
Claemon | Crystal Complex | None | 
|
| Metallic Moth | 
|
Delly | Moth Garden | Use the Imago eidolon. | 
|
| Tooth Decay | 
|
CicadaP | Sickly Sweet | TBA | 
|
| Premium Roast | 
|
Umbrakinetic | Coffee Maze | Requires Rodentia. | 
|
| Aztec | 
|
Claemon | Neo Aztec Club | None | 
|
| Gradient | 
|
Delly | Gradient City | None | 
|
| Oracle | 
|
Dohus | Optical Offices | Complete the three chessboard puzzles. | 
|
| Vacation | 
|
Delly | Sandstone Resort | None | 
|
| Brass Moon | 
|
Delly | Clockwork Backstage | None | 
|
| Sleepy Mouse Polka | 
|
Delly | Monster Manuscripts | None | 
|
| Picnic A | 
|
Carson | September | None | 
|
| Picnic B | 
|
Carson | April | None | 
|
| Flame Pattern | 
|
Raptarr8 | TBA | TBA | 
|
| Butterfly | 
|
Takofuusen | Wisteria Grove | See the Drain Girl with both her eyes open and her eyes closed. | 
|
| Chromatic Apparation | 
|
bas.real | Undergrowth | None | 
|
| Hyper Sigils | 
|
eviled | Hyper Road Maze | Solve the puzzle with the four sigils throughout the map, then interact with the last reminaing sigil. | 
|
| Shambling | 
|
maple | Shambling Mass | Requires interacting with the three glowing wall decorations for the menu theme to appear | 
|
| Chess | 
|
rollaby | Twisted Chess Void | None | 
|
| Ecstasy | 
|
witblos | Hostile Love Abyss | Survive for three minutes during the night, then interact with the red glow behind a sign. The menu theme can be collected at any time after it appears. | 
|
