| Constellation World | |||||||||||||||||
|---|---|---|---|---|---|---|---|---|---|---|---|---|---|---|---|---|---|

| |||||||||||||||||
| Basic Info | |||||||||||||||||
| Regional Name(s) |
星座 | ||||||||||||||||
| Effects | None | ||||||||||||||||
| Collectibles |
WP #188 | ||||||||||||||||
| Events | None | ||||||||||||||||
| Notable NPCs | The Zodiacs | ||||||||||||||||
| Other | |||||||||||||||||
| Connecting Areas | Candy World Cloud Tops ✨ Fox Temple Lapine Forest ✨ Radiant Rainbow Reef Red Lily Lake 🔐 Spacey Retreat 🔐 Innocent Dream 🔐 ✨ ➡️ Rainbow Pottery Zone ☀️ Libra Palace 🔒 🍂 Archery Cavalry World 🍂 Capricorn Palace ❄️ Alrescha Sea ✨ ❄️ Red Sky Cliff ⛔ | ||||||||||||||||
| Removed Connections | Fantasy Library ⛔ Butterfly Forest 🔐 | ||||||||||||||||
| BGM | 🔊 tonny31.6 (No. 284A) 🔊 n3-tWW – Star Building Exterior (No. 288B) 🔊 bgm012 – Star Building | ||||||||||||||||
| Map ID | 0699, 0808, 1522, 1523, 1524 | ||||||||||||||||
| Version Added | 0.103h | ||||||||||||||||
| Last Updated | 0.126h patch 1 | ||||||||||||||||
| Primary Author | spelude | ||||||||||||||||
| Contributing Author(s) | 2i9, oneirokamara | ||||||||||||||||
| |||||||||||||||||


Constellation World is a relatively large area accessible by going up the north path in Candy World.

Features
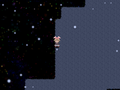
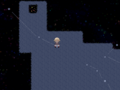
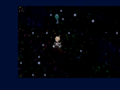
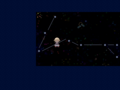
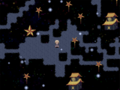
The Constellation World is a rather big map consisting of a skyish-looking main area and 12 smaller rooms. The ground and walls in this area appear to be made of blue sand or rocks, while the background resembles a starry night sky. Throughout the map, various constellations and clusters of stars can be found floating around. Using the Glasses effect near a cluster of stars will often connect them together with thin white lines, creating a new constellation.
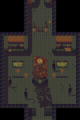
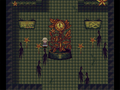
This area is mainly uninhabited save for the Zodiac signs, each residing in its own room, which can be randomly accessed from the north-east teleporter coming from the Red Lily Lake entrance. Some of the signs can be killed (Aries, Pisces, Virgo and some more), some won't react at all (Aquarius and Sagittarius), Scorpio and Cancer will hurt you when trying to kill them and Leo will roar while Urotsuki is backing away. In a dream session, you can encounter three out of all 12 zodiac signs, as determined by their respective season in the Northern Hemisphere.
Interacting with Leo takes you to Leo Palace if the current season is summer. During Fall, Libra will connect to Libra Palace provided that you have entered from the opposite entrance, and Sagittarius will connect to Archery Cavalry World. If the current season is winter, you can interact with Capricorn to be sent to Capricorn Palace, or you can equip the Glasses effect in Pisces' room and interact with the star furthest to the left to be transported to the Alrescha Sea. If the current season is spring, you can interact with Gemini while the Child effect is equipped to be sent to Radiant Rainbow Reef.
The initial area is an area with three teleporters; they look like small bunches of colorful stars. The north-west teleporter transports you to the Xylophone Path in Radiant Rainbow Reef. The keys of the path make different sounds. The aforementioned north-east teleporter takes you to one of the 12 rooms, and the south-west teleporter takes you to a bigger and emptier area similar to the one you came from. Having either of the Ninetails masks or the Gakuran, Bunny Ears, or Glasses effect equipped and taking the aforementioned teleporter will put you closer to certain constellations, such as the Lepus constellation.
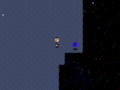
A blue wisp can be found at the southeast edge of the initial area, which transports the player to Red Lily Lake. This will be a one-way teleport until the player goes from Red Lily Lake to Candy World at least once.
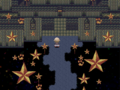
Without specific effects or masks, taking the aforementioned south-west teleporter and heading south leads past the river constellation Eridanus, which can be traversed, making a splashing sound. Further south is a constellation shaped like the number "2". Equipping the Glasses effect and interacting with the largest star in this numerical constellation takes you to an isolated platform with the same constellation and a star road to the dark version of the Cloud Tops. This is the area accessible from the Splash Streetway, and you can return to the main map by interacting with the brightest star in this constellation with the Glasses effect equipped. The northern path leads to a section with a constellation forming Urotsuki's head, but if a set of conditions are met, the path would lead to a cross-shaped constellation, where interacting with the center star five times will take you to the Innocent Dream. The passage here is shortened after visiting Innocent Dream once. You can also view the Urotsuki constellation again by wearing the Glasses while on the path to Innocent Dream. Using the Polygon effect instead of the Glasses leads to a different area with 10 stars in a position similar to the number keys on a numpad. Using the Glasses will show numbers, which are randomized every time this area is entered.
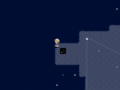
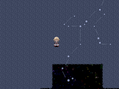
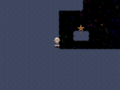
West of the "2" constellation is a bench and a vending machine that costs 50夢. Further west is a moving blue star NPC that leads to Spacey Retreat, which will appear if you have the Spring or Bunny Ears effect. Nearby, next to the one-way warp to the initial area, is a small, three-star constellation. The third star in this lineup leads to the night version of Fox Temple.
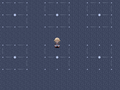
By using the Bunny Ears effect on one of the stars of the Lepus constellation, which you can find within the northeastern section of the larger section, you will be taken to the Lapine Forest.
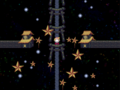
The Star Path can also be found at the south end of the larger area. The path is lined with star-shaped pinwheels, as well as dark blue houses with gold tiled roofs and a star pattern on their door. At the end of the maze is another teleporter, accessible once you've solved the little maze that's surrounding it, which will teleport Urotsuki to a second path. This path has a golden statue depicting a clock framed by vines in the center. By going to the right from here, a vending machine and a bench can be found. By continuing north from the clock, a building can be found, which will slowly teleport Urotsuki to the Star Building.
Star Building
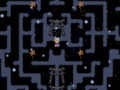
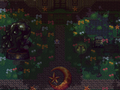
The Star Building is a small grassy area surrounded by a mansion. At the center, a statue of a golden moon with a star can be found, while at the sides there are four star-shaped pinwheels. A vending machine that also costs 50夢 is located at the right-top side of the area, but it only sells stars. At the left-top there is a weird statue with legs, while at the left-bottom, a snake-like NPC can be seen swimming in a pond. The south-eastern section houses a golden egg, unlocking Menu Theme #22 upon interaction. When using the Stretch effect, the flowers can be seen changing colors and appearance.
The entrance to the train station can be found by going north. Inside is a hall with various shadowy silhouettes, star-shaped pinwheels and a golden statue, and going further leads to a corridor ending in a train station entrance, where the front desk attendant is blocked off with a construction sign and barricade, preventing interaction.
Directions
- The Nexus → Lemonade Edifice → Pulsating Yellow Passage → Candy World → Constellation World
With the Child effect:
- The Nexus → Graveyard World → Red Lily Lake → Candy World → Constellation World
After unlocking the connection from Red Lily Lake to here:
- The Nexus → Graveyard World → Red Lily Lake → Constellation World
Trivia
- In older versions of this world, the blue butterfly could be found in the opening area, that would teleport you to the Butterfly Forest as well as open the path back in the form of a corresponding blue butterfly. It was removed in 0.111h patch 4 along with Butterfly Forest itself, but has been reinstated as of 0.117h with new hidden unlock conditions for the butterfly.
- Before version 0.109g, the Star Building's hall was accessible from the end of the Star Path. The north of the hall had a corridor blocked by two construction barricades, before said area's removal. It was then reinstated in 0.115b patch 4.
- In Star Building if you use Noclip Mode and walk into the construction sign. The front desk attendant can be interacted with and causes an event that plays out similar to a vending machine, where Urotsuki will obtain a boarding pass from the man for 100夢 and will allow her to pass through the gates. As of 0.118d Patch 4 this event is impossible to see legitimately.
- The island that connects to Candy World strongly resembles the shape of North and South Korea.
Gallery
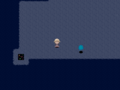
The wisp that leads to Red Lily Lake
The warp to the colorful Xylophone Path in Radiant Rainbow Reef
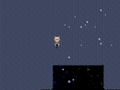
A cluster of stars
The same cluster viewed with the Glasses
The star you need to interact to enter Lapine Forest
The star NPC that leads to Spacey Retreat
The star that leads to Fox Temple
A lonely star pinwheel
The Star Building's hall
The Star Building's garden
Relaxing outside of the Star Building


- 000040
- 636d84