| Nerium Lab | |||
|---|---|---|---|

| |||
| Basic Info | |||
| Regional Name(s) |
ネリウムラボ | ||
| Effects | None | ||
| Collectibles |
WP #779 | ||
| Events | The Toxic Corruption | ||
| Notable NPCs | Toxic Scholar | ||
| Other | |||
| Connecting Areas | Pleasure Street Strawberry Milk Sea ➡️ | ||
| BGM | 🔊 at-29b (No. 883A) 🔊 at-29b – Corrupted state (No. 883B) 🔊 at-47 – Pink Hell/Toxic Scholar's Corridor (No. 884A and 884B) | ||
| Map ID | 2153, 2154, 2157 | ||
| Version Added | 0.123a | ||
| Author | natl | ||
| |||


The Nerium Lab is an area accessible by talking to the Toxic Scholar in Pleasure Street, with the Boy effect.
Features
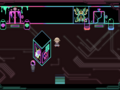
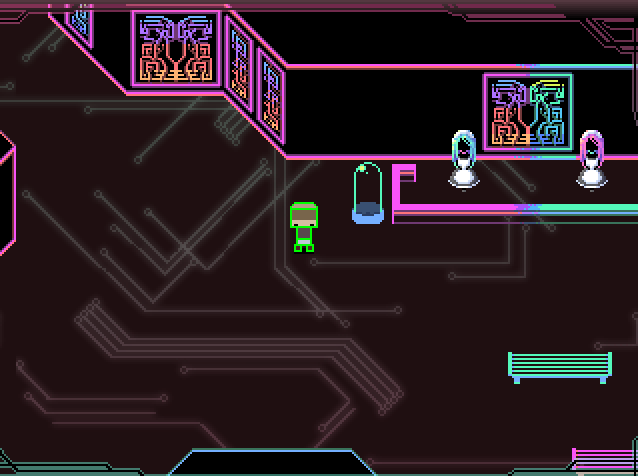
The Nerium Lab is a neon area with a large amount of mostly diagonal walls, reminiscent of Yume Nikki's Number World. The panorama features a cybernetic design, as does the border present everywhere in this world. Neon murals of interlocking lines and posters with stylized depictions of fetuses can be found on many walls. Multiple smiling maids and faceless scholar NPCs appear throughout the area, most of whom react to the Boy effect by stopping in place and staring at Urotsuki. Equipping the Chainsaw effect in this world will cause a warning logo to appear on the screen, before the effect is taken away from Urotsuki.
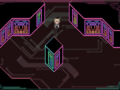
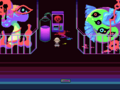
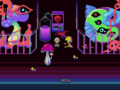
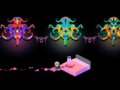
The player starts in a flooded pink corridor with floating neon fetuses, a flower that brings the player back to Pleasure Street, and two symmetrical plant-like neon structures that act as a portal to the main area. The first proper room is a wide one, featuring two smiling maids behind a counter on the right. Talking to the maids will change the player's current menu theme to a unique neon-themed one. The maid on the left offers a purple-to-cyan gradient, while the one on the right offers a pink-to-blue gradient. Two vending machines can be also found embedded in the rightmost wall.
Below the maids' counter is a small building with a door leading to a room with a faceless scholar NPCs and several beds, two of which are occupied by a tentacle and a blob, respectively. If the Glasses effect is equipped, the ghosts of two scholars can be seen smiling sinisterly at the Toxic Scholar in the corner.
Southwest of the small building is a corridor featuring torso-shaped statues, another scholar NPC, and three doors, one being adorned with decorations. The first plain-looking door leads to a balcony overlooking a large, highly saturated mountain with a spoon embedded in it. The rightmost door leads to a small room with two tables and two smiling maids, as well as another vending machine.
The decorated center door leads to another room containing three different doors and two scholars.
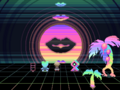
From here, the rightmost door leads to a small room with a scholar and two tables, one of which has what appears to be a hologram on it. Interacting with it will bring the player to a Synthwave-looking room with a grid floor, palm trees, and a sun with lips marks on it. A Teleport Rune is also present, which will teleport the player to Pink Hell.
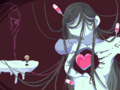
The middle door leads to a room with a scholar whose face is pale rather than the usual pitch-black and several specimen display tubes, some containing creatures, as well as a large tank full of pink liquid and neon fetuses. The table here has two flashing pills, which will take Urotsuki to another room when interacted with. This room features a large armless and faceless girl's corpse with long hair, syringes stabbed into her, and a large cavity in her chest, revealing a heart.
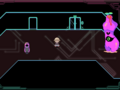
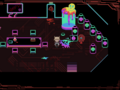
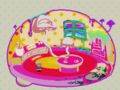
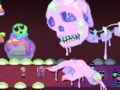
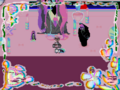
The leftmost door is surrounded by the same poison bottles seen near the Toxic Scholar's house in Pleasure Street and leads to a room similarly filled with such bottles as well as an NPC resembling a heart suspended by a floating ring. To the north is a door with a warning symbol, which leads to a wide room filled with monstrous beings locked in cages. Each cage has a corresponding machine displaying a red skull. Interacting with the machine middle of the room that is dripping colorful blood will transport Urotsuki to the inside of a small, mushroom-shaped house with pink floors, walls, and furniture. The only inhabitant is a green-haired girl in a pink dress who floats slightly above the ground and appears to have no feet. Large red mushrooms grow out of the table as well as out of a coffee mug, in addition to a few sliced ones sitting on a cutting board.
The Toxic Corruption event
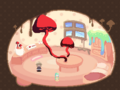
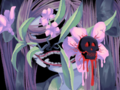
Back in the poison bottles room, the door to the left has two smiling scholars in front of it that appear to be chatting and laughing. Entering it leads to a long corridor, at the end of which is the Toxic Scholar standing in front of an open locker with shattered objects on the floor. Interacting with her will cause her face to vanish and bloody tendrils to crawl out of it, before causing her to collapse and the screen to fade to black. The player will then be taken to a path featuring various abstract, colorful designs where the menu is disabled. At the end lies the Toxic Scholar. Approaching her will pan the camera to show a giant skeleton with several poison bottles near it and a giant hand pointing directly at the Scholar. A close-up of her corrupted face will then show, before the player is sent to a corrupted version of the Nerium Lab.
This version of the area has a corrupted border, and most NPCs are either missing, dead, or in a glitched state. The anti-Chainsaw effect field will now be disabled. Equipment is broken or knocked over and posters are distorted and oozing liquid. The mushroom house in the monsters' area now has over-saturated colors and one of the giant table mushrooms now has an eye that leers in the direction of the bed, on which is the grisly corpse of the green-haired girl, now splattered with dark green blood.
The connections to the giant body area and Pink Hell are now gone, and the door to the mountain is blocked. While the two maids that give out the menu themes now give out corrupted dialogue static noises, they still accomplish their tasks as usual.
Once the player leaves back to Pleasure Street (the connection flower now being replaced by a blood splatter), both the lock and the Toxic Scholar will be missing from their usual location. Once the player enters the street itself, the door back to the Toxic Scholar's room will be blocked, completely preventing access back to the Nerium Lab. Pleasure Street itself will be changed a bit, with the NPC now missing from the Eye Lab and the door to the Cat Café now leading to an entirely different area. Waking up or using the Eyeball Bomb effect is now the only way to go anywhere else and undo these changes.
Pink Hell

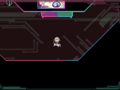
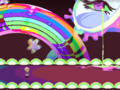
Pink Hell starts with a series of platforms floating above a sea of blue and purple clouds. A Teleport Rune with a heart in the center takes the player to the rest of the area, which consists of a pink corridor filled with feminine items such as dolls, perfumes, mirrors, and lipstick. A hand-drawn border appears on the screen at this time. The next room is another corridor with several desks and a flask. One of the desks seems to be cracked and has a black pot of flowers on it. The next area takes the player back outside, where a large ladder awaits them. Midway through climbing the ladder, the screen will glitch and suddenly teleport the player to another pink and feminine corridor, which is now dim. The sky outside is distorted, the hand-drawn border is partially scratched off, and one of the dolls has turned pitch-black and been decapitated. At the end of this corridor is a large humanoid resembling the Toxic Scholar with 3 eyes dripping rainbow blood and holding the corpse of a fellow scholar, with another dead scholar and maid on the ground. Another rune awaits beyond her.
This rune takes the player back outside, with a now severely corrupted background featuring a can and a bottle. A single pair of footprints wait at the end of this platform. Urotsuki can jump off this tile, causing the screen to fade to black with fleshy noises and a splash. She will then find herself in Strawberry Milk Sea, with no way back. The corpse of the Toxic Scholar can be seen nearby. Notably, the usual window border will be absent unless the player re-enters the world.
Directions
With the Boy effect:
- The Nexus → Red Streetlight World → Gray Road → Florist → Pleasure Street → Nerium Lab
Gallery

Rune to Pink Hell
Girl's corpse
Corrupted
Monsters room before corruption
Monsters room after corruption
Mushroom room
Corrupted Mushroom room
The Toxic Scholar's corridor
End of the Toxic Scholar's corridor
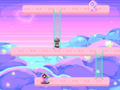
The start of Pink Hell
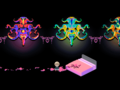
Entrance
Entrance to Nerium Lab after corruption


- 1f0f11
- f953f7