The rewritten Style Guide has an open discussion of the spoiler policy. The current policy will be used if no new consensus is reached. Discuss it here.
| Pleasure Street | |
|---|---|

| |
| Basic Info | |
| Regional Name(s) |
歓楽通り |
| Effects | None |
| Collectibles |
WP #973 |
| Masks | Pink Towel |
| Events | Mermaid's Hunger |
| Notable NPCs | Cat Person, Toxic Scholar |
| Other | |
| Connecting Areas | Florist ⛔ Nerium Lab ✨ |
| BGM | 🔊 sound5d – Neon Apartments (No. 570E) 🔊 sound5d – Main Area (No. 570D) 🔊 2_20 – Monochrome Shopkeeper's Face (No. 507D) 🔊 e8 – Sensu Zone (No. 439D) 🔊 soundb – Forbidden Room (Entrance) 🔊 e25(off) – Forbidden Room |
| Map ID | 1559, 2151, 2152, 2155, 2156, 2158 |
| Version Added | 0.123a |
| Author | natl |
Pleasure Street is an area accessible from the Florist by interacting with the bathtub filled with tendrils.
Features
This world is composed of multiple sub-areas, most of them reachable from two primary areas: the street itself and the Neon Apartment.
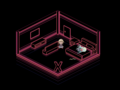
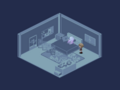
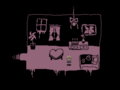
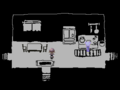
From the Florist, the player first arrives in the Neon Apartment. It is a single, looping neon corridor with several doors leading to isometric rooms. A rotating cube wanders the area as well as a maid with a cube head who will stop and stare at Urotsuki if the Boy effect is equipped.
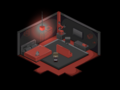
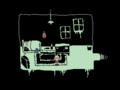
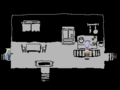
Immediately behind the player is a set of double doors leading to Pleasure Street itself. The door to the right of this entrance leads to a red room with two living cubes. The cube on the bed will move much less when the Chainsaw, Child, or Boy is equipped. This room also has a cubic bathroom with a small cube washing its head.
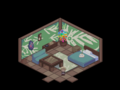
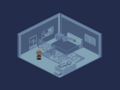
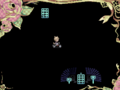
To the left of the entrance is a cozy room with a plant-like creature sleeping on a bed. This room also has a bathroom, where plants can be seen growing from the water of the bathtub.
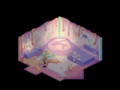
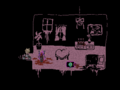
Further to the left of this room is a pastel bedroom with what looks to be frosting all over. A wandering cake and two girls sitting on a bed can be found here. Equipping the Boy effect will show the girls covered in blood with a bloody knife on the bed behind them. To their right is another room featuring a cycloptic creature with a knife embedded in it. The floor near the doorway back to the bedroom will be bloody if the Boy effect is equipped.
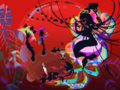
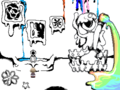
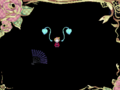
Going further to the left is a door with a red window. This door cannot be entered usually, but if the player has completed the Abuse event in the Florist, the room's window will be flashing, there will be blood and writhing worm on the floor, and a big X will now be placed nearby. This signifies that the door is unlocked. Beyond the door is a lamp that when interacted with will show a continuation of the full-screen event that played before arriving in Pleasure Street from the Florist. A white tendril grabs a flower, causing it to bloom into a heart with a bloody eye. The player is then transported to a sub-area where the menu is disabled.
This area consists of a black and red hallway with worms crawling on the floor and colorful melting creatures painted on the walls. On the wall near the end of the path is what seems to be a child's drawing of a girl and her parents holding hands, though the face of the presumed father has been scribbled out and an X has been drawn where he and the girl's hands meet. Nooses hang from the ceiling and there is a bloody crowbar on the floor. Entering the door here leads to a room of abstract imagery featuring flowers, eyes, and chained hands that ends in a large slice of bleeding cake being stabbed by a fork held by a giant hand. Interacting with it will transport the player to a forbidden room in the apartment. This room is entirely black and red, and features a girl on the bed holding a heart, as well as the worm and big X that were in front of this area's initial door. The player cannot do anything but exit and go back down the black and red hallway. This puts them back in the corridor before the door and locks them out of accessing it again until they go back and re-do the Abuse event.
Main Street
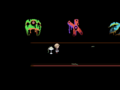
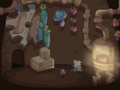
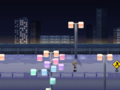
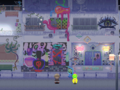
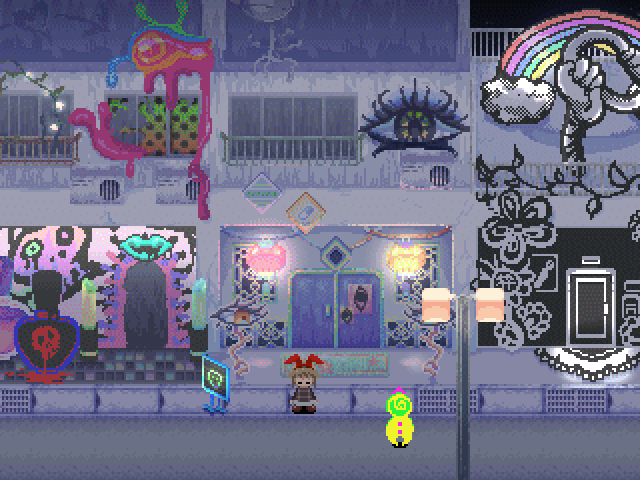
The Pleasure Street itself is a detailed street featuring several houses/shops on it. Various neon creatures roam the area, which are drawn to the Rainbow effect and repelled by the Chainsaw. The first building to the right is blocked by a red construction sign.
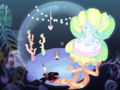
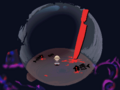
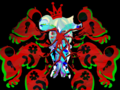
The second building to the right hosts the Mermaid's Bowl. It consists of a large bowl with a giant mermaid sitting on a clam as well as dead fish with a knife stabbed into it. The room also has a light switch, which will dim the outside and turn the inside elements of the bowl into a bright pink. Turning off the lights has a 1 in 32 chance to trigger the Mermaid's Hunger event. The screen will go black accompanied with fleshy noises, before turning back on. The room will now be mostly red, with the mermaid having grown a bit and turned completely black, with a bloody smile replacing her usually blank face. Several more dead fish will be present in this version of the room, including one stabbed by the fork held by the mermaid. Trying to turn the light back on will glitch the screen temporarily instead of doing anything. Leaving and then returning to this area will put the player in yet another version of the room, this time very dim and with no mermaid or decoration, save for a few dead fish and a large bloody knife. This can be undone by leaving Pleasure Street and coming back, which will bring back the mermaid.
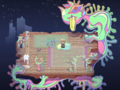
The third building to the right hosts the Cat Café, which displays confections in its shop window and a cannabis leaf on its door. The room inside consists of a wooden floor floating in front of a starry background. A large, mutated cat-like creature surrounds the entire building and a smaller mutated cat wanders the room. Interacting with it will spawn transparent images of other creatures across the shop that will temporarily disappear if the Glasses effect is used. A person with long hair and cat ears can be seen smoking behind the counter. Talking to the cat person will cause them to wink at Urotsuki.
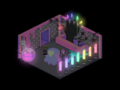
The fourth building to the right hosts the Toxic Shop. It is a small, dim room featuring a large flask, a large hand with multi-colored nails, several sticks of lipstick as well as the Toxic Scholar herself. Equipping the Boy or Chainsaw effects will cause her to freeze in place and turn to stare at Urotsuki wherever she walks, with the Boy having the additional effect of turning her face pitch-black. Interacting with the Toxic Scholar will transport Urotsuki to a special corridor where she will be forced into the Boy effect and her menu will be disabled. If Urotsuki does not have the Boy effect, she cannot access this and the following connection. This corridor consists of a long streak of pink blood over a black void with a series of abstract symbols looming above. At the end of the corridor is a bed with a lock floating above it. Interacting with the lock will unlock it and teleport the player to the Nerium Lab.
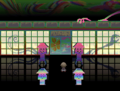
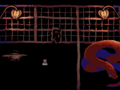
The fifth building to the right hosts the Eye Lab. It is an entirely cyan-colored room featuring scientific-looking depictions of eyes and flowers as well as an anatomy diagram of a blob-like cyclops and a large eyeball in a specimen display case. The north wall has a door to a bedroom with someone sleeping in a bed, though you can only see their hair. A small square object can be seen at the foot of the bed for a brief moment when using the Glasses effect. Interacting with this object while wearing the effect and with text events enabled will reveal it is a medical book of sorts. A brief cutscene will play where the girl in the bed comes up and rips the book away from you. You cannot interact with the book again after this.
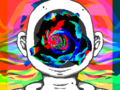
The sixth building to the right hosts the Paint Shop. It is a mostly monochromatic area with a character whose face is a dark hole standing behind a counter and a statue of another hole-faced entity holding a multicolored paintbrush. Talking to the entity behind the counter will pan the camera up, revealing a colorful painting of two flowers and a rainbow. If you equip the Rainbow effect, the shopkeeper's empty face will become rainbow-colored, and interacting with them will show a colorful close-up of a flashing rose in their facial cavity.
The seventh building to the right hosts the Mouse Furnace. It is a vertically large room featuring a large hot furnace, several hanging vegetables, and a humanoid mouse in a wheelchair. Talking to the humanoid mouse will pan the camera upwards, revealing the rest of the scenery. This includes more foodstuff and a large three-eyed mouse sleeping on a bed at the very top. If Urotsuki kills the mouse in the wheelchair, her bloodied corpse will remain and the screen will fade out much more slowly when exiting the house. Should the player return afterward, they'll find that the house is now entirely different, being largely an empty void. Interacting with the wall pans the camera upwards, revealing a giant rat king looming over Urotsuki. Exiting the house after this point will lock the player out of it until they re-enter the Street.
The final building to the right hosts the Onigiri House. The outside resembles a Japanese restaurant with noren curtains and a picture of an onigiri. The inside consists of four colorful stone lanterns and an eastern-style wall with a set of sliding doors. Entering the doors will lead the player to the Sensu Zone sub-area.
Going to the absolute right of the street leads to a gate with a two-headed snake on it. Past the gate is a dock area showing a distant city beyond the water. Two colorful wireframe sculptures can also be seen in the background. At the very end of the dock is a construction sign blocking the way forward.
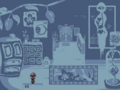
This world will undergo a number of changes should the player arrive directly from the Toxic Corruption event in Nerium Lab. The door to the Toxic Shop will now be painted over and inaccessible, the NPC in the Eye Lab will now be gone and the Cat Café will be entirely changed. Its interior is now a roughly drawn monochrome house, with a blue-haired woman doing the dishes. Equipping the Boy, Chainsaw or Plaster Cast effects will make her turn and stare at Urotsuki with a blank face. The room to the left room contains a bedroom with an ash tray, clothes, and beer bottles lying around, as well as a bed where the NPC who once stood behind the counter in the Café is sleeping.
The room to the right of the kitchen contains an empty pink bedroom with a motif of flowers and hearts, as well as science beakers on the dresser. Upon exiting the room, a quick flash of the Toxic Scholar and poison bottles will appear before the player can leave. This will cause the door to that room to now be locked.
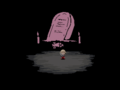
Trying to chainsaw the blue-haired woman in this house will cause the sleeping NPC to come running into the room, wielding a gun. The woman's face will distort and the screen will turn black before transporting Urotsuki in front of a giant pink grave. There is no escape from this area without waking up or the using the Eyeball Bomb.
Sensu Zone
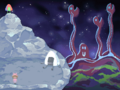
The Sensu Zone is a small looping area featuring the design of sensu fans on the ground. A flowery border surrounds the player's view as long as they stay in the main area. To the southwest of the entrance is a wandering onigiri creature. Interacting with it will take Urotsuki to a pond on a cliffside and equip her with a pink towel. The pond has a large onigiri-shaped character sitting in it, and a smaller red onigiri on top of the cliff. Odd creatures can be seen emerging in the distant mountains. The player can exit this pond by going left.
Going northeast from the entrance leads to a door with heart signs around it. Past the door is a traditional Japanese room, with a tall woman in a kimono sitting on the bed across from the entrance. Equipping the Boy, Chainsaw, or Maiko effects will make her open her eyes to look at Urotsuki. A structure resembling a mix between a snake and a DNA helix can be seen on the left. Attempting to chainsaw the woman will cause the screen to freeze as a large black snake crawls out of the woman's face to attack Urotsuki. The player will then find themselves in a large wooden prison, with a crying snake on the other side of the room. The player can exit from the door present here, putting them back in the main Sensu Zone in front of a broken down door. Urotsuki cannot enter the woman's room again until the player exits and re-enters Pleasure Street. The exit door of this prison will not exist outside of these circumstances.
Directions
- The Nexus → Red Streetlight World → Gray Road → Florist → Pleasure Street
Gallery
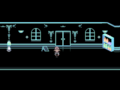
The Neon Apartment

Proper hygiene is important!
The Forbidden Room
The Mermaid
Her hunger
The Cat Café
The Toxic Shop
The Eye Lab
The Paint Shop
The Mouse Furnace
The Rat King
The Onigiri House
The end of the street
The Sensu Zone
The snake prison
After corruption event
Right when you exit the room

Blue haired woman looking at you
About to die


- 898ea8
- 434979