| Simple Street | |
|---|---|

| |
| Basic Info | |
| Regional Name(s) |
うろつき邸:無限廊下 |
| Effects | None |
| Events | None |
| Notable NPCs | None |
| Other | |
| Connecting Areas | Urotsuki's Dream Apartments The Hand Hub ➡️ Chocolate World ➡️ Art Gallery ➡️ Broken Faces Area ➡️ Red Streetlight World ➡️ Theatre World ➡️ Gray Road ➡️ School ➡️ Cyber Maze ➡️ Intestines Maze ➡️ Cipher Keyboard ➡️ Parallel Graveyard ➡️ |
| Removed Connections | Tatami Room ➡️ |
| BGM | 🔊 tiriri (No. 063) |
| Map ID | 0371 |
| Version Added | 0.090b |
| Last Updated | 0.123e patch 2 |
| Primary Author | kuraud |
| Contributing Author(s) | oneirokamara |
Simple Street is an area accessible from Urotsuki's Dream Apartments.
Features
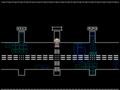
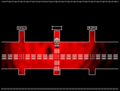
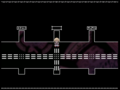
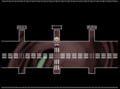
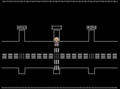
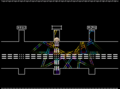
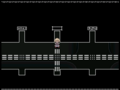
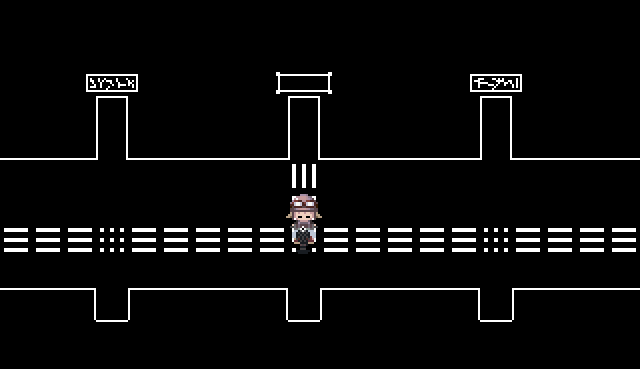
The Simple street is a long, black and white road with nineteen doors leading to random different areas in the game, serving as a 'fast-travel' room.
By entering any of the doors, Urotsuki can be taken to The Hand Hub, Chocolate World, the Art Gallery, Broken Faces Area, Red Streetlight World, Theatre World, the Gray Road, the School, the Cyber Maze, the Cipher Keyboard, the Intestines Maze and the Parallel Graveyard.
How to Cheat the Simple Street
The enterable worlds are not randomly assigned to each of the doors, instead, they are chosen according to an algorithm described in the next paragraph, and then every door in the area besides the one Urotsuki entered from (which is distinguishable from the others, by the empty sign above it, all other doors have writing on their signs) will lead to the world that the street has selected.
The Simple Street is governed by Variable #1444, which ranges from 0 to 11, counts up upon each visit, and saves between dream sessions. Each number corresponds to a world, and upon reaching the final entry, it will reset to 0 on the next revisit. Using this fact, one can exit and reenter the Simple Street until getting the desired destination. On a new save, the cycle should begin from 1 (Chocolate World). The location order is the following:
- 0: The Hand Hub
- 1: Chocolate World
- 2: Art Gallery
- 3: Red Streetlight World
- 4: Theatre World
- 5: Broken Faces Area
- 6: Intestines Maze
- 7: Gray Road
- 8: School
- 9: Cyber Maze
- 10: Cipher Keyboard
- 11: Parallel Graveyard
So, for example, if it picks The Hand Hub initially, leaving and re-entering the Simple Street will force it to pick Chocolate World.
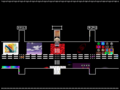
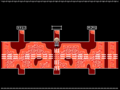
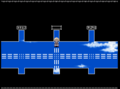
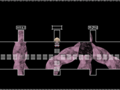
Equipping the Glasses effect will change the street to a scrolling parallax background depicting the corresponding panorama or image for the world that the doors will lead to, including no panorama for the Gray Road. Using the Glasses effect will cycle through the worlds as described above in reverse, meaning Urotsuki can repeatedly adjust her Glasses until the desired area is chosen.
NOTE: In order to access any of these worlds from the Simple Street, Urotsuki must have accessed the desired world a different way first. For example, Urotsuki must have entered Red Streetlight World from The Nexus before being able to access it from this location. Entering the Simple Street without visiting any of the potential destinations will result in every door exiting Urotsuki out to her Dream Apartments, and using the Glasses will show The Nexus' background.
Directions
- The Nexus → Urotsuki's Dream Apartments → Simple Street
Gallery
The Hand Hub background.

Chocolate World background.
Art Gallery background.
Red Streetlight World background.
Theatre World background.
Broken Faces Area background.
Intestines Maze background.
No effect background / Gray Road background.
School background.
Cyber Maze background.
Cipher Keyboard background.
Parallel Graveyard background.


- 000000
- ffffff