SalmSamuel (talk | contribs) mNo edit summary |
mNo edit summary |
||
| (20 intermediate revisions by 5 users not shown) | |||
| Line 1: | Line 1: | ||
{{Locationbox | {{Locationbox | ||
|headercolor = #a100fc | |headercolor = #a100fc | ||
| Line 5: | Line 4: | ||
|Name = ''Domino Meiro'' | |Name = ''Domino Meiro'' | ||
|JapaneseName = ドミノ迷路 | |JapaneseName = ドミノ迷路 | ||
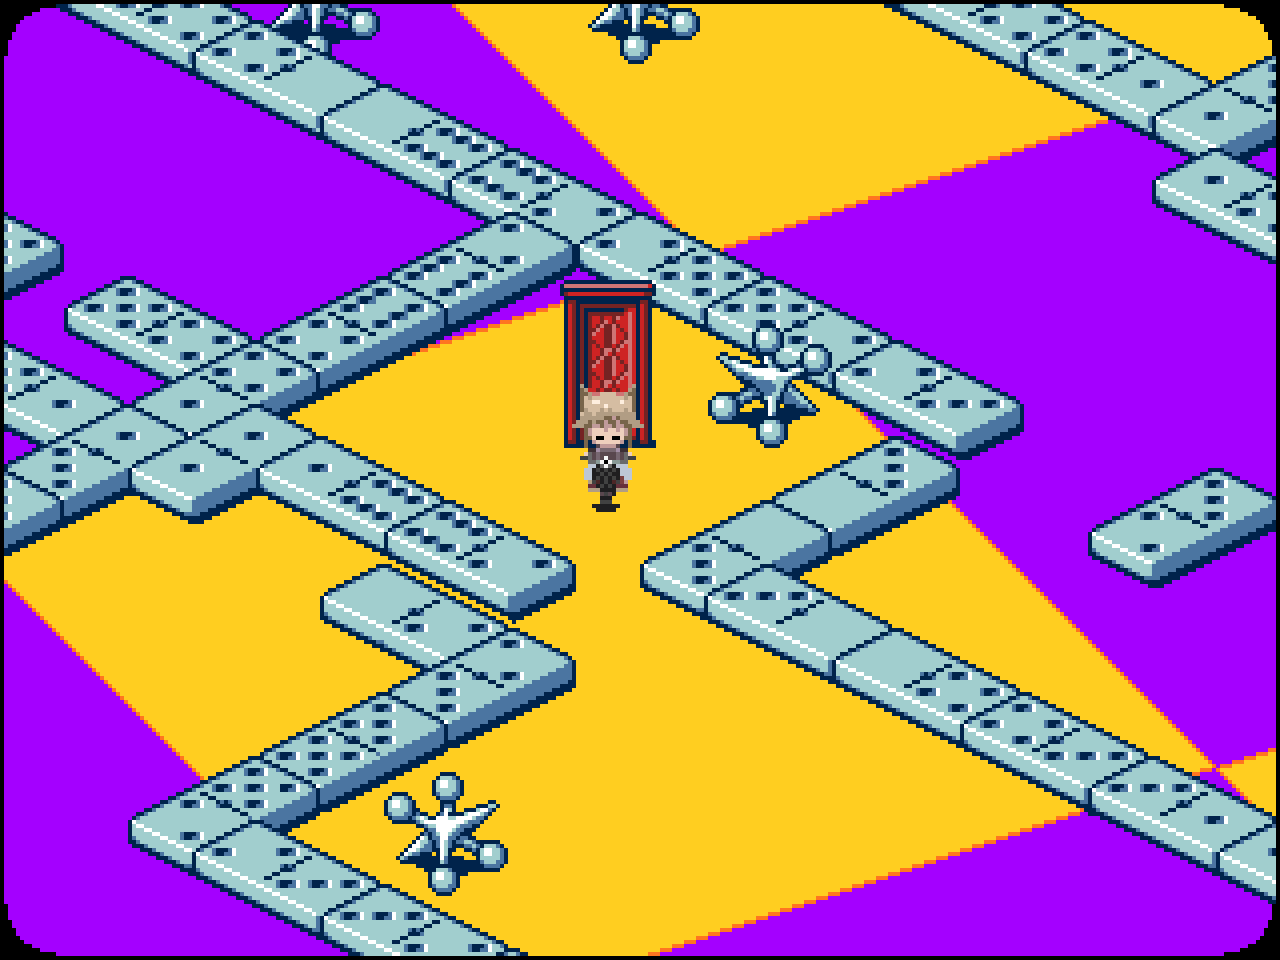
|image = | |image = Welcome to the Domino Maze!.png | ||
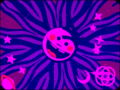
|caption = The red magic door from [[Yume 2kki: | |caption = The red magic door from [[Yume 2kki:Stomach Maze|Stomach Maze]]. | ||
|Effects = None | |Effects = None | ||
|Menu = None | |Menu = None | ||
| Line 14: | Line 13: | ||
|Connections = {{Connection|Stomach Maze|one_way_type=NoEntry}}, {{Connection|Board Game Islands|isolation_type=DeadEnd}}, {{Connection|Wrinkled Fields||effects_needed=Trombone}} | |Connections = {{Connection|Stomach Maze|one_way_type=NoEntry}}, {{Connection|Board Game Islands|isolation_type=DeadEnd}}, {{Connection|Wrinkled Fields||effects_needed=Trombone}} | ||
|RemovedConnections = {{Connection|Flesh Paths World|one_way_type=NoEntry}} | |RemovedConnections = {{Connection|Flesh Paths World|one_way_type=NoEntry}} | ||
|BGM = {{BGM|title=n3-RtH|filename=n3-RtH.ogg|soundroom=622A|speed=100}} | |BGM = {{BGM|title=n3-RtH|filename=n3-RtH.ogg|soundroom=622A|speed=100}} | ||
{{BGM|title=n3-RtH|filename=Y2 n3-RtH 70.ogg|label=Burnt photo}} | {{BGM|title=n3-RtH|filename=Y2 n3-RtH 70.ogg|label=Burnt photo}} | ||
{{BGM|title=Kong_聞け|filename=Y2 Kong 聞け 100.ogg|label=TV}} | |||
{{BGM|title=bekkouame2_anon|filename=Bekkouame2_anon.ogg|label=Crayon Area|speed=80}} | |||
{{BGM|title=dance_sick4_anon|filename=Y2 dance sick4 anon 100.ogg|label=Tomato Hole|soundroom=1097A}} | {{BGM|title=dance_sick4_anon|filename=Y2 dance sick4 anon 100.ogg|label=Tomato Hole|soundroom=1097A}} | ||
{{BGM|title=dance_sick4_anon|filename=Y2 dance sick4 anon 60.ogg|label=Tomato Hole (Dark)|soundroom=1097B}} | {{BGM|title=dance_sick4_anon|filename=Y2 dance sick4 anon 60.ogg|label=Tomato Hole (Dark)|soundroom=1097B}} | ||
{{BGM|title=dance_sick3_anon|filename=Y2 dance sick3 anon 100.ogg|label=Tomato Hole (Distorted)|soundroom= |speed=100}} | {{BGM|title=dance_sick3_anon|filename=Y2 dance sick3 anon 100.ogg|label=Tomato Hole (Distorted)|soundroom=1097C|speed=100}} | ||
{{BGM|title=tonny30|filename=Y2 tonny30 80.ogg|label=Mozza's Room|soundroom=705C}} | {{BGM|title=tonny30|filename=Y2 tonny30 80.ogg|label=Mozza's Room|soundroom=705C}} | ||
{{BGM|title=Kong_ToBlip_Remix|filename=Y2 Kong ToBlip Remix 110.ogg|label=Egao-kun}} | {{BGM|title=Kong_ToBlip_Remix|filename=Y2 Kong ToBlip Remix 110.ogg|label=Egao-kun}} | ||
| Line 30: | Line 31: | ||
{{BGM|title=at-29a|filename=Y2 at-29a 50.ogg|label=Creature (High resolution Polygon)|speed=50}} | {{BGM|title=at-29a|filename=Y2 at-29a 50.ogg|label=Creature (High resolution Polygon)|speed=50}} | ||
{{BGM|title=at-29b|filename=Y2 at-29b 50.ogg|label=Creature (Low resolution Polygon)|speed=50}} | {{BGM|title=at-29b|filename=Y2 at-29b 50.ogg|label=Creature (Low resolution Polygon)|speed=50}} | ||
{{BGM|title=Roninnozlo_Pi3_Mud(slower)|filename=Y2 Roninnozlo Pi3 Mud(slower) 90.ogg|label=Head}} | {{BGM|title=Roninnozlo_Pi3_Mud(slower)|filename=Y2 Roninnozlo Pi3 Mud(slower) 90.ogg|label=Head}} | ||
{{BGM|title=Roninnozlo_Pi3_Mud(slower)|filename=Y2 Roninnozlo Pi3 Mud(slower) 70.ogg|label=Head (Interior)}} | {{BGM|title=Roninnozlo_Pi3_Mud(slower)|filename=Y2 Roninnozlo Pi3 Mud(slower) 70.ogg|label=Head (Interior)}} | ||
{{BGM|title=bgm034|filename=Y2 bgm034 60.ogg|label=Snowglobe}} | {{BGM|title=bgm034|filename=Y2 bgm034 60.ogg|label=Snowglobe}} | ||
{{BGM|title=kanenarashi-byzetsu(slower)|filename=Y2 kanenarashi-byzetsu(slower) 150.ogg|label=Interacting with the girl}} | {{BGM|title=kanenarashi-byzetsu(slower)|filename=Y2 kanenarashi-byzetsu(slower) 150.ogg|soundroom=1095|label=Interacting with the girl}} | ||
{{BGM|title=bgm030 (loop)|filename=Y2 bgm030 (loop) 60.ogg|label=Head (with Lantern)}} | {{BGM|title=bgm030 (loop)|filename=Y2 bgm030 (loop) 60.ogg|label=Head (with Lantern)}} | ||
|Map ID = 1606 | |Map ID = 1606 | ||
|Primary = Kong | |Primary = Kong | ||
| Line 43: | Line 43: | ||
}} | }} | ||
'''Domino Maze''' is an area accessible from the red magic door in [[Yume 2kki:Stomach Maze|Stomach Maze]]. | '''Domino Maze''' is an area accessible from the red magic door in [[Yume 2kki:Stomach Maze|Stomach Maze]]. | ||
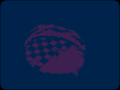
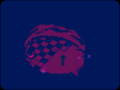
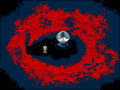
{{LocationMap|filename=Dominomaze | {{LocationMap|filename=Y2 DominoMaze Map.png|caption=Blank map of Domino Maze.}} | ||
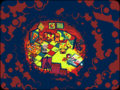
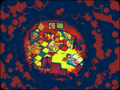
{{LocationMap|filename=Dominomaze.png|caption=Annotated map of Domino Maze. (Background darkened for visibility.)}} | |||
==Features== | ==Features== | ||
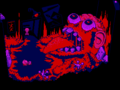
As the name describes, the Domino Maze is a labyrinthine world consisting of dominoes that serve as walls, over a purple and yellow ground. Jackstone pieces, colored balls, and dice are scattered around the place. | As the name describes, the Domino Maze is a labyrinthine world consisting of dominoes that serve as walls, over a purple and yellow ground. Jackstone pieces, colored balls, and dice are scattered around the place. | ||
Arriving from [[Yume 2kki:Board Game Islands|Board Game Islands]] places you in an isolated section where you collect a banana on the ground. If you use the [[Yume 2kki:Effects#Dice|Dice]] effect and land a red eye, the red door will close and disappear while laughing when interacted with, making the place a dead end. | Arriving from [[Yume 2kki:Board Game Islands|Board Game Islands]] places you in an isolated section where you collect a banana on the ground. If you use the [[Yume 2kki:Effects#Dice|Dice]] effect and land a red eye, the red door will close and disappear while laughing when interacted with, making the place a dead end. | ||
Arriving from [[Yume 2kki:Stomach Maze|Stomach Maze]] will place Urotsuki in the main part of the map. A little camera on legs can also be seen in various parts of the map. It reacts to the [[Yume 2kki:Effects#Marginal|Marginal]] and [[Yume 2kki:Effects#Chainsaw|Chainsaw]] effects by running away. | Arriving from [[Yume 2kki:Stomach Maze|Stomach Maze]] will place Urotsuki in the main part of the map. There are various points of interest throughout the map, such as a floating painting of a cat that doesn't react to any effects, and a hidden path that leads to a purple puddle on the ground, which gives Urotsuki a pogo stick to ride. Southeast of the entrance is a small hole, which is seemingly empty. Using the [[Yume 2kki:Effects|Glasses]] effect, however, will reveal some sort of ghostly creature coming out of the hole. Repeatedly using the [[Yume 2kki:Effects#Lantern|Lantern]] effect on the hole may trigger an event that traps Urotsuki in an isolated area of the map with a TV on a bench surrounded by chairs, but only the chair in front of the TV can be sat on using the [[Yume 2kki:Effects#Child|Child]] effect. As the [[Yume 2kki:Effects#Bat|Bat]] effect cannot be used in this world, your only choices are to use the [[Yume 2kki:Effects#Eyeball Bomb|Eyeball Bomb]] effect or wake up. | ||
A little camera on legs can also be seen in various parts of the map. If it catches up to you, it will flash its bulb and take a picture of Urotsuki, which will deactivate whatever effect you are using, with a few exceptions. It reacts to the [[Yume 2kki:Effects#Marginal|Marginal]] and [[Yume 2kki:Effects#Chainsaw|Chainsaw]] effects by running away. It will turn transparent and walk away if using the [[Yume 2kki:Effects#Stretch|Stretch]] effect, and using the Child effect around it will give Urotsuki a bee costume. The camera will drop photos on the ground with each picture it takes, most of which are black and unable to be interacted with. Using the Child effect will drop a blue photo, and interacting with it will show Urotsuki in her bee costume playing with some dominoes. If you are riding the pogo stick, it will drop a pink photo that shows Urotsuki on the pogo stick. Rarely, the camera may drop a red photo, which shows a disturbing image of a girl with a deformed face. Equipping the Lantern effect will make the camera run away, but catching up to it and using it will kill it, leaving behind a burned photo with a distorted image. | |||
Within the center of the maze is a giant, square hole. To the south of the hole is a circle tile with music notes on the ground. If you use the [[Yume 2kki:Effects#Trombone|Trombone]] effect while standing on the circle, applause will play and a ladder will descend from the sky, acting as an entrance to [[Yume 2kki:Wrinkled Fields|Wrinkled Fields]]. | Within the center of the maze is a giant, square hole. To the south of the hole is a circle tile with music notes on the ground. If you use the [[Yume 2kki:Effects#Trombone|Trombone]] effect while standing on the circle, applause will play and a ladder will descend from the sky, acting as an entrance to [[Yume 2kki:Wrinkled Fields|Wrinkled Fields]]. | ||
| Line 56: | Line 59: | ||
To the left of the maze, there is a path leading to a small side area. The area is a field of flowers with colored pencils as well as some large letters of the alphabet in the ground. This leads to a dead end along with a construction sign suggesting more will be added to this area in the future. | To the left of the maze, there is a path leading to a small side area. The area is a field of flowers with colored pencils as well as some large letters of the alphabet in the ground. This leads to a dead end along with a construction sign suggesting more will be added to this area in the future. | ||
To the north of the hole, there is an attraction that changes depending on your [[Yume 2kki:Randomizers#Seasonal System|in-game season]]. If it is Winter, Spring or Summer a grey figure with a balloon will be standing by the edge of the hole. If it is Fall, a tomato will be by the edge instead, and the figure's balloon will occasionally fly around the map. If you chainsaw the grey figure, an event will occur where a dark floating head will appear and push Urotsuki into the hole. Upon area transition, there is a chance that Urotsuki will be teleported to two completely different areas. | To the north of the hole, there is an attraction that changes depending on your [[Yume 2kki:Randomizers#Seasonal System|in-game season]]. If it is Winter, Spring or Summer a grey figure with a balloon will be standing by the edge of the hole. If it is Fall, a tomato will be by the edge instead, and the figure's balloon will occasionally fly around the map. If you chainsaw the grey figure, an event will occur where a dark floating head will appear and push Urotsuki into the hole. Upon area transition, there is a chance that Urotsuki will be teleported to two completely different areas, both of which are one-way. | ||
===Tomato Hole (Tomato)=== | ===Tomato Hole (Tomato)=== | ||
| Line 63: | Line 66: | ||
In the stairwell is a light switch. If you turn off the light and return to the first area, the room will be dark except for a small green hole to the right. To access this area you need at least 10 HP, which you can increase by eating from the [[Yume 2kki:Vending Machine|Vending Machines]]. If you use the [[Yume 2kki:Effects#Child|Child]], [[Yume 2kki:Effects#Fairy|Fairy]] or [[Yume 2kki:Effects#Dice|Dice]] effect and walk up to the hole, you will find a small artist's studio with an NPC inside. The NPC appears to be a girl made out of pizza. Interacting with her will give you [[Yume 2kki:Menu Themes|Menu Theme #83]]. She reacts to the Marginal and Chainsaw effects by running away in a frightened manner, and chainsawing her might give better odds of getting to the other area after falling through the hole. Using the [[Yume 2kki:Effects#Glasses|Glasses]] effect will transform her into a floating slice of pizza. | In the stairwell is a light switch. If you turn off the light and return to the first area, the room will be dark except for a small green hole to the right. To access this area you need at least 10 HP, which you can increase by eating from the [[Yume 2kki:Vending Machine|Vending Machines]]. If you use the [[Yume 2kki:Effects#Child|Child]], [[Yume 2kki:Effects#Fairy|Fairy]] or [[Yume 2kki:Effects#Dice|Dice]] effect and walk up to the hole, you will find a small artist's studio with an NPC inside. The NPC appears to be a girl made out of pizza. Interacting with her will give you [[Yume 2kki:Menu Themes|Menu Theme #83]]. She reacts to the Marginal and Chainsaw effects by running away in a frightened manner, and chainsawing her might give better odds of getting to the other area after falling through the hole. Using the [[Yume 2kki:Effects#Glasses|Glasses]] effect will transform her into a floating slice of pizza. | ||
Back to the stairwell, there's an entrance leading to a bar staffed by a tall figure with a glass of tomato juice for a head. Up further is a second part of the area. The path to the next area is blocked off by traffic cones and a fire rages under it. But to the side is an entrance to a small room that contains only a vending machine. It is not recommended to interact with it, as it has a chance of giving you a poisonous snack that lowers your HP to 5. If you use the [[Yume 2kki:Effects#Rainbow|Rainbow]] effect, the area will change color. If you use the [[Yume 2kki:Effects#Lantern|Lantern]] effect, the area will change further. If you leave and come back, the area will be different and there will be a new NPC there. Its appearance will be different depending on whether or not you used the Lantern effect. If you use the [[Yume 2kki:Effects#Polygon|Polygon]] effect, it transforms into a broken image. To the left of the vending machine in this new room is a locked door. | Back to the stairwell, there's an entrance leading to a bar staffed by a tall figure with a glass of tomato juice for a head. Up further is a second part of the area. The path to the next area is blocked off by traffic cones and a fire rages under it. But to the side is an entrance to a small room that contains only a vending machine. It is not recommended to interact with it, as it has a chance of giving you a poisonous snack that lowers your HP to 5. You can recover your HP by turning off the light and entering the hole in the tomato room, then interacting with the head NPC here with the [[Yume 2kki:Effects#Boy|Boy]] or [[Yume 2kki:Effects#Gakuran|Gakuran]] effects equipped. In this case, you'll only have lost 5 HP overall. If you use the [[Yume 2kki:Effects#Rainbow|Rainbow]] effect, the area will change color. If you use the [[Yume 2kki:Effects#Lantern|Lantern]] effect, the area will change further. If you leave and come back, the area will be different and there will be a new NPC there. Its appearance will be different depending on whether or not you used the Lantern effect. If you use the [[Yume 2kki:Effects#Polygon|Polygon]] effect, it transforms into a broken image. To the left of the vending machine in this new room is a locked door. | ||
Interacting with the light switch and returning to the tomato room has a small chance on screen transition to cause a loud, abrupt event (jumpscare warning!) showing the tomato room in a glitchy and distorted manner. The switch seemingly needs to be interacted with on each attempt. If this event occurs, soon after the player will find themselves in the '''Tomato Hole (Head)''' area, making this method potentially preferable over waking up and backtracking to the balloon NPC should the goal be to reach this area. | Interacting with the light switch and returning to the tomato room has a small chance on screen transition to cause a loud, abrupt event (jumpscare warning!) showing the tomato room in a glitchy and distorted manner. The switch seemingly needs to be interacted with on each attempt. If this event occurs, soon after the player will find themselves in the '''Tomato Hole (Head)''' area, making this method potentially preferable over waking up and backtracking to the balloon NPC should the goal be to reach this area. | ||
| Line 70: | Line 73: | ||
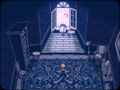
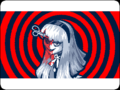
The second area is a strange area with a giant head sticking out in the room. Urotsuki's lifeless body will be lying on the ground after the fall, but another Urotsuki, wearing the Child effect, will descend from the stairs. At this point, you'll gain control over the child version of Urotsuki. You cannot access the menu in this state. Interacting with the body of the Urotsuki on the ground will have her vocalize refusal. The only thing to do in this area is to go inside the mouth of the giant head. Inside the mouth is a snowglobe, and interacting with it from behind will take you to a strange monochromatic room. The only inhabitant of this room is a girl staring outside the window. When interacting with her, a fullscreen event plays. She turns to Urotsuki to reveal one side of her face is completely covered in blood, her eye is gouged out and there are a pair of scissors embedded in her head. A laughing soundbyte plays as the player looks at her. Once the player exits out of this screen, the laughing sound will continuously play as the screen wobbles and gains a red, ominous filter. On the table to the left are some red flowers, and interacting with them will give you [[Yume 2kki:Menu Themes|Menu Theme #84]]. The menu theme is only available at this point, and stops becoming available when further progress in the event is made. | The second area is a strange area with a giant head sticking out in the room. Urotsuki's lifeless body will be lying on the ground after the fall, but another Urotsuki, wearing the Child effect, will descend from the stairs. At this point, you'll gain control over the child version of Urotsuki. You cannot access the menu in this state. Interacting with the body of the Urotsuki on the ground will have her vocalize refusal. The only thing to do in this area is to go inside the mouth of the giant head. Inside the mouth is a snowglobe, and interacting with it from behind will take you to a strange monochromatic room. The only inhabitant of this room is a girl staring outside the window. When interacting with her, a fullscreen event plays. She turns to Urotsuki to reveal one side of her face is completely covered in blood, her eye is gouged out and there are a pair of scissors embedded in her head. A laughing soundbyte plays as the player looks at her. Once the player exits out of this screen, the laughing sound will continuously play as the screen wobbles and gains a red, ominous filter. On the table to the left are some red flowers, and interacting with them will give you [[Yume 2kki:Menu Themes|Menu Theme #84]]. The menu theme is only available at this point, and stops becoming available when further progress in the event is made. | ||
In order to escape from this area, you must take the lantern by the table next to the girl. By doing so, a hole will open up in the carpet. You can optionally burn the girl with the lantern as well. Once you return to the main area, the snowglobe has been shattered. There is nothing you can do other than interact with Urotsuki's body. The floating head will appear again over the body, and Urotsuki will immolate her own corpse. The screen turns black and the sound of screams can be heard. This will cause Urotsuki to forcefully wake up. | In order to escape from this area, you must take the lantern by the table next to the girl. By doing so, a hole will open up in the carpet. You can optionally burn the girl with the lantern as well. If you do, she will drop a book which, upon interaction, unlocks a book in the [[Yume 2kki:Library|Library]] (found two shelves to the left of the book leading to [[Yume 2kki:Memory Garden|Memory Garden]]). Once you return to the main area, the snowglobe has been shattered. There is nothing you can do other than interact with Urotsuki's body. The floating head will appear again over the body, and Urotsuki will immolate her own corpse. The screen turns black and the sound of screams can be heard. This will cause Urotsuki to forcefully wake up. | ||
==Directions== | ==Directions== | ||
With a 1/2 chance per dream session, if the day/times slept counter on the PC is even: | With the [[Yume 2kki:Effects#Child|Child]] effect, and a 1/2 chance per dream session, if the day/times slept counter on the PC is an even number before going to bed: | ||
*The Nexus → [[Yume 2kki:Heart World|Heart World]] → [[Yume 2kki:Valentine Land|Valentine Land]] → [[Yume 2kki:Cyber Maze|Cyber Maze]] → [[Yume 2kki:Sea Lily World|Sea Lily World]] → [[Yume 2kki:Mutant Pig Farm|Mutant Pig Farm]] → [[Yume 2kki:Stomach Maze|Stomach Maze]] → '''Domino Maze''' | *The Nexus → [[Yume 2kki:Heart World|Heart World]] → [[Yume 2kki:Valentine Land|Valentine Land]] → [[Yume 2kki:Cyber Maze|Cyber Maze]] → [[Yume 2kki:Sea Lily World|Sea Lily World]] → [[Yume 2kki:Mutant Pig Farm|Mutant Pig Farm]] → [[Yume 2kki:Stomach Maze|Stomach Maze]] → '''Domino Maze''' | ||
With the [[Yume 2kki:Effects#Trombone|Trombone]] | With the [[Yume 2kki:Effects#Child|Child]] and [[Yume 2kki:Effects#Trombone|Trombone]] effects, and a 1/2 chance per dream session if the day/times slept counter on the PC is an even number before going to bed: | ||
*The Nexus → [[Yume 2kki:Ornamental Plains|Ornamental Plains]] → [[Yume 2kki:Wrinkled Fields|Wrinkled Fields]] → '''Domino Maze''' | *The Nexus → [[Yume 2kki:Ornamental Plains|Ornamental Plains]] → [[Yume 2kki:Wrinkled Fields|Wrinkled Fields]] → '''Domino Maze''' | ||
With the [[Yume 2kki:Effects#Bat|Bat]] | With the [[Yume 2kki:Effects#Child|Child]] and [[Yume 2kki:Effects#Bat|Bat]] effects, and a 1/2 chance per dream session if the day/times slept counter on the PC is an odd number before going to bed: | ||
*The Nexus → [[Yume 2kki:Garden World|Garden World]] → [[Yume 2kki:Board Game Islands|Board Game Islands]] → '''Domino Maze''' (Isolated) | *The Nexus → [[Yume 2kki:Garden World|Garden World]] → [[Yume 2kki:Board Game Islands|Board Game Islands]] → '''Domino Maze''' (Isolated) | ||
OR | OR | ||
| Line 90: | Line 93: | ||
*Before version 0.125c patch 1, equipping the Child effect in the main area softlocked the game, which was not intended. | *Before version 0.125c patch 1, equipping the Child effect in the main area softlocked the game, which was not intended. | ||
*The main area of this world was previously only accessible from [[Yume 2kki:Flesh Paths World|Flesh Paths World]]. The connection was changed to [[Yume 2kki:Stomach Maze|Stomach Maze]] in version 0.125c patch 1. | *The main area of this world was previously only accessible from [[Yume 2kki:Flesh Paths World|Flesh Paths World]]. The connection was changed to [[Yume 2kki:Stomach Maze|Stomach Maze]] in version 0.125c patch 1. | ||
*The light switch event in the Tomato Hole is a reference to the [[Yume Nikki:Events#Uboa|Uboa event]] from ''Yume Nikki''. | |||
==Gallery== | ==Gallery== | ||
<gallery> | <gallery> | ||
DominoMaze.png|The red magic door from [[Yume 2kki:Board Game Islands|Board Game Islands]]. | |||
DominoMaze VM.png | DominoMaze VM.png | ||
DominoMaze toWrinkledFields.png|The ladder to [[Yume 2kki:Wrinkled Fields|Wrinkled Fields]]. | DominoMaze toWrinkledFields.png|The ladder to [[Yume 2kki:Wrinkled Fields|Wrinkled Fields]]. | ||
DominoMaze Pogo.png|'':)'' | |||
DominoMaze Photo4.png | |||
DominoMaze Bee.png | DominoMaze Bee.png | ||
DominoMaze Photo.png | DominoMaze Photo.png | ||
DominoMaze2.png | DominoMaze2.png | ||
DominoMaze5.png | DominoMaze5.png | ||
DominoMaze Tomato.png | DominoMaze Tomato.png | ||
DominoMaze3.png | DominoMaze3.png | ||
DominoMaze GhostHole.png | |||
DominoMaze TV2.png|where's the cartoons channel >:( | |||
DominoMaze Pencil1.png | DominoMaze Pencil1.png | ||
DominoMaze Pencil2.png | DominoMaze Pencil2.png | ||
| Line 111: | Line 117: | ||
{{SpoilerSectionStart|Spoiler Image Gallery}} | {{SpoilerSectionStart|Spoiler Image Gallery}} | ||
<gallery> | <gallery> | ||
DominoMaze Photo3.png | |||
DominoMaze Photo2.png|The photo that the Paparazzi leaves after being burned. | |||
DominoMaze TV.png|The TV's only channel. | |||
DominoMaze4.png|uh oh | DominoMaze4.png|uh oh | ||
DominoMaze Falling.png|Falling down the rabbit hole... | DominoMaze Falling.png|Falling down the rabbit hole... | ||
| Line 119: | Line 128: | ||
DominoMaze-TomatoHole Room2.png | DominoMaze-TomatoHole Room2.png | ||
DominoMaze-TomatoHole Room3.png|The room after entering with the lights on or killing the girl. | DominoMaze-TomatoHole Room3.png|The room after entering with the lights on or killing the girl. | ||
DominoMaze-TomatoHole guy1.png|The room after entering with less than 10 HP. | DominoMaze-TomatoHole guy1.png|The room after entering with less than 10 HP. You can recover (most of) your lost HP by interacting with the NPC with [[Yume 2kki:Effects#Boy|Boy]] or [[Yume 2kki:Effects#Gakuran|Gakuran]] effects equipped. | ||
DominoMaze-TomatoHole guy2.png | DominoMaze-TomatoHole guy2.png|With the Lantern effect. | ||
DominoMaze-TomatoHole guy3.png | DominoMaze-TomatoHole guy3.png | ||
DominoMaze-TomatoHole Bar.png|A nice view of the city. | DominoMaze-TomatoHole Bar.png|A nice view of the city. | ||
DominoMaze-TomatoHole Bar2.png|A secret | DominoMaze-TomatoHole Bar2.png|A secret construction sign. | ||
DominoMaze-TomatoHole VM1.png | DominoMaze-TomatoHole VM1.png | ||
DominoMaze-TomatoHole VM2.png|After using the [[Yume 2kki:Effects#Rainbow|Rainbow]] effect. | DominoMaze-TomatoHole VM2.png|After using the [[Yume 2kki:Effects#Rainbow|Rainbow]] effect. | ||
DominoMaze-TomatoHole VM3.png|After using the [[Yume 2kki:Effects#Lantern|Lantern]] effect. | DominoMaze-TomatoHole VM3.png|After using the [[Yume 2kki:Effects#Lantern|Lantern]] effect. | ||
DominoMaze-TomatoHole VM7.png|The | DominoMaze-TomatoHole VM7.png|The room after only using the Rainbow effect. | ||
DominoMaze-TomatoHole VM4.png|The | DominoMaze-TomatoHole VM4.png|The room after using the Lantern effect. | ||
DominoMaze-TomatoHole VM5.png | DominoMaze-TomatoHole VM5.png | ||
DominoMaze-TomatoHole VM6.png | DominoMaze-TomatoHole VM6.png | ||
DominoMaze-TomatoHole VM8.png | |||
DominoMaze-TomatoHole Vomit1.png|After getting a poisonous snack from the vending machine. | DominoMaze-TomatoHole Vomit1.png|After getting a poisonous snack from the vending machine. | ||
DominoMaze-TomatoHole Vomit2.png|The | DominoMaze-TomatoHole Vomit2.png|The room after getting a poisonous snack. | ||
DominoMaze-TomatoHole4.png | DominoMaze-TomatoHole4.png | ||
DominoMaze-TomatoHole Head1.png | DominoMaze-TomatoHole Head1.png | ||
Latest revision as of 05:34, 10 November 2024
| Domino Maze | |||||||||||||
|---|---|---|---|---|---|---|---|---|---|---|---|---|---|
 The red magic door from Stomach Maze. | |||||||||||||
| Basic Info | |||||||||||||
| Japanese Name(s) |
ドミノ迷路 | ||||||||||||
| Effects | None | ||||||||||||
| Collectibles | |||||||||||||
| Events | None | ||||||||||||
| Notable NPCs | Angry Dice, Kanashimi | ||||||||||||
| Other | |||||||||||||
| Connecting Areas | Stomach Maze ⛔ Board Game Islands ↩️ Wrinkled Fields ✨ | ||||||||||||
| Removed Connections | Flesh Paths World ⛔ | ||||||||||||
| BGM | 🔊 n3-RtH (No. 622A) 🔊 n3-RtH – Burnt photo | ||||||||||||
| Map ID | 1606 | ||||||||||||
| Version Added | 0.120b patch 4 | ||||||||||||
| Last Updated | 0.125c patch 1 | ||||||||||||
| Primary Author | Kong | ||||||||||||
| Contributing Author(s) | Nakatsu | ||||||||||||
| |||||||||||||


Domino Maze is an area accessible from the red magic door in Stomach Maze.
Features
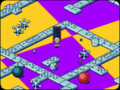
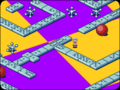
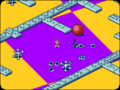
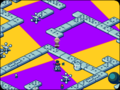
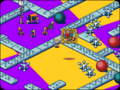
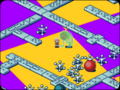
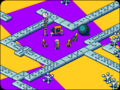
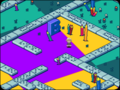
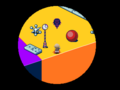
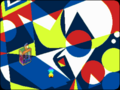
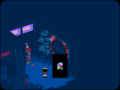
As the name describes, the Domino Maze is a labyrinthine world consisting of dominoes that serve as walls, over a purple and yellow ground. Jackstone pieces, colored balls, and dice are scattered around the place.
Arriving from Board Game Islands places you in an isolated section where you collect a banana on the ground. If you use the Dice effect and land a red eye, the red door will close and disappear while laughing when interacted with, making the place a dead end.
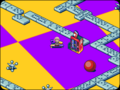
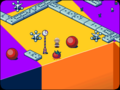
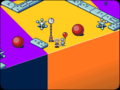
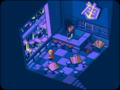
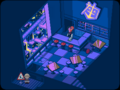
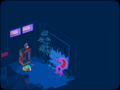
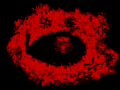
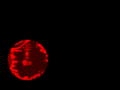
Arriving from Stomach Maze will place Urotsuki in the main part of the map. There are various points of interest throughout the map, such as a floating painting of a cat that doesn't react to any effects, and a hidden path that leads to a purple puddle on the ground, which gives Urotsuki a pogo stick to ride. Southeast of the entrance is a small hole, which is seemingly empty. Using the Glasses effect, however, will reveal some sort of ghostly creature coming out of the hole. Repeatedly using the Lantern effect on the hole may trigger an event that traps Urotsuki in an isolated area of the map with a TV on a bench surrounded by chairs, but only the chair in front of the TV can be sat on using the Child effect. As the Bat effect cannot be used in this world, your only choices are to use the Eyeball Bomb effect or wake up.
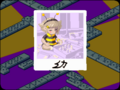
A little camera on legs can also be seen in various parts of the map. If it catches up to you, it will flash its bulb and take a picture of Urotsuki, which will deactivate whatever effect you are using, with a few exceptions. It reacts to the Marginal and Chainsaw effects by running away. It will turn transparent and walk away if using the Stretch effect, and using the Child effect around it will give Urotsuki a bee costume. The camera will drop photos on the ground with each picture it takes, most of which are black and unable to be interacted with. Using the Child effect will drop a blue photo, and interacting with it will show Urotsuki in her bee costume playing with some dominoes. If you are riding the pogo stick, it will drop a pink photo that shows Urotsuki on the pogo stick. Rarely, the camera may drop a red photo, which shows a disturbing image of a girl with a deformed face. Equipping the Lantern effect will make the camera run away, but catching up to it and using it will kill it, leaving behind a burned photo with a distorted image.
Within the center of the maze is a giant, square hole. To the south of the hole is a circle tile with music notes on the ground. If you use the Trombone effect while standing on the circle, applause will play and a ladder will descend from the sky, acting as an entrance to Wrinkled Fields.
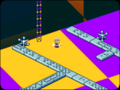
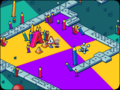
To the left of the maze, there is a path leading to a small side area. The area is a field of flowers with colored pencils as well as some large letters of the alphabet in the ground. This leads to a dead end along with a construction sign suggesting more will be added to this area in the future.
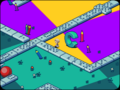
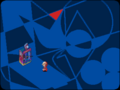
To the north of the hole, there is an attraction that changes depending on your in-game season. If it is Winter, Spring or Summer a grey figure with a balloon will be standing by the edge of the hole. If it is Fall, a tomato will be by the edge instead, and the figure's balloon will occasionally fly around the map. If you chainsaw the grey figure, an event will occur where a dark floating head will appear and push Urotsuki into the hole. Upon area transition, there is a chance that Urotsuki will be teleported to two completely different areas, both of which are one-way.
Tomato Hole (Tomato)
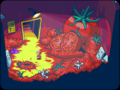
The first area is a tomato-themed area. The starting room has a large tomato which cushioned Urotsuki's fall, but caused half of her side to be splattered with tomato juice. This is a cosmetic effect and can be deactivated by choosing a new effect in the menu. There is also a Kanashimi in this area. To the north are stairs leading to a stairwell.
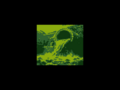
In the stairwell is a light switch. If you turn off the light and return to the first area, the room will be dark except for a small green hole to the right. To access this area you need at least 10 HP, which you can increase by eating from the Vending Machines. If you use the Child, Fairy or Dice effect and walk up to the hole, you will find a small artist's studio with an NPC inside. The NPC appears to be a girl made out of pizza. Interacting with her will give you Menu Theme #83. She reacts to the Marginal and Chainsaw effects by running away in a frightened manner, and chainsawing her might give better odds of getting to the other area after falling through the hole. Using the Glasses effect will transform her into a floating slice of pizza.
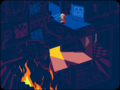
Back to the stairwell, there's an entrance leading to a bar staffed by a tall figure with a glass of tomato juice for a head. Up further is a second part of the area. The path to the next area is blocked off by traffic cones and a fire rages under it. But to the side is an entrance to a small room that contains only a vending machine. It is not recommended to interact with it, as it has a chance of giving you a poisonous snack that lowers your HP to 5. You can recover your HP by turning off the light and entering the hole in the tomato room, then interacting with the head NPC here with the Boy or Gakuran effects equipped. In this case, you'll only have lost 5 HP overall. If you use the Rainbow effect, the area will change color. If you use the Lantern effect, the area will change further. If you leave and come back, the area will be different and there will be a new NPC there. Its appearance will be different depending on whether or not you used the Lantern effect. If you use the Polygon effect, it transforms into a broken image. To the left of the vending machine in this new room is a locked door.
Interacting with the light switch and returning to the tomato room has a small chance on screen transition to cause a loud, abrupt event (jumpscare warning!) showing the tomato room in a glitchy and distorted manner. The switch seemingly needs to be interacted with on each attempt. If this event occurs, soon after the player will find themselves in the Tomato Hole (Head) area, making this method potentially preferable over waking up and backtracking to the balloon NPC should the goal be to reach this area.
Tomato Hole (Head)
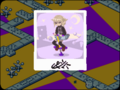
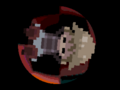
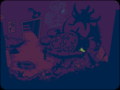
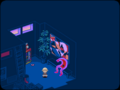
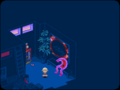
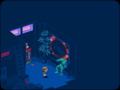
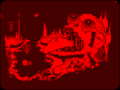
The second area is a strange area with a giant head sticking out in the room. Urotsuki's lifeless body will be lying on the ground after the fall, but another Urotsuki, wearing the Child effect, will descend from the stairs. At this point, you'll gain control over the child version of Urotsuki. You cannot access the menu in this state. Interacting with the body of the Urotsuki on the ground will have her vocalize refusal. The only thing to do in this area is to go inside the mouth of the giant head. Inside the mouth is a snowglobe, and interacting with it from behind will take you to a strange monochromatic room. The only inhabitant of this room is a girl staring outside the window. When interacting with her, a fullscreen event plays. She turns to Urotsuki to reveal one side of her face is completely covered in blood, her eye is gouged out and there are a pair of scissors embedded in her head. A laughing soundbyte plays as the player looks at her. Once the player exits out of this screen, the laughing sound will continuously play as the screen wobbles and gains a red, ominous filter. On the table to the left are some red flowers, and interacting with them will give you Menu Theme #84. The menu theme is only available at this point, and stops becoming available when further progress in the event is made.
In order to escape from this area, you must take the lantern by the table next to the girl. By doing so, a hole will open up in the carpet. You can optionally burn the girl with the lantern as well. If you do, she will drop a book which, upon interaction, unlocks a book in the Library (found two shelves to the left of the book leading to Memory Garden). Once you return to the main area, the snowglobe has been shattered. There is nothing you can do other than interact with Urotsuki's body. The floating head will appear again over the body, and Urotsuki will immolate her own corpse. The screen turns black and the sound of screams can be heard. This will cause Urotsuki to forcefully wake up.
Directions
With the Child effect, and a 1/2 chance per dream session, if the day/times slept counter on the PC is an even number before going to bed:
- The Nexus → Heart World → Valentine Land → Cyber Maze → Sea Lily World → Mutant Pig Farm → Stomach Maze → Domino Maze
With the Child and Trombone effects, and a 1/2 chance per dream session if the day/times slept counter on the PC is an even number before going to bed:
- The Nexus → Ornamental Plains → Wrinkled Fields → Domino Maze
With the Child and Bat effects, and a 1/2 chance per dream session if the day/times slept counter on the PC is an odd number before going to bed:
- The Nexus → Garden World → Board Game Islands → Domino Maze (Isolated)
OR
- The Nexus → Marijuana Goddess World → Dark Room → Sewers → Monochrome Feudal Japan → Bishop Cathedral → Board Game Islands → Domino Maze (Isolated)
Trivia

- If the map is accessed without the Child effect (only possible through Debug Mode), the screen will go dark after a few seconds, and then the map will become glitched and tinted red. The player is unable to move in this state. Pressing the confirm key will cause an error message written in binary to appear, which translates to "kid not found" when decoded. After this, pressing any key will take you directly to the title screen.
- This also occurs in Board Game Islands.
- Before version 0.125c patch 1, equipping the Child effect in the main area softlocked the game, which was not intended.
- The main area of this world was previously only accessible from Flesh Paths World. The connection was changed to Stomach Maze in version 0.125c patch 1.
- The light switch event in the Tomato Hole is a reference to the Uboa event from Yume Nikki.
Gallery
The red magic door from Board Game Islands.
The ladder to Wrinkled Fields.
:)
where's the cartoons channel >:(


Spoiler Image Gallery
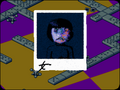
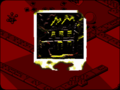
The photo that the Paparazzi leaves after being burned.
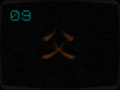
The TV's only channel.
uh oh
Falling down the rabbit hole...
Or tomato hole...?
The pizza girl that gives you Menu Theme #83.
The room after entering with the lights on or killing the girl.
With the Lantern effect.
A nice view of the city.
A secret construction sign.
After using the Rainbow effect.

After using the Lantern effect.
The room after only using the Rainbow effect.
The room after using the Lantern effect.

After getting a poisonous snack from the vending machine.
The room after getting a poisonous snack.
"I had a little trouble with the scissors."
Interacting with the flowers on the left will grant you Menu Theme #84.


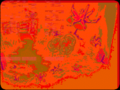
 (Blank map of Domino Maze., https://yume.wiki/images/d/de/Y2 DominoMaze Map.png) + and
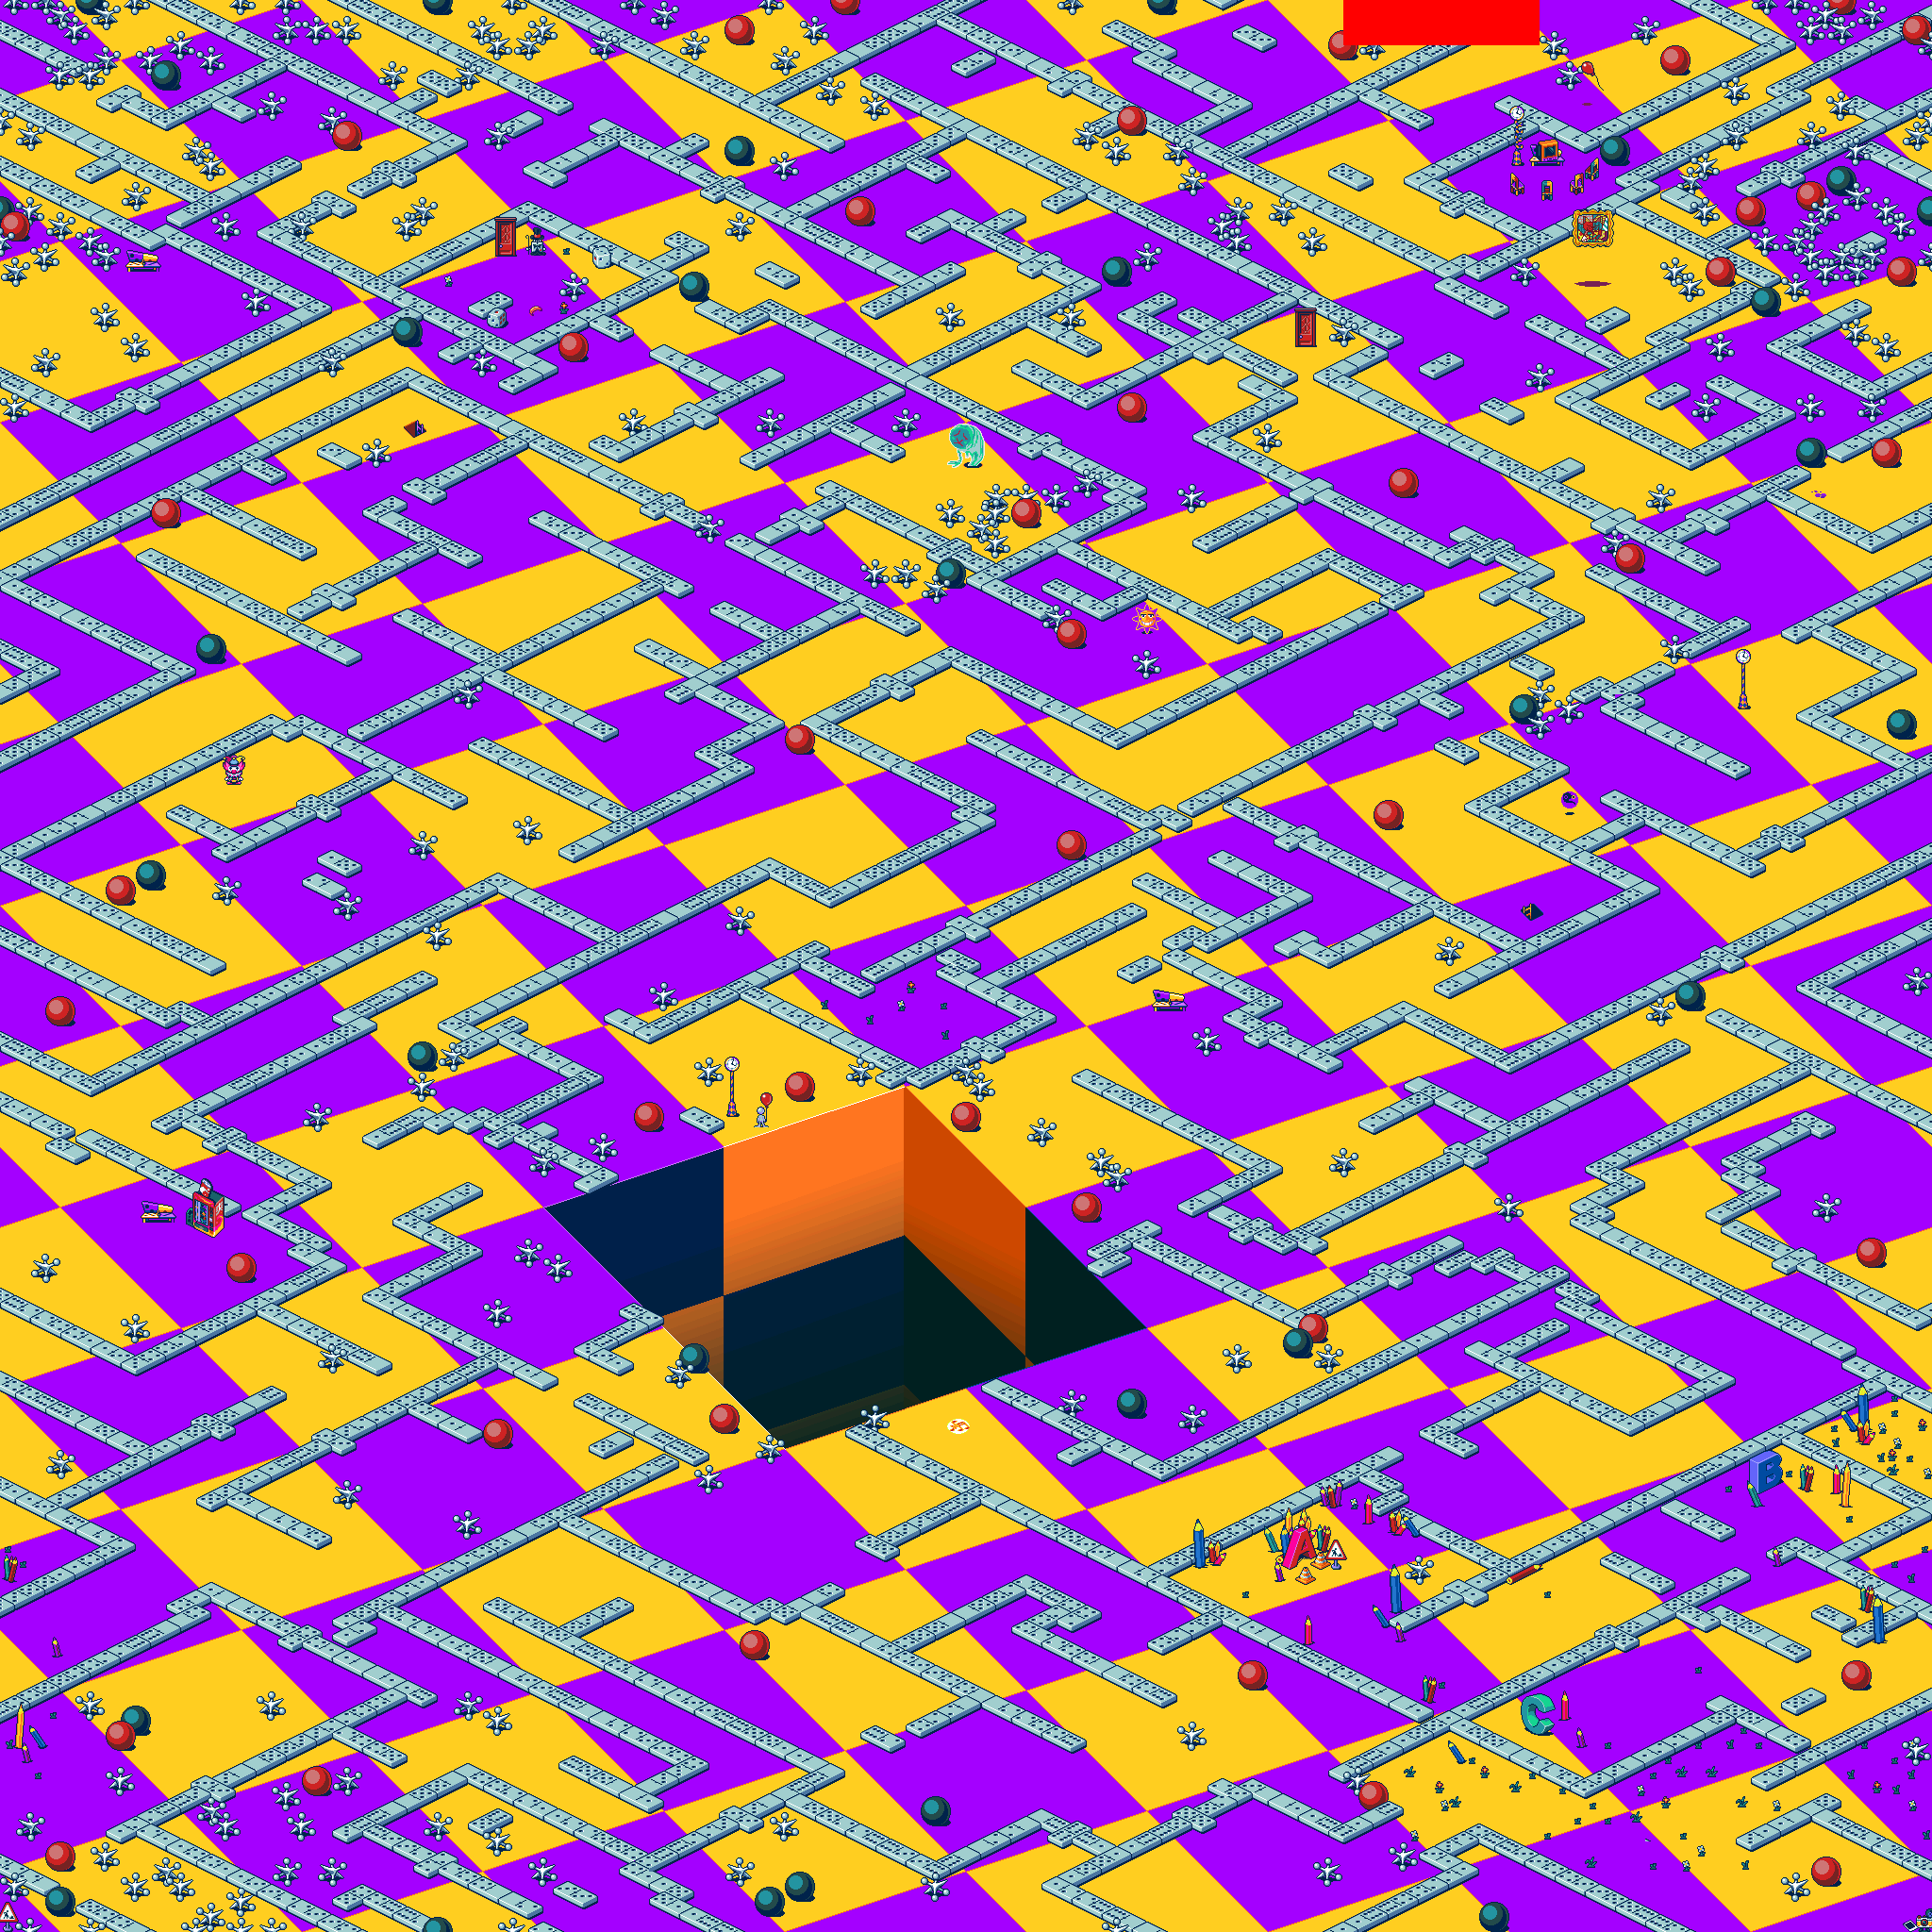
 (Annotated map of Domino Maze. (Background darkened for visibility.), https://yume.wiki/images/4/4b/Dominomaze.png) +
-3B-20https:-2F-2Fyume.wiki-2Fimages-2F4-2F4b-2FDominomaze.png)
- a100fc
- fcce23