Kinoseidon (talk | contribs) (Add images for Nature Broadcast and Restful Sleep) |
|||
| (18 intermediate revisions by 4 users not shown) | |||
| Line 3: | Line 3: | ||
===After Hours=== | ===After Hours=== | ||
[[File:CU Hall of Malignant Statues trap.png|thumb]] | |||
'''Location:''' [[Collective Unconscious:Hall of Malignant Statues|Hall of Malignant Statues]] | '''Location:''' [[Collective Unconscious:Hall of Malignant Statues|Hall of Malignant Statues]] | ||
'''Prompt:''' | '''Prompt:''' Interact with the potted plant just east of the drinky bird statue to push it, then stand in the spot where it previously stood and wait for about 6.5 uninterrupted seconds.<ref group="note" name="After Hours timer">Walking away from the position that [[Collective Unconscious:Minnatsuki|Minnatsuki]] is required to wait in during the After Hours event will reset the hidden timer counting down the time spent waiting there, as the only adjacent tile without collision is programmed to do so when it is stepped on. Additionally, there are many actions, including some that could be used to bypass this tile, that are disabled while Minnatsuki is standing in this position, including opening the main menu, opening the gestures menu, returning from the spirit world, and using [[Collective Unconscious:Eidola|eidolon]] actions. Other actions, such as turning in place, will not reset the timer.</ref> | ||
'''Description:''' | '''Description:''' Pushing the potted plant will cause it to fall off of the edge of the floor into the void below. After about 6.5 uninterrupted seconds of Minnatsuki waiting in the plant's former position has passed,<ref group="note" name="After Hours timer" /> a startling noise will suddenly play and [[Collective Unconscious:Minor Characters#Darcy|Darcy]], cloaked in shadow, will appear a few paces to the west of Minnatsuki and charge at them, unequipping any eidola Minnatsuki currently has equipped while shoving them into the same pit that the potted plant was pushed into. The screen will then fade to black. Shortly after, it will fade in to a view of Hall of Malignant Statues, now cast in a dim orange light. Here, Minnatsuki will find themselves trapped within a square enclosure of stanchions, unable to escape other than through the use of the [[Collective Unconscious:Eidola#Umbra|Umbra]] eidolon or by returning from the spirit world. On a pathway just north of where Minnatsuki is imprisoned, a simple, white humanoid statue can be seen running west across the breadth of the world in a perpetual loop. | ||
{{clear}} | {{clear}} | ||
| Line 31: | Line 32: | ||
'''Prompt:''' Interact with the red glowing hole in one of the walls of the world. | '''Prompt:''' Interact with the red glowing hole in one of the walls of the world. | ||
'''Description:''' Upon interaction, | '''Description:''' Upon interaction, a fullscreen animation will play of a pink heart symbol pulsating in time to a short electronic music loop. With each beat of the heart, an electrocardiogram reading flashes into view behind it. Two rows of stylized red, pink, and orange arms scroll by endlessly above and below the heart. with the top row scrolling to the right, and the bottom row scrolling to the left. Pressing the cancel key will dismiss the event. | ||
{{clear}} | {{clear}} | ||
===Bench POV=== | ===Bench POV=== | ||
[[File:Overgrownrailway9.png|thumb]] | |||
'''Location:''' [[Collective Unconscious:Overgrown Railway|Overgrown Railway]] | '''Location:''' [[Collective Unconscious:Overgrown Railway|Overgrown Railway]] | ||
'''Prompt:''' Sit on the bench next to the large tree. | '''Prompt:''' Sit on the bench next to the large tree. | ||
'''Description:''' When sitting on the bench, | '''Description:''' When sitting on the bench, the point of view will switch to Minnatsuki's view from the bench of the train tracks. Pressing interact will cause Minnatsuki to look up and see the sky above. Interacting again will restore the normal top-down view of Minnatsuki on the bench. To view the event again, simply get off the bench and get back on. | ||
{{clear}} | {{clear}} | ||
| Line 51: | Line 53: | ||
===Blood Drive=== | ===Blood Drive=== | ||
[[File:CU Blood Drive syringe full.png|thumb]] | |||
'''Location:''' [[Collective Unconscious:Blood Drive|Blood Drive]] | '''Location:''' [[Collective Unconscious:Blood Drive|Blood Drive]] | ||
'''Prompt:''' Kill any | '''Prompt:''' Kill any [[Collective Unconscious:Minor Characters#Nurse Dolls|Nurse Doll]] by using the Soulfire eidolon. | ||
'''Description:''' Killing any of the | '''Description:''' Killing any of the Nurse Dolls in this area will cause the remaining Nurse Dolls to enter an aggressive state, wherein they will chase after Minnatsuki while wielding syringes. If Minnatsuki is caught by one of them, a fullscreen animation will play of a syringe filling up with blood, after which Minnatsuki will be forcibly returned to their room from the spirit world. | ||
{{clear}} | {{clear}} | ||
| Line 84: | Line 87: | ||
'''Description:''' Killing the Miner Grandpa outside the shop will initiate a chaser event. If the player is caught, Minnatsuki will be transported to a looping hallway that will eventually lead to another area. | '''Description:''' Killing the Miner Grandpa outside the shop will initiate a chaser event. If the player is caught, Minnatsuki will be transported to a looping hallway that will eventually lead to another area. | ||
{{clear}} | |||
===The Clock=== | |||
[[File:CU Loading Zone the clock normal.png||thumb]] | |||
'''Location:''' [[Collective Unconscious:Loading Zone|Loading Zone]] | |||
'''Prompt:''' Find a blank, black screen surrounded by four other screens with small, animated clocks displayed on them. Interact with the backside of the blank screen at its center. | |||
'''Description:''' After interacting with the backside of the screen, the surrounding small clocks will disappear, a drum beat will play, and a giant, mostly monochrome analog clock will appear on the screen. The clock features numbers from various different numeral systems on its face, including Roman, Arabic, and Mayan, among others. Additionally, it has three hands that spin quickly and asynchronously, including a cyan seconds hand. After viewing the event for approximately 24 seconds, several changes will suddenly occur. The background will become a scrolling, wavy pattern, the music will change to incorporate synthesizers in addition to the previously playing drum beat, and the hands will spin even more rapidly. Pressing the 'Z' key will dismiss the event and place Minnatsuki elsewhere within Loading Zone. | |||
{{clear}} | {{clear}} | ||
| Line 121: | Line 133: | ||
'''Description:''' Upon the girl's death, a large, charred mess is left where she was. Leaving the cocoon will reveal that the entire world appears darkened and dead. The [[Collective Unconscious:Eidola#Lumen|Lumen]] and [[Collective Unconscious:Eidola#Soulfire|Soulfire]] eidola help somewhat with the darkness. The world will remain in this state for the remainder of the current session in the spirit world. | '''Description:''' Upon the girl's death, a large, charred mess is left where she was. Leaving the cocoon will reveal that the entire world appears darkened and dead. The [[Collective Unconscious:Eidola#Lumen|Lumen]] and [[Collective Unconscious:Eidola#Soulfire|Soulfire]] eidola help somewhat with the darkness. The world will remain in this state for the remainder of the current session in the spirit world. | ||
{{clear}} | |||
===The Doppelganger=== | |||
'''Location:''' [[Collective Unconscious:The Underneath|The Underneath]] | |||
'''Prompt:''' Unlock the gate in the Underneath and enter the room past it. | |||
'''Description:''' After interacting with the four computer terminals on the way to the gate, Interacting with a switch will allow Minnatsuki to open the gate. In the room past it, a strange, black smiling creature stands still in the center. Interacting with it will suddenly make you take control of it, leaving Minnatsuki. You can leave the room with it, but the camera will not follow. You're left with Minnatsuki's motionless body as a window interface appears above, where you control the cursor and press the "X" key, causing Minnatsuki to forcibly return back to their room from the spirit world. | |||
{{clear}} | {{clear}} | ||
| Line 129: | Line 149: | ||
'''Description:''' | '''Description:''' | ||
{{clear}} | |||
===The Eye=== | |||
'''Location:''' [[Collective Unconscious:Artery Maze|Artery Maze]] | |||
'''Prompt:''' Kill the eye using the [[Collective Unconscious:Eidola#Soulfire|Soulfire]] eidolon. | |||
'''Description:''' There is a giant eye in the very center of Artery maze, in a heart-shaped cavity. Killing it with the [[Collective Unconscious:Eidola#Soulfire|Soulfire]] eidolon will cause the heartbeat BGM to quicken and every NPC will become hostile, but it also opens up every connection (other than [[Collective Unconscious:Blood Drive|Blood Drive]]). | |||
{{clear}} | {{clear}} | ||
| Line 145: | Line 173: | ||
'''Prompt:''' Wait in the exterior area without leaving for six uninterrupted minutes. | '''Prompt:''' Wait in the exterior area without leaving for six uninterrupted minutes. | ||
'''Description:''' After six minutes have passed, the background music will change into distorted noise and a fullscreen image of [[Collective Unconscious:Minor Characters#Hemlock|Hemlock]], a red and yellow rabbit-like creature that somewhat resembles [[Collective Unconscious:Minor Characters#Honey|Honey]], will slowly begin to fade in. It has black, empty eyes, a big smile, and a bleeding hole in its forehead. After the image fully comes into view, a distorted roaring can be heard drowning out faint screams. Following this, Minnatsuki will be automatically returned from the spirit world. | '''Description:''' After six minutes have passed, the background music will change into distorted noise and a fullscreen image of [[Collective Unconscious:Minor Characters#Hemlock|Hemlock]], a red and yellow rabbit-like creature that somewhat resembles [[Collective Unconscious:Minor Characters#Honey|Honey]], will slowly begin to fade in. It has black, empty eyes, a big smile, and a bleeding hole in its forehead. After the image fully comes into view, a distorted roaring sound can be heard drowning out faint screams. Following this, Minnatsuki will be automatically returned from the spirit world. | ||
{{clear}} | {{clear}} | ||
| Line 163: | Line 191: | ||
'''Description:''' Upon entering the rooftop, the Flower Girl can be found at the edge, with vines tangling the surroundings. Upon interacting with the Flower Girl, a close-up of her will appear before she disappears. If the Youth or Spectral eidola are equipped before entering the rooftop, and it is the player's first time entering the rooftop upon visiting the area, then the rooftop will change to have a white sky and no vines, with the Flower Girl still there. The close-up of the Flower Girl in this rooftop variant is slightly different, bearing a budding flower instead of a blooming one. | '''Description:''' Upon entering the rooftop, the Flower Girl can be found at the edge, with vines tangling the surroundings. Upon interacting with the Flower Girl, a close-up of her will appear before she disappears. If the Youth or Spectral eidola are equipped before entering the rooftop, and it is the player's first time entering the rooftop upon visiting the area, then the rooftop will change to have a white sky and no vines, with the Flower Girl still there. The close-up of the Flower Girl in this rooftop variant is slightly different, bearing a budding flower instead of a blooming one. | ||
{{clear}} | |||
===The Forest Clearing=== | |||
'''Location:''' [[Collective Unconscious:GBC Village|GBC Village]] | |||
'''Prompt:''' Enter the clearing in GBC Village. | |||
'''Description:''' There's a rocky clearing filled with holes to the east path of the village. The BGM will fade out, and you may encounter a priestess here. There's a 1/16 chance that when you enter here, the priestess will be gone and a blood splatter will be present next to one of the holes by the far end of the clearing. If you have seen the Lantern Man in the GBC Village dungeon, you will be guaranteed to see this variant. | |||
{{clear}} | {{clear}} | ||
| Line 179: | Line 215: | ||
'''Description:''' As Minnatsuki keeps moving right, the sky in the background will lighten up. Midway through (and only midway through), the entrance to [[Collective Unconscious:Psyche|Psyche]] becomes available. Once Minnatsuki has gone far right enough, the moon will appear in the sky, and standing below it will cause a droplet to fall from it, which brightens the entire world. | '''Description:''' As Minnatsuki keeps moving right, the sky in the background will lighten up. Midway through (and only midway through), the entrance to [[Collective Unconscious:Psyche|Psyche]] becomes available. Once Minnatsuki has gone far right enough, the moon will appear in the sky, and standing below it will cause a droplet to fall from it, which brightens the entire world. | ||
{{clear}} | |||
===The Giant Teleporter=== | |||
'''Location:''' [[Collective Unconscious:Blue Forest City|Blue Forest City]] | |||
'''Prompt:''' | |||
'''Description:''' | |||
{{clear}} | {{clear}} | ||
| Line 208: | Line 252: | ||
===Haunted Computer=== | ===Haunted Computer=== | ||
[[File:CU Bloodsoaked Office haunted view.png|thumb]] | |||
'''Location:''' [[Collective Unconscious:Bloodsoaked Office|Bloodsoaked Office]] | '''Location:''' [[Collective Unconscious:Bloodsoaked Office|Bloodsoaked Office]] | ||
'''Prompt:''' | '''Prompt:''' Find the small square room with gray flooring and a single computer. Then, equip the Spectral eidolon and interact with the computer monitor from the front. | ||
'''Description:''' Interacting with the computer will | '''Description:''' Upon equipping the Spectral eidolon, the computer monitor's screen will turn red. Interacting with the computer monitor from the front with the Spectral eidolon equipped will cause a sound to play as the background music is replaced with sporadic crackling and a fullscreen view of the monitor appears. From this view, the monitor now displays an image of two of the figures seen throughout Bloodsoaked Office looking at two of the pink eyeballs which can be seen above Minnatsuki's head while the Spectral eidolon is equipped sitting on the floor in a puddle of blood. Pressing the interact key will play a lower pitched version of the sound heard when the monitor is interacted with and dismiss the event. | ||
{{clear}} | {{clear}} | ||
===Haunted Console=== | ===Haunted Console=== | ||
[[File:Micro Forest 10.png|thumb]] | |||
'''Location:''' [[Collective Unconscious:Micro Forest|Micro Forest]] | '''Location:''' [[Collective Unconscious:Micro Forest|Micro Forest]] | ||
| Line 258: | Line 304: | ||
===I've Been Known to Waltz=== | ===I've Been Known to Waltz=== | ||
[[File:CU Hall of Malignant Statues waltz close.png|thumb]] | |||
'''Location:''' [[Collective Unconscious:Hall of Malignant Statues|Hall of Malignant Statues]] | '''Location:''' [[Collective Unconscious:Hall of Malignant Statues|Hall of Malignant Statues]] | ||
'''Prompt:''' | '''Prompt:''' Attack Darcy using the Soulfire eidolon in [[Collective Unconscious:Square Garden|Square Garden]]. Then, without being caught by the shadowy form of Darcy that will appear and chase after Minnatsuki, interact with the pedestal in Square Garden to escape to Hall of Malignant Statues.<ref group="note" name="IBKTW condition">The I've Been Known to Waltz event will not activate if Minnatsuki escapes the chaser in [[Collective Unconscious:Square Garden|Square Garden]] by using the [[Collective Unconscious:Eidola#Umbra|Umbra]] eidolon, or by returning from the spirit world and subsequently making their way back to [[Collective Unconscious:Hall of Malignant Statues|Hall of Malignant Statues]].</ref> | ||
'''Description:''' When Minnatsuki escapes to Hall of Malignant Statues from Square Garden,<ref group="note" name="IBKTW condition" /> the area's layout will have changed significantly. Minnatsuki will emerge from a desaturated cuboid topiary tree which stands at the southern end of a short, vertical passage which is bounded by invisible barriers. Beyond the confines of the traversable pathway, four pedestals supporting marble sculptures stand, arranged into a square. Each sculpture is of a human figure, except for the solid marble slab in the northeastern corner. The area is shrouded in nearly pitch-black darkness, save for a small spotlight at the northern edge of the passage, under which [[Collective Unconscious:Minor Characters#Krarav|Krarav]] and Darcy can be seen dancing to waltz music together. Surrounding the spotlight are five figures completely obscured by the darkness, save for their glowing white eyes, who will watch Minnatsuki's movement and occasionally turn in place. | |||
Upon interacting with the edge of the spotlight at the middle, rain will begin to fall, and a fullscreen animation, in which Krarav and Darcy dance under the spotlight while two of the shadowy figures can be seen watching from behind, will play. Upon pressing the interact key to dismiss the animation, Minnatsuki will then be transported to an isolated section of Square Garden which can only be escaped by using the Umbra eidolon or returning from the spirit world. | |||
{{clear}} | {{clear}} | ||
| Line 279: | Line 328: | ||
'''Location:''' [[Collective Unconscious:Heart World|Heart World]] | '''Location:''' [[Collective Unconscious:Heart World|Heart World]] | ||
'''Prompt:''' | '''Prompt:''' Interact with the life support machine. | ||
'''Description:''' | '''Description:''' Interacting with the life support machine will cause it to become unplugged from the wall while the electrogram on the monitor flatlines. After this, the world will fade to black and suddenly, all of the large heart symbol-shaped objects in the area will be replaced by anatomically accurate hearts. A heartbeat can be heard in the background, and it will quicken over time. In addition, not only will the heart-shaped NPC that roamed the area originally become aggressive and chase after Minnatsuki, but additional copies of it—also in an aggressive state—will appear throughout the area as well, and their movement will speed up with the heartbeat ambience. If caught, Minnatsuki is taken to the path just outside the main area and the event will reset, allowing for another try. While the event is active, the electric gate northeast of the life support machine will also become disabled, allowing access to [[Collective Unconscious:Flesh Walls Forest|Flesh Walls Forest]] if the gate is reached quickly enough. | ||
{{clear}} | {{clear}} | ||
| Line 305: | Line 354: | ||
'''Prompt:''' Kill the NPC with the white mask. | '''Prompt:''' Kill the NPC with the white mask. | ||
'''Description:''' Minnatsuki will be transported to a side view of a slope surrounded by pillars. The only option at this point is to walk uphill, pushing a heavy rock in search of atonement. Ascending for enough time leads to a small chamber shaped like an eye, featuring a door obstructed from further passage. The only option at this point is to | '''Description:''' Minnatsuki will be transported to a side view of a slope surrounded by pillars. The only option at this point is to walk uphill, pushing a heavy rock in search of atonement. Ascending for enough time leads to a small chamber shaped like an eye, featuring a door obstructed from further passage. The only option at this point is to return from the spirit world or use the Umbra eidolon to escape. | ||
{{clear}} | {{clear}} | ||
| Line 320: | Line 369: | ||
===Nature Broadcast=== | ===Nature Broadcast=== | ||
[[File:Cu hometown tv1.png|thumb]] | |||
'''Location:''' [[Collective Unconscious:Hometown|Hometown]] | '''Location:''' [[Collective Unconscious:Hometown|Hometown]] | ||
| Line 339: | Line 389: | ||
'''Location:''' [[Collective Unconscious:Dilapidated Complex|Dilapidated Complex]] | '''Location:''' [[Collective Unconscious:Dilapidated Complex|Dilapidated Complex]] | ||
'''Prompt:''' Walk to the end of the Derelict Catwalk. | '''Prompt:''' Walk to the eastern end of the Derelict Catwalk subarea. | ||
'''Description:''' The red eyes of a large black creature that looms over the edge of the catwalk will flash before the screen slowly fades to black, transporting Minnatsuki to [[Collective Unconscious:Dark Spire Hell|Dark Spire Hell]]. | '''Description:''' The red eyes of a large black creature that looms over the edge of the catwalk will flash before the screen slowly fades to black, transporting Minnatsuki to [[Collective Unconscious:Dark Spire Hell|Dark Spire Hell]]. | ||
| Line 386: | Line 436: | ||
===Restful Sleep=== | ===Restful Sleep=== | ||
[[File:Cu hometown sleep.png|thumb|Good night, Minnatsuki.]] | |||
'''Location:''' [[Collective Unconscious:Hometown|Hometown]] | '''Location:''' [[Collective Unconscious:Hometown|Hometown]] | ||
| Line 404: | Line 455: | ||
'''Location:''' [[Collective Unconscious:Isolation|Isolation]] | '''Location:''' [[Collective Unconscious:Isolation|Isolation]] | ||
'''Prompt:''' | '''Prompt:''' Interact with the statue of a torso in Isolation. | ||
'''Description:''' | '''Description:''' Minnatsuki will be trapped in the room until either returning from the spirit world or using the Umbra eidolon. | ||
{{clear}} | {{clear}} | ||
| Line 433: | Line 484: | ||
'''Description:''' Hadie and Minnatsuki will both sit on the nearby balcony bench as Hadie smokes. The event can be exited at any time by pressing the 'X' key. | '''Description:''' Hadie and Minnatsuki will both sit on the nearby balcony bench as Hadie smokes. The event can be exited at any time by pressing the 'X' key. | ||
Viewing this event unlocks the [[Collective Unconscious:Book Covers#Serenity and Smoke|"Serenity and Smoke" Book Cover]]. | Viewing this event unlocks the [[Collective Unconscious:Book Covers#Serenity and Smoke|"Serenity and Smoke" Book Cover]]. Minnatsuki will also be granted 500 Luna by Hadie after exiting the event, but only after the first time the event is viewed in each spirit world session. | ||
{{clear}} | {{clear}} | ||
| Line 443: | Line 494: | ||
'''Description:''' A small scene showing some of the heads populating the world will appear, showcasing them dancing back and forth to a crackling recording of piano music. The cutscene can be dismissed by pressing the 'X' key. During this event, using some of the directional keys will allow the player to play a simple drum kit along with the music. Left/'A' is a bass drum, Up/'W' is a hi-hat, and right/'D' is a snare drum. | '''Description:''' A small scene showing some of the heads populating the world will appear, showcasing them dancing back and forth to a crackling recording of piano music. The cutscene can be dismissed by pressing the 'X' key. During this event, using some of the directional keys will allow the player to play a simple drum kit along with the music. Left/'A' is a bass drum, Up/'W' is a hi-hat, and right/'D' is a snare drum. | ||
{{clear}} | |||
===The Squid God=== | |||
'''Location:''' [[Collective Unconscious:Eternal Communion|Eternal Communion]] | |||
'''Prompt:''' Interact with the Squid God in the chapel of Eternal Communion. | |||
'''Description:''' A full-screen animation of text and different images of squids will play rapidly. After this, Minnatsuki will be transported to [[Collective Unconscious:Squid Paradise|Squid Paradise]]. | |||
{{clear}} | {{clear}} | ||
| Line 467: | Line 526: | ||
'''Description:''' | '''Description:''' | ||
{{clear}} | {{clear}} | ||
| Line 547: | Line 557: | ||
'''Location:''' [[Collective Unconscious:Untamed Forest|Untamed Forest]] | '''Location:''' [[Collective Unconscious:Untamed Forest|Untamed Forest]] | ||
'''Prompt:''' | '''Prompt:''' Torch any tree in the area with the [[Collective Unconscious:Eidola#Soulfire|Soulfire]] eidolon. | ||
'''Description:''' | '''Description:''' Every tree in the forest will begin to chase down Minnatsuki. Being caught by a tree during this event will black out the screen and play a crushing sound before Minnatsuki is forced out of the spirit world and returned to their room. | ||
{{clear}} | {{clear}} | ||
| Line 619: | Line 629: | ||
This event was present in version 0.1.0 and removed in version 0.2.0, along with much of Orchid Haven. | This event was present in version 0.1.0 and removed in version 0.2.0, along with much of Orchid Haven. | ||
==Notes== | |||
<references group="note" /> | |||
[[Category:Collective Unconscious Guides]] | [[Category:Collective Unconscious Guides]] | ||
Latest revision as of 12:27, 18 November 2024
| This page is missing information. You can help YumeWiki by expanding it. Details: Add pictures, descriptions, and requirements for Collective Unconscious events. |
Like Yume Nikki and many of its fangames, there are many events found throughout Collective Unconscious that Minnatsuki may encounter while exploring the spirit world. Here is a list of all of the current events that can be found, along with their individual locations, their requirements to activate, and what they may unlock when activated.
After Hours
Location: Hall of Malignant Statues
Prompt: Interact with the potted plant just east of the drinky bird statue to push it, then stand in the spot where it previously stood and wait for about 6.5 uninterrupted seconds.[note 1]
Description: Pushing the potted plant will cause it to fall off of the edge of the floor into the void below. After about 6.5 uninterrupted seconds of Minnatsuki waiting in the plant's former position has passed,[note 1] a startling noise will suddenly play and Darcy, cloaked in shadow, will appear a few paces to the west of Minnatsuki and charge at them, unequipping any eidola Minnatsuki currently has equipped while shoving them into the same pit that the potted plant was pushed into. The screen will then fade to black. Shortly after, it will fade in to a view of Hall of Malignant Statues, now cast in a dim orange light. Here, Minnatsuki will find themselves trapped within a square enclosure of stanchions, unable to escape other than through the use of the Umbra eidolon or by returning from the spirit world. On a pathway just north of where Minnatsuki is imprisoned, a simple, white humanoid statue can be seen running west across the breadth of the world in a perpetual loop.
Agoraphobia
Location: Agoraphobia
Prompt: Attempt to leave while using the Child or Spectral eidola.
Description: it's a lot.
Ancient Grove
Location: Deep Woods
Prompt: Interact with the orb in the Ancient Grove subarea of Deep Woods.
Description: Upon interaction, the orb will crack. The top wall will then disappear, revealing a mummified body and a bloody path leading to Basalt Fields.
Beating Heart
Location: Flesh Walls Forest
Prompt: Interact with the red glowing hole in one of the walls of the world.
Description: Upon interaction, a fullscreen animation will play of a pink heart symbol pulsating in time to a short electronic music loop. With each beat of the heart, an electrocardiogram reading flashes into view behind it. Two rows of stylized red, pink, and orange arms scroll by endlessly above and below the heart. with the top row scrolling to the right, and the bottom row scrolling to the left. Pressing the cancel key will dismiss the event.
Bench POV
Location: Overgrown Railway
Prompt: Sit on the bench next to the large tree.
Description: When sitting on the bench, the point of view will switch to Minnatsuki's view from the bench of the train tracks. Pressing interact will cause Minnatsuki to look up and see the sky above. Interacting again will restore the normal top-down view of Minnatsuki on the bench. To view the event again, simply get off the bench and get back on.
Bike Ride
Location: April
Prompt: Buy a bike from the bike store in April.
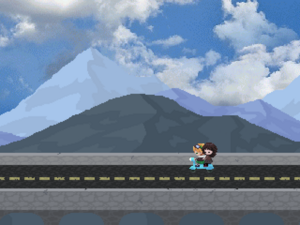
Description: Upon buying a bike from the store, Minnatsuki can ride a bike around the map at a higher speed.
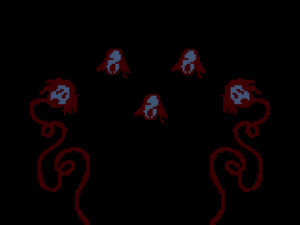
Blood Drive
Location: Blood Drive
Prompt: Kill any Nurse Doll by using the Soulfire eidolon.
Description: Killing any of the Nurse Dolls in this area will cause the remaining Nurse Dolls to enter an aggressive state, wherein they will chase after Minnatsuki while wielding syringes. If Minnatsuki is caught by one of them, a fullscreen animation will play of a syringe filling up with blood, after which Minnatsuki will be forcibly returned to their room from the spirit world.
Boombox
Location: Burning Building
Prompt: Enter the annex in Burning Building by interacting with the red, cat-like creature named Hotsauce atop a ladder in the northern section of the building. Upon entering, interact with the DJ table in front of the entrance.
Description: Upon interacting with the DJ table, Honey will take on a more cheerful expression and start bobbing its head to the music. Sitting on Hotsauce's side next, without first leaving the annex, will cause a bridge to appear on the right side of the room, leading to a platform holding the cube that grants the "Sun" Menu Theme. Collecting it will also unlock the "Fire Friends" Book Cover.
Bubble Flight
Location: Soapy Baths
Prompt: Interact with the bubble on top of the large tower.
Description: Minnatsuki floats inside a bubble, and can move in any of the four cardinal directions across the sky. Pressing 'X' returns Minnatsuki to Soapy Baths.
Activating this event unlocks the "Soapy Voyage" Book Cover.
Cave Chase
Location: Cave
Prompt: Kill the Miner Grandpa NPC.
Description: Killing the Miner Grandpa outside the shop will initiate a chaser event. If the player is caught, Minnatsuki will be transported to a looping hallway that will eventually lead to another area.
The Clock
Location: Loading Zone
Prompt: Find a blank, black screen surrounded by four other screens with small, animated clocks displayed on them. Interact with the backside of the blank screen at its center.
Description: After interacting with the backside of the screen, the surrounding small clocks will disappear, a drum beat will play, and a giant, mostly monochrome analog clock will appear on the screen. The clock features numbers from various different numeral systems on its face, including Roman, Arabic, and Mayan, among others. Additionally, it has three hands that spin quickly and asynchronously, including a cyan seconds hand. After viewing the event for approximately 24 seconds, several changes will suddenly occur. The background will become a scrolling, wavy pattern, the music will change to incorporate synthesizers in addition to the previously playing drum beat, and the hands will spin even more rapidly. Pressing the 'Z' key will dismiss the event and place Minnatsuki elsewhere within Loading Zone.
Cosmic Horror
Location: Celestial Platforms
Prompt: Enter Hoshiko's room and turn the light switch on.
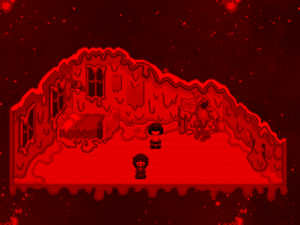
Description: Rarely, when turning Hoshiko's light switch on (1/15 = 6.67%), instead of them rushing to turn it off, the screen will suddenly become red in tint while the appearance of the entire room, which is shaking violently, will change to seem as if it has been partially melted. Interacting with Hoshiko at this point will cause them to melt into a puddle, and an opening will appear in the wall behind them. Outside, a towering black monster with tentacles and three eyes looms over the house. Here, Minnatsuki's sprite will appear much smaller, due to the scene being substantially zoomed out. Interacting with the enormous monster will cause Minnatsuki to appear in and plummet through a strange void filled with giant plants, tentacles, and arachnids, before they eventually awaken on a bench in an isolated section of Sunset Woods. They are joined on the bench by Hoshiko, and interacting with them will cause the screen to fade to black before Minnatsuki is forcibly ejected from the spirit world.
Coyote Rave
Location: Lavender Ruins
Prompt: Interact with the green window found atop one of the raised ruins, southeast of the Nexus entrance.
Description: Upon interaction, a fullscreen, flashing animation of several neon coyotes dancing to upbeat rave music will appear. Upon pressing the 'X' key, the animation is dismissed.
Viewing this event will unlock the "Dance 'til Dawn" Book Cover.
Cruel Prank
Location: Dilapidated Complex
Prompt: Attempt to enter the door found immediately southeast from the Spiral Limb Passage connection.
Description: Attempting to enter the door will cause duplicates of Minnatsuki to begin to appear around them one by one, pointing and laughing at them. During this event, Minnatsuki will not be able to move beyond simply turning in place. Before long, the sound of the laughter will become louder, pitched down, and slowed down, and the screen will become tinted red while beginning to fade to black. Before the screen can blacken completely, the duplicates of Minnatsuki will suddenly disappear, along with the false door.
Dead Spiral Purgatory
Location: Spiral Purgatory
Prompt: Kill the Girl in the Cocoon using the Soulfire eidolon.
Description: Upon the girl's death, a large, charred mess is left where she was. Leaving the cocoon will reveal that the entire world appears darkened and dead. The Lumen and Soulfire eidola help somewhat with the darkness. The world will remain in this state for the remainder of the current session in the spirit world.
The Doppelganger
Location: The Underneath
Prompt: Unlock the gate in the Underneath and enter the room past it.
Description: After interacting with the four computer terminals on the way to the gate, Interacting with a switch will allow Minnatsuki to open the gate. In the room past it, a strange, black smiling creature stands still in the center. Interacting with it will suddenly make you take control of it, leaving Minnatsuki. You can leave the room with it, but the camera will not follow. You're left with Minnatsuki's motionless body as a window interface appears above, where you control the cursor and press the "X" key, causing Minnatsuki to forcibly return back to their room from the spirit world.
Dungeon
Location: People Palace
Prompt: Equip the Soulfire eidolon or use the Rodentia eidolon to transform into its small rodent form. Then, get caught by the guards.
Description:
The Eye
Location: Artery Maze
Prompt: Kill the eye using the Soulfire eidolon.
Description: There is a giant eye in the very center of Artery maze, in a heart-shaped cavity. Killing it with the Soulfire eidolon will cause the heartbeat BGM to quicken and every NPC will become hostile, but it also opens up every connection (other than Blood Drive).
Eye-Lily's Awakening
Location: White Lotus Islands
Prompt: Found inside of the tunnel with the closed eye graffiti tagged onto it. Upon entering, walk to the very end of the tunnel.
Description: Upon going through the tunnel, the dark environment will slowly change. At the end of the tunnel, Minnatsuki will encounter the Eye-Lily, a giant flower that appears to be asleep. When interacted with, the Eye-Lily will open its singular eye. If Minnatsuki goes back to the start and exits the tunnel, the eye graffiti on the tunnel exterior will now be open.
Figure in the Flames
Location: Burning Building
Prompt: Wait in the exterior area without leaving for six uninterrupted minutes.
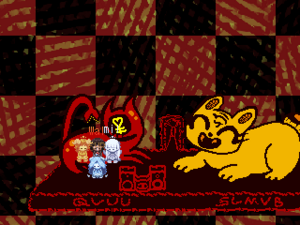
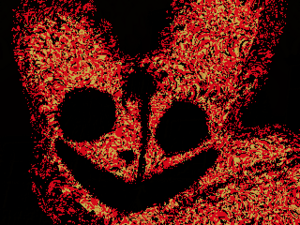
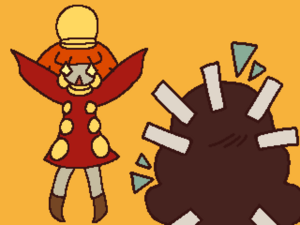
Description: After six minutes have passed, the background music will change into distorted noise and a fullscreen image of Hemlock, a red and yellow rabbit-like creature that somewhat resembles Honey, will slowly begin to fade in. It has black, empty eyes, a big smile, and a bleeding hole in its forehead. After the image fully comes into view, a distorted roaring sound can be heard drowning out faint screams. Following this, Minnatsuki will be automatically returned from the spirit world.
Floating Deity
Location: Ghost Village
Prompt: Climb two short flights of stairs up to the top of a small hill found directly north of the wooden bridges in Ghost Village. Then, hold the 'W' key while standing at the northern edge of the hill.
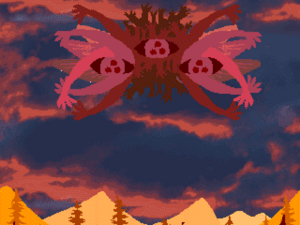
Description: The view will slowly pan up to reveal a large pink creature floating motionlessly in the sky above. The creature sports many arms, six insect-like wings, and three eyes bearing three pupils each. Releasing the 'W' key will pan the camera back down to Minnatsuki.
Flower Girl
Location: Corrupted School
Prompt: Head to the top floor of the Corrupted School, entering the rooftop. For the alternate version of this event, equip either the Youth or Spectral eidola before entering the rooftop.
Description: Upon entering the rooftop, the Flower Girl can be found at the edge, with vines tangling the surroundings. Upon interacting with the Flower Girl, a close-up of her will appear before she disappears. If the Youth or Spectral eidola are equipped before entering the rooftop, and it is the player's first time entering the rooftop upon visiting the area, then the rooftop will change to have a white sky and no vines, with the Flower Girl still there. The close-up of the Flower Girl in this rooftop variant is slightly different, bearing a budding flower instead of a blooming one.
The Forest Clearing
Location: GBC Village
Prompt: Enter the clearing in GBC Village.
Description: There's a rocky clearing filled with holes to the east path of the village. The BGM will fade out, and you may encounter a priestess here. There's a 1/16 chance that when you enter here, the priestess will be gone and a blood splatter will be present next to one of the holes by the far end of the clearing. If you have seen the Lantern Man in the GBC Village dungeon, you will be guaranteed to see this variant.
Fourth Wall Break
Location: Uncanny World
Prompt: Attempt to go north while having four or more eidola.
Description: Due to the large amount of content associated with the event, the full description can be found on the Uncanny World page.
Full Moon
Location: Harsh Light Road
Prompt: Keep moving right on Harsh Light Road.
Description: As Minnatsuki keeps moving right, the sky in the background will lighten up. Midway through (and only midway through), the entrance to Psyche becomes available. Once Minnatsuki has gone far right enough, the moon will appear in the sky, and standing below it will cause a droplet to fall from it, which brightens the entire world.
The Giant Teleporter
Location: Blue Forest City
Prompt:
Description:
Girl in the Cocoon
Location: Spiral Purgatory
Prompt: Find and enter the cocoon within Spiral Purgatory. Interact with the titular Girl in the Cocoon found inside.
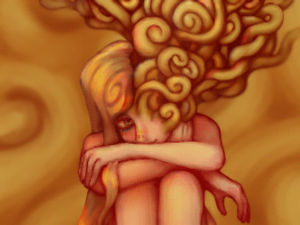
Description: Upon interacting with the Girl in the Cocoon, a fullscreen view of her is shown in which the camera slowly pans up from her feet to her face, where the mass of spirals emerging from the right side of her head to form the walls of the cocoon can be seen more clearly. After the camera has finished panning up to her face, she will open her one eye, smile, and then close her eye again. This event can only be viewed once per spirit world session.
Girl's Journey's End
Location: A Long Journey
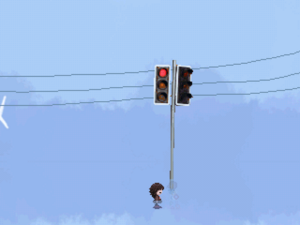
Prompt: Interact with the Girl at the Crossroads standing near the traffic signal pole at the eastern end of the world.
Description: Upon interaction, the Girl at the Crossroads will begin to move around and very slowly fade away. This causes her to disappear permanently, but will unlock the "Formos" Book Cover, as well as cause the cube that grants the "Vague Memory" Menu Theme to appear at the western end of the world.
Glitching Spiral
Location: Sunset Woods
Prompt:Interact with the red figure with the blue face at the eastern edge of Sunset Woods.
Description:Upon interacting with the figure, Minnatsuki will be rapidly teleported back and forth between Sunset Woods and a spot at the end of a pathway in Spiral Limb Passage where the same figure can be found. The event ends with Minnatsuki remaining in Sunset Woods.
Haunted Computer
Location: Bloodsoaked Office
Prompt: Find the small square room with gray flooring and a single computer. Then, equip the Spectral eidolon and interact with the computer monitor from the front.
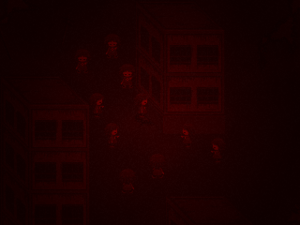
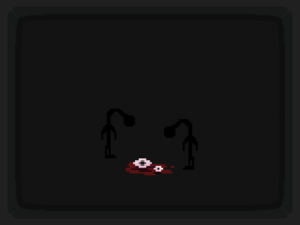
Description: Upon equipping the Spectral eidolon, the computer monitor's screen will turn red. Interacting with the computer monitor from the front with the Spectral eidolon equipped will cause a sound to play as the background music is replaced with sporadic crackling and a fullscreen view of the monitor appears. From this view, the monitor now displays an image of two of the figures seen throughout Bloodsoaked Office looking at two of the pink eyeballs which can be seen above Minnatsuki's head while the Spectral eidolon is equipped sitting on the floor in a puddle of blood. Pressing the interact key will play a lower pitched version of the sound heard when the monitor is interacted with and dismiss the event.
Haunted Console
Location: Micro Forest
Prompt: Take the boat south of the main island.
Description: The boat will lead you to a new island in Micro Forest, where the BGM changes to a quiet ambience and a locked house can be seen. The island only has one route to head, and as Minnatsuki moves there, they'll see a shadowy figure dart out of sight occasionally. At the end of the area, the figure will stand in front of another house, and interacting with it will cause it to disappear. Heading inside to grab the key, you'll see the figure appear outside of the console space and take up some of the screen to the right. After heading back to the locked house and opening it, you'll see an egg on a table. Interacting with it will cause the figure to become monstrous as glitched static sounds crescendo, and Minnatsuki will be forcibly returned back to their room from the spirit world.
Honey of Disaster
Location: Tragic Dimension
Prompt: Interact with the drawing of the laptop.
Description: A monochrome drawing of a person with their face scribbled over will quickly fade in and out while expanding to cover the screen, as a sound like wheezing, muffled laughter can be heard.
Ibis Vision
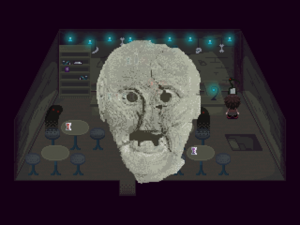
Location: Ghost Village
Prompt: Interact with The Ibis, found standing inside the bar beside the counter.
Description: Upon interacting with The Ibis, a sound will play as a photographic image of a fractured stone mask appears on the screen before immediately shrinking and fading away.
Ibis Vision II
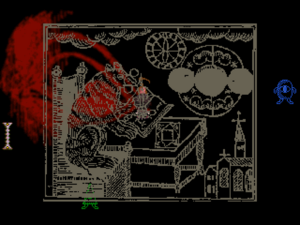
Location: Altered Plains
Prompt: Interact with The Ibis, found standing within the dark, looping area within Altered Plains.
Description: Upon interacting with The Ibis, a sound will play, and an illustration will appear on the screen. The illustration depicts various circular patterns, a church, some clouds, and a bear sitting in a chair next to a table while using a quill to write into a book. The illustration will shrink and fade away immediately after appearing.
I Keep Forgetting
Location: Sunset Woods
Prompt:
Description:
I've Been Known to Waltz
Location: Hall of Malignant Statues
Prompt: Attack Darcy using the Soulfire eidolon in Square Garden. Then, without being caught by the shadowy form of Darcy that will appear and chase after Minnatsuki, interact with the pedestal in Square Garden to escape to Hall of Malignant Statues.[note 2]
Description: When Minnatsuki escapes to Hall of Malignant Statues from Square Garden,[note 2] the area's layout will have changed significantly. Minnatsuki will emerge from a desaturated cuboid topiary tree which stands at the southern end of a short, vertical passage which is bounded by invisible barriers. Beyond the confines of the traversable pathway, four pedestals supporting marble sculptures stand, arranged into a square. Each sculpture is of a human figure, except for the solid marble slab in the northeastern corner. The area is shrouded in nearly pitch-black darkness, save for a small spotlight at the northern edge of the passage, under which Krarav and Darcy can be seen dancing to waltz music together. Surrounding the spotlight are five figures completely obscured by the darkness, save for their glowing white eyes, who will watch Minnatsuki's movement and occasionally turn in place.
Upon interacting with the edge of the spotlight at the middle, rain will begin to fall, and a fullscreen animation, in which Krarav and Darcy dance under the spotlight while two of the shadowy figures can be seen watching from behind, will play. Upon pressing the interact key to dismiss the animation, Minnatsuki will then be transported to an isolated section of Square Garden which can only be escaped by using the Umbra eidolon or returning from the spirit world.
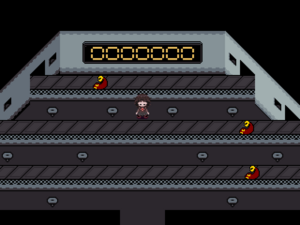
Labour
Location: Brutalist Warehouse
Prompt: Find the room with the long desk with an employee behind it and a pole blocking passage to the other side of the desk. Interact with the employee behind the desk to get an ID card and then enter behind the desk.
Description: Minnatsuki is taken to a room with several conveyor belts and a large number display on the back wall. Red fish will slowly come through on the belts, which can be smashed by interacting with them, causing the number display to go up by one for each fish. Minnatsuki can exit the room at any time by pressing the 'X' key and they will be paid equal to the number of fish they smashed.
If at least 100 fish are smashed, the room will change drastically to now play calming music and display a starry background scrolling by. Otherwise, the environment stays like this beyond 100 fish.
Life Support
Location: Heart World
Prompt: Interact with the life support machine.
Description: Interacting with the life support machine will cause it to become unplugged from the wall while the electrogram on the monitor flatlines. After this, the world will fade to black and suddenly, all of the large heart symbol-shaped objects in the area will be replaced by anatomically accurate hearts. A heartbeat can be heard in the background, and it will quicken over time. In addition, not only will the heart-shaped NPC that roamed the area originally become aggressive and chase after Minnatsuki, but additional copies of it—also in an aggressive state—will appear throughout the area as well, and their movement will speed up with the heartbeat ambience. If caught, Minnatsuki is taken to the path just outside the main area and the event will reset, allowing for another try. While the event is active, the electric gate northeast of the life support machine will also become disabled, allowing access to Flesh Walls Forest if the gate is reached quickly enough.
Lottery
Location: Lottery Parlor
Prompt: Interact with the Lottery Fiend with the hat.
Description: Upon interaction, the player will pay 7 Luna to receive a lotto ticket with three numbers, and a lotto machine is rolled. If the three numbers from the machine match with the three numbers you are given (a 1/729 chance), you will win 77,777 Luna and get access to the red car (which Minnatsuki will attempt to drive and immediately crash).
Minnatsuki? Encounter
Location: Dark Archives
Prompt: Find the humanoid specimen in Dark Archives.
Description: In the lower area of Dark Archives, there's a room that has a dead-end corridor to the right, where the player can see a humanoid in one of the displays. Attempting to leave after having seen it, there will be another Minnatsuki with a darkened face who appears out of the door you were going to use. They turn towards you and rush quickly at you, where then the real Minnatsuki will return to their room from the spirit world.
Minnatsuki's Punishment
Location: Monochrome Mausoleum
Prompt: Kill the NPC with the white mask.
Description: Minnatsuki will be transported to a side view of a slope surrounded by pillars. The only option at this point is to walk uphill, pushing a heavy rock in search of atonement. Ascending for enough time leads to a small chamber shaped like an eye, featuring a door obstructed from further passage. The only option at this point is to return from the spirit world or use the Umbra eidolon to escape.
Moonlit Dream
Location: Moonlit Path
Prompt: Interact with the futon while standing on it in the house near the southwest corner of the main area of Moonlit Path.
Description: Minnatsuki will fall asleep in the futon. When this happens, they'll awaken within a subarea featuring a small, linear path. At the end, a set of glowing stairs and platforms appear. Climbing atop and navigating the platforms reveals a large, white creature with several eyes. Interacting with it will close its eyes, the entire area will become monochrome, and a path in the upper area of the glowing platforms will appear.
Taking the new path to the exit will take place Minnatsuki back inside the house, now lit brighter than before. This will also unlock the "Moonlit Dream" Book Cover and cause the main area of Moonlit Path outside of the house to undergo certain changes. Some NPCs will have changed their appearance to resemble pale, ghostly angels, the area will become somewhat brighter, and the water will now reflect a cloudy sky as it appears at sunrise or sunset. Sleeping in the futon again will reactivate the event, and each additional time it is completed will toggle the appearance of the main area between its altered, brighter state and its original, darker state.
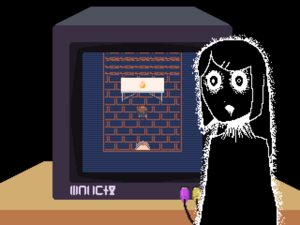
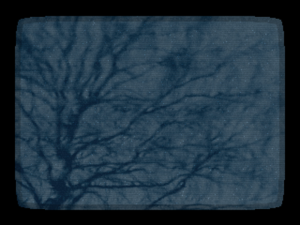
Nature Broadcast
Location: Hometown
Prompt: Interact with the TV in the house.
Description: The TV will display several wobbling images of nature photographs while calming music plays in the background, before a fade to black and Minnatsuki gets control again.
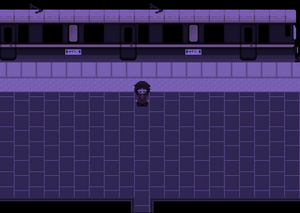
Night Train
Location: Train Station
Prompt: Enter the train platform when the event is active.
Description: There is a 10/256 chance (approximately 1/26 or 3.9%) for the Night Train event to be active that is determined every time Minnatsuki activates the totem in their room and enters the spirit realm. If the event is active, entering the train platform through either door while the station is dark will tint the screen a dark purple color before taking Minnatsuki to a unique version of the train platform.
Ominous Giant
Location: Dilapidated Complex
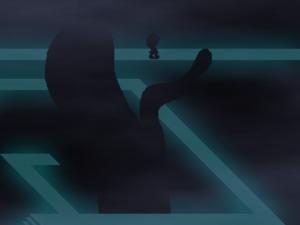
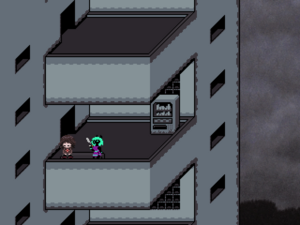
Prompt: Walk to the eastern end of the Derelict Catwalk subarea.
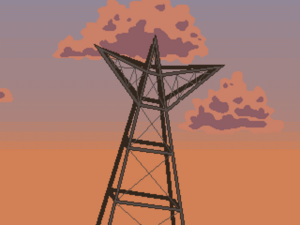
Description: The red eyes of a large black creature that looms over the edge of the catwalk will flash before the screen slowly fades to black, transporting Minnatsuki to Dark Spire Hell.
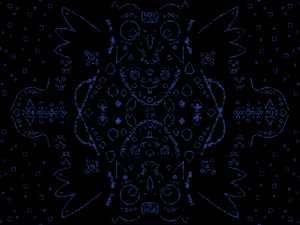
Owl Hole
Location: Mud Brick Heights
Prompt: Interact with a square-shaped hole in the northern interior wall of a small room in Mud Brick Heights.
Description: Upon interacting with the hole in the wall, a fullscreen animation set to fast music will play, featuring flickering, blue, mirrored patterns of various shapes and lines that resemble a multitude of owls. Pressing the 'Z' key will dismiss the event.
Panic
Location: People Palace
Prompt: Kill Cecilia in the back room of the theater.
Description: All NPCs in People Palace will begin to function as though Soulfire is equipped (even if it isn't), meaning that the helmeted guards throughout the palace will chase Minnatsuki in an attempt to capture them. Getting caught by a guard will send Minnatsuki to the dungeon as normal. The guards are not particularly quick, and it is possible to outmaneuver them in the palace's tight corridors at Minnatsuki's running speed. Evading capture and successfully escaping the palace through the front entrance provides access to Wooden Puppet Area.
Park Path
Location: Pale Park
Prompt: Power on the two unpowered lampposts by interacting with their buttons from the front, then step between them.
Description: When both lampposts are powered on, stepping between them will transport Minnatsuki to a narrow passage within a secluded grove. Proceeding north from the initial clearing will lead Minnatsuki to a larger clearing in which a copious amount of butterflies dwell. They will slowly gather around Minnatsuki and push them aside when touched, making it somewhat difficult to navigate.
Possession Ritual
Location: Dark Spire Hell
Prompt: Find the magic circle surrounded by the four braziers that the Soulfire eidolon cannot light. Stand on the eye symbol in the center of it.
Description: Standing on the eye symbol in the center of the magic circle will suddenly light the braziers. The area surrounding the magic circle will become dark, and two symbols resembling eyes with crosses in them will appear on each side of Minnatsuki, from which streams of red will quickly move to engulf their eyes. The screen will then darken completely before Minnatsuki reappears in Red Waters.
Red Giant
Location: Dimensional Graves
Prompt:
Description:
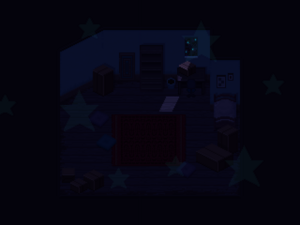
Restful Sleep
Location: Hometown
Prompt: Sleep in the bed on the top floor of Hometown.
Description: A full-screen animation of scrolling glow-in-the-dark stars will be displayed as Minnatsuki sleeps.
Severance
Location: Bleeding Ladders
Prompt:
Description:
Shadow Sentinel
Location: Isolation
Prompt: Interact with the statue of a torso in Isolation.
Description: Minnatsuki will be trapped in the room until either returning from the spirit world or using the Umbra eidolon.
Silence the Signal
Location: Lost Signal Shoal
Prompt:
Description:
Sleeping Girl
Location: Orchid Haven
Prompt: Interact with the Sleeping Girl found among the flowers at the eastern end of Orchid Haven.
Description: Interacting with the girl will cause all the flowers to glow and her to wake up. Heading back west and exiting the world will now take Minnatsuki to Primeval Edifice.
Smoke Break
Location: Brutalist Warehouse
Prompt: Head to the balcony where Hadie can be found. Use the Soulfire eidolon on her to light her cigarette and then interact with her.
Description: Hadie and Minnatsuki will both sit on the nearby balcony bench as Hadie smokes. The event can be exited at any time by pressing the 'X' key.
Viewing this event unlocks the "Serenity and Smoke" Book Cover. Minnatsuki will also be granted 500 Luna by Hadie after exiting the event, but only after the first time the event is viewed in each spirit world session.
Spiral Dance
Location: Spiral Limb Passage
Prompt: Found by interacting with an odd object found at the end of a spiraling path inside one of the head houses, west of the Dilapidated Complex warp.
Description: A small scene showing some of the heads populating the world will appear, showcasing them dancing back and forth to a crackling recording of piano music. The cutscene can be dismissed by pressing the 'X' key. During this event, using some of the directional keys will allow the player to play a simple drum kit along with the music. Left/'A' is a bass drum, Up/'W' is a hi-hat, and right/'D' is a snare drum.
The Squid God
Location: Eternal Communion
Prompt: Interact with the Squid God in the chapel of Eternal Communion.
Description: A full-screen animation of text and different images of squids will play rapidly. After this, Minnatsuki will be transported to Squid Paradise.
Star Death
Location: Outer Hospital
Prompt: Find the room with cracks in the wall and a nurse blocking one of the doors. Use the Soulfire eidolon on them to get through and enter the previously blocked set of rooms. At the end is the Dying Star, simply resting. Use the Soulfire eidolon on the star to start the event.
Description: The Dying Star darkens and shrivels up before the hospital suddenly shakes and the power goes out. The entire hospital is now covered in a dark blue tint (which can be brightened with the Lumen eidolon) as the doctors and nurses populating the hallway now frantically run about.
Stone Crevice
Location: Ancient Trenches
Prompt:
Description:
Strange Channel
Location: Sunset Woods
Prompt:
Description:
The Trapped Safe
Location: Smiling Pen Office
Prompt: Interact with the safe in Smiling Pen Office.
Description: A trapdoor beneath Minnatsuki opens and causes them to fall down into the empty picture frame in the hallway. This is an inescapable area that forces the player to return to Minnatsuki's Room manually.
Toolbar Overload
Location: Terracities
Prompt: Interact with the flashing banner directly underneath the visitor counter near the bottom of the main page.
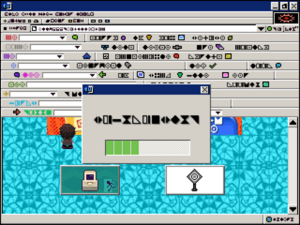
Description: Upon interacting with the banner, a Windows 95-style dialog box containing a prompt written in an unfamiliar script will appear, along with two buttons: a green circle, and a red X. Pressing the 'X' key will simply cause the dialog to close, while pressing the 'Z' key will cause the dialog content to be replaced by a progress bar. After the progress bar fills completely, the dialog will close, a system sound will play, and a brand new toolbar will be installed beneath the address bar of the browser window. Opting to repeat the same steps again to install multiple toolbars will result in events proceeding normally the second time. However, upon attempting to accept a third toolbar, multiple progress bars will appear and an increasing number of additional toolbars will be added automatically and in quick succession until the entire screen has been filled with toolbars. The screen will then turn blue, and Minnatsuki will be forcibly returned from the spirit world.
Train Ride
Location: Train Station
Prompt: Sit on the train for 25 seconds without moving.
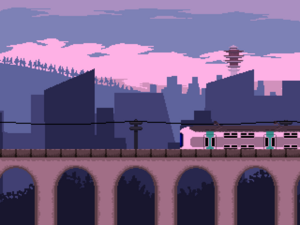
Description: Minnatsuki falls asleep. A cutscene of the train going the tracks will play. The background will be a cityscape with a tree covered hill further back. Sometimes, it will be sunset instead of daytime. Pressing 'Z' will awaken Minnatsuki. The leftmost door will be open and leads to Overgrown Railway.
Tree Attack
Location: Untamed Forest
Prompt: Torch any tree in the area with the Soulfire eidolon.
Description: Every tree in the forest will begin to chase down Minnatsuki. Being caught by a tree during this event will black out the screen and play a crushing sound before Minnatsuki is forced out of the spirit world and returned to their room.
Triangle Eye
Location: Basalt Fields
Prompt:
Description:
Turning On a Light
Location: Movie Theater
Prompt: Equip the Lumen or Soulfire eidola while in the auditorium.
Description: Upon using either eidolon, the movie-watcher NPCs will become very fast and aggresive, catching Minnatsuki near-instantly. Once caught, they'll be taken to a small room with a poster reminding you to keep all lights off while the movie is playing. The NPCs are watching through the only door out, preventing Minnatsuki's escape, but a small hole can be crawled through with the Rodentia eidolon.
Tusuq Warmi's Dance
Location: Mural Passage
Prompt: Find Tusuq Warmi while in the non-neon state and interact with them while the Kalimba eidolon is equipped.
Description: A small cutscene appears showing Tusuq Warmi doing a dance while Minnatsuki plays music for them. The scene can be dismissed with the 'X' key.
Viewing this event unlocks the "Tabloid of a Dancer" Book Cover.
Village Transformation
Location: GBC Village
Prompt:
Description:
Wandering Together
Location: Fantasy Forest, Flower Valley Apartments, Glass Cathedral, Movie Theater, Paper Plains and Underwater Statue Garden.
Prompt: Find and interact with the Wanderer. Then select Return in the menu and start a new Spirit World visit. Do this two more times. The NPC may spawn in one of the above listed locations upon entering the Spirit World.
Description: Every third time Luna is received by finding and interacting with the Wanderer, a cutscene will play of Minnatsuki riding on the back of a moped driven by the Wanderer. Sometimes, the event will take place at sunset or during nighttime, rather than at daytime. Pressing the 'Z' key will dismiss the cutscene.
Viewing this cutscene for the first time will unlock the "Wandering Together" Book Cover.
What You Saw
Location: Field of Buried Memory
Prompt: Complete the sunflower maze within the field and interact with the pylon at the end.
Description: Upon interacting with the pylon, the view will pan up to the top of it. At the top, a mangled corpse censored by black bars is present. Suddenly, the view changes to depict the Field of Buried Memory at sunset, with distant crows calling and the pylon corpse now gone.
Completing this event will cause the connection to Field of Buried Memory within Tragic Dimension, ordinarily a monochrome figure wearing a dress with a sunflower pinned to their back, to be replaced by a lone, monochrome sunflower for the remainder of the current spirit world session.
Removed Events
Transformation Stone
Location: Orchid Haven
Prompt: Interact with the stone with glowing marks.
Description: Interacting with this particular stone would cause the screen to flash and the appearance of the world to be changed to appear brighter and more vibrant.
This event was present in version 0.1.0 and removed in version 0.2.0, along with much of Orchid Haven.
Notes
- ↑ 1.0 1.1 Walking away from the position that Minnatsuki is required to wait in during the After Hours event will reset the hidden timer counting down the time spent waiting there, as the only adjacent tile without collision is programmed to do so when it is stepped on. Additionally, there are many actions, including some that could be used to bypass this tile, that are disabled while Minnatsuki is standing in this position, including opening the main menu, opening the gestures menu, returning from the spirit world, and using eidolon actions. Other actions, such as turning in place, will not reset the timer.
- ↑ 2.0 2.1 The I've Been Known to Waltz event will not activate if Minnatsuki escapes the chaser in Square Garden by using the Umbra eidolon, or by returning from the spirit world and subsequently making their way back to Hall of Malignant Statues.


