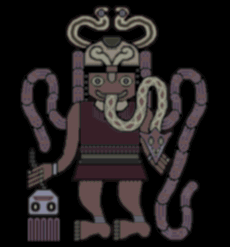
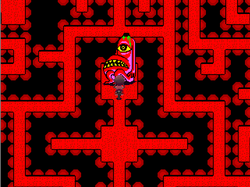
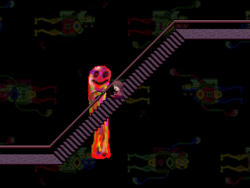
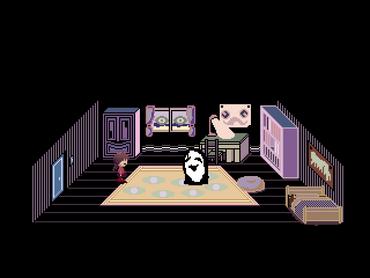
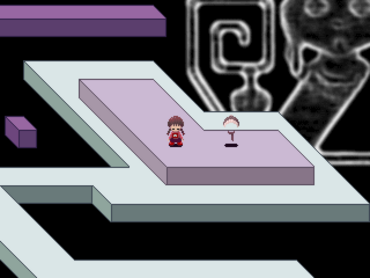
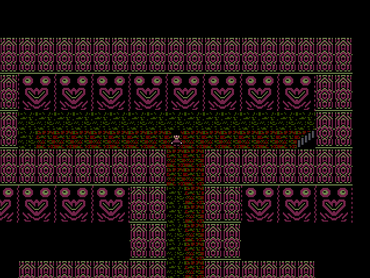
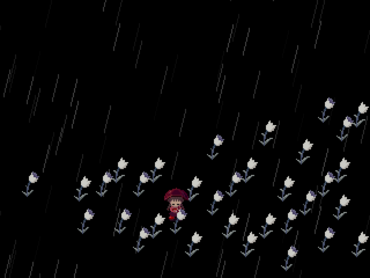
Welcome to my sandbox. This is where I'll put stuff when I'm experimenting with wiki assets, constructing new pages, or just doing trivial analytical things for fun.
Contents
- 1 Specific World Exploration
- 1.1 The Chair
- 1.2 No-Clip Glitch
- 1.3 Avoiding the Nexus
- 1.4 Arrow Key Challenge (WIP)
- 1.5 idk
- 1.6 Longest Possible Route From YN Nexus Worlds
- 1.7 goooooooooo
- 1.8 Number World
- 1.9 Neon World
- 1.10 Shield-folk World
- 1.11 The Dream World Census + The Streets of London (WIP)
- 1.12 YN Badge Requirements and Specifics
- 1.13 YN Badge Routes (WIP)
- 1.14 2kki Badges Sorted by Needed Effects
- 2 Name Articles
- 3 Article Construction
- 4 Making and Submitting Badges
- 5 Plot
- 6 Yume Nikki Internal Stuff
- 7 Worlds
- 8 Game
- 9 Bugfixes
- 10 Worlds
- 11 Game
- 12 Bugfixes
- 13 Worlds
- 14 Game
- 15 Bugfixes
- 16 Worlds
- 16.1 Added Worlds
- 16.2 Nexus Worlds
- 16.3 Other Worlds
- 16.3.1 Barracks Settlement
- 16.3.2 Checkered Tile Path
- 16.3.3 Dense Woods B
- 16.3.4 The Docks
- 16.3.5 Face Carpet Plaza
- 16.3.6 Footprint Path
- 16.3.7 Guillotine World
- 16.3.8 Hell
- 16.3.9 Lamp World
- 16.3.10 The Mall
- 16.3.11 Mini Hell
- 16.3.12 Neon Tile Path
- 16.3.13 Sky Garden
- 16.3.14 White Desert A
- 16.3.15 The Wilderness
- 16.4 FC Worlds
- 17 Game
- 18 Bugfixes
- 19 Yumesyuusei (0.10a)
- 20 Worlds
- 21 Game
- 22 Bugfixes
- 23 Fun
Specific World Exploration
Documenting how the dream world can be explored under certain conditions and other various things related to the dream world. Click Expand to view contents.
The Chair
This table lists locations that are accessible with the Chair, obtained in Madotsuki's Dream Bedroom, and nothing else. Effect combination glitches with the Chair will not be included, as this list only compiles what can be achieved with the Chair alone with no effects obtained prior. Notes and ranking are also based on the availability of rooms and events in a given area.
- "Yes" means everything here works normally.
- "Partially" means you can get to this world and only do some things available there.
- "No" means you can't get to this world at all.
This list will also not count areas you get trapped in by already-hostile Toriningen.
| World | Functional? | Notes |
|---|---|---|
| Madotsuki's Dream Room | Yes | This is where you obtain the Chair. KALIMBA event can be experienced. |
| The Nexus | Yes | |
| Forest World | Yes | Namekuji can still be interacted with. Gate to Face Carpet Plaza works. |
| Block World | Partially | The bed here can't be slept in. The men's Restroom here can not be used. Mafurako can still be interacted with and can teleport you, including to the White Desert gate, which also works. |
| Puddle World | Yes | The lampposts can still be turned on and off. Tunnel to Dense Woods A works. |
| Dark World | Yes | The gate to the Wilderness works. |
| Snow World | Partially | The bed here can't be slept in. The igloos can be entered, so you can visit Kamakurako. Warp to the Pink Sea also works. |
| Mural World | Yes | The manhole to the Sewers works. |
| Graffiti World | Partially | The women's Restroom here can not be used. The elevator to the Mall works. |
| Eyeball World | Yes | Can interact with the pair of lips found here normally. Severed Blue Head warp also works. |
| Candle World | Partially | The bed here can't be slept in. |
| Shield-folk World | Partially | Can not climb the ladder in the static maze. |
| Neon World | Yes | Doorway to Neon Tile Path works. |
| Number World | Partially | The bed here can't be slept in. Lamp World door and Guillotine World warp both work. |
| Face Carpet Plaza | Yes | Both warps back to Forest World work. The Nenrikido here also works. |
| Footprint Path | Yes | Can interact with all of the Goppa bumps normally. The Nenrikido here also works. |
| Checkered Tile Path | Yes | Can enter from Lamp World and interact with Closet Madotsuki. The Nenrikido here also works. |
| Neon Tile Path | Yes | The warp back to Neon World and the Nenrikido here works. |
| Hell | Yes | Vending Machine still functions. The staircase to the Docks and the gate to the Dense Woods both work. |
| The Sewers | Partially | Can experience the Sewer Drawings and visit the Nopperabou Ghost. You can visit Big Red, but you can't go over the tiny slope required to go into his mouth. |
| Windmill World | No | Can not enter Big Red's mouth, so you can not get to Windmill World. |
| The Docks A | No | Can not enter through the Sewers or Windmill World warps, so you can not access Docks A. |
| The Dock B | Yes | Stairway to Hell works. Pirori warp to Barracks Settlement works. |
| The Wilderness | Partially | Aztec Rave Monkey and Toriningen Party event can be experienced. You can enter the Infinite Wilderness and the bathhouse containing Onsen-san but you can't go up the stairs in the bathhouse. You can also not get onto the Staircase to the Sky, meaning you can not experience the Falling Men event. Warp to the Barracks Settlement works. Static path to FC World A does not work. |
| Barracks Settlement | Partially | The Pirori will not teleport you to FC World B. You can still visit the Seahorse and go through the Isee tunnel to Mural World. |
| Sky Garden | No | Can not go up the Staircase to the Sky, so you can not access the Sky Garden. |
| Ghost World | No | Can not access Sky Garden, so you can not access Ghost World. |
| The Mall | Partially | You can still interact with the Mall Shoppers, Tokuto-kun, and the Toriningen which changes your menu style. You can not sit in the chair in Tokuto-kun's room. You can head to the Mall's roof and interact with The Black Cat too. The Dense Woods manhole works. |
| Pink Sea | Yes | Balloon warps work and you can enter the house with Poniko. The Uboa event can also be experienced and Uboa's Trap can be entered. |
| Dense Woods A | Yes | Vending Machine still functions. |
| Dense Woods B | Yes | Can enter the White Desert manhole as well as get to the forested areas from the Mall and Hell. Jellyfish that lets you go to the Teleport Maze also works. |
| Traincar | Partially | Can enter the blue-skied Traincar area, but you can not sit down inside of the Traincar, making it so you can not travel to the red-skied area. |
| Witch's Island | No | Can not sit down in the Traincar, so you can not get to Witch's Island. |
| Lamp World | Yes | Door to Steve 'Leif' Kareha works. Lamp warp to the Checkered Tile Path also works. |
| Guillotine World | Yes | Closet warps work. |
| Mini Hell | No | Requires use of the Knife effect. |
| White Desert A | Partially | Can enter the tunnel with Monoko and can see Takofuusen flying by. |
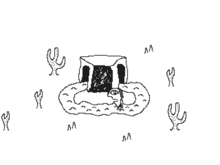
| White Desert B | Partially | Can visit Manhole-sama, the isolated ring in the main section, the Brain Creature, and The Thing with the Quivering Jaw. Can not enter the lagoon or non-isolated main areas. |
| Teleport Maze | Yes | All teleporting tiles work normally. |
| FC House | No | Can not climb the ladder in the static maze, so you can not enter FC House. |
| FC World A | No | Can not go up the stairs in the static tunnel, so you can not enter FC World A. |
| FC World B | No | Pirori can not warp you to FC World B while in the Chair, so you can not enter FC World B. |
| FC Dungeon | No | Can not enter FC World A, so you can not enter FC Dungeon. |
| Staircase of Hands | No | Can not get into any of the beds in the dream world, so you can not get to the Staircase of Hands. |
| Underground World | No | Can not get to the Staircase of Hands, so you can not get to Underground World. |
| The Spaceship | No | Can not get to Underground World, so you can not get to the Spaceship. |
| Mars | No | Can not get to the Spaceship, so you can not get to Mars. |
No-Clip Glitch
This table lists locations that are accessible when the No-Clip Glitch is used.
| World | Notes |
|---|---|
| Madotsuki's Room | KALIMBA TV Channel event can be triggered. Balcony can not be accessed. Getting in the Bed here deactivates the glitch, even if it sends you to the Staircase of Hands. You can get stuck here by interacting with the chair while on top of the desk. |
| Forest World | You can still interact with the ghosts here. The gate to Face Carpet Plaza does not work. |
| Block World | Getting in the Bed here deactivates the glitch, even if it sends you to the Staircase of Hands. The gate to White Desert does not work. You can still teleport around with Mafurako, even when using the Snowman combo. Teleporting with Mafurako to a higher place and then leaving her will make X-marks appear on some of the blocks. The Restroom here still works. |
| Puddle World | The path to Dense Woods does not work. |
| Dark World | The gate to The Wilderness does not work. |
| Snow World | Getting in the Bed here deactivates the glitch, even if it sends you to the Staircase of Hands. None of the igloos can be entered. The Toriningen here allows you to access Hell freely, since the isolated section can be escaped with the glitch. |
| Mural World | The Sewers manhole does not work. |
| Graffiti World | The Restroom here still works. The elevator to the Mall still works. |
| Eyeball World | The gate to The Footprint Path does not work. |
| Candle World | Getting in the Bed here deactivates the glitch, even if it sends you to the Staircase of Hands. The pyramid to The Checkered Tile Path does not work. The Toriningen here allows you to access Hell freely, since the isolated section can be escaped with the glitch. |
| Shield-Folk World | The gate to Static Tunnel does not work. |
| Neon World | The doorway to The Neon Tile Path does not work. |
| Number World | First room: The first room loops, which can't be seen during normal gameplay. You can also access the water portion at the bottom of the room, which makes the "water step" noise, despite being unable to step on it during normal gameplay. The Zippertile leading to the FACE event can be interacted with and stabbed, but the tunnel to the event does not work. The Stabbing Room and the Lamp World door can be used. Second room: Getting in the Bed here deactivates the glitch, even if it sends you to the Staircase of Hands. You also can't use the unoccupied beds that are normally unreachable due to the surrounding beds. Guillotine World and Mini Hell can both be accessed. The Toriningen here allows you to access both ああああああああ event variants, and they can both be escaped with the glitch. |
| Staircase of Hands | Accessible through the beds, but entering a bed deactivates the glitch, so it can not be used here. |
| Hell | Only accessible through the Snow World, Candle World, and Guillotine World Toriningen. The Nenrikido here can be interacted with to teleport you to other worlds. The Toriningen here can also help you access other worlds, as their isolated traps can be escaped with the glitch. The Henkei Shita here can be stabbed to access The Footprint Path's first section. The gate to Dense Woods and the stairway to The Docks do not work. The Vending Machine can be interacted with. |
| Mini Hell | Accessed through the same process as normal gameplay. The closets still work. |
| Neon Tile Path | Both sections can be accessed, though not normally, as the transition between the two sections does not work. The top section with the smaller pyramids is only accessible through a Nenrikido in Hell. The bottom section with the larger pyramid is only accessible after getting caught by the Face Carpet Plaza Toriningen. |
| Footprint Path | Both sections can be accessed, though not normally, as the transition between the two sections does not work. The Henkei Shita section is only accessible through stabbing the red Henkei Shita in Hell, while the Goppa section is only accessible through a Nenrikido in Hell. The Goppa can still be interacted with, though only when standing on the path. |
| Checkered Tile Path | Both sections can be accessed, though not normally, as the transition between the two sections does not work. The top section is only accessible through a Nenrikido in Hell. The bottom section is only accessible through the small lamp in Lamp World. The pyramid to Candle World does not work. The Toriningen here allows you to access The Docks freely, since the isolated section can be escaped with the glitch. |
| Face Carpet Plaza | Only accessible through a Nenrikido in Hell. The gate to Forest World does not work. The Toriningen here allows you to access the Neon Tile Path's first section freely, since the isolated section can be escaped with the glitch. |
| Dense Woods | Only accessible through a Toriningen in Hell, as the isolated area can be escaped with the glitch. Only Dense Woods A can be accessed. The path to Puddle World does not work. The Vending Machine can be interacted with. The Infinite Road can not be accessed. There is a glitched Jellyfish out-of-bounds to the south that causes the game to lock when loading anything. |
| Teleport Maze | Only accessible through a Toriningen in Hell, as the isolated area can be escaped with the glitch. The teleport tiles work, but you have to manually interact with them instead of stepping on them. Teleporting with any of them deactivates the glitch. |
| Sky Garden | Only accessible through a Toriningen in Hell, as the isolated area can be escaped with the glitch. The staircase to The Wilderness and the doorway to the Crossover Garden do not work. Unlike a lot of worlds, the transition to the second area works with the glitch. Sitting on the benches in the first section deactivates the glitch. |
| Mall | Only one room can be accessed (the one from the Graffiti World elevator). The escalators do not work, even if the one leading to the rooftop is not blocked. |
| Docks | Only accessible through a Toriningen in The Checkered Tile Path, as the isolated area can be escaped with the glitch. The entire area loops, which can't be seen during normal gameplay. The stairways to The Sewers and Hell do not work. Interacting with the Pirori here is the only way to get to The Wilderness. The Vending Machine can be interacted with. |
| Wilderness | Only accessible through a Pirori in The Docks or by teleporting with the blue tile in the Teleport Maze. If accessed via the Docks Pirori, the player can visit the room before the Barracks Settlement, where none of the transitions work (heading into the Barracks Settlement, exiting the room through the southern exit, going along the gate to the east). The latter room with the portal to FC World A, accessed via the Teleport Maze, can be entered, though the glitch is deactivated once the blue tile in the Teleport Maze is interacted with. |
| Lamp World | Accessible through the door in Number World. The Toriningen in Number World allows you to access the ああああああああ event variant here, and it can be escaped with the glitch. Interacting with the small lamp allows access to the bottom section of The Checkered Tile Path. |
| Guillotine World | Accessible through the hole in Number World. The closets here can still be interacted with, whether they send you to Number World or not. The Toriningen here allows you to access Hell and Dense Woods freely since the isolated sections can be escaped with the glitch. |
Avoiding the Nexus
This table lists locations that are accessible without entering the Nexus.
| World | Notes | Route |
|---|---|---|
| Madotsuki's Dream Room | Where the dream starts, before the Nexus, and is the only area that can be accessed in this situation without first going to the Staircase of Hands. The KALIMBA event can also be witnessed here. | Madotsuki's Dream Room |
| Staircase of Hands | By sleeping in the bed in Madotsuki's Dream Room, there is a chance you will enter the Staircase of Hands, which acts as the primary starting connection to every other world under this condition. | Madotsuki's Dream Room → Staircase of Hands |
| Underground World | Accessed from the Staircase of Hands. Snow World and Puddle World can not be entered to get either the Yuki-onna or Umbrella effects, so the flames can not be put out to enter the Spaceship, but the elevator at the beginning can be used. | Madotsuki's Dream Room → Staircase of Hands → Underground World |
| Mall | Accessed from Underground World. The Flute effect can be obtained here, making it the first obtainable effect on the route, and both Graffiti World and the Dense Woods can be accessed from here. | Madotsuki's Dream Room → Staircase of Hands → Underground World → Mall |
| Graffiti World | Accessed from the Mall. The Bicycle effect can be obtained here. One of two Nexus worlds that can be accessed without going to the Nexus. | Madotsuki's Dream Room → Staircase of Hands → Underground World → Mall → Graffiti World |
| Dense Woods B | Accessed from the Mall. Only the Frog Path part of the Dense Woods can be accessed from here. The Frog effect can also be found here. | Madotsuki's Dream Room → Staircase of Hands → Underground World → Mall → Dense Woods B |
| Teleport Maze | Accessed from Dense Woods B. | Madotsuki's Dream Room → Staircase of Hands → Underground World → Mall → Dense Woods B → Teleport Maze |
| Wilderness | Accessed from the Teleport Maze. Only the isolated section leading to the Static Tunnel can be accessed. | Madotsuki's Dream Room → Staircase of Hands → Underground World → Mall → Dense Woods B → Teleport Maze → Wilderness |
| Static Tunnel | Accessed from the Wilderness. Leads to FC World A. | Madotsuki's Dream Room → Staircase of Hands → Underground World → Mall → Dense Woods B → Teleport Maze → Wilderness → Static Tunnel |
| FC World A | Accessed from the Static Tunnel. Leads to FC Dungeon. | Madotsuki's Dream Room → Staircase of Hands → Underground World → Mall → Dense Woods B → Teleport Maze → Wilderness → Static Tunnel → FC World A |
| FC Dungeon | Accessed from FC World A. The Famicom Glitch event can be witnessed here. Leads to White Desert B. | Madotsuki's Dream Room → Staircase of Hands → Underground World → Mall → Dense Woods B → Teleport Maze → Wilderness → Static Tunnel → FC World A → FC Dungeon |
| White Desert B | Accessed from FC Dungeon. Only the larger portion outside of the mountain ring can be accessed. | Madotsuki's Dream Room → Staircase of Hands → Underground World → Mall → Dense Woods B → Teleport Maze → Wilderness → Static Tunnel → FC World A → FC Dungeon → White Desert B |
| White Desert A | Accessed from White Desert B. Takofuusen can be seen flying by here, although none of the other events can be witnessed due to requiring either the Stoplight or Knife effect. Leads to Block World. | Madotsuki's Dream Room → Staircase of Hands → Underground World → Mall → Dense Woods B → Teleport Maze → Wilderness → Static Tunnel → FC World A → FC Dungeon → White Desert B → White Desert A |
| Block World | Accessed from White Desert A. The Hat & Scarf effect can be found here, making it the final effect that can be found on this route. It is one of two Nexus World that can be accessed without entering the Nexus. | Madotsuki's Dream Room → Staircase of Hands → Underground World → Mall → Dense Woods B → Teleport Maze → Wilderness → Static Tunnel → FC World A → FC Dungeon → White Desert B → White Desert A → Block World |
Arrow Key Challenge (WIP)
Inspired by ZASNK's No-key Challenge, this will document how far you can get into Yume Nikki without pressing a specific directional key (up, down, left, right).
"All Restrictions"
The player can't press the signified button at all.
Up Key
- If started on a new save, the player can not access the save desk, NASU, or the bed that takes them to the dream world, as they are all above Madotsuki's spawn point. In this case, she can only walk down to the balcony and can't exit it after entering.
- If done on an existing save (if the game has been saved at least once), the player can access the bed after simply getting off the save desk chair and pressing right to interact with the bed. The player can be taken to the dream balcony, but can't progress further, as the balcony exit is above Madotsuki.
Down Key
- If started on a new save, the player can access NASU and the save desk, though they will be unable to leave the desk upon interacting with it. Additionally, if the player accesses the Famicom menu, they can only exit it by starting up NASU and then exiting the game by pressing the Esc key, as the Famicom menu requires you to press down to exit it. The player can also access the bed to get sent to the dream world, and can even exit the dream balcony and dream room. However, upon entering the Nexus, they will be unable to access any doors, as they are all below the door to the dream room.
- However, the player can still access the Staircase of Hands from Madotsuki's Dream Room, allowing the player to access more of the dream world beyond the Nexus. The Staircase of Hands only requires you to head left, which will lead to Underground World.
- From Underground World, the player can use the elevator leading to the Mall, as it only needs the up button. However, this will be the only Mall room that can be accessed, as pressing down is required to get to the escalators. Interacting with the elevator again by pressing up will take you to Graffiti World where, due to the world looping, can be fully accessed without pressing the down button. Most notably, the Bicycle effect and Nexus door can be accessed. As the Graffiti World door is at the bottom of the Nexus (and is also aligned with the Mural World door to its left), any of the other Nexus worlds can be accessed, as there is no need to go down.
- However, the player can still access the Staircase of Hands from Madotsuki's Dream Room, allowing the player to access more of the dream world beyond the Nexus. The Staircase of Hands only requires you to head left, which will lead to Underground World.
- If done on an existing save (if the game has been saved at least once), the player can't leave the save desk.
idk
All of these are assuming you have not used any effects prior to these conditions (such as using the Knife effect to anger a Torinngen to enter Mini Hell), only during the conditions.
Longest Possible Route From YN Nexus Worlds
The longest possible route from all YN Nexus worlds (as long as you hit a dead end or don't end up in a world that you've already been to, excluding isolated areas like the Dense Woods B Frog Path or Wilderness FC Warp).
goooooooooo
Number World
- Lamp World
- Guillotine World
- Staircase of Hands
- Underground World
- Spaceship
- Mars
- Spaceship
- Underground World
Neon World
- Neon Tile Path
- Hell
- Witch's Island
- Docks B
- Hell
- Neon Tile Path
Shield-folk World
- Static Maze
- FC House
- Static Maze
The Dream World Census + The Streets of London (WIP)
How many NPCs live in each dream world and how many die to the Knife effect.
| World | Total Population | Genocide Route Count | Notes |
|---|---|---|---|
| Barracks Settlement | 13 | 6 | The Seahorse and Isee can not die, but the former can still be attacked with the Knife effect. |
| Block World | 1 | 1 | |
| Candle World | 9 | 8 | The Toriningen can not die, but this one can be enraged. |
| Checkered Tile Path | 2 | 1 | The Toriningen can not die. |
| Dark World | 4 | 1 | The Pissipissini are immune to the Knife effect. |
| Dense Woods A | 1 | 0 | The Jellyfish can not die. |
| Dense Woods B | 27 | 1 | The Floyag, Isee, Jellyfish, and Shitai-san can not die. |
| Docks | 6 | 3 | Dropfish, Mizume, and the Sea Snake can not be accessed since they inhabit the surrounding water. |
| Eyeball World | 130 | 125 | The Blue Severed Head and Pier Monsters can not die. |
| FC Dungeon | 2 | 2 | |
| FC House | 14 | 14 | |
| Neon World | 137 | 137 |
YN Badge Requirements and Specifics
This what 1 AM brain does to ya.
- Excluding "Window", a badge that requires you to have all of the effects, the following effects are the minimum of what is needed while taking the shortest possible routes for badges:
- Cat effect (Beneath the Surface, Acknyawledgement, etc.)
- Hat & Scarf effect (Melted-tsuki)
- Knife effect (Dave-y Jones Locker, A Stab in the Dark, etc.)
- Medamaude effect (Monoko of the White Desert, under the condition Madotsuki does not wake up once entering the dream world unless woken up by an event or to achieve the game's ending while also taking the shortest possible route to obtain a badge)
- Midget effect (Mars-san)
- Spirit Headband effect (Ghostly Assembly)
- Stoplight effect (Monoko of the White Desert)
- Witch effect (Black Cat)
- Yuki-onna effect (They Like Me-ow~!, Moonwalk, etc.)
- The majority of badges that require an effect require at least some sort of backtracking (going back one world in order to get to another). However, there are a few exceptions of badges that require an effect that also do not require backtracking.
- A Stab in the Dark (requires Knife effect, which is obtainable on the same route to the Wilderness)
- Seahorse (requires Knife effect, which is obtainable on the same route to the Barracks Settlement)
- No Escape (requires Knife effect, which is obtainable on the same route to the Sky Garden)
- U-F-Uh-Oh (requires Yuki-onna or Umbrella effect, with Yuki-onna being obtainable on the same route to Mars (assuming that the bed in Snow World lands on the proper 1/5 chance of sending Madotsuki to the Staircase of Hands))
YN Badge Routes (WIP)
The player can't backtrack or enter worlds they have already entered. They start off with no effects and can't wake up after going to sleep (unless an event forces it to happen)
Starting points completed so far:
- Number World
- Mural World
- Shield-Folk World
- Puddle World
- Neon World
2kki Badges Sorted by Needed Effects
RRRAAAAAAAAGHGDSHD{GNEWIOUHNGINH{gihwnouiewrg3hn4g2-34589t79453tughrg3u[4thfergoiupqnvibnrug3hb4u1ip4gqip[w;gu;eoqgbrjbripu3gi342uigtfpbwq
| Effect | Badges that can be unlocked only if this effect is obtained |
|---|---|
Name Articles
The "Name" articles are a series of articles originally created by Mt.kiki on the old Yume Nikki Wiki. These pages list various theories relating to Yume Nikki and possible design inspirations for various aspects of the game. As the articles (likely) provide a Japanese point-of-view on the game's visuals and themes, they are likely to give better insight into possible design processes while creating Yume Nikki.
As the articles are either largely written in Japanese, have broken Google-Translated English, or are copy-pasted from other websites, I'd like to try and see if I could decode what each of the article's sections intends to communicate. This is also done to squeeze the contents of the articles into a smaller, usually multi-paragraph, state so that it can be read from a single section rather than an entire article.
Not all of the articles have currently been analyzed or translated, so this is still a work-in-progress section. Once one has been completed, an image will accompany the section.
Click Expand to view contents.
Bed Room
The article makes a connection between the Number World Bed Room and "Naraka", a Buddhist term that is basically the Buddhism equivalent of Hell or purgatory. A being is usually sent to Naraka as a result of bad karma, which may relate to how the Number World Toriningen must be stabbed in order to enter Mini Hell, where a ghost of Madotsuki resides.
In Buddhism, it is widely believed there are eight Hells (with there being a total of sixteen, split between Hot and Cold Hells). The Eight Hot Hells appear to relate to the eight closets found in the Bed Room. There are also four gates on the four sides of the Eight Hot Hells, which is similar to how there are four closets (gates) in the four cardinal directions of Mini Hell.
Note from the sandbox owner: Mini Hell also appears to be based on the Blood Pool Hell in Buddhism. While texts of this punishment, called the Blood Bowl Sutra, originated in China, it grew quite popular in Japan. The belief was that women who died during childbirth were sent to this blood pool as a form of punishment (which may explain the red drip effect seen in Mini Hell, and why it shares a similar appearance to the normal Hell map). This may also relate to Aztec themes seen in the game, as the Aztecs considered childbirth to be a form of battle that women faced. The Aztecs believed that women who suffered the same fate would be sent to Paradise alongside those that died in physical battle, a much more peaceful ending.
Bloody Touching Monster
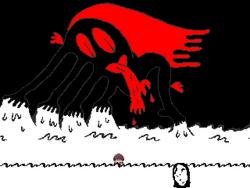
The Bloody Touching Monster may be based on the Daidarabotchi of Japanese mythology, a giant who weighed Mount Fuji and Mount Tsukuba on a great scale to see which was heavier. This is similar to how the Bloody Touching Monster is large in size and grabs onto the mountains in the background of Uboa's Trap. The picture in the article also depicts Daidarabotchi as fully black, almost shadow-like, much like the Bloody Touching Monster.
The article also makes an odd connection between Myristica fragrans and bloodletting. The Bloody Touching Monster appears to have small spurts of blood coming from its arms/legs, which may allude to bloodletting. This process is a treatment for "nutmeg liver", the chronic congestion of the liver that gives it the appearance of nutmeg. The article then uses this connection between blood and nutmeg to bring up Myristica fragrans, a nutmeg tree that has yellow fruit with black and red seeds. The yellow hair may symbolize Poniko (blonde hair) and her room (yellow door and carpet) being transformed into Uboa's Trap (black and red, the same colors as the Bloody Touching Monster).
Candle World
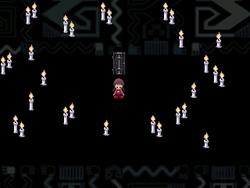
The article first relates Candle World to The Presentation of Jesus at the Temple, which is also known as Candlemas. There are also the Twelve Great Feasts, related to the Presentation of Jesus at the Temple, which the article links to the twelve Nexus doors. It seems that each of the twelve doors in the Nexus represent an event that the Twelve Great Feasts are based on (though the article's table does not just use Nexus doors, it states other non-Nexus worlds like the Pink Sea and Sky Garden Stairway).
The pyramid in Candle World is also taken into consideration in the article. One of the first instances of a candle-like object was in Ancient Egypt. Egypt is well known for its pyramid structures. The pyramid also links back to the religious theme discussed earlier. There is a Slavic dish known as Paskha, which is typically eaten at Easter, is molded into a pyramid shape, and is often decorated with a single candle atop it.
The article also links the fairy tale Snow White to the Candle World. The characters located there seem to represent the characters in Snow White. The Dwarf represents the Seven Dwarfs, the Toriningen represents the Evil Queen, and Madotsuki represents Snow White. It should also be noted that there are seven Walking Candles in Candle World, the same number of dwarfs in the tale. In the tale, Snow White is offered a poisoned apple by the Evil Queen in disguise, which causes her to go into a coma/fall asleep, which may explain why there is a Bed in the Candle World near the Toriningen. The Toriningen are also considered "enemies" in the game and the Evil Queen is considered the antagonist of the Snow White fairy tale.
The last section involving the Walking Candles simply links it to wax sculptures.
Note from the sandbox owner: This table is in the original Name article and might be expanded upon by me in the future, as it seems unfinished or unsure on the locations in some areas.
| The Twelve Great Feasts | 12 doors | ||
|---|---|---|---|
| Pascha(Easter) | The Nexus | ||
| 1 | September 8, the Nativity of the Theotokos | (Undecidedness) | |
| 2 | September 14, the Exaltation of the Cross | (Undecidedness) | |
| 3 | November 21, the Presentation of the Theotokos | The Stairway to the Sky Garden | |
| 4 | December 25, the Nativity of Christ/Christmas | Snow World | |
| 5 | January 6, the Baptism of Christ -- Theophany, also called Epiphany | The Pink Sea | |
| 6 | February 2, the Presentation of Jesus at the Temple/Candlemas | Candle World | |
| 7 | March 25, the Annunciation | (Undecided) | |
| 8 |
The Sunday before Pascha (Easter) -- Flowery/Willow/Palm Sunday |
(Undecided) | |
| 9 | Forty Days after Pascha (Easter) -- the Ascension of Christ | (Undecided) | |
| 10 | Fifty Days after Pascha (Easter) -- Pentecost | (Undecided) | |
| 11 | August 6, the Transfiguration | (Undecided) | |
| 12 | August 15, the Dormition (Falling Asleep) of the Theotokos | The Bed Room | |
Dave Spector
The article suspects that Dave Spector may be another instance of indigenous imagery in the game. They resemble a Nazca female effigy figure (picture viewable here) which is made of hair, shell, and whale tooth.
Dave Spector is also compared to the children's game Manhunt, which is like a combination of hide & seek and tag. Madotsuki is considered "it" and Dave Spector is "tagged" by being stabbed with the Knife effect, allowing access to the Monoe and Severed Head tunnels. The "manhunt is sometimes played with teams" addition may relate to how there are two Dave Spectors. More about the White Desert and how it may be based on children's games is detailed in the White Desert's Name article.
Effects
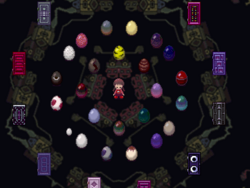
Effects take the form of eggs when they are dropped in the Nexus. The article relates this to Easter eggs, which are special eggs given out around springtime to celebrate Easter. Eggs, which are often used to symbolize rebirth, are used in Christianity to symbolize the empty tomb of Jesus of which he was resurrected from. This could relate to the ending of the game, as many fans view Madotsuki's death as a "rebirth" or "reawakening", and the only way to achieve the ending is through dropping all of the effects (eggs) in the Nexus. The Name article also relates the time that Easter eggs are given out (spring) to a section in the Wilderness article detailing Batsu's similarity to the Asian royal fern, which sprouts in the spring. Batsu also resembles a spiral shape, which is noticed in the Wilderness Name article. In some ancient civilizations, spirals are regarded as a symbol for the cycle of life and death, which could also relate to the "reawakening" ending theory.
The connection to eggs does not stop at the theories of rebirth and reawakening. The Floyag in the Dense Woods are stated to resemble a uterus, though the article suggests that their appearance may come from the Earthly Branch symbol for the rabbit zodiac sign (卯). The symbol also vaguely resembles a uterus, which also fits into the egg and "rebirth" themes of the article. The article also brings up the symbol for a fertilized egg (卵), which shares a similar resemblance.
The article also notes the presence of an "Easter egg" in the game itself. A code similar to the Konami code is input into NASU to play the eggplant-headed NASU mode. It should be noted that inputting the Easter egg causes increased bonus eggplants.
Fabergé eggs may have also been an inspiration for some of the effects and their egg design when left in the Nexus. Fabergé eggs were jeweled eggs made by the House of Fabergé from 1885 to 1917. They were typically given as gifts during Easter. A table is even given in the Name article to compare some of the eggs. A simplified version is put below:
| Midget egg |
Yuki-onna egg |
Bicycle egg |
Triangle Kerchief egg |
| First Hen Fabergé Egg | Winter Fabergé Egg | Steel Military Fabergé Egg | Twilight Fabergé Egg |
Another Fabergé egg that is brought up is the Bouquet of Lilies Clock egg, which has roman numerals up to twelve surrounding it. The egg is also split into 12 sections. Notably, there are also twelve doors in the Nexus (excluding Madotsuki's door). The lilies may have also inspired the presence of the white lilies in the Crossover Garden. White lilies are also associated with death in Japanese culture, which may allude to the ending, which requires leaving the effect eggs.
The final parts of the article relate to the ending, resurrection, and the directions that two events in the game symbolize. The article first mentions the Feast of the Ascension, a feast meant to commemorate the ascension of Jesus that usually takes place during Eastertide. There are two different events which the article associates with "ascension": the Witch's Flight and the Ending. The Name article also relates this to the cycle of the Sun and Moon, and how they could symbolize positivity and negativity, respectively:
- The Sun rises in the east, symbolizing brightness/positivity/good. The Witch's Flight, which is a happier event compared to a lot of what happens in the game, could symbolize this positivity. It should be noted that when Madotsuki has her effects, she travels East and has a more positive experience. When you fall from the event by unequipping the effect, Madotsuki wakes up while facing east, which could relate to the resurrection (waking up) and Christ (Easter).
- The Sun sets in the west, symbolizing darkness/negativity/bad. The Ending, which is a more negative experience and literal ending of Madotsuki's life, could symbolize this negativity. It should be noted that when Madotsuki does not have her effects, she jumps West and has a more negative experience.
Eyeball World
The Medamaude NPC that gives the Medamaude effect resembles the hamsa, a palm-shaped amulet depicting an open right hand with an eye on the palm. The sign represents protection, which could relate to how the Medamaude effect returns Madotsuki to the peaceful Nexus while remaining asleep, especially in a situation where she is lost or trapped by characters such as Uboa or the Toriningen.
The Eyeball World background also heavily resembles Paracas textile work, depicting a dream being that is an often reoccurring design throughout Paracas textiles. This being represents the dreamer and acts as a sort of self-awareness during dreams to signify that the person is in fact dreaming. The figure also holds the head of the dreamer.
While the background obviously takes inspiration from the Paracas, it may also be inspired by the Native American sun dance ritual. One of the members of the dance wears a red loincloth with no upper-body wear, face paint, a packet of tobacco around their neck, and sage rings around their head and wrists. This description slightly fits the Eyeball World background, as it wears red, has rings around its wrists (and ankles), and also some sort of neck attachment. The sun dancer also holds an eagle bone flute in their mouth during the sun dance, blowing it in order to attract eagles. It was considered good luck if eagles flew down due to the flute's sound, as they were considered the eyes of the heavens.
FACE
FACE resembles various drawings and paintings by the artist Louis Wain, who particularly drew cats. Some of his later works depicted more surreal and abstract representations of cat faces.
The Name article relates FACE's connection to Louis Wain's works to the Cat effect, suggesting that the two may have a connection. Due to these similarities, it suggests that FACE may be an interpretation of someone in Madotsuki's life, possibly a family member or her parents.
FC House
FC World obviously takes inspiration from classic Famicom/NES games, though Mother (also known as EarthBound Beginnings) appears to be one of the more significant and obvious inspirations.
The next installment in the Mother series, Mother 2/EarthBound, has the beginning of the story start with a meteor crash. This may have inspired the NPC Merutomaro, who resembles star jelly. Star jelly is a gelatinous substance that, in folklore, is stated to fall during meteor showers. The substance also often takes a primarily white color, matching Merutomaro's appearance. Considering this slime and meteor connection to Merutomaro, they may also be based on the monster from The Blob, who comes from outer space on a meteorite. The term "blob" can also stand for "binary large object", a collection of binary data in a single entity, which is befitting of the retro/digital/game-theme of the world Merutomaro lives in.
The mushrooms in the FC Basement, know as Kinoko-san, appear to be based on a kyōgen performance known as "Mushroom" or "Fungus". The play centers around a man who grows annoyed due to the large mushrooms growing around his house, so he orders a Yamabushi to pray in order to get rid of the mushrooms. However, the more that the Yamabushi prays, the bigger the mushrooms grow and move. One of the characters in the play, Oni Mushroom, may also relate to why they surround the FC Demon's room. Their place near the FC Demon may also relate to how mushrooms have stimulated growth when exposed to jolts of electricity or large sounds simulating lightning strikes, as the FC Demon gives the Demon effect, which creates lightning.
The inclusion of the Goblins in the basement appears to interpret them as computer viruses in the article. Their brighter appearance and them wielding weapons may indicate they are intended to represent this. They also have a noticeably higher chance of giving Yen, which may indicate that eradicating them is good because they are "evil" or "bad". The castle wall they find themselves by may be intended to be a pun on a firewall, a network system intended to keep a network secure.
Graffiti World
Graffiti World's tile-like layout appears to be inspired by the game LSD: Dream Emulator, which is based on a dream journal kept by Hiroko Nishikawa. The game has a similar feel to Yume Nikki, relying on dream-like visuals and player exploration. This inspiration may be why the Bicycle effect can be found here, as "LSD" is also a drug. The first recorded LSD trip is known as "Bicycle Day" where Swiss chemist Dr. Albert Hofmann ingested the substance and reported intense perception changes. His assistant helped escort him out, and the two rode on bicycles in order for Hofmann to reach his house.
The left design in Graffiti World (the more monkey-like one) appears to have a mudrā-like design on its hand. References to Buddhist beliefs appear throughout the game, and this appears to be one of them. One of the mudrās known as a seal gesture involves facing one's full hands up and forward. The figure seems to make this gesture, considering both of its hands can be seen facing forward in the graffiti.
The right design in Graffiti World (the more face-like one) appears to be representative of evil, which the left figure is warding off. The article draws similarities to its design and Linophryne lucifer, also known as the devilfish. This particular fish can be found in the Indian ocean, which is relevant to the theme of mudrās, as they are practiced particularly in Indian religions. The devilfish also has two appendages on its face, one resembling the lure of an anglerfish and one resembling a long beard. These are both seen in the right design, as the lure holds the Bicycle effect and the end of the "beard" has a Restroom. The connection between this figure and Buddhism is also furthered by the name of the anglerfish/monkfish in Japanese: "アンコウ" (Ankō). The word appears to be derived from "ango" which is a term for a Japanese period of training that Zen Buddhist monks undergo. The English name "monkfish" also literally has "monk" in the name.
Graffiti World overall also seems to be based on chakra, which are vital points associated with a person's life force. The colorful tiles can be compared to the seven rainbow chakras and chakra is also a part of Buddhism (see mudrā section), though Buddhist texts usually only refer to five chakras. The name "chakra" also means "wheel" or "cycle", which may be another explanation for why the Bicycle effect can be found here.
Hell
The maze-like structure of Hell appears to be inspired by the "Man in Maze" symbol created by the Papago Indians of Arizona. Though interpretations of the symbol vary between families, the general consensus is that it represents life, death, and the afterlife. The man in the symbol represents life and the center of death while the maze represents the various choices made during life. The symbol also correlates to I'itoi bring people to the earth from the underworld.
The red Henkei Shita found in Hell may reference a supernatural being described in various religions known as the "preta" or "gaki" (both literally meaning "hungry ghost"). They are often described as having very sunken skin and narrow limbs, though their belly has become overly bloated. They are reincarnations of people who were previously greedy or jealous in a previous life and have been reborn as entities with seemingly insatiable hunger and thirst. Even food and drinks are unable to relieve this suffering, as they turn into fire when touched by a preta, which may align with the common "fire" theme often associated with the underworld. The concept of the preta is described in Taoism, Hinduism, and Buddhism, the latter of which has common themes throughout Yume Nikki.
The article also mentions how the mouth of the Henkei Shita, and how its large stomach could represent a pregnant person, could allude to a caesarean section delivery (more commonly known as simply a C-section).
The staircase leading to the Docks and the gate leading to the Dense Woods may refer to punishments in the lowest layer of Hell in Buddhism. There are areas of boiling hot water (The Docks) and trees made of sword blades that must be climbed (Dense Woods).
KyuuKyuu-kun
The article first compares the landscape in which KyuuKyuu-kun is found, the Number World Stairway, to Diyu. This is essentially what hell in Chinese mythology is called. Within East Asian Buddhism, the color of Diyu is described as pure black, which is an accumulation of the colors of those inhabiting Diyu: the red color of hungry spirits, the yellow color of animals, and the blue color of asura (demigods or titans). These same three colors are also commonly used for oni/demons in Japanese mythology. The overall comparison with these colors if to the "flying man" figures in the background of the area, which sport the same three colors (with the addition of green).
(TO BE COMPLETED)
Article Construction
Construction and testing for article ideas or possible future articles. Stuff here may or may not appear in/as future articles. Heavy WIPs ahead.
Click Expand to view contents.
Badge Page Submission Process (WIP)
Making and Submitting Badges
Badges are made by a large array of different artists who have made and submitted artwork to be used as badges. Anyone is able to submit a badge, as long as they have a proposal in mind. Below will be a guide on how badges are submitted, coming up with a badge proposal, and making the art for a badge.
Badges are most often submitted through this Google Form, which has the submitter fill out the information regarding their badge, as well as upload the badge art itself. To view all submissions for badges, this spreadsheet shows all currently unimplemented badges, sorted by their time submitted (as well as a tab for implemented badges).
It is highly recommended to join the YNOproject Discord server to submit badges, get confirmation on an idea for a badge, or receive feedback from other artists, though this is not strictly required for submitting a badge through the badge form or having it be implemented.
Badge-making Tips
When coming up with a badge to implement into the game, make sure your badge condition isn't shared by an already existing badge. Duplicate badges will not be accepted and, if two or more unimplemented badges are found to have the same condition, it may become difficult to choose which gets implemented, and may also require discussion between each submitter to agree on an outcome.
When thinking of how your badge should be unlocked, it is also recommended that your badge be of something notable in the game you're making it for. This can include visiting deep worlds, experiencing events, encountering special characters or scenes, using effects to make NPCs react, etc. If a badge condition is made that does not seem entirely notable, such as using an effect on an NPC that has the same reaction to it as any other NPC, it may not be accepted for this reason. Badges with specific conditions like this may also be difficult to implement in the first place, as badges largely rely on different triggers, switches, and values found within each game to be unlocked, and hyperspecific conditions can typically not be reasonably tracked by these.
After coming up with an acceptable condition for a badge, it's time to make the art! The artwork that you make must be original and must not include any existing pixel art, whether it originates from the games or not. Badges that feature stolen artwork or tracings of sprites may be suggested to be redone before they are implemented. Possible tools and websites that can be used to make your badge art include Aseprite, Pixilart, Piskel, or any image editor with a 1-pixel size brush and adjustable canvas.
As stated before, all badges are a 37x37 image or gif, so it is highly recommended to start with a 37x37 canvas when making a badge. Making a piece of art that is larger than this size and then shrinking it down to fit is not ideal, as shrinking an image down to this size usually lowers the quality of the image, which could make the badge visually difficult to interpret. It's also recommended to center your badge art on the canvas so that it doesn't appear uneven. Your badge art also must at least represent or depict something related to the condition, such as a symbol, character, or landscape related to the event. When making animated badges, multiple of these aspects can even be included.
If you are making an animated badge, it is required to also have a still-frame version of the badge that will be used as a chat icon. The still-frame version can be a single frame from the animation or an entirely new piece of badge art that also represents the condition.
| Similar Animated and Still versions | ||
|---|---|---|
| Different Animated and Still versions |
Submitting a Badge
Once you've finished your badge art and believe it is ready to be submitted, access either the Google Form linked above or use the '''#badge-proposals''' channel in the Yume Nikki Online Discord server. Using either of these options will require filling out information regarding your badge.
On the good form, the badge submitter must include their badge's name, the game it is intended for, the author(s) of the badge's art, and the condition that allows for the badge to be unlocked. The submitter can also add an optional description for the badge which can range from anything from a referential quote related to the badge topic to a hint on how to unlock the badge. If you are aware of the internal triggers that allow for the badge to be unlocked, there is a section in which this can be entered.
Muma Rope
Memories
Memories are collectibles within Muma Rope that replace the usual effects found within many Yume Nikki fan games. While they serve the same purpose of being a group of collectibles that are scattered throughout the game's world, only a few select memories can be actually utilized like effects. When a memory is obtained, it will show up as an orange square on the save screen. There are a total of 28 memories.
Below is a list of memories that can be collected in Muma Rope:
EDITOR'S NOTE: This is just a simple list of the memories, where they can be found, and how. The names of each memory here are tentative, since I'm not sure if they have names, and if they do, I don't know them.
| Memory | Location and Method |
|---|---|
| Neon Die | Rainbow Labyrinth - Found on the top floor after going up five ladders scattered throughout the labyrinth. |
| Hourglass | Sands of Time - Obtained after waiting for the black pillar displaying the memory to sink into the quicksand. |
| 2600 Artifact | 2600 World - Found in one of the ruins, northwest of the town area. |
| Real Heart | Sanguinary Sea - Located on the heart-shaped island, south of the warp from Thorny Vine World. |
| Star Wand | The Moon - Found floating on the Moon. |
| Celestial Jewel | Windy Canyon - Located atop a pillar blocked by two rocks. Can be accessed after activating the Sun pillar and solving the Moon pillar puzzle. |
| Flute | Owl Swamp - Found in a nest after making three of the five owls sing, excluding the two that sound like brass instruments. |
| Hand | Puzzle Chamber - Located behind two barriers that can be deactivated by flipping the two levers on the south side of the main puzzle room. |
| Diamond | Dream Chicago - Obtained after breaking through the glass in the Swimming Pool, which will drop Muma into Dream Chicago. |
| Knife | Yin Yang Lake - Found east of the figure under the red streetlight after it has been interacted with to turn the lake to its Yin/dark variant. |
| Void Orb | Stare's Stairs - Found within a dark tunnel with a duplicate Muma. The player Muma will shake hands with the duplicate Muma before the double turns into the memory. If the Knife memory has been obtained prior, the duplicate Muma will stab the player Muma, causing them to turn into the memory as the player now controls the double. |
| Neon Leaf | Dark Neon Meadow - Located within a grass patch in an occasional extension of the world's middle room. |
| Totem Egg | Totem Hill - Located on the ground level, north of the gate to the Dark Neon Meadow. |
| Rainbow Heart | Cyber Cavern - Found after activating the teleportation tile with rainbow particles around it, sending Muma to a unique part of the cavern. |
| Daikon | Isle of Seasons - Found in the basement of the house during Summer, which only opens after feeding the carrot to the rabbit in the Isle of Seasons. |
| RBG Substance | Realm of the Orb - Found inside of the world's red variant by placing the orb in the transition room's southeast platform and then taking the left pathway. |
Additionally, there are seven extra memories known as Empty Memories (also referred to as Blank Memories). These types of memories are hidden within various worlds and normally require odd means of reaching them. They each take the appearance of a black heart, resembling the pink heart memory gained during the game's tutorial, and are found behind doors resembling the Memory Room door. After they are obtained, Muma will distort to reflect the event or location that led her to the empty memory. When an empty memory is obtained, it will show up as a black square on the save screen. There are a total of 7 empty memories.
| Memory | Location and Method |
|---|---|
| Memory of Static | Memory Room - Find the secret pathway near the Memory Room door. |
| Memory of Darkness | Retro Dungeon - Walk across the water near the doorway to White Shores. |
| Memory of Eels | Realm of the Orb - Hold the orb and then press SHIFT to return to the Memory Room. Return to the realm, pick up the orb and get caught by the pursuing eels. |
| Memory of Vines | Faraway Place - Take the bus again before it leaves after dropping you off once. |
| Memory of Screams | Monochrome Building (Red) - Pass the balcony and interact with the large sky eye. |
| Memory of Light | Cloudy Rainbow World - Ride the invisible rainbow onto the cloud with a bump. |
| Memory of Decay | Sanguinary Ocean - Escape the pipes and swim north of the normal Memory Room door. |
List of Locations
| Name | Notable Features |
|---|---|
| Memory Room | Coin Pink Heart Memory Memory of Static (Empty) |
| First Steps | Coin Rose Memory |
| Retro Dungeon | Memory of Darkness (Empty) |
| Inversed Retro Dungeon | |
| White Shores | Monochrome Square Memory |
| White Hill | |
| White Passage | |
| Puzzle Chamber | Coin Hand Memory |
| Owl Swamp | Flute Memory |
| Lamp World | Coin Alternate Muma |
| 2600 World | 2600 Artifact Memory |
| Cave of Perils | Coin Double-Jump Boots Memory |
| Sands of Time | Hourglass Memory |
| Red Sands A | |
| Red Sands B | Ball Memory |
| Orange Mausoleum | Coin |
| Pink Snowscape | Snowglobe Memory |
| Rainbow Labyrinth | Coin Neon Die Memory |
| Weird Forst | Coin |
| Unicorn Woods | Coin Sword Memory |
| Sanguinary Sea | Coin Real Heart Memory |
| Sanguinary Ocean | Memory of Decay (Empty) |
| Occult Basement | Bloody Cassette Memory |
| Undersea Expanse | Red Coral Memory |
| Dark Neon Meadow | Neon Leaf Memory |
| Isle of Seasons | Coin Daikon Memory |
| Succubus Grotto | |
| Sunset Cliff | Coin |
| Projector Room | |
| Realm of the Orb | RBG Substance Memory Memory of Eels (Empty) |
| Sheet Music Zone | |
| Stare's Stairs | Void Orb Memory Alternate Muma |
| Sugary Fields | Coin |
| Sugar Maze | Coin |
| Greenhouse | |
| Dream Chicago | Diamond Memory |
| Jarred Rose | |
| Dark Stairways | |
| Cloudy Rainbow World | Coin Memory of Light (Empty) |
| Windy Canyon | Coin Celestial Jewel Memory |
| Swimming Pool | Coin OK Can Memory |
| Tree Trunk Complex | |
| Black Waters | |
| Cyber Cavern | Coin Rainbow Heart Memory |
| Particle World | Coin |
| Totem Hill | Coin Totem Egg Memory |
| The Grinder | Alternate Muma |
| Rainforest Road | Coin Umbrella Memory |
| Sunflower Fields | Coin |
| Patterned Block Zone | Coin |
| Bus Stop | |
| Faraway Place | Memory of Vines (Empty) |
| Yin Yang Lake | Coin Knife Memory |
| The Moon | Star Wand Memory |
| Great Rope | |
| Blue Flow | Coin Alternate Muma |
| Thorny Vine World | Coin |
| Digital Abyss | |
| Rusty Compound (Outside) | Coin |
| Rusty Compound (Inside) | Coin |
| Empty Museum | |
| Antiquated Facility | |
| Chaotic Dimension | |
| Monochrome Building | Balloon Memory Memory of Screams (Empty) |
| Hidden Laboratory | Alternate Muma |
Template Testing
| This page or its contents are under consideration of being forked. To discuss this, please use this article's talk page. Details: The section about so-and-so differs enough from this page to be made into its own article. |
| This page has been requested to be moved. To discuss this, please use this article's talk page. If the move is being done manually, remember to check what links here and change any links to direct to the moved article. Details: The page needs to be moved because so-and-so is a more fitting article name. |
2channel threads discovery archive
Listing things as they are discovered in the original 2channel threads where Yume Nikki began to get noticed and played. Everything is found here.
| Thread and Post Number | Post Contents | Discovery |
| Thread 1 8 |
なんだかよくわからんが、終わりも目的もないみたい
とりあえず自転車を手に入れると楽 tanasinnの権化みたいなゲームだ |
Finds the Bike effect and comments on how it is easy to obtain. |
| Thread 1 12 |
雪の世界で寝ている女ってどうすればいい? | Finds and asks about Kamakurako. |
| Thread 1 17 |
けっこうやりこんだw
包丁はかなり使える。 邪魔なキャラを倒せるし、たまにお金ももらえる。 そのお金は自販機で使えるんだけど、どんな意味があるのかわからん。 |
Finds the use of the Knife effect: you gain money by killing NPCs and you can use it for vending machines. |
| Thread 1 19 |
ボスのようなデカイ敵倒したけど何も起きねぇ。
だがそれがいい。 左回りで2個目の部屋(レゴブロックみたいなところ)からいける 白黒の世界を解読できた人いる? |
Refers to a big enemy like a boss that they beat. Possibly referring to the large FC Goblin? Also describes Block World and White Desert. |
| Thread 1 22 |
発見&質問
ジュースを買うとハートが増えるな。意味は良く分からんが 小人のエフェクトって何か得することある?入れないところに入れるとか |
Finds that health increases when you buy juice from vending machines. Also asks what the Midget effect's use is for. |
| Thread 1 24 |
>>23 どういう形か忘れたけど、なんか動く物体に話しかければ行ける
森のフィールドの奥行ったらある電車 あれってなんか意味ある? 単なる行き止まり? |
Informs a user they can reach the White Desert gate in Block World by talking to Mafurako. Also discovers the Traincar at the end of the Dense Woods. |
| Thread 1 25 |
>>24
ありがと 行けた。 白黒の世界は、トンネル内の女の子と入り口の右側に生えてる腕を刺すとそれぞれ100円。 あと、目のような模様の箱は正面から包丁で刺せるが意味なさそう・・・・・ 森の電車は乗客を刺して100円もらえるだけ・・・・か? |
Related to the 24th post detailed above. The user thanks the previous comment for informing them. Discovers Monoko and the Eye Box, but does not know the purpose of the Eye Box yet. |
| Thread 1 26 |
電車、乗客刺して座ってしばらくしてから下車したら
違う場所にいた。 乗客刺す、座る、はしなくて良いのかもしれんけど。 |
Finds Witch's Island through the Train Car. |
| Thread 1 27 |
夢のなかの自室で椅子に座ったまま方向転換して、そのあと机に向かって決定キーで椅子に座ったまま移動できる。
ただものっそい遅いしウィンドウ開けない。 |
Finds you can sit in the chair in Madotsuki's dream room and move around with it, though you're slowed down and can't open the menu. |
| Thread 1 28 |
>>25
白黒の世界の「目の模様の箱」をたくさん包丁で指したら(20回くらい) 変なところに飛ばされたよ。 トンネル内の女の子に「しんごう」使ったら大変なことになった。 >>27 >椅子に座ったまま移動 おお、マジだ。 意味あるのかな。 意味無いんだろうなぁw |
This post replies to both the 25th and 27th posts above. The reply to the 25th states they were teleported by the Eye Box and, additionally, they found out about the Monoko event by using the Stoplight effect. |
| Thread 1 33 |
連投スマン
ミニゲームで何かしらの効果確認した人いる? 俺20点しかとれないから確認できない・・・ |
Questions if there is an effect reward for reaching a certain point in the NASU minigame. |
| Thread 1 35 |
包丁は真っ暗闇の扉の中にあったぞ | Helping a user by telling them the Knife is in Dark World. |
| Thread 1 36 |
かさ→おに、でおにエフェクト起動したら雷が鳴る
ゆきおんな→ぼうしとマフラー、でぼうしエフェクト起動で雪だるま化 何か使えそうな場所ないかな |
Discovers the effect combinations of Umbrella + Demon and Yuki-onna + Hat & Scarf, though they don't know where they can be used. |
| Thread 1 42 |
「めだまうで」を使うと、夢から覚めることなく扉のある部屋へ戻れるっぽい。 | Discovers the use of the Medamaude effect: teleporting back to the Nexus. |
| Thread 1 43 |
扉のある部屋で可能な「エフェクトを捨てる」をやってみた。
単に消えるのではなく、卵としてその場に残った。 夢から覚めても違う場所に移動しても卵は消えないっぽい。 卵を調べるとそのエフェクトを再習得できる(その際、卵は消える) 全部捨ててからいったん夢から覚めてもう一回戻ってみたら、 雑然と捨てた卵がきれいに配置されてた。 エフェクトを全て集めて卵化するとなにかあるかも。 |
Finds the process of discarding effects in the Nexus and reclaiming them. Wonders if something will happen if you discard all of the effects in the Nexus. |
| Thread 1 48 |
マザーの世界が出てきたときは笑ったもんだが
歩行スピードがトロいのが辛いな、自転車ってどこにあるんだ |
Says they previously found FC House. Also asks where the Bike effect is located. |
| Thread 1 49 |
>>91 夢の扉が集中してる部屋(一番最初の扉だらけの部屋)
で円上の一番下の扉の右側(濃い紫?みたいな扉) このフロア(踏むと音が鳴るギミックがいっぱいあるフロア)には"自転車"のエフェクトがあって移動速度が上がる これ取れば散策楽になるよ |
Describes the user above where the Bicycle effect is, specifically pointing out which door and describing Graffiti World. |
| Thread 1 50 |
真っ赤なダンジョンにいる腹に目がある頭がない化け物みたいなのって何?
包丁で五十回くらい刺したけどなんにもならんかった |
Describes and asks about the Henkei Shita located in Hell. |
| Thread 1 53 |
雪のところで雪女になってかまくら入ったら
変な水と雪?のところにワープした |
Describes finding the Yuki-onna effect and the warp to the Pink Sea. |
| Thread 1 56 |
好きなゲームだけど、ネオンとかフラッシュとか目に痛いのが辛い
ゲームの世界へ行く途中の梯子のあるマップで吐きそうになった。 光の刺激をもうちょっと抑えて欲しい。 |
Describes the Static Maze while also bringing up the amount of flashing/bright lights in the game. |
| Thread 1 60 |
エフェクトは
かえる かさ ぼうしとマフラー ゆきおんな ほうちょう めだまうで ふとる こびと ふえ ネオン のっぺらぼう なまくび タオル ねこ でんとう じてんしゃ ロングヘアー ウンコヘアー ブロンド △ずきん まじょ おに ぶよぶよ しんごう の24個 全部集めたら卵に還元して夢から脱出 ベランダへ行くことでED |
Lists all 24 of the effects and how to obtain the ending. |
| Thread 1 63 |
今のところ一種しか確認できず・・
♥もある程度溜めてみたが意味は無いようだ バージョン更新があれば意味が出てくる未実装システムなのかも |
Confirms there is only one ending of the game. |
| Thread 1 67 |
赤白の碁盤模様なところで、主人公に会えた。
鳥肌たった。 |
Found Closet Madotsuki. |
| Thread 1 74 |
タオル : 赤い迷路の階段おりたところ
△ずきん : 暗闇のマップをさまよってる ふえ ねこ ブロンド が見つからない。 |
Gives directions for finding the Towel and Triangle Kerchief effects (the Triangle Kerchief effect is still in Dark World), although they oddly say that the Towel effect is located after the staircase in Hell, when it is in the Wilderness. |
| Thread 1 84 |
ウンコヘアーはロングヘアーと同じマップ内にあるよ
まじょは赤い経路からいける森マップにある電車に乗ってエフェクトはずして席に座る しばらくしてから下車すると違う世界についてる その奥にある ねことブロンドの場所誰か知らんかね? |
Gives directions for the Poop Hair and Witch effects (the Poop Hair effect is still in Mural World). |
| Thread 1 85 |
ブロンドもロングヘアーと同じマップのだった希ガス | Gives directions for the Blonde effect. |
| Thread 1 86 |
あとねこは、扉の部屋の右回りに3つ目の部屋(兵士みたいなネオンオブジェのあるマップ)にある。
ネコの顔をしたオブジェがチョロチョロ動き回っている。 あと情報thx! |
Gives directions for the Cat effect and thanks the user for helping find the Poop Hair and Witch effects. |
| Thread 1 92 |
電灯は扉の部屋の一番上の扉の右側のところ
電灯がいっぱいあってそのMAP内に動き回ってる電灯が一匹いるからそいつからもらえる 質問なんだが>>61の言ったとおりに暗闇MAPでそれっぽいの発見して話しかけたが△ずきんが貰えなかった なんでだー |
Gives directions for the Lamp effect. |
| Thread 1 98 |
扉の部屋から行ける、目玉と腕のオブジェが大量にあるマップを散策すると
数多くある腕のオブジェとは微妙に異なった腕のオブジェがある。 それ。 |
Gives directions for the Medamaude effect. |
| Thread 1 102 |
地下水道みたいなとこ。
扉の部屋の下のほうの扉かな? カードがそびえ立ってたり、草が生えてたり、 髪型系のエフェクトが手に入る部屋から、マンホールに入って道ナリに進めばOK。 |
Gives directions to the Sewers and the Nopperabou effect. |
| Thread 1 108 |
電車乗って座席に腰掛けて・・・
オレは10秒くらい座って降りたら別のエリア着いてた |
Simply telling another user how long it takes (around 10 seconds) to get to Witch's Island with the Traincar. |
YN Images to Replace
In-game screenshots to replace later because the images are too small, weirdly sized, or low quality.
Similar Images
- Footprintpatha2.png
Guideline for Editing Badge Pages (WIP)
- Badge images and information are easily accessible from the ynobadges section of the YNO Project GitHub page. If a badge has a hidden condition or art on YNO, it can be seen on the GitHub page for the batch the badge was in.
- Badge filenames have a specific naming scheme that must be followed to keep them sorted. Badge filenames usually consist of one to three words briefly describing the badge (such as its goal or what it depicts), though it is recommended to use as little words as possible for the filename, with two short words being the best. This is followed by, in parentheses, the word "badge" next to two initials signifying which game the badge belongs to. The list of proper initials are listed below:
| YN | Y2 | DF | AP | DD | SD | AM | UD | BG | MR | DG | MM | UV | SA | OS | YT | YNO |
| Yume Nikki | Yume 2kki | Dotflow (.flow) | Answered Prayers | Deep Dreams | Someday | Amillusion | Uneven Dream | Braingirl | Muma Rope | Dream Genie | Mikan Muzou | Ultra Violet | She Awaits | Oversomnia | Yume Tsushin | YNO |
Some examples of properly named badges are below:
| BikerUro(badgeY2).png | |
| Busted(badgeOS).gif | |
| CelestialGardenBluz(badgeY2).gif |
It should also be noted that, if a badge is animated (thus it has both a still and animated version), the filenames should still be the same. The file extension (.png and .gif) will be what distinguishes the still and animated version, not the filename.
- When adding a new batch of badges, make sure to add them all at a time. Do not upload some of the badges in a batch without uploading others. Users may want to look for a badge but may see that it is missing while other new badges are present, which creates confusion and inconvenience.
- Make sure to place badges in order of how they appear on YNO (sorted by Map ID). Do not sort badges by artist, number of Badge Points, or when they were added, nor place them simply wherever you want.
All Badges page
The way tables are sorted on the All Badges page is as follows:
| Badge image file(s) | Badge name | Badge location (if it has one specified) | Badge description (if it has one) | Badge condition | Additional notes | Badge author(s)/creator(s) | Batch number and date added |
Game Subpages
| Badge ID | Badge image file(s) | Badge name | Badge location (if it has one specified) | Badge description (if it has one) | Badge condition | Additional notes | Badge author(s)/creator(s) | Batch number added | Date added |
YNDD (WIP)
The Docks
The Docks is one of the worlds accessible from the Nexus, behind the door that leads to Snow World in the original Yume Nikki.
The Docks is overall very visually similar to its original counterpart. The area is made up of boardwalks surrounded by pitch-black water, although the water structures found on Witch's Island can also be found here and the area is lit by streetlamps and lanterns tied to the boardwalk rather than water lanterns. Several raised platforms, levers, and crates can also be found in the area which make for puzzle and platforming sections. Toriningen also infest the area, which will pursue Madotsuki once she comes into their line of sight. Several 10 Yen Coins can also be found scattered throughout the world.
Upon entry to the world, a single coin can be found on the ground as well as the Fisherman fishing on the edge of the dock. Further right is a vending machine and a pushable crate with a Toriningen blocking the way. Once the crate is pushed into the water, the Toriningen will chase after Madotsuki, forcing her to run back through the area. The Toriningen will stop chasing Madotsuki once it falls into an area with three raised platforms where Madotsuki must climb onto one of them to get out of the Toriningen's line of sight. Atop the middle platform is another coin.
Now able to pass where the Toriningen was, Madotsuki will come across a pulley system and another Toriningen. A crate at the top of the room must be pushed to the left to weigh down one side of the pulley in order to raise a part of the boardwalk to continue. Another coin can be found in this room, though it can only be accessed later when the Toriningen in the room has left. Past the pulley room is another Toriningen atop a raised platform which must be lured to the lower room on the right in order to get past it. Once in the room, Madotsuki must pull a lever once the Toriningen has entered, dropping it down into the water below. When the Toriningen has been dropped, Madotsuki can now traverse the raised platform that the Toriningen originally blocked, which contains a crate that can be pushed into the water below, creating a path to go further into the Docks. Three coins can also be found in this room: below the platform with the lever on it, on the highest platform next to a crate, and on the other side of the broken dock.
At the farthest right section of the Docks is the Traincar, Strober, and another coin that can be picked up. A red sign with a hamsa symbol on it can be found at the side of a platform on the left. Interacting with the platform next to the sign will make Madotsuki rip the planks off of a blocked path, which will both give Madotsuki a Wooden Plank and reveal a secret path where the Hamsa item can be found.
Once Madotsuki has collected enough coins, she can buy something from the vending machine found near the start of the world. For 100 Yen, she can buy a Blood Bag. The Blood Bag can then be given to the Fisherman at the start of the area to be poured in the water, attracting a Sad Fish that the Fisherman will reel in and give to Madotsuki. Once the fish has been obtained, Madotsuki must return to the end of the area again to give it to the hungry Strober. Once Strober has finished its meal, it will hop into the water, unblocking the way for Madotsuki.
Past Strober is a section with a larger lighthouse with a spinning light. The light must be avoided by going behind several pieces of the boardwalk which block the light's oath. Gaps in the boardwalk and a crate that must be pushed to continue will hinder progress. At the end of the dock is a dark, forested island with Nopperabou Witches standing about.
Plot for Yume Nikki: I Am Not in Your Dream (WIP)
Plot
Part 1: You
Madotsuki finds herself in her boring room, observing the many things that decorate it. She examines her carpet, television, desk, and bookshelf, while also heading out to her veranda only to find that things are lifeless and empty both indoors and outdoors. After glancing at the door to exit her room, she stumbles towards her bed and snugly enters the dream world. Upon entering the dream version of her room, Madotsuki instantly feels more lively and notices her dream is a place of freedom. She heads for her dream room's door to exit as her television flashes on, displaying a singular eye that glares at her. Madotsuki creaks open her door and tumbles into the Nexus, catching sight of the floating Paracas figures and the twelve doors that circle around the room. Gazing upon the variety of surreal-looking doors, Madotsuki contemplates what could be behind each and which to open first. She takes into account the appearance and position of the doors before deciding that there is no reasonable choice within the Nexus, and she simply goes for the Nexus's red door.
Madotsuki enters the vast but empty Puddle World as the door floats behind her. Despite the motionless environment, Madotsuki begins walking to explore the area, stepping through the puddles as they shift between clear water and muddy bacteria-filled filth. She steps into one of the puddles, seeing the reflection of herself and the cloudy sky. As the ripples in the puddles distort Madotsuki's reflection, the image of her in the puddle morphs into a man and woman arguing, only growing more distorted with more water ripples. Madotsuki simply continues through the world, running from the distorted reflection that seems to follow her, until she trips over a small umbrella on the ground. Out of curiosity, she grabs the umbrella and opens it, causing it to rain. The rain dispels the reflection of the arguing couple, putting Madotsuki's worries to rest and she continues through the empty Puddle World.
The puddles of the world Madotsuki explores continue to retain the sound of the arguing couple, though they are simply drowned out by the pattering of the rain. Madotsuki suddenly sees a stairwell in the distance, closing her umbrella and curiously heading inside to see what lies at the bottom. She enters the Dense Woods, surrounded by outstretched trees that obstruct her view, and is instantly attracted to the out-of-place vending machine. However, Madotsuki finds out that she has no change and can not purchase one of the many drinks the machine offers, walking away in defeat. The road cutting through the Dense Woods lies in front of her, stretching infinitely through the trees. She walks along the road before realizing she is becoming bored as she loops around, heading nowhere until she sees a humanesque figure in the distance. Upon rushing towards the figure, she realizes it is not a human, but rather a man-sized Jellyfish, a creature resembling a cluster of organs. Disgusted, she runs away from the creature as it simply continues to stand in place, emitting the noise of a ringing bell as Madotsuki plugs her ears and continues to flee.
As Madotsuki runs from the Jellyfish, she notices that the scenery around her has changed despite continuing along the same road. The trees have disappeared and Floyag hover above Madotsuki, watching her travel through the corpse-reeking path. Eyes sprout from the Floyag as Madotsuki feels their presence, prompting her to run back with a nervous feeling. The sea of trees comes into her sight as she once again enters the forested area of the Dense Woods, relieved after escaping the Floyag who simply watched her. She opens the umbrella once again on a now stoplight-filled road with lights flickering between red and yellow. Suddenly, Madotsuki catches sight of a corpse on the road in front of her. The body rots in the rain as Madotsuki squats beside it, contemplating the aspects of death and life. Above her, one of the stoplights swings about before snapping off its pole and landing on her head, flickering between "stop" and "go" states. After getting hit, Madotsuki weakly stands up, now with the stoplight fully surrounding her like a costume. She stumbles about with her legs emerging from the stoplight's base, flicking between the red and green lights out of amusement. However, she is unable to see in front of her, and is grabbed by a red tentacle emerging from a nearby manhole, which drags her in.
Falling through the manhole, Madotsuki lands at the bottom largely unharmed, though the rough landing causes her clothes to become tattered and the stoplight to crack, as it absorbed most of the fall. The stoplight crumbles and falls apart, leaving behind a mere pile of dust and shards. Inside the manhole lies Manhole-sama, who leaves Madotsuki horrified as it looks at her with a vulgar expression. Noticing her clothes are tattered, she shields herself with her hands and quickly climbs a red string near the end of Manhole-sama's room, noticing that Manhole-sama's hands are growing closer. She makes it out of Manhole-sama's room through a hole at the top of the string, vomiting from exhaustion as soon as she makes it to the top. She looks around at the scenery, now finding she is in the White Desert in front of a large head looking at her with bloodshot eyes. As the rain continues to fall, Madotsuki once again opens up her umbrella to shield herself. She moves around the head, attempting to avoid its gaze, before finding an entrance that she reluctantly enters.
The path within the head stretches across a large expanse, resembling clouds and pitch-black charcoal. As Madotsuki continues she comes across the Thing with the Quivering Jaw, terrified by the creature as it snarls and grinds its teeth. Madotsuki plugs her ears to ignore the grinding noise, though she finds that she is also grinding her own teeth. She holds and lowers her head in horror before her hand slips down her face, leaving her fingers to pinch her cheek. She awakens, pulling away the blankets and taking a deep breath before realizing that it was all a dream. Madotsuki hastily grabs her diary and writes about the details of her dream, eventually exhausting her as she lies her head down once more and the diary slips from her hands.
Madotsuki returns to the Nexus and decided to check the various doors before fully heading to their associated dream world. She decides that she will simply creak open the doors, and if the world inside feels uneasy, she will close the door and choose another. One of the doors catches Madotsuki's attention despite its drab color scheme, as beyond it is a pale snowscape with falling snow. Relieved by the peaceful land, she opens the umbrella that she has taken a liking to and takes a stroll through Snow World. She rolls up and throws snowballs, falls into the snow, and is even covered by snow when a branch suddenly shakes some loose, though she suddenly sees a cluster of igloos that she goes to investigate. Madotsuki crawls inside the igloos, looking about until she comes across Kamakurako who is sleeping peacefully within one of the igloos. The small girl reminds Madotsuki of her younger self, which causes her to think about the much more playful nature of being a child. As Madotsuki reaches out to Kamakurako, a figure appears in the igloo's doorway. A small Yuki-onna appears before her, small enough to be held in her hand. Madotsuki also reaches for the Yuki-onna, though it flees from her, which results in Madotsuki chasing after it. Madotsuki scoops up the Yuki-onna, holding it close as the small creature becomes docile, simply resting in her arms. As Madotsuki cradles the Yuki-onna, the blizzard obscures where the igloo cluster was, and the Yuki-onna begins to melt into water as Madotsuki is simply left standing in the cold snowscape.
Suddenly, Madotsuki spots another igloo in the distance, though it is strangely alone instead of in a group. She approaches, only for the head of a strange creature to emerge from the snow hut, causing Madotsuki to express great disgust. A single Toriningen appears, simply standing around as Madotsuki observes its odd facial features. Disgusted by the creature, Madotsuki instead collects some of the snow around the igloo only to find a familiar sight: the stoplight she previously obtained in the Dense Woods. Despite the stoplight shattering in the White Desert, she pulls it out of the snow and puts it over her head. As the Toriningen walks towards Madotsuki, she flicks the stoplight's red light and tells the creature to stop, comically petrifying the Toriningen in place. Now that it has been stopped, Madotsuki turns to run from the Toriningen, though she trips over some snow and once again breaks the stoplight into bits. The Toriningen unfreezes and continues to wander about, though Madotsuki quickly runs away. She comes across a bed, another out-of-place object in the dream world, and leaps in as the Toriningen draws close. While under the covers, the Toriningen patrols nearby as Madotsuki looks for something in the bed to help her out. She once again finds the Yuki-onna and holds it close, though it transforms into a pair of clothing resembling the one the Yuki-onna wears. Madotsuki changes under the bed's covers and emerges, resembling a Yuki-onna to confront the Toriningen. Uninterested in her new appearance, the Toriningen walks away as Madotsuki lets out a sigh of relief. Now with the tall creature gone, Madotsuki looks about for another igloo, this time finding one with a small, discolored spring inside. She reaches out to the water of the spring, splashing it onto her face, though she quickly finds herself in another world entirely.
The Pink Sea surrounds Madotsuki as she finds herself in the world's expansive body of water. She playfully splashes through the water before climbing onto one of the sea's rocky islands. Beside her floats a single balloon, which she grabs onto. The balloon floats upward and takes Madotsuki across the sea, flowing in the wind before deflating and landing next to another balloon, which Madotsuki grabs onto again. Madotsuki is taken into the sky, so high that the environment grows cold and her breath grows visible. She wiggles her arms and legs in a panic before seeing another island below. Letting go of the balloon, she falls straight onto the island, though she is unharmed despite landing on her back. Before Madotsuki is a large tent made up of many colors, which she enters, finding that inside is a cute room with a soft bed, pictures depicting landscapes, and neatly arranged books on a bookshelf and desk. Dazed by the comforting room, Madotsuki suddenly notices that there was another girl standing before her all along. Poniko suddenly speaks, apologizing for the mess and questioning if Madotsuki needs anything, to which Madotsuki simply responds with a light muffled sound.
Part 2: Me
Poniko, confused about what to say to Madotsuki, calms herself and welcomes her visitor. She offers Madotsuki to sit on the cushion in her room, though Madotsuki continues to show no reaction and simply stares at Poniko. Madotsuki wanders toward the bookshelf to look at Poniko's books, though they are revealed to all be identical, having the contents of Madotsuki's dream diary within all of them. Some familiar worlds such as "Red Umbrella" and "Stoplight" are scrawled inside, though there are various fainter words that are not quite clear, such as "Frog", "Witch", and "Lamp". Some other words, not as pleasant, appear in the diary such as "Severed Head". Poniko continues to show the book to Madotsuki, telling her that she wants to escape the nightmarish dream world, which she is assumes is also Madotsuki's goal.
Part 3: Yume Nikki - Dream Diary
Yume Nikki Internal Stuff
Sorting through and observing internal stuff relating to the original Yume Nikki. Click Expand to view contents.
YN Files by Date
Yume Nikki files by their date created/edited, going off of the earliest available version (0.04). These are sorted by the month and day last updated and aren't to be taken as the exact order they were created or put into the game.
| File | Located in | Date | Contents and Notes |
| BGMIDI1 | Music | March 1, 2003 | A MIDI version of the save theme. |
| MG主人公ネオン | CharSet | January 28, 2004 | Neon effect character sheet. |
| 背景キャラ1 | Panorama | February 11, 2004 | Forest World background. |
| 背景キャラ7 | Panorama | February 12, 2004 | Eyeball World background. Interestingly, the Eyeball World background is labeled as "Background Character 7", even though the background before it, the Shield-folk World background, is listed as "Background Character 4", showing a two-number skip between the listed backgrounds. This may indicate there were removed backgrounds depicting characters, possibly in the Nexus worlds. |
| 背景キャラ2 | Panorama | February 14, 2004 | Block World background. |
| BGM_03 | Music | April 3, 2004 | Block World music. |
| BGM_04 | Music | April 4, 2004 | Dark World music. |
| BGMループ6 | Music | April 25, 2004 | Dream Balcont music. |
| 階段マップ | ChipSet | April 28, 2004 | Stairs debug map tiles. |
| 顔セット2 | FaceSet | April 28, 2004 | Portraits for Triangle Kerchief effect, Fat effect, Cat effect, unused crick in the neck portrait, Midget effect, Yuki-onna effect, Lamp effect, unused Ghost Madotsuki portrait, Snowman effect, and unused hitodama Madotsuki. |
| 顔セット3(ネオン) | FaceSet | April 28, 2004 | Portrait for the Neon effect. |
| イベント8 | CharSet | May 2, 2004 | Neon effect egg, Frog effect egg, Fat effect egg, Knife effect egg, Tringle Kerchief effect egg, Neon effect egg wobble, Medamaude effect egg, and Hat & Scarf effect egg character sheet. |
| イベント9 | CharSet | May 6, 2004 | Flute effect egg, Towel effect egg, Blonde Hair effect egg, Yuki-onna effect egg, Umbrella effect egg, Severed Head effect egg, Midget effect egg, and Bicycle effect egg character sheet. |
| イベント10 | CharSet | May 7, 2004 | Lamp effect egg, Poop Hair effect egg, Nopperabou effect egg, Cat effect egg, Long Hair effect egg character sheet. |
| イベント4 | CharSet | May 10, 2004 | Balcony pieces, balcony shoes, balcony railing, ending stairs, lashed eyes, lips, Yuki-onna, Walking Lamp, Hell Mirror shine, Ittan-momen, Dwarf, and Hell Mirror character sheet. |
| 背景キャラ4 | Panorama | May 10, 2004 | Shield-folk World background. |
| イベント2 | CharSet | May 12, 2004 | Chair, unused hat and scarf on stand, hat and scarf, unused stand, unused filled trashcan, trashcan, unused light shimmer, unused TV outline, TV, unused less-detailed TV, desk lamp light, Guillotine, bicycle, unused handleless umbrella, unused leaning umbrella, umbrella, Madotsuki's room door, Frog, lit candles, Neon Parrot, and face Neon Creature character sheet. |
| ノイズ | Panorama | May 13, 2004 | Guillotine World background. |
| 血飛沫 GET | Battle | May 16, 2004 | Battle animations (blood, "GET" effect, and Midget effect summon). |
| イベント3 | CharSet | May 16, 2004 | Medamaude, arm, Nekoin, Long Hair Mouth Monster, Poop Hair Mouth Monster, Blonde Hair Mouth Monster, Fleebie, and Follony character sheet. |
| ベランダセット | ChipSet | May 16, 2004 | Madotsuki's Balcony tiles. |
| ベッド | CharSet | May 19, 2004 | Reoccurring beds. Not sized or placed in a normal CharSet. Likely for copying and pasting into ChipSets for worlds that had them. |
| 部屋チップ1 | ChipSet | May 19, 2004 | Madotsuki's Room tiles. |
| 紫背景 | Panorama | May 21, 2004 | Checkered Tile Path background. |
| 主人公ACT2 | CharSet | May 23, 2004 | Midget effect groups character sheet. |
| 自販機 | CharSet | May 28, 2004 | Reoccurring vending machines. Not sized or placed in a normal CharSet. Likely for copying and pasting into ChipSets for worlds that had them. |
| 小マップ2 | ChipSet | May 28, 2004 | Dense Woods A tiles. |
| 背景キャラ3 | Panorama | May 28, 2004 | Candle World background. |
| MG主人公3 | CharSet | June 4, 2004 | Madotsuki's Ghost, Triangle Kerchief effect, Fat effect, Cat effect, cricked neck Madotsuki, Midget effect, Yuki-onna effect, Lamp effect (on) character sheet. |
| MG主人公4 | CharSet | June 4, 2004 | Snowman effect, invisible Mafurako, braidless Hat & Scarf effect, and Blonde Hair effect character sheet. |
| MG主人公5 | CharSet | June 4, 2004 | Unused hitodama Madotsuki. |
| MG主人公元 | CharSet | June 4, 2004 | Duplicate Madotsuki walking sprites character sheet. |
| イベント6 | CharSet | June 4, 2004 | Knife effect action, cricked neck in chair, pinching awake, and Knif effect character sheet. |
| 主人公ACT3 | CharSet | June 4, 2004 | Cat effect meow, Towel effect sneeze, Long Hair effect sitting, and Long Hair effect curling animation sheet. |
| 主人公ACT5 | CharSet | June 4, 2004 | Chair wake-up and moving character sheet. |
| 顔セット1 | FaceSet | June 4, 2004 | Portraits for Madotsuki, chair, Frog effect, Umbrella effect, Hat & Scarf effect, Long Hair effect, Poop Hair effect, unused Blindfold effect, Flute effect, Nopperabou effect, Medamaude effect, Towel effect, Knife effect, Bicycle effect, Severed Head effect, and Blonde Hair effect. |
| 夕焼け | Panorama | June 8, 2004 | Balcony daytime background. |
| 夕焼け色反転 | Panorama | June 8, 2004 | Dream balcony sky background. |
| 月夜 | Panorama | June 8, 2004 | Balcony nighttime background. |
| MG主人公1 | CharSet | June 11, 2004 | Madotsuki, riding chair, Frog effect, Umbrella effect, Hat & Scarf effect, Long Hair effect, and Poop Hair effect character sheet. |
| イベント11 | CharSet | June 11, 2004 | Restrooms, small Neon Creature, tongue Neon Creature, eyeballs, curved Neon Creature, and bug Neon Creature character sheet. |
| 主人公ACT4 | CharSet | June 11, 2004 | Madotsuki jumping, Madotsuki sitting, cricked neck sitting, Madotsuki curling, and duplicate Long Hair curling character sheet. |
| 建物 | ChipSet | June 11, 2004 | Block World tiles. |
| イベント7(扉) | CharSet | June 13, 2004 | Forest World door, Snow World door, Puddle World door, Block World door, Shield-folk World door, Dark World door, Graffiti World door, and Eyeball World door character sheet. |
| イベント13(扉) | CharSet | June 13, 2004 | Mural World door, Lamp/Number World door, Neon World door, and Candle World door. The bottom half is copied from "イベント7(扉)". |
| 山 | Panorama | June 14, 2004 | Dream balcony mountains background. |
| かえる | ChipSet | June 15, 2004 | Forest World tiles. |
| ネオン | ChipSet | June 15, 2004 | Neon World tiles. |
| ねこ | ChipSet | June 15, 2004 | Shield-folk World and Graffiti World tiles. |
| 基本 | ChipSet | June 15, 2004 | General set of tiles for reoccurring elements (grass, blood puddle, beds, tree, lamps, pink and purple portals). |
| 小マップ3 | ChipSet | June 15, 2004 | Footprint Path A and Guillotine World tiles. |
| 小マップ4A | ChipSet | June 15, 2004 | Footprint Path B tiles (Goppa unpushed). |
| 小マップ4B | ChipSet | June 15, 2004 | Footprint Path B tiles (Goppa pushed). |
| 水たまり | ChipSet | June 15, 2004 | Puddle World tiles. |
| 目玉腕 | ChipSet | June 15, 2004 | Eyeball World tiles. |
| 髪型 | ChipSet | June 15, 2004 | Mural World tiles. |
| 土元 | ChipSet | June 18, 2004 | Duplicate of the Barracks Settlement dirt tiles. |
| イベント12 | CharSet | June 21, 2004 | Beak Neon Creature, Neon World double-tiles, Pirori, Pain Blob, and Isee character sheet. |
| 電燈 | ChipSet | June 21, 2004 | Lamp World tiles. |
| 砂 | ChipSet | June 23, 2004 | Wilderness tiles. |
| イベント1 | CharSet | June 25, 2004 | Unused light, unused elevators, unlit candles, Closet Creatures, closets, Closet Madotsuki, and Nopperabou Ghost character sheet. |
| BGM_05 | Music | June 30, 2004 | Dense Woods A music. |
| BGM_06 | Music | June 30, 2004 | Candle World music. |
| BGM_07 | Music | June 30, 2004 | Lamp World music. |
| BGM_08 | Music | June 30, 2004 | Neon World music. |
| BGM_09 | Music | June 30, 2004 | Shield-folk World music. |
| BGM_10 | Music | June 30, 2004 | Snow World music |
| BGM_13 | Music | June 30, 2004 | Graffiti World music. |
| BGM_14 | Music | June 30, 2004 | Ending music. |
| BGM_15 | Music | June 30, 2004 | Footprint Path A music. |
| BGM_17 | Music | June 30, 2004 | Title music. |
| BGM_18 | Music | June 30, 2004 | Guillotine World music. |
| BGM_21 | Music | June 30, 2004 | Aztec Rave Monkey music. |
| BGM_24 | Music | June 30, 2004 | Toriningen Party music. |
| BGM_25 | Music | June 30, 2004 | Barracks Settlement music. |
| BGMループ13 | Music | June 30, 2004 | Eyeball World music. |
| BGMループ5 | Music | June 30, 2004 | Puddle World music. |
| BGMループ9 | Music | June 30, 2004 | Forest World music. |
| イベント14 | CharSet | July 1, 2004 | Sewer Pirori, Alley Demon, and Mall Shoppers character sheet. |
| 雑踏3 | Music | July 2, 2004 | Mall music. |
| 赤い部屋 | Panorama | July 3, 2004 | Big Red (mouth open). |
| 赤い部屋1 | Panorama | July 3, 2004 | Big Red (mouth closed). |
| MG主人公2 | CharSet | July 4, 2004 | Flute effect, Nopperabou effect, Medamaude effect, Towel effect, Knife effect, unused Blindfold effect, Bicycle effect, and Severed Head effect character sheet. |
| 土 | ChipSet | July 4, 2004 | Barracks Settlement tiles. |
| 扉部屋背景2 | Panorama | July 4, 2004 | Nexus background. Interestingly, the filename states it is the second background for the Nexus. However, there is no first or "1" background, indicating the Nexus may have had a different background in previous versions. |
| どぶ | ChipSet | July 5, 2004 | Sewers tiles, but with graffiti. Other than that, identical to "展示室". |
| 展示室 | ChipSet | July 5, 2004 | Sewers tiles, but with the Sewer Drawing hole. Other than that, identical to "どぶ". |
| BGM_29 | Music | July 5, 2004 | O-Man Room music. |
| ブロック | ChipSet | July 6, 2004 | Windmill World tiles. |
| イベント5 | CharSet | July 7, 2004 | Toriningen and Jellyfish character sheet. |
| イベント15 | CharSet | July 9, 2004 | Unused rising Submarine Fish, Submarine Fish, traffic cone, Cube Guru, unused rising blue Submarine Fish, unused blue Submarine Fish, Mall Toriningen, and O-Man character sheet. |
| イベント16 | CharSet | July 9, 2004 | Radio, E-Man, and distorted Mall Shoppers character sheet. |
| エントランス1-1 | Panorama | July 9, 2004 | E-Man's room. |
| エントランス1-2 | Panorama | July 9, 2004 | O-Man's room. |
| 縮小 | Panorama | July 9, 2004 | Graffiti World background. |
| 主人公ACT1 | CharSet | July 10, 2004 | Lamp effect (off), Nopperabou effect spin, Medamaude effect warp, and Madotsuki head shake character sheet. |
| 主人公ACT6 | CharSet | July 10, 2004 | Frog effect jumping character sheet. |
| 小マップ1 | ChipSet | July 11, 2004 | Hell, Face Carpet Plaza, Checkered Tile Path, and Neon Tile Path tiles. |
| どろどろ | ChipSet | July 25, 2004 | Unused "sordid" tiles. |
| 雪 | ChipSet | July 28, 2004 | Snow World tiles. |
| かまくら | Panorama | July 28, 2004 | Snow World igloo interior. |
| FC01 | Music | August 20, 2004 | FC House music. A little bit compressed compared to newer versions. |
| FC主人公1 | CharSet | August 26, 2004 | FC Madotsuki, FC Umbrella effect, FC Frog effect, FC Hat & Scarf effect, FC Long Hair effect, FC Poop Hair effect, FC Snowman effect, and FC Blonde Hair effect character sheet. |
| FC主人公2 | CharSet | August 26, 2004 | FC Flute effect, FC Nopperabou effect, FC Medamaude effect, FC Towel effect, FC Knife effect, unused FC Blindfold effect, FC Bicycle effect, and FC Severed Head effect character sheet. |
| FC主人公3 | CharSet | August 26, 2004 | FC Neon effect, FC Triangle Kerchief effect, FC Fat effect, FC Cat effect, unused FC cricked neck, FC Midget effect, FC Yuki-onna effect, and FC Lamp effect (on) character sheet. |
| FC主人公ACT1 | CharSet | August 26, 2004 | FC Knife effect stabbing and FC Madotsuki waking up character sheet. |
| FC主人公ACT2 | CharSet | August 26, 2004 | FC Midget effect groups character sheet. |
| FC主人公ACT3 | CharSet | August 26, 2004 | FC Cat effect meow, FC Towel effect sneeze, and FC Frog effect jump character sheet. |
| FC主人公ACT4 | CharSet | August 26, 2004 | FC Medamaude effect warp, FC Nopperabou effect spin, and FC Lamp effect (off) character sheet. |
| FC主人公ACT5 | CharSet | August 26, 2004 | FC Madotsuki sitting, FC Madotsuki sleeping, FC Long Hair effect sitting, FC Long Hair effect sleeping character sheet. The bottom half is copied from "FC主人公1". |
| エントランス | ChipSet | August 26, 2004 | Mall Rooms tiles. |
| エントランス1-3 | Panorama | August 26, 2004 | Tokuto-kun's room. |
| FC02 | Music | August 27, 2004 | FC Demon Room music. |
| デパート | ChipSet | August 28, 2004 | Mall tiles. |
| 真っ黒 | Panorama | August 28, 2004 | Pure black panorama. |
| FC06 | Music | August 28, 2004 | FC Basement music. |
| エフェクト使用 | Battle | September 22, 2004 | Battle animations (equipping effect circle, Fat effect GOOOO, Flute effect notes, yen, and vending machine drinks. |
| BGM_30 | Music | September 22, 2004 | Windmill World music. |
| FCイベント1 | CharSet | September 26, 2004 | FC Demon, Walking Eye, Merutomaro, Kinoko-san, unused Kinoko-san, and Goblins character sheet. |
| FC03 | Music | September 26, 2004 | FC Goblins Room music. |
| イベント17 | CharSet | September 28, 2004 | Tokuto-kun, Tokuto-kun pouring, Sea Snake, and unused Sea Snake sprites character sheet. |
| イベント18 | CharSet | September 28, 2004 | Windmills, Docks lamps, Dropfish, descending cubes Nenrikido, Fisherman, Fisherman reeling, Fisherman bobber, and ascending cubes Nenrikido character sheet. |
| イベント19 | CharSet | September 28, 2004 | Kamakurako character sheet. |
| FC | ChipSet | September 28, 2004 | FC House tiles. |
| 湖回廊 | ChipSet | September 28, 2004 | Docks tiles. |
| FC家2 | Panorama | September 28, 2004 | FC House interior. |
| FC家3 | Panorama | September 28, 2004 | FC House exterior. |
| ノイズB | Panorama | September 28, 2004 | Static Maze static. |
YN Version History
Version 0.07
Version 0.07 marks a transitional period in the game's development, primarily in the world structure. The overall structure of the dream world is more akin to the final game, with many warps being moved or removed and nearly all of the pink and purple gates used in previous versions being removed in favor of new structures and NPCs. Some notable changes include the Severed Head effect being moved to Guillotine World and the Checkered Tile Path undergoing a large overhaul. The Pink Sea and White Desert were added in this version, as well as the FC Overworld being expanded to contain what would later become FC World B.
Worlds
Added Worlds
- Added the Pink Sea.
- Added the White Desert.
Nexus Worlds
Madotsuki's Dream Room
- There is now a 1/8 chance that the TV in the dream room will be on by default, regardless of whether it was turned on or off before sleeping.
- The red static that appears on the dream TV when it is turned on has been replaced by an eye design.
Lamp World
- The purple gate leading to the Checkered Tile Path has been removed.
- The pink gate leading to the Footprint Path has been removed.
- The blood splatter in the interior now leads to Guillotine World when walked on. A blood arrow was also added to indicate the new warp.
Neon World
- The purple gate leading to the Neon Tile Path has been replaced with a purple pyramid, still leading to the same world.
- The pink gate leading to Guillotine World has been removed.
Shield-Folk World
- The pink gate leading to the Static Maze has been replaced with a blue gate, still leading to the same world.
- The purple gate leading to the Checkered Tile Path has been removed.
Candle World
- The purple gate leading to the Checkered Tile Path has been replaced with a striped pyramid, still leading to the same world.
- The pink gate leading to the Docks has been removed.
Eyeball World
- The purple gate leading to the Footprint Path has been replaced with a blue head, still leading to the same world.
Graffiti World
- The pink gate leading to the Mall has been replaced with a blue building with an elevator, still leading to the same world.
- The purple gate leading to the Neon Tile Path has been removed.
Mural World
- The pink gate leading to the Sewers has been replaced with an open manhole, still leading to the same world.
- The purple gate leading to the Dense Woods A has been removed.
Snow World
- The purple gate leading to the Face Carpet Plaza has been removed.
- The pink gate leading to the Footprint Path has been removed.
- An igloo leading to the Pink Sea has been added.
Dark World
- The pink gate leading to the Wilderness has been replaced with a tan gate, still leading to the same world.
- The purple gate leading to the Face Carpet Plaza has been removed.
Puddle World
- The two Nenrikido have been removed.
- The purple gate leading to the Dense Woods A has been replaced with a pink tunnel, still leading to the same world.
- The pink gate leading to the Footprint Path has been removed.
Block World
- The purple gate leading to the Toriningen's Bed event has been replaced with a black gate leading to the White Desert. The Toriningen's Bed event is unused but is still present in the files.
- Mafurako has been moved to Block World from the Checkered Tile Path.
- The purple gate leading to the Neon Tile Path has been removed.
- The Guillotine has been removed and placed in Guillotine World.
Forest World
- The purple gate to Hell has been replaced by a set of pillars that lead to the Face Carpet Plaza.
- A set of trees north of the now-removed gate has been cleared to make way for the Face Carpet Plaza pillars.
Other Worlds
Checkered Tile Path
- The layout of both the first and second portions have been changed due to various removed elements:
- The short paths leading to the Lamp World purple gate and Mafurako in the first portion were removed. The island containing Closet Madotsuki is now fully surrounded by the path.
- The second portion has been fully remodeled into a more linear path lined with lamps. The beds and trees have been completely removed.
- The Toriningen from the second portion has been moved to the first portion.
- The area's music has been changed to an original track.
- Mafurako has been removed and placed in Block World.
- The purple gates leading to Shield-Folk World World and Lamp World in the first portion have been removed.
- The purple gate leading to Hell in the second portion has been replaced with a Nenrikido, still leading to the same world.
Dense Woods A
- A full path has been created in the northern portion of the map that loops back to the road.
The Docks
- The pink gate leading to Candle World has been replaced with an extended dock, connecting to the Docks B.
Face Carpet Plaza
- The layout of the spikes was slightly changed.
- The purple gates leading to Dark World and Snow World have been replaced with two pairs of green pillars, both of which lead to Forest World.
- A Nenrikido that leads to Hell has been added around the center of the map.
- The Toriningen's position has been moved to around the center of the map.
Footprint Path
- The two Footprint Path sections are now joined, with the Footprint Path A connected by its east side and the Footprint Path B connected by its northwest path.
- The warps in Footprint Path A leading to Neon World and Lamp World have been replaced by warps to Eyeball World and Footprint Path B respectively.
- The warps in Footprint Path B leading to Puddle World and Snow World have been removed. The Puddle World warp now leads to Footprint Path A while a lower portion of the path was remade to house a Nenrikido that leads to Hell.
Guillotine World
- The Guillotine has been moved to Guillotine World from Block World.
Hell
- Four of the purple gates have been replaced with Nenrikido.
- The warps leading to Candle World, Forest World, and Mini Hell now lead to the Neon Tile Path, Face Carpet Plaza, and the Footprint Path.
- The Henkei Shita can now be stabbed with the Knife effect for a 1/256 to be sent to the Footprint Path.
The Mall
- The first room accessed from Graffiti World was remodeled, now sporting an elevator.
Mini Hell
- The world is completely unused due to all of its connections being removed. Regardless, the world's layout has been changed and it still contains a purple gate leading to Eyeball World, which leaves the player in front of the Footprint Path warp.
Neon Tile Path
- The area has been split into two portions instead of being one room.
- The second portion contains a Nenrikido, which leads to Hell.
- The purple gates leading to Block World and Graffiti World have been removed.
- The bottom warp leading to Mini Hell has been removed.
The Sewers
- The pink gate leading to Mural World has been replaced with a ladder, still leading to the same world.
- The tunnel from the Docks can not be entered with the Midget effect, making it only accessible through the staircase in the Docks.
Static Maze
- The blue gate replacing the pink gate in Shield-Folk World has been added to the beginning of the Static Maze, making the ability to warp back to Shield-Folk World more apparent.
- The graphic for the light at the end of the maze was changed.
The Wilderness
- The pink gate leading to Dark World has been replaced with a tan gate, still leading to the same world.
FC Worlds
FC World A
- The overworld has been expanded with an added southwest island and an expansion of the eastern island, although neither of these can be seen in-game, only being visible when viewing the map in RPG Maker.
Game
- The player can now wake up while effects are equipped, though this only works with some effects.
- A sound was added for the spotlight that appears when opening a door in the Nexus.
Bugfixes
- Fixed several bugs that involved discarding effects in the Nexus:
- Patched the ability to discard effects while the spotlight appeared while opening a Nexus door.
- Patched the ability to discard the Hat and Scarf effect while transformed into a snowman, which could result in a glitch changing Madotsuki's movement speed.
- Patched a glitch that would cause an effect's 1-key action to activate if it was discarded in the Nexus immediately after sitting down without any effects equipped.
- Fixed a bug where using the Knife effect on some NPCs would cause Madotsuki's sprite to remain in the stabbing animation.
Version 0.08
Version 0.08 largely added onto existing worlds, adding new NPCs or events. This update introduced both the Uboa and FACE events, which would become iconic within the community, with the former helping the game gain popularity in the West. Some more additions include the introduction of Number World, which replaced Lamp World as one of the Nexus worlds, and the Buyo Buyo effect being moved to the newly accessible FC World B. Some small additions to some worlds also gave some effects more usage options, such as using the Midget effect to access a previously one-way corridor in the Sewers, using the Lamp effect to light up parts of Dense Woods B and FC World B, and using the Knife effect to access Mini Hell.
Worlds
Added Worlds
- Added Number World, replacing Lamp World's place in the Nexus.
- Added Poniko's House.
- Although first present in-game in version 0.07, FC World B is now largely accessible.
Nexus Worlds
Madotsuki's Dream Room
- The chance for the TV to randomly be on in the dream room was removed. It will always remain off unless turned on.
- There is now a 1/8 chance that the TV in the dream room will display the KALIMBA TV Channel event when turned on.
The Nexus
- The first door to the right of the dream room door that led to Lamp World now leads to Number World.
Neon World
- Groups of Neon Statues were added around the world.
Candle World
- A group of Walking Candles were added south of the Nexus door.
Eyeball World
- Jumping legs were added around the world.
- More body parts are scattered throughout the world.
Snow World
- If the Toriningen here is turned lunatic with the Knife effect, they will appear inside one of the igloos if Madotsuki attempts to retreat there.
Dark World
- A single Pissipissini was added southeast of the Nexus door.
Block World
- Additional block structures were added to the world.
- Mafurako's behavior has been changed:
- She now sports a different appearance when the Stoplight effect is used.
- She will teleport alongside the player when interacted with once but will place the player elsewhere in Block World when interacted again.
- She will always teleport alongside the player if Madotsuki interacts with her as a snowman by using the Hat and Scarf effect.
Other Worlds
Barracks Settlement
- One of the six Pirori is now randomly picked upon entering the area to send Madotsuki to FC World B when interacted with.
- The Seahorse has been added to the shack containing Buyo Buyo, which has now been moved to FC World B. It sucks on the corpse of the previous Buyo Buyo, now shriveled up.
Dense Woods B
- The Isee in the Isee Path are now binocular, having the appearance of a pair of eyes.
- The Isee Path is now dark, making it more difficult to navigate without the Lamp effect.
The Docks
- A Toriningen trap was added to the area, closely northeast of Mizume.
Hell
- The Henkei Shita has been changed to an original red design exclusive to Hell.
- One of the Toriningen now traps Madotsuki in the Teleport Maze instead of the Checkered Tile Path, the trap of which was bugged in the previous version.
Lamp World
- The world is no longer a Nexus world, instead being accessible from a door in the newly-added Number World. The area also received an overhaul:
- The area's music has been changed to match Number World.
- The area is a different size, with its map size being a bit taller rather than largely square.
- There are overall fewer lamps in the world and they are placed more sparsely.
- The interior sections were removed and repurposed for Number World. Instead, a building resembling the walls in Number World was added in the world's southern portion which has a door leading to Number World's canal.
- This building also contains one of the variants of the new ああああああああ event, accessible from Number World.
- The short lamp leading to the isolated Checkered Tile Path section was moved to the northeastern part of the world.
The Mall
- A new red menu theme has been added, which can be obtained from the Toriningen in the Mall's southwestern room.
Mini Hell
- Mini Hell now connects to Number World through a closet accessed after using the Knife effect to stab a Toriningen inhabiting Number World.
- The world's layout was changed, now an extension of its unused appearance in the previous version.
Pink Sea
- An island was added to the southern portion of the world with a conical house leading to Poniko's Room. Additional balloons were added that allow access to the island.
- An island in the northeastern portion of the world was removed.
The Sewers
- An additional room was added to the left of the Nopperabou Ghost room, which contains two new Sewer Drawings and a pool that either contains a Pirori or Submarine Fish.
- The Midget effect can now be used to enter the path directly leading to the Docks.
White Desert
- The picture used for Monoe was changed, having her cover more of the screen and darkening the image overall.
The Wilderness
- In the room containing the warp to the Static Tunnel, a single vine was placed on the right of the room, blocking a pathway through the vines that looked like a warp.
Windmill World
- The world now has a parallax background.
FC Worlds
FC House
- The Goblin's Room music has been changed.
FC World A
- Some small additions were made to the southeastern part of the FC World A overworld island, particularly adding several bridges allowing access to most of the eastern side of the map. However, they are completely inaccessible during normal play. Like the other islands, the eastern island was also decorated with soil, mountains, volcanoes, and lava.
Game
- The game's version number now displays on the title screen, underneath the game's logo.
Bugfixes
- Fixed a bug where using an effect, moving on stairs, and then opening the menu would cause the player to no-clip out of the stairs.
- Fixed a tiling error where the Bicycle effect's front wheel protruded through the terrain.
- Fixed a bug where viewing the instructions in certain worlds would freeze the player's movement.
- Fixed some minor sound issues where sounds would delay or overlap with other sounds.
- Fixed a bug where the effect could be discarded outside of the Nexus.
- Fixed a bug where repeatedly discarding effects would cause the menu to become inaccessible or the player's movement speed to change.
- The trap that the twintails Toriningen in Hell sends Madotsuki to was changed to the Teleport Maze. In the previous version, it sent Madotsuki to an out-of-bounds part of the Checkered Tile Path, which was due to the area's redesign.
Version 0.09
Version 0.09 is very similar to the final version with only some worlds missing and some minor changes present. The update appeared to largely focus on adding new worlds and extending routes deeper into the dream world while expanding upon existing worlds. This is evident in additions such as the Wilderness expansion extending into the new Sky Garden and Ghost World areas and one of the ruins areas of FC World A being rebuilt to include the FC Dungeon, leading into the White Desert Underground Lagoon, which became the deepest area in the game upon its addition. Additionally, the Towel and Triangle Kerchief effects were moved to the expansive Infinite Wilderness and Ghost World areas, making finding them a bit more challenging. Version 0.09 would also mark a long hiatus for the game until the next version.
Worlds
Added Worlds
- Added the Sky Garden.
- Added Ghost World.
- Added the FC Dungeon.
- Added White Desert B.
Nexus Worlds
Dark World
- Floor patterns were added, making the world less empty visually.
- Two Pissipissini were added to the world.
- Fleebie has been removed and placed in Ghost World.
Puddle World
- The world is slightly larger.
Other Worlds
Barracks Settlement
- The Seahorse inside one of the huts has now turned orange. It continues to suck on Buyo Buyo's corpse, even after it was moved in the previous version.
Dense Woods B
- The manhole can now be opened up by looping through the Infinite Road, allowing access to the newly added White Desert Mountain Ring.
Face Carpet Plaza
- The area's music has been changed to a new track.
Guillotine World
- A bigger variant of the world has been added, which is accessed through a 1/8 chance upon entering the normal Guillotine World warp in Number World.
The Mall
- The chair in Tokuto-kun's room can now be sat in. It has also been slightly moved to the left.
The Sewers
- The Nopperabou Ghost has been moved to the new room added in the previous version, making it located slightly deeper into the Sewers.
White Desert A
- The world has been made slightly larger: a large group of cacti has been added to the east side of the world, the wall squiggles have been expanded upon, and a tunnel from White Desert B has been added in the world's southeastern corner.
The Wilderness
- The Infinite Wilderness area has been added.
- Ittan-momen has been moved here, previously located just outside of the Barracks Settlement, making the Towel effect a bit more difficult to locate.
- The Hot Spring House containing Onsen-san has been added.
- The Staircase to the Sky, accessed from the Infinite Wilderness, has been added, leading to the newly-added Sky Garden. Here, the new Falling Men event can be experienced.
- The path leading to the Toriningen Party event has been populated with more plants to remove empty space.
FC Worlds
FC World A
- Some very minor changes are made to the FC World A overworld island. Particularly, a single bridge connecting to the eastern island has been removed in favor of a land extension farther north. Regardless, none of the islands that the changes were made to are accessible during normal play.
- The ruins subarea has been added onto, increasing the number of stone walls, adding water, and adding a staircase leading to the newly-added FC Dungeon.
FC World B
- The path to the pyramid subarea has been cleared and the area is now accessible. In the previous version, it was blocked despite being fully functional.
Game
- The graphic for the version number on the title screen has been changed to reflect the current version number.
- The Witch effect now makes a floating sound when the broom is ridden.
Bugfixes
- Fixed a bug where the menu could be opened in the Nexus when it normally couldn't be.
- Fixed a bug where brightening the Isee Path with the Lamp effect while it was raining would cause the area to stay brightened.
Version 0.10
Version 0.10 and its subsequent patch would mark the last released content update for the game. The game was remade on an entirely new instance within RPG Maker 2003 and the update largely focused on smaller details, such as updating or moving some decorative elements of worlds and rebuilding some subareas, with one final linear route buried deep in the dream world. Some of the biggest changes include the Fat and Poop Hair effects being moved to the Docks B and the newly added Underground World respectively and Neon World being entirely restructured, as well as a new subarea of the Mall housing a new event where the Witch effect can find use.
Worlds
Added Worlds
- Added the Staircase of Hands.
- Added Underground World.
- Added the Spaceship.
- Added Mars.
Nexus Worlds
Madotsuki's Dream Room
- The background for the dream balcony is no longer determined by getting sent to two different maps. It is now randomly determined upon entering the map, with a 1/3 chance for the mountain background and a 2/3 chance for the sky background.
Number World
- The beds in this world's bed room no longer dim the screen when entered.
Neon World
- The world was given a complete restructure:
- The world is now made up of several hallways with round rooms containing various sculptures and tile patterns.
- The Neon Statues introduced in version 0.08 were removed entirely.
- The purple pyramid leading to the Neon Tile Path has been replaced with a simple doorway, still leading to the same world.
Candle World
- Two candles were changed.
Eyeball World
- A pile of eyeballs on the eastern side of the map was spread out slightly.
Graffiti World
- The path between the Bicycle effect and the women's restroom was given an entirely new design, resembling a face with an anglerfish lure and a winding tail.
Mural World
- The Mouth Monster that gave the Poop Hair effect has been moved to the newly added Underground World.
- More murals have been added around the world.
Other Worlds
Barracks Settlement
- The corpse of Buyo Buyo has now been fully removed from the shack. The Seahorse has fully taken its place.
Checkered Tile Path
- The starting position of the Toriningen was moved closer to the striped pyramid.
Dense Woods B
- The Frog found in the Frog Path now gives the Frog effect when interacted with, making the effect no longer exclusive to Forest World.
The Docks
- Strober has been added to the Docks B, being the new bearer of the Fat effect.
Face Carpet Plaza
- The area's music was slowed to play at 70% speed, no longer being the same as the Wilderness's Hot Spring House.
Footprint Path
- All of the Henkei Shita in Footprint Path A can be stabbed with the Knife effect, although this does not warp Madotsuki like the Hell Henkei Shita.
Guillotine World
- The starting positions of some of the Toriningen in both the normal and big variants were moved.
Hell
- The funhouse mirror that gave the Fat effect in previous versions has been removed. The Fat effect was moved to the Docks.
- A bobbed hair Toriningen was added to Hell, which uses the Sky Garden trap that was unused in the previous version.
Lamp World
- The eye graphic found in the Lamp World variant of the ああああああああ event has been changed into a more bloodshot appearance with a looping pattern resembling a face.
The Mall
- In the elevator room, there is a 1/4 chance upon entering from Graffiti World (or a 100% chance upon entering from Underground World) that the cone blocking the escalator will be absent, leading to the newly added Mall Rooftop area.
Mini Hell
- Many winding pathways and a repeated blood-dripping animation were added around the area.
Neon Tile Path
- The area's music was slowed to play at 70% speed, no longer being the same as Snow World's.
Sky Garden
- The reflection of the ground lamps was slightly changed.
White Desert A
- Small additions are made to the main area, simply adding more cacti, walls, and a set of bumps in the area's northwest corner.
The Wilderness
- More foliage was added around one of the fence rooms.
- The graphics for some of the foliage lining the fence before the Staircase to the Sky was fixed.
FC Worlds
FC Dungeon
- The map was made slightly larger.
FC House
- The trees in the FC Field were replaced with a different graphic, resembling trees with rounded tiers as opposed to pine trees.
- The side of the house in the FC Field was made slightly thinner, moving the window along with it.
- The potted trees inside the house and basement were replaced by trees from the FC Field, sprouting out of the ground. Two rocks also surround the tree in the basement.
- Smaller details of the house interior were changed, making the baseboard thinner and the carpet and windows darkened.
FC World A
- The entrance from the Static Tunnel has been changed. A shoreline now takes up the northern portion, a stone wall surrounds the cave Madotsuki exits from, and a single Lizardman inhabits the room.
- More walls were added to the ruins area, making the area appear taller and more constructed.
FC World B
- The subarea with the totems was changed to be more constructed and taller. The appearance of the totems was also changed from black and purple to red and yellow.
- A single Lizardman that was trapped within the walls in previous versions has been removed.
- The lower floor containing Buyo Buyo has been lit up, no longer requiring the Lamp effect to light up. Rows of stone walls were also added across the room.
- The subarea with the pyramids had its stone walls removed. There are now six pyramids, arranged in a circular pattern. The entrance was also changed to the bottom center of the map as opposed to the bottom left.
- The subarea with the Pirori had two face-like statues added to it. A single pebble on the shoreline was also removed.
Game
- The graphic for the version number on the title screen has been changed to reflect the current version number.
- The Knife effect's 1-key action has been finalized. Madotsuki now switches the knife between hands rather than stabbing the air.
- The Triangle Kerchief effect's 1-key action has been finalized. Madotsuki now appears fully invisible and Toriningen will not track her down instead of becoming progressively transparent.
- The traffic cone graphic found in the Dense Woods B and the Mall was changed to a shorter sprite.
- The stone wall graphic found throughout FC World A and B was changed.
Bugfixes
- A bug was fixed where the tall, face-like Neon Creatures did not react to the Cat effect.
Yumesyuusei (0.10a)
The Yumesyuusei patch was a patch for version 0.10 that was released a couple of days after the initial update's release. The patch largely fixed most of the bugs present in 0.10, likely due to the game being made in a new instance, though not all of them were fixed. Additionally, and strangely, one minor change was made to the FC Dungeon that made it so the room containing the glitch event was lit up, unlike the rest of the dungeon, likely to hint to players that the room contains an event.
Worlds
FC Worlds
FC Dungeon
- The room containing the glitch event is lit up naturally, no longer requiring the Lamp effect to be used to brighten it.
Game
- The graphic for the version number on the title screen has been changed to reflect the current version number.
Bugfixes
- Fixed an incorrect warp that placed Madotsuki out-of-bounds in the Dense Woods B when attempting to return back from the Teleport Maze.
- Fixed an error where Madotsuki could walk through the upper portion of the hill on Mars, going out-of-bounds.
- Changed the menu currency symbol from gold (G) to yen (円).
- Fixed a glitch where the player could discard effects in Nexus worlds if they had the effect equipped prior to entering the world's door.
- Fixed a glitch where 1-key actions could be performed while sitting in chairs such as the Mall sofas or the Traincar seats.
- Fixed a glitch where the player would not receive a 1000-point bonus in NASU if they caught a pink eggplant before a purple eggplant when catching both in the same jump.
- Fixed a bug where the player could permanently lock their save by pressing the 1-key action after waking up from the Witch's Flight event and then saving.
- Fixed the footstep sound effect being present when floating with the Witch effect's broom in Face Carpet Plaza.
- Fixed a glitch where returning to the Nexus with the Medamaude effect while atop the Mars summit would cause the screen scroll to lock to the center of the screen.
- Fixed an error where one of the walls before the Mall Rooftop could be walked under due to an incorrect order of tiles.
Worlds by Version Added
(This is solely going off of what's currently on the wiki, which is determined by the file dates of some of the graphics from different versions.)
0.00
- Madotsuki's Room
- Nexus
- Block World
- Candle World
- Dark World
- Dense Woods A
- Eyeball World
- Forest World
- Graffiti World
- Lamp World
- Mural World
- Neon World
- Puddle World
- Shield-Folk World
- Snow World
- The Wilderness
0.01
- Face Carpet Plaza
- Footprint Path
- Hell
- Mall
- Neon Tile Path
0.02
- Barracks Settlement
- Guillotine World
- Sewers
- Windmill World
"pre-0.03"
- Checkered Tile Path
- The Docks
0.03
- FC House
- Static Maze
0.04
- Mini Hell
0.05
- Dense Woods B
- Witch's Island
0.06
- FC World A
- Static Tunnel
- Teleport Maze
0.07
- FC World B (made, but not accessible)
- Pink Sea
- White Desert A
0.08
- FC World B (made accessible)
- Number World
- Poniko's House
0.09
- FC Dungeon
- Ghost World
- Sky Garden
0.10
- Mars
- Spaceship
- Staircase of Hands
- Underground World
Fun
Stuff for fun, I guess. Click Expand to view contents.
YNOproject Badges by Artist
Note: This is not meant to show that certain users/artists are better than others or have a greater/smaller work output. This is solely for documentation and isn't intended to offend anyone or belittle/overly praise the work people have already done.
If a badge appears under more than one person's name, that means this badge was a collab between those people.
THIS TABLE IS CURRENTLY OUTDATED
Removed
| Name | Y2 | UD | AM | DG |
| Liliana | ||||
| Ena | ||||
| Olive Deer | ||||
| Sodamoth | ||||
| NuzzlX | ||||
| StudyMan99 | ||||
| penpen | ||||
| nex | ||||
| Moucky233 |
Yume Nikki fans powerscaling their characters from a game with zero fighting
Okay but like what if they hypothetically just all started fighting like this would be so cool
| Alley Demon |
|
| Aztec Rave Monkey |
|
| Batsu |
|
| Big Red |
|
| Black Cat |
|
| Bloody Touching Monster |
|
| Body Parts |
|
| Brain Creature |
|
| Buyo Buyo |
|
| Closet Creature |
|
| Closet Madotsuki |
|
| Cube Guru |
|
| Dave Spector |
|
| Dekishi-san |
|
| Dropfish |
|
| Dwarf |
|
| E-Man |
|
| Eye People |
|
| FACE |
|
| Falling Men |
|
| FC Demon |
|
| Fisherman |
|
| Fleebie |
|
| Floyag |
|
| Follony |
|
| Frog |
|
| Ghostmen |
|
| Goblins |
|
| Goppa |
|
| Guillotine |
|
| Henkei Shita |
|
| Isee |
|
| Ittan-momen |
|
| Jellyfish |
|
| KALIMBA |
|
| Kamakurako |
|
| Kimajo |
|
| Kinoko-san |
|
| Kisu-Tenmetsu |
|
| KyuuKyuu-kun |
|
| Lizardmen |
|
| Madotsuki |
|
| Madotsuki's Ghost |
|
| Mafurako |
|
| Mall Shoppers |
|
| Manhole-sama |
|
| Mars-san |
|
| Maussan Bros |
|
| Medamaude |
|
| Merutomaro |
|
| Mizume |
|
| Monoe |
|
| Monoko |
|
| Mouth Monsters |
|
| Namekuji |
|
| NASU |
|
| Nekoin |
|
| Nenrikido |
|
| Neon Creatures |
|
| Neon Parrot |
|
| Nopperabou Ghost |
|
| Nopperabou Witches |
|
| O-Man |
|
| Onsen-san |
|
| Organoid |
|
| Pain Blob |
|
| Pier Monsters |
|
| Pirori |
|
| Pissipissini |
|
| Poniko |
|
| Seahorse |
|
| Sea Snake |
|
| Seccom Masada |
|
| Severed Blue Head |
|
| Severed Heads |
|
| Shield Folk |
|
| Shitai-san |
|
| Steve Kareha |
|
| Strober |
|
| Submarine Fish |
|
| Takofuusen |
|
| Tasei's Kid |
|
| Thing with the Quivering Jaw |
|
| Tokuto-kun |
|
| Toriningen |
|
| Train Passengers |
|
| Uboa |
|
| UFOs |
|
| Walking Candles |
|
| Walking Eye |
|
| Walking Lamp |
|
| Warpo and Loople |
|
| Wheelies |
|
| Yuki-onna |
|
| Zippertile |
|
dream
| aaaaaaaaa | ooooooooo | ......... |

|
||

|
||
|
||

|
Yume Nikki Character Etymology
This table will go over the origins of various Yume Nikki character's names. Names that are very descriptive and are made of normal English words (such as Black Cat, FACE, Big Red, etc.) will not be listed. Unknown origins (as far as I know) are listed as ???.
| Character | Etymology |
| Batsu | ??? |
| Buyo Buyo | "ブヨブヨ" (buyobuyo, squishy/flabby). |
| Choshu Heads | "聴取" (chōshu, hearing). |
| Dave Spector / Dali | "Dave Spector" comes from the American television producer of the same name. "Dali" comes from the Spanish surrealist painter Salvador Dalí. |
| Dekishi-san | "溺死" (dekishi, death by drowning) followed by the Japanese honorific "-san". |
| Fleebie | Portmanteau of "flee" and "freebie". |
| Floyag | ??? |
| Follony | Portmanteau of "follow", "felony", and "alone". |
| Goppa | ??? |
| Henkei Shita | "変形した" (henkei shita, deformed). |
| Ittan-momen | "一反木綿" (ittan-momen, a type of yōkai). |
| Kamakurako / Nemuko | "Kamakurako" is a portmanteau of "かまくら" (Kamakura, a Japanese festival including snow huts where children play) and "子" (ko, child). "Nemuko" is a portmanteau of "ねむる" (nemuru, to sleep) and "子" (ko, child). |
| Kimajo | "木魔女" (kimajo, witch's tree). |
| Kinoko-san | "茸" (kinoko, mushroom) followed by the Japanese honorific "-san". |
| Kisu-Tenmetsu | Named after "Kisai Tenmetsu", a type of watch with an LED display. |
| KyuuKyuu-kun | "きゅっきゅっ" (kyuukyuu, Japanese onomatopoeia for squeaking, specifically when rubbing an object) followed by the Japanese honorific "-kun". |
| Madotsuki | 窓付き (madotsuki, windowed). |
| Mafurako | Portmanteau of "マフラ" (transliteration of "muffler", a neck scarf) and "子" (ko, child). |
| Maussan Bros | Named after José Jaime Maussan Flota, a ufologist, as the characters peer over at a UFO in the Sky Garden. |
| Medamaude | Portmanteau of "目玉" (medama, eyeball) and "腕" (ude, arm). |
| Merutomaro | Portmanteau of "メルト" (transliteration of "melt") and "マロー" (transliteration of "mallow", likely referring to marshmallows). |
| Mizume | Portmanteau of "水" (mizu, water) and "目" (me, eye). |
| Monoe | From "monochrome", followed by the kanji "江" (e, which can mean bay or inlet, neither of which seem to describe her or her surroundings). |
| Monoko | Portmanteau of "monochrome" and "子" (ko, child). |
| Namekuji | "蛞蝓" (namekuji, slug). |
| NASU | "茄子" (nasu, eggplant). |
| Nekoin | Portmanteau of "猫" (neko, cat) and "coin". |
| Nenrikido | Possibly from "念力" (nenriki, psychokinesis, likely referring to their warping abilities). |
| Onsen-san | "温泉" (onsen, hot spring) followed by the Japanese honorific "-san". |
| Organoid | Possibly a portmanteau of "organ" (referring to innards) and "paranoid" (as it teleports away when approached, as if afraid). |
| Pirori | Possibly from a Vocaloid song about Helicobacter pylori, a type of bacteria. In the music video, Hatsune Miku wears a costume vaguely resembling a Pirori. |
| Pissipissini | ??? |
| Poniko | Portmanteau of "ポニーテール" (transliteration of "ponytail") and "子" (ko, child). |
| Seccom Masada-sensei / Sekomu Masada-sensei | Portmanteau of "sentimental", "Tetsuya Komuro", "Maikeru/Michael Jackson", "Ryuichi Sakamoto", and "Dada". See Seccom Masada-sensei's Trivia section. |
| Shitai-san | "死体" (shitai, corpse) followed by the Japanese honorific "-san". |
| Steve 'Leif' Kareha | Named after three different people in an Uboachan thread where Steve 'Leif' Kareha was discussed. |
| Takofuusen | Portmanteau of "たこ" (tako, can mean either octopus or kite) and "風船" (fuusen, balloon). |
| Tasei's Kid | From "Tasei-san", an alternate name for Mars-san / Kasei-san, as they share a vague resemblance. |
| Tokuto-kun | From "トクトク" (tokutoku, Japanese onomatopoeia for heavy pouring) followed by the Japanese honorific "-kun". |
| Toriningen | Portmanteau of "鳥" (tori, bird) and "人間" (ningen, person/human). |
| Uboa | "ウボァー" (uboaaa, a 2channel meme about a scream/line of dialogue from the game Final Fantasy II). |
| Yuki-onna | "雪女" (yuki-onna, a type of yōkai). |
Stairs in YN
There are a lot!!!!
| World | Where are the Stairs |
| Puddle World | The pink tunnel that leads to Dense Woods A appears to be a stairwell of some sort, telling by the extra lower pixels inside of it. |
| Number World | The world contains a stairway sub-area leading to the FACE event. |
| Hell | A set of stairs leading downward leads to the Docks B. |
| Static Tunnel | The icon used to enter FC World A from here is a set of stairs. |
| FC House | The basement is filled with stairs, especially long sets of them. |
| FC World A, B, and Dungeon | Stair tiles are used to go into deeper areas or different rooms in the areas outside of the overworld (such as entering the FC Dungeon, the isolated section from FC House, the entrance to Buyo Buyo's location, and the paths to different rooms within the FC Dungeon). |
| White Desert B | The way from FC Dungeon is a set of stairs. Madotsuki must also climb a set of stairs to exit the White Desert Lagoon as well. |
| Docks A | The entrance from the Sewers (by using the Midget effect to get to the hallway leading here) is a stairway. |
| Docks B | Same staircase as the one in Docks A visually, albeit it leads to Hell instead. |
| Dense Woods A | The same tunnel/stairwell warp is used here as is done in Puddle World. |
| The Wilderness | A small set of stairs can be found in the Hot Spring House while a very tall set of stairs can be found leading up to the Sky Garden. |
| Sky Garden | Has a set of stone brick stairs leading from the Wilderness. |
| Sewers | The pathway accessed with the Midget effect has a set of stairs leading up to the Docks A. |
| The Mall | The Mall appears to use escalators, which are simply automatically-moving staircases. |
| Staircase of Hands | The whole area is a staircase. |
| Underground World | Also contains a set of stairs, leading down from the Staircase of Hands. A very tiny stairstep is also before the room with the Mouth Monster. |
| Spaceship | Once crashed on Mars, a staircase will come down from the Spaceship to allow access to the area. |
| Mars | Some sets of stairs lead down into the Mars Underground. While unused, there was also originally intended to be a set of stairs instead of a hole atop the Mars Summit. |
| Madotsuki's Room | A set of stairs is ultimately what allows the player to access the ending and for Madotsuki to jump from the balcony. |
Neon Effect "Glowing Objects" effect
Specific areas in the dream world where Yume Nikki's Neon effect tints surrounding objects instead of the entire screen. This is due to the black portions in these areas being empty tiles instead of black tiles from the area's ChipSet.
- Neon World
- Lamp World
- Mural World
- Face Carpet Plaza
- Footprint Path (sections A and B)
- Dense Woods A (main section and Infinite Road)
- Staircase of Hands
- The Mall (elevator, main, and manhole rooms only)
- Static Maze (only before the first static flash)
- Static Tunnel (only before the first static flash)
- The Docks
- Ghost World
- White Desert A (Monoe, Monoko, and Eye Box rooms only)
- White Desert B (staircase room only)
- Dark World (only if the dark overlay is removed with cheats)
- The Ending (only experienced with cheats)
Yume Nikki Movie drafts and stuff
This idea was conceived somewhere in early 2023 and the first drafts were made mid-2023. These were based on a conversation about a hypothetical Yume Nikki movie, but done as an animated family comedy film with typical crude or awkward/relatable humor, with the idea primarily likened to memes based on children's animated films or stereotypical "Illumination-style films" (for example, this audio sketch based on the then-unreleased Super Mario movie, which served as a primary inspiration to make any of this).
The first scripts were made by me on June 25th, 2023 and everything ranges from between that time and October 2023. The initial idea behind this was to make it as cringey as a kid's film could be and have extremely dumb trendy or goofy humor, though later on, the idea was toned down a bit, though it still has the goal of being what a stereotypical "somewhat corny kid's film" would be (I think this is reflected the most in Madotsuki and Masada lol).
During the time this concept has been around, a trailer storyboard and fully-made script have been considered, but currently do not exist and would likely take a significant amount of time to make (though I'm leaning towards possibly expanding on the latter option because it would be both stupid and fun). Below is all the stuff from Notes that I had plus stuff that occasionally gets added whenever something comes to mind. It is largely just vague scenes, possible trailer cuts, and some extra notes, including character descriptions and a very rough plot structure, mostly listed in the order I believe they would play out in the hypothetical film, but here is everything:
 Stupid movie trailer concept based on Yume Nikki hypothetically directed by Illumination. Typical crude + awkward humor = funny type stuff.

 THIS SUMMER
 > Various close-up shots of Madotsuki's Room as a magical, soothing tune plays.
 YOU'LL BE LIVING
 > Zooms in on Mado's diary, which magically opens up with sparkles.
 THE DREAM
 > The music rises to a climax as the pages turn before Mado suddenly slams her hands on the table, interrupting the music and page flipping.
 Mado: Alrighty...so what did I dream about today?
 > Flip to a super quick montage of stuff in her dreams as she explains them.
 Mado: Splashed in some mud, saw a dead guy, got claustrophobic, got chased by some weird bird people, aaaand got my head chopped off.
 > Last shot is of Mado in the Guillotine. The montage abruptly ends before the Guillotine chops her head off, cutting back to Madotsuki chewing on her pen.
 Mado: Eh, pretty boring dream, I guess. (She begins writing in the diary anyway)


 > Cut to an outside shot of Poniko's House.
 Mado: Um, excuse me...but who the heck are you?
 Poniko: I'm a girl with a curse, locked away in this little room in the middle of a vast ocean...
 Mado: No, I mean, like, what's your name?
 Poniko: Oh...I don't have one...
 Mado: I'll call you...Poniko! Cuz you got that crazy ponytail!
 Poniko: Well, my hair actually looks like this...
 > Poniko undoes a tie in her hair and it flows out all over the place. A majestic light emits from behind her as a heavenly chorus sings.
 > Mado looks on with sparkling, open eyes before closing them again and saying:
 Mado: Eh, looks lame. I kind of like it better in a ponytail.


 > Madotsuki, Poniko, and Masada are all inside Masada's spaceship, which is crash-landing and falling at a rapid rate.
 > Masada is facing the organ (which is half a control panel in the film) nervously before turning towards Mado and Poniko and stating:
 Masada: Don't worry new friends! I've had TONS of ship training. I know how we can get out of this!
 > He turns back towards the keyboard and it is a cluttered mess of buttons, levers, piano keys, and flashing lights.
 Masada: What about... (he presses a random button on the control panel)
 Control Panel: ACCELERATION ACTIVATED
 Masada: GOSH DARNIT!
 > The ship speeds up its crash landing as everybody goes flying to the back wall of the ship before they hit Mars.


 > Shows a POV shot from the Neon Tile Path, facing the connection to Neon World. The beginning of PSY's "Gangnam Style", slightly muffled, can be heard coming from Neon World.
 > Next shot is of Mado, Poniko, and Masada entering Neon World followed by an above shot of the world with everyone dancing like it's a rave. Gangnam Style is now fully playing.
 Mado: This party is so...
 > Cut to Mado doing the floss dance.
 Mado: ...freaking...
 > Cut to Masada twerking towards the screen.
 Mado: ...LIT!!!!!
 > Cut to Poniko breakdancing, doing a super fast spin that transforms her into Uboa. The music stops with a record scratch and all of the Neon Creatures stop dancing and stare at her.
 Random Neon Creature: ...IT'S THE MONSTER OF THE PINK SEA!!!
 > All of the Neon Creatures flee while screaming in terror.
 Mado: (her eyes open up accompanied by a glass shattering sound) ...woah.
 Masada: (he is still dancing in the background) Well THAT was awkward!


 > Mado, Poniko, and Masada all enter Guillotine World, which is shown to be a large city solely populated by Toriningen (who are only referred to as "bird people" throughout the whole film).
 Mado: Oh no, not here...these bird people are kinda... (swirls finger around the side of her head while making coocoo noises)
 Masada: Relaaax, guys! You've just got to act natural.
 > It is silent for a moment before Masada starts "acting natural" around the Toriningen, putting his arms on his sides and pecking at the ground like a bird/chicken while squawking loudly.
 > This only alerts the Toriningen, who all swiftly turn their heads towards the trio menacingly as their eyes glow fully pink, all sporting angry expressions.
 Masada: (he nervously gulps and scratches the back of his head) Well, that didn't work...
 Poniko: RUN!
 > Poniko grabs onto Madotsuki and they both run as Masada trails behind, flailing his arms in the air while screaming.
 > Epic and dramatic chase scene ensues.
 > The trio escapes the large crowd of Toriningen by ducking into an alley and hiding behind a closet. They all wipe their brow and let out a breath of relief in unison.
 Mado: Now THAT was a close one...
 Poniko: Masada...you're an idiot. Why did you even TRY that?
 Masada: Hey! I worked really hard on that impression!
 > The closet behind them suddenly opens up, revealing a Closet Creature inside, who swipes them up and takes them inside. The scene cuts to black.


 Additional vague plot structure:
 Madotsuki goes to her dream world and meets Poniko and the two of them then meet Masada. They follow Masada around, even though Masada encourages them to leave him alone, but they are all seen by Mars-san, who is Masada's boss. Mars-san is the antagonist of the film and acts sort of as a tyrannical boss/king-like figure.
Mars-san does not take kindly to Masada leading normal humans into his dream realm, so he sentences them up for execution.
The three plead and Madotsuki makes a deal with Mars-san: if the three of them can return to Mars-san with the 24 effects found throughout the dream world after 3 days, then they get to live and are allowed to wander the dream world as they please.
The film follows the three of them embarking on their quest for the effects, entering dangerous dream worlds and meeting strange characters in even weirder scenarios.


 Additional character personalities:

 MAJOR CHARACTERS

 Madotsuki
 One of the three protagonists. Very goofy and jolly, often the one to deliver dumb one-liners relating to the current situation, or just in general giving commentary.
There is a running gag where certain events, like scary or stunning things, cause her typically-closed eyes to pop open. Vaguely like a typically goofy teenager with a normally upbeat personality.

 Poniko
 Very closed-off and a bit quiet, though still makes conversation with Mado and Masada.
One plot point of the movie is that she is "cursed" with the power to turn into Uboa and needs to learn how to control this power, as she often transforms into Uboa at the worst times and is
feared as the "Monster of the Pink Sea". By the end of the film, she learns to take control of her power and use it for good to help her friends in a bad situation.

 Masada
 Quite possibly the goofiest of them all. Very squash-and-stretch and either constantly anxious or a slight nerd who believes he has everything under control when he typically doesn't.
Very anxious unless he's just having fun. He is a servant/employee to Mars-san, so both his job and life are on the line during this adventure. Typically the center of the slapstick or awkward
comedy bits.


 SUPPORTING CHARACTERS

 Mars-san
 The main antagonist of the film and acts as a king/boss-like figure for the dream world. Doesn't take kindly to humans like Madotsuki and blames Masada for leading her to his chambers.
Sets up the adventure that the trio must go on. He leads an army of other dream denizens who attempt to stop the trio's quest and has all-seeing vision to view their progress.

 Monoe
 Virtually a celebrity in the White Desert, she's said to know her way around the entire dream world and know many important figures. A "popular girl" figure somewhat.
She is able to help the dreamers navigate some of the effects but doesn't tag along.

 Monoko
 Tags along right behind Monoe, even though not as popular and pretty dimwitted compared to her. She cheers her on and essentially just supports her while backing off White Desert paparazzi.

 Boss Toriningen
 A special Toriningen inhabiting one of the tallest buildings within the Guillotine World city. Unlike a lot of the Toriningen, they're much more controlling of their lunatic side and run an office space that other dream denizens work in. A bit of a rebel towards Mars-san and makes a deal with the trio upon hearing their story, proposing to give them an effect in exchange for completing a task. Mob boss energy.

 Idk how I'm going to incorporate any of the other popular characters into this I would need to do actual heavy scriptwriting for this if I wanted to (I kinda do).


 ROUGH PLOT STRUCTURE (SPOILERS IF YOU SOMEHOW ACTUALLY CARE ABOUT THIS DUMPSTER FIRE!!!!!!)

 > Madotsuki is introduced.
 > Madotsuki goes to Snow World, gets the Yuki-onna effect, goes to the Pink Sea, and meets Poniko.
 > The two enter Snow World and go through the Staircase of Hands -> Underground World -> Spaceship process. They meet Masada.
 > They crash land on Mars and all three encounter Mars-san, who sets their goal.
 > Mado already has Severed Head, Stoplight, Yuki-onna, Umbrella, and Poop Hair from the previous scenes, so the trio sets for the Nexus.
 > They try and start simple in Shield-folk World and try to catch Nekoin for the Cat effect. Masada stumbles into FC World for the Demon effect (please include 'so retro' jokes here).

 > ???

 > Neon World scene. Read above. You know the one.

 > ???

 > White Desert scene where they meet Monoe and Monoko. They hitch a ride on Takofuusen somewhere. (really unsure where to put this part or what comes after it)

 > ???

 > Guillotine World scene(?) Needs to happen before the second-act conflict. The trio somehow "betrays" the Boss Toriningen, probably by not completing the task they assigned them while still
taking the effects. They'd need a reason for the Toriningen to be infuriated later.

 > ???

 > Second-act conflict involves the trio getting caught by the Toriningen mob and getting sent to Hell (or the Teleport Maze idk), which is depicted as a sort of prison. Poniko is able to escape with her "Uboa powers" but leaves the other two behind in an attempt to fulfill the rest of the quest herself, considering there are only a few effects left.
 > Cue sad montage of memories and goofy stuff the trio did. Poniko consoles her reflection in the Pink Sea warp and has a sudden change of heart, realizing she has become much more controlling over her powers thanks to her friends
increasing her confidence, and goes back to free Mado and Masada.
 > Cut to Masada attempting to saw the bars with a file he so happened to have as Madotsuki sits in the corner, depressed about her friend leaving her. "Don't worry, Mado! We'll be outta here
in NO TIME!" (the file breaks in two and crumbles into dust).
 > Poniko arrives after returning to Monoe and Monoko for help, all riding in on Takofuusen. Tako destroys part of the prison and a big fight breaks out, leading to the trio's victory. They hop on Tako and fly to Mars to settle things the hard way with Mars-san.

 > ???

 > Penultimate scene is the trio fighting against Mars-san and his army (maybe he sets aside his difference with the Boss Toriningen and its a huge fight between all of them). Mado and Masada
use the effects while Poniko uses freaking epic cool awesome Uboa powers.


