OperaSection (talk | contribs) (Minor edits for clarity and added NPC reactions.) |
(cleanup tag) |
||
| (81 intermediate revisions by 29 users not shown) | |||
| Line 1: | Line 1: | ||
{{MissingInfo|0.124f changes}} | |||
{{Cleanup|Page needs to be rewritten in accordance to the style guide. Dream Guardians section likely needs a full rewrite. See if this page can be rewritten in a more coherent ordering as well.}} | |||
{{Locationbox | {{Locationbox | ||
|headercolor = #007D00 | |headercolor = #007D00 | ||
|headerfontcolor = #DE9E5A | |headerfontcolor = #DE9E5A | ||
|image = dream_park.png | |image = dream_park.png | ||
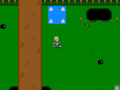
|caption = Bench near the [[Yume 2kki:Shadowy Caves|Shadowy Caves]] entrance. | |||
|JapaneseName = 夢想公園 | |JapaneseName = 夢想公園 | ||
|Name = | |Name = ''Musō Kōen'', Dream Park | ||
|Effects = None | |Effects = None | ||
|Wallpapers = WP #288, #384 | |Wallpapers = WP #288, WP #384, WP #534, WP #538, Kura Puzzle #60, Kura Puzzle #67 | ||
|Masks = [[Yume 2kki:Masks/Others#Various Authors|Puni]] | |||
|Events = None | |Events = None | ||
|NPCS = [[Minor Characters#Puni|Puni]], [[Guardians|The Five Guardians]], [[Minor Characters#Shirube-chan|Shirube-chan]] | |Map Type = Large, Multiple | ||
|Other = [[ | |NPCS = [[Yume 2kki:Minor Characters#Puni|Puni]], [[Yume 2kki:Guardians#The Five Guardians|The Five Guardians]], [[Yume 2kki:Minor Characters#Shirube-chan|Shirube-chan]] | ||
|Connections = | |Other = [[Yume 2kki:Vending Machine/Unique Vending_Machines#{{PAGENAME}}|Unique Vending Machine]] | ||
|BGM = | |Connections = {{Connection|Art Gallery|unlock_type=Locked}},{{Connection|Shadowy Caves}},{{Connection|Haniwa Temple|effects_needed=Haniwa}},{{Connection|Sixth Terminal|effects_needed=Spacesuit}},{{Connection|Jigsaw Puzzle World|effects_needed=Bat|unlock_type=Unlock}},{{Connection|Boogie Street|effects_needed=Fairy, Spacesuit|effect_conjunction=Or|unlock_type=Unlock}},{{Connection|Broken Faces Area|effects_needed=Marginal|unlock_type=Unlock}},{{Connection|Theatre World|effects_needed=Bat|one_way_type=NoReturn}},{{Connection|Guts World|effects_needed=Marginal|unlock_type=LockedCondition|unlock_conditions=Visit the balcony in Guts World at least once.|one_way_type=NoReturn}},{{Connection|Dizzy Spirals World|chance_description=Connection only available sometimes (10% chance)|chance_percentage=10%|one_way_type=NoReturn}},{{Connection|Apartments|effects_needed=Penguin|unlock_type=Locked}},{{Connection|Tribe Settlement|unlock_type=Locked}},{{Connection|Guardians' Temple|effects_needed=Child|unlock_type=LockedCondition|unlock_conditions=Requires finding all of the Five Guardians.}},{{Connection|Scrambled Egg Zone|effects_needed=Child|unlock_type=LockedCondition|unlock_conditions=Requires breaking the egg in the Guardians' Temple and having the orbs show on each pillar.|one_way_type=NoReturn}},{{Connection|Birthday Tower|effects_needed=Cake}},{{Connection|Dice World|effects_needed=Tissue}},{{Connection|Guardians' Realm|unlock_type=LockedCondition|unlock_conditions=Requires fulfilling the conditions to locating each entrance.}},{{Connection|Underground Passage|unlock_type=LockedCondition|unlock_conditions=Obtain Menu Theme #21 in Stone Towers.|one_way_type=NoReturn}},{{Connection|Graveyard World|one_way_type=NoEntry}},{{Connection|Abyss of Farewells|one_way_type=NoEntry}} | ||
|BGM = {{BGM|title=オルゴール|filename=オルゴール(346B).ogg|soundroom=346A, 346B|speed=50}}, {{BGM|title=2_19|filename=2_19.ogg|label=Wooden Maze|soundroom=421A|speed=70}}, {{BGM|title=ねおん@ネコノハ|filename=ねおん@ネコノハ(Caves).ogg|label=Gray house trap|soundroom=216B|speed=60}}, {{BGM|title=風化|filename=風化(250C).ogg|label=Five Guardians' shrines|soundroom=250C|speed=90}}, {{BGM|title=spelude-40|filename=Spelude-40(348B).ogg|label=Egg House|soundroom=348B|speed=70}}, {{BGM|title=RIMA-bgm-recorder001|filename=RIMA-bgm-recorder001(Abyss of Farewells).ogg|label=Puni Homes|soundroom=423A|speed=50}}, {{BGM|title=yukihi1|filename=Yukihi1(164B).ogg|label=Eastern section towers|soundroom=164B|speed=140}}, {{BGM|title=e4b|speed=130|label=Guessing Maze Game|filename=E4b_fast.ogg|soundroom=085D}} | |||
|Map ID = 1061, 1062, 1063, 1064, 1065, 1066, 1067, 1069, 1070 | |Map ID = 1061, 1062, 1063, 1064, 1065, 1066, 1067, 1069, 1070 | ||
|Primary = | |Primary = maptsuki | ||
|VersionAdded = 0.110a | |VersionAdded = 0.110a | ||
|VersionsUpdated = 0.112 patch 3,0.113-b,0.113i-c,0.114b patch 4-b,0.114c patch 2,0.114d patch 4,0.114d patch 6-b,0.114h patch 4,0.115c,0.115c patch 1-b,0.115e patch 1,0.115g-c+,0.117b patch 4,0.117f patch 3-- | |VersionsUpdated = 0.112 patch 3, 0.113-b, 0.113i-c, 0.114b patch 4-b, 0.114c patch 2, 0.114d patch 4, 0.114d patch 6-b, 0.114h patch 4, 0.115c, 0.115c patch 1-b, 0.115e patch 1, 0.115g-c+, 0.117b patch 4, 0.117f patch 3--,0.119, 0.119b patch 10-+, 0.124f, 0.124g patch 1 | ||
}} | }} | ||
'''Dream Park''' is a large and expansive area accessible from several worlds, including [[Yume 2kki:Graveyard World|Graveyard World]], the [[Yume 2kki:Apartments|Apartments]], the [[Yume 2kki:Art Gallery|Art Gallery]], the [[Yume 2kki:Tribe Settlement|Tribe Settlement]], and others. | |||
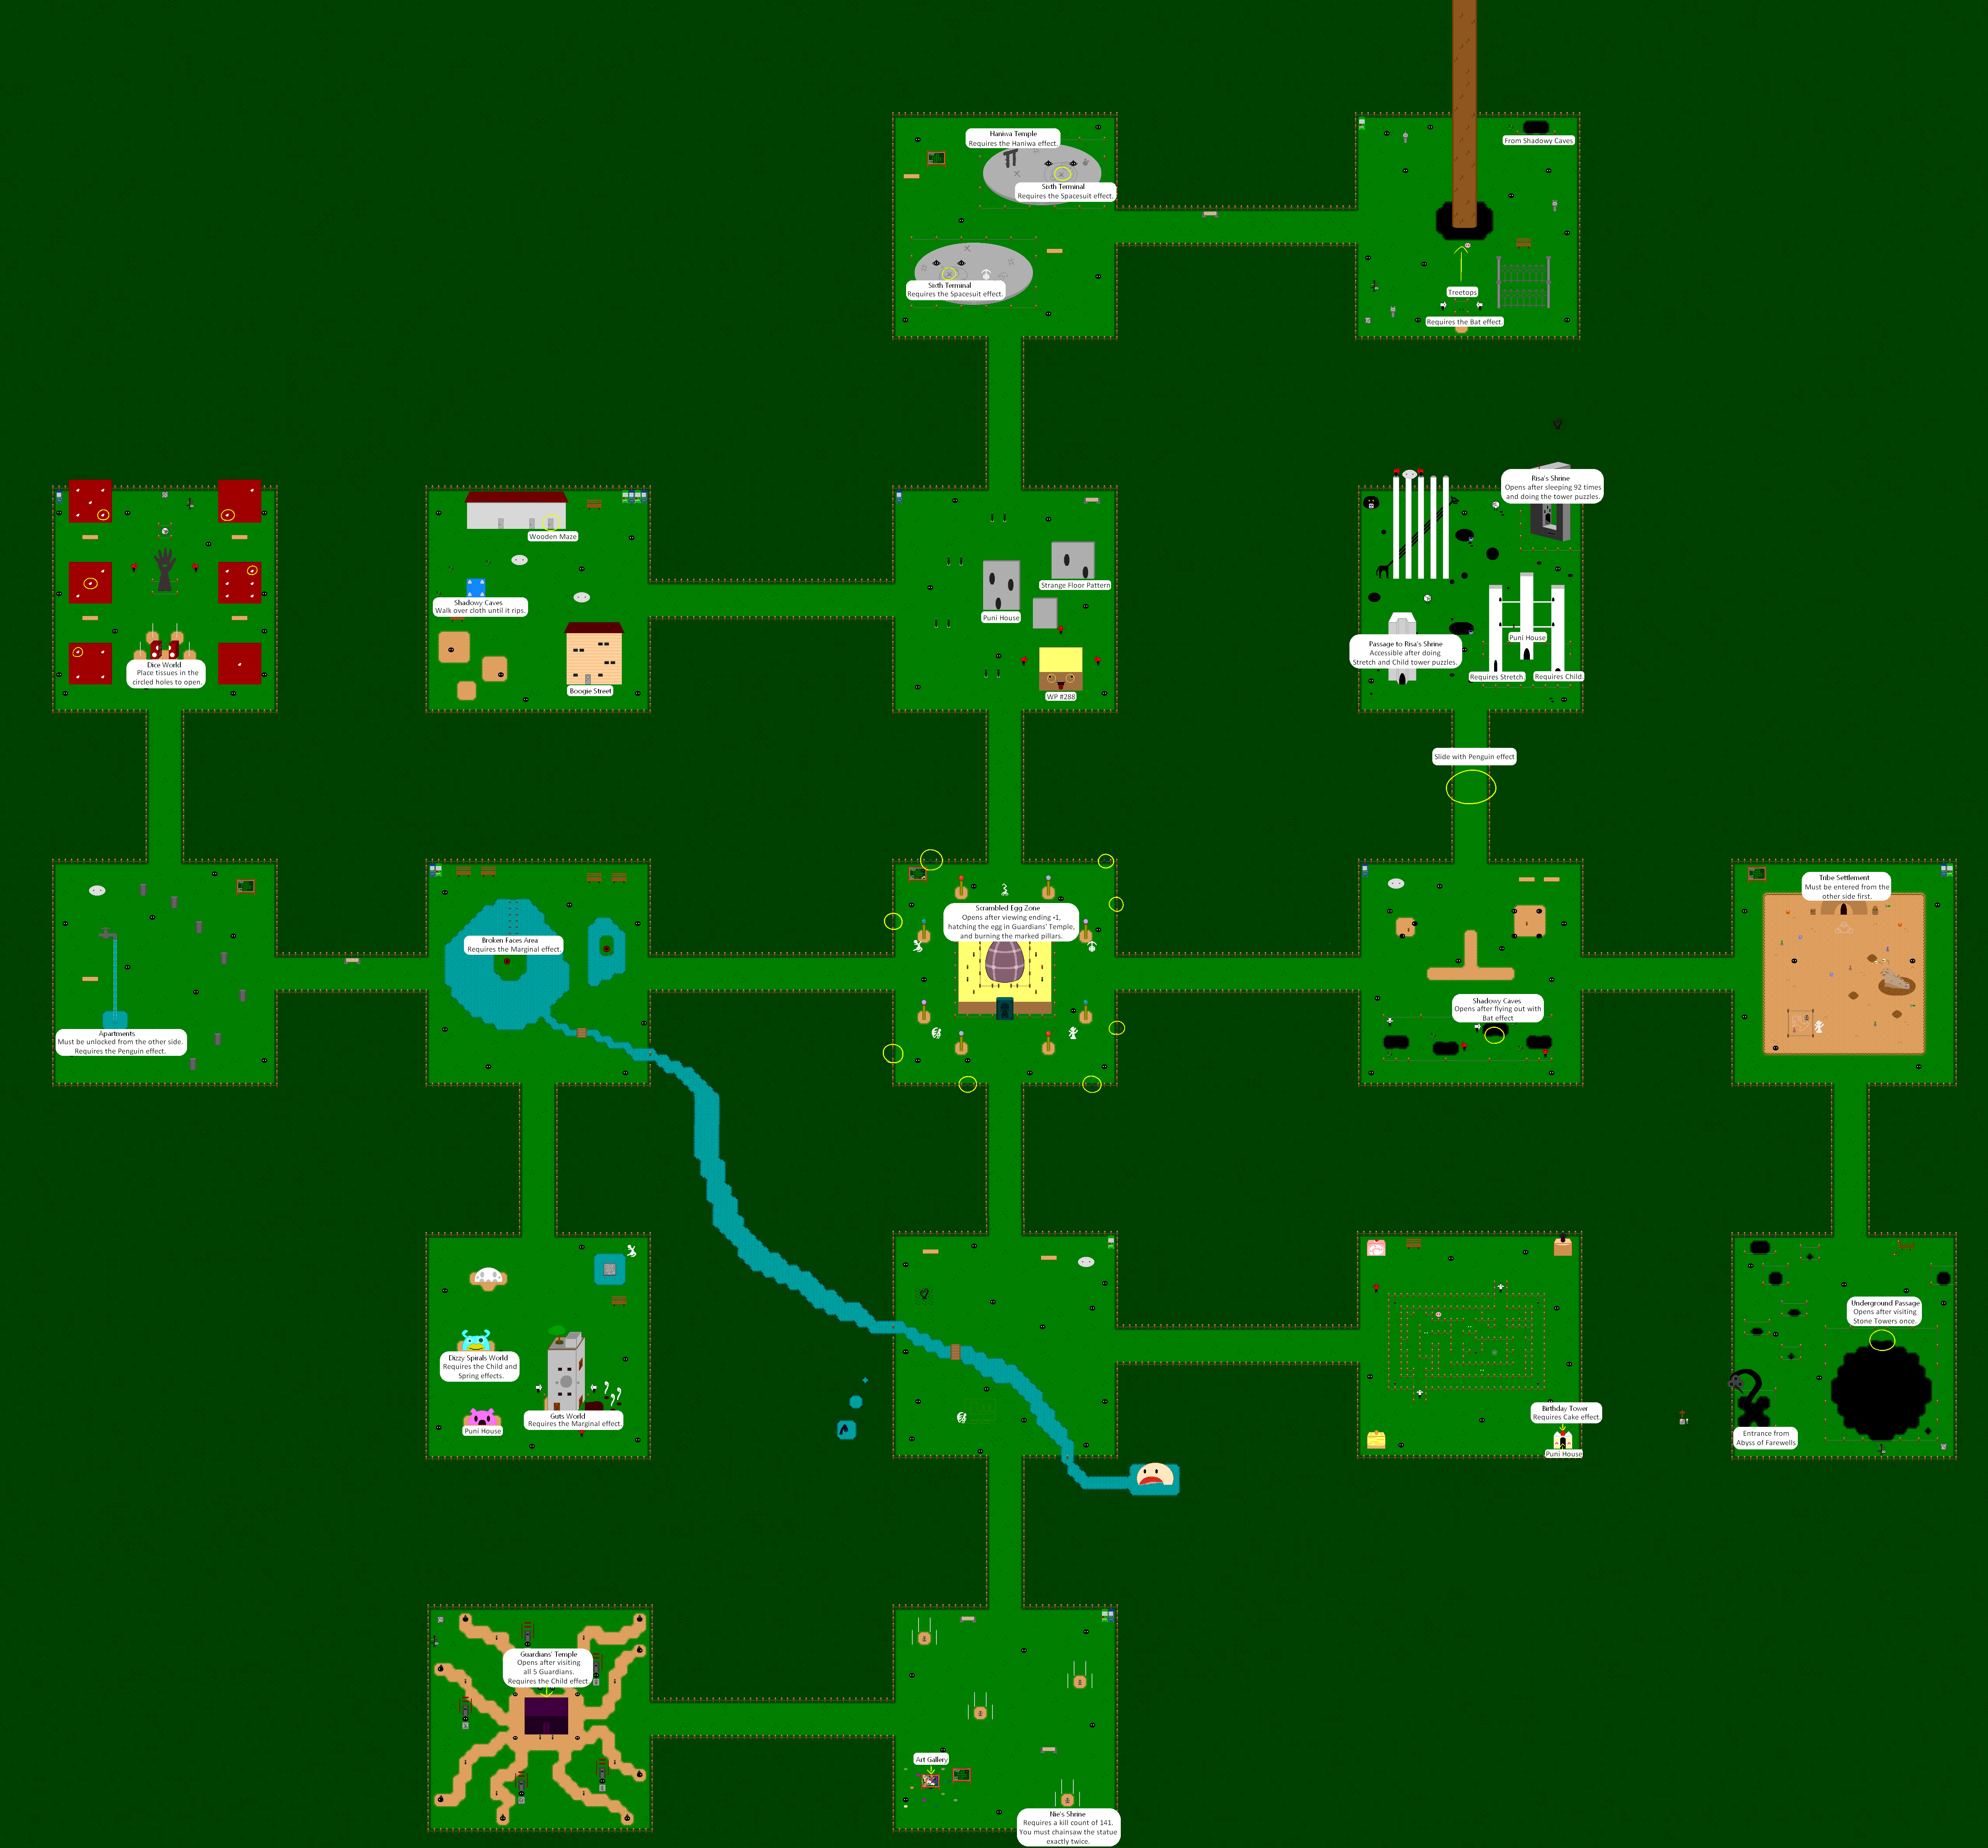
{{LocationMap|filename=map annotated.png|caption=Map of Dream Park.}} | |||
==Features== | ==Features== | ||
The Dream Park | The Dream Park has 17 fenced "acres" comprising 5 sections. | ||
Some vending machines can be found throughout the Park, but they will be empty until you've visited all 5 sections. | |||
The Park's main inhabitants are the Puni, round, usually pitch-black creatures with bright eyes that communicate in squeaks. Various Puni have favorite and least-favorite effects. Equipping a Puni's favorite effect will make them change appearance accordingly: | |||
* '''Bike -''' The Puni will be wearing a bike helmet much like [[Yume 2kki:Urotsuki|Urotsuki]]'s. | |||
* '''Bike -''' The Puni will be wearing a bike helmet much like [[Urotsuki]]'s. | |||
* '''Boy -''' The Puni will have an arrow on its head. The shape of the Puni resembles a male gender sign. | * '''Boy -''' The Puni will have an arrow on its head. The shape of the Puni resembles a male gender sign. | ||
* '''Chainsaw -''' The Puni will become spiky. | * '''Chainsaw -''' The Puni will become spiky. | ||
*'''Lantern -''' The Puni will have a candle on its head. | *'''Lantern -''' The Puni will have a candle on its head. | ||
* '''Bat -''' Bat wings will be on the Puni's back | * '''Bat -''' Bat wings will be on the Puni's back. | ||
* '''Drum -''' The Puni will have an outline of a drum around it. | * '''Drum -''' The Puni will have an outline of a drum around it. | ||
* '''Bunny Ears -''' The Puni will have bunny ears. | * '''Bunny Ears -''' The Puni will have bunny ears. | ||
* '''Fairy -''' Fairy wings will be on the Puni's back. | * '''Fairy -''' Fairy wings will be on the Puni's back. | ||
* '''Maiko -''' The Puni will have a hairbun | * '''Maiko -''' The Puni will have a hairbun with a ''kanzashi'' in it. | ||
* '''Penguin''' '''-''' The Puni will have a penguin | * '''Penguin''' '''-''' The Puni will have a penguin beak and flippers. | ||
*'''Child -''' The Puni will have lines on its face to resemble blushing and will be slightly smaller. | *'''Child -''' The Puni will have lines on its face to resemble blushing and will be slightly smaller. | ||
*'''Stretch -''' The Puni will be slightly bigger and have wrinkles on its face. | *'''Stretch -''' The Puni will be slightly bigger and have wrinkles on its face. | ||
*'''Invisible -''' The Puni will turn transparent and will go invisible if [[Urotsuki]] does so too. | *'''Invisible -''' The Puni will turn transparent and will go invisible if [[Yume 2kki:Urotsuki|Urotsuki]] does so too. | ||
*'''Wolf -''' The Puni will have wolf ears and a wolf tail. | *'''Wolf -''' The Puni will have wolf ears and a wolf tail and will follow the player. | ||
*'''Insect -''' The Puni will have insect wings and an antenna on its head. | *'''Insect -''' The Puni will have insect wings and an antenna on its head. | ||
*'''Spacesuit -''' The Puni change its shape to look like a UFO. | *'''Spacesuit -''' The Puni change its shape to look like a UFO. | ||
*'''Crossing -''' The Puni will have crossing pieces stuck on it | *'''Crossing -''' The Puni will have crossing pieces stuck on it. | ||
*'''Eyeball bomb -''' The Puni will have a fuse on its head and an eye drawn on its back. | *'''Eyeball bomb -''' The Puni will have a fuse on its head and an eye drawn on its back. | ||
*'''Tissue -''' The Puni will have a chonmage. | *'''Tissue -''' The Puni will have a ''chonmage''. | ||
*'''Telephone -''' The Puni will have a telephone on its head. | *'''Telephone -''' The Puni will have a telephone on its head. | ||
*'''Teru Teru Bōzu -''' The Puni will have an umbrella and wings on its sides. | *'''Teru Teru Bōzu -''' The Puni will have an umbrella and wings on its sides. | ||
*'''Marginal -''' The Puni will have a cross on its back | *'''Marginal -''' The Puni will have a cross on its back, an extra eye, and tears coming out of its eyes. | ||
*'''Rainbow -''' The Puni will have bigger eyes and will sparkle. | *'''Rainbow -''' The Puni will have bigger eyes and will sparkle. | ||
*'''Plaster Cast -''' The Puni will have scratches all over it and the eyes will be partially closed. | *'''Plaster Cast -''' The Puni will have scratches all over it and the eyes will be partially closed. | ||
*'''Trombone -''' The Puni will shape itself as a | *'''Trombone -''' The Puni will change its shape to resemble an eighth note. | ||
*'''Dice -''' The Puni will become square-shaped and have dots floating above it representing the number on the front face of the die. When the front face shows the red eye, there will be no dots nor will there be any patterns on the Puni itself. | |||
The other prominent NPCs here are creatures that resemble arrows and serve as hints to certain secrets. | |||
As you explore the park, there is a random chance to encounter certain unique creatures, including a helicopter with flapping wings, a pair of eyestalks sticking out of the water, and a nautilus with a long neck. | |||
After sleeping many times and visiting all of the Park's sections at least once, you will be able to interact with Shirube-chan, an NPC that can teleport you across the Park. There will also be stone tiles with enciphered letters symbolizing the section that you're in. | |||
===Central Section=== | |||
At the center of the park is a large egg patterned after Urotsuki's sweater. Ending -1 must be done to enter the egg. Also, the egg-hatching event in the Guardians' Temple must be done each time before entering the area. By getting all of the orbs on each of the pillars to show up by burning some of the wooden poles of the area's fence with the [[Yume 2kki:Effects#Lantern/Torch|Lantern]], the door can be opened, assuming that the conditions to having the door appear have been met. The exact poles to be burned can be found by using the Lantern in the purple temple's location, as some of the Puni there will face those poles, with fins on their heads. Inside the egg is a small room with a frame showing Urotsuki as a child, as well as a symbol right in front of it. Interacting with the symbol with the [[Yume 2kki:Effects#Child|Child]] effect will change the portrait into an egg, and exiting the room will now lead to [[Yume 2kki:Scrambled Egg Zone|Scrambled Egg Zone]]. | |||
===Northern Section=== | ===Northern Section=== | ||
Going north from the Central Section leads to an area two stone buildings, a vending machine, and a strange yellow box with a face on it. The box makes a strange sound when interacted with or attacked and grants Wallpaper #288 upon interaction. It cannot be killed with the Chainsaw effect. There are three arrow NPCs pointing to the back of the box, but investigating there merely makes one of the sign NPCs laugh. | |||
This area has a path going west to the House Area and one going north to the Stone Platform Area. | |||
====House Area==== | |||
In this part of the park, there are some vending machines and two houses with tiled roofs. The lower house leads to a corridor with a large gap in the floor that can be crossed with the [[Yume 2kki:Effects#Fairy/Yousei|Fairy]] or [[Yume 2kki:Effects#Spacesuit|Spacesuit]] effects. The door on the other side unlocks a two-way connection through the second house on [[Yume 2kki:Boogie Street|Boogie Street]]. | |||
To the west is a blue panel on the ground surrounded by four white structures. Walking across this panel will eventually cause it to break, sending Urotsuki to the [[Yume 2kki:Shadowy Caves|Shadowy Caves]] below. | |||
To the north is a house with several doors, though only the door on the right opens from the outside. | |||
Inside the house are many small corridors, including a room with a wireframe chaser that requires interacting with the exit multiple times to escape. Getting caught will send you to an empty version of that same room. The door will be locked from the outside, but if you use the Fairy effect, you'll be able to escape out the broken window on the left and find yourself back outside behind the house. | |||
A door blocked with horizontal iron bars can also be found somewhere inside the house. Chainsawing the bars is a condition for unlocking the '''Terminal Room'''. If you have completed the other requirements, you will then be able to access the room through this door. | |||
If you go all the way left through the corridors, you'll find yourself outside the building out a hidden exit on the left wall, though this door will lock behind you. | |||
====Stone Platform Area==== | |||
Going further north from the entrance, there are two circular, fenced stone platforms with symbols inscribed on them. On the top one is a shape resembling a ''tori'' gate. Interacting with it with the [[Yume 2kki:Effects#Haniwa|Haniwa]] effect equipped will take you to [[Yume 2kki:Haniwa Temple|Haniwa Temple]]. In addition, using the [[Yume 2kki:Effects#Spacesuit|Spacesuit]] effect on the X between four UFO Puni on either platform will take you to the topmost layer of [[Yume 2kki:Sixth Terminal|Sixth Terminal]]. | |||
====Treetops Area==== | |||
East of the Stone Platform Area is an area with a large tree. In front of it is a fenced-off set of footprints with two white arrow creatures pointing at it. Using the [[Yume 2kki:Effects#Bat|Bat]] or [[Yume 2kki:Effects#Spring|Spring]] here will take you to the '''Treetops''', though you will need the Bat to explore this section fully. | |||
There are three Puni with distinct eye colors on the tree canopy. The red Puni reacts to the Bug effect, the yellow reacts to the Bunny Ears effect, and the blue reacts to the Wolf effect. | |||
On the left-hand side in the sky above the treetops is a large puzzle piece that unlocks a two-way connection to [[Yume 2kki:Jigsaw Puzzle World|Jigsaw Puzzle World]] when accessed with the Bat effect (the puzzle piece will not spawn unless you have visited the Jigsaw Puzzle World first). There's also a chance a moon will appear in the sky, serving as a one-way connection to [[Yume 2kki:Theatre World|Theatre World]]. | |||
To the bottom-right of this screen is a smaller tree platform that can also be accessed with the Bat effect. The ladder here leads down to a small Puni room that will be empty unless you have unlocked seven specific entrances to Dream Park: the [[Yume 2kki:Apartments|Apartments]], [[Yume 2kki:Boogie Street|Boogie Street]], [[Yume 2kki:Broken Faces Area|Broken Faces Area]], [[Yume 2kki:Graveyard World|Graveyard World]], [[Yume 2kki:Jigsaw Puzzle World|Jigsaw Puzzle World]], [[Yume 2kki:Stone World|Stone World]] (via [[Yume 2kki:Shadowy Caves|Shadowy Caves]]), and [[Yume 2kki:Tribe Settlement|Tribe Settlement]]. | |||
If this condition is met, there will be a pink Puni here. Interacting with it will cause the three Puni from the big treetop to appear and transform Urotsuki into a [[Yume 2kki:Masks/Others#Various Authors|Puni]] herself. Upon transformation, you will be sent in front of the Tribe Settlement entrance, and by returning to the section leading to the treetops, you can change your appearance by interacting with the pink Puni by the tree or the Puni statues. | |||
In this same area you can find a blue panel on the ground similar to the one from the Northern section. Walking across this panel will eventually cause it to break, sending Urotsuki to an isolated area of the [[Yume 2kki:Shadowy Caves|Shadowy Caves]]. The panel is initally blocked by three white puni statues, but they will disappear once you complete the [[Yume 2kki:Sacred Crypt|Sacred Crypt]] event. | |||
===Western Section=== | ===Western Section=== | ||
West of the Central Section is an acre with a small lake and a few vending machines. Equipping the [[Yume 2kki:Effects#Marginal|Marginal]] effect will fill the water with blood and reveal a stone path across the lake to the center island. Crossing and interacting with the red dot here unlocks a two-way connection to [[Yume 2kki:Broken Faces Area|Broken Faces Area]]. | |||
====Playground==== | |||
South of the lake is some kind of playground and a rectangular gray building. Equipping the Marginal effect will reveal the building is haunted. Interacting with it in this state from the back wall will send you on a one-way trip to [[Yume 2kki:Guts World|Guts World]] if the player has been to the area with the woman on the balcony in said world. | |||
The entrance from [[Yume 2kki:Graveyard World|Graveyard World]] is also around here, but trying to return by using the [[Yume 2kki:Effects#Child|Child]] effect will lead to a passage, which has a 1/10 chance every time you enter the path to be unblocked and connect with [[Yume 2kki:Dizzy Spirals World|Dizzy Spirals World]]. | |||
====Faucet Area==== | |||
West of the lake, you can find seven pillars and a floating faucet. Using the [[Yume 2kki:Effects#Rainbow|Rainbow]] effect will give the pillars color. The faucet can be opened and leads to the [[Yume 2kki:Apartments|Apartments]] provided you've unlocked this connection from that side. | |||
====Dice World Entrance==== | |||
The northwesternmost area contains six red dice sculptures surrounding a smaller die sculpture in the center. Filling in the missing white marks on the six sculptures with the Tissue effect will cause the smaller sculpture to split in half, creating an entrance to [[Yume 2kki:Dice World|Dice World]]. | |||
===Southern Section=== | ===Southern Section=== | ||
The area south of the Central Section holds a river and various Puni, but not much else of interest. Directly east of this is the Maze Area, while the path to the south leads to the Gallery Area. | |||
====Maze Area==== | |||
This area holds a maze made out of fences and a giant slice of cake in each corner. Solving the maze will net you 100[[Yume 2kki:Money|夢]]. The ropes within the maze can be chainsawed. The logs blocking off the path beyond the ropes can be removed by entering the [[Yume 2kki:Shadowy Caves|Shadowy Caves]] at least once, but traversing those paths has a chance of a wireframe hand popping out of the ground here, taking you to an isolated section of the Shadowy Caves. | |||
A pink teleport pad may activate in the middle of the maze taking you to a guessing game. The key to solving the game is to look for the white arrow NPC that is different than the others and go on that path. Failure to do so will result in all your money being taken. Upon successful completion of this game, you will receive a random snack from the Dream Park vending machines and 750[[Yume 2kki:Money|夢]]. Afterwards, you will be teleported back into the normal maze. | |||
If Urotsuki enters the cake in the lower-right corner with a visible entrance, she will find a room with four Puni, two of whom will move toward her if she equips the Cake effect. There is also a back door leading outside again. However, if Urotsuki equips the Cake effect and enters the cake from the back door, she will instead find a room with four pieces of cake on plates and one empty plate in the middle. Interacting with the middle plate with the Cake effect will cause the piece of cake on Urotsuki's head to fall onto the plate. Leaving through the front door will take Urotsuki to a beach by a pink sea with several Puni wandering around and a few cake-shaped structures. The orange cake will take Urotsuki back to Dream Park, and the brown one contains a room of Puni. Urotsuki can also find a cake-shaped tower much taller than the other two structures. Entering it will lead to the [[Yume 2kki:Birthday Tower|Birthday Tower]]. | |||
====Gallery Area==== | |||
A painting here serves as a connection to [[Yume 2kki:Art Gallery|Art Gallery]] provided you've entered at least once from the opposite side. If it is interacted with before it is unlocked, Urotsuki will make a refusal sound. Scattered about are statues that make bell sounds when interacted with. One of them can be chainsawed, as part of the way to enter [[Yume 2kki:Dream Park#Nie|Nie's shrine]]. West of here is the entrance to the Guardian's Temple. | |||
====Guardian's Temple Entrance==== | |||
West of the Gallery Area is a purple building surrounded by five peeping stones between two red pillars next to stone tablets. The red pillars will turn into a torii gate after their corresponding Guardian's Realm is entered. The purpose of these structures is explained in [[Yume 2kki:Dream Park#Entering the Guardians' Realm|Entering the Guardians' Realm]]. | |||
===Eastern Section=== | ===Eastern Section=== | ||
East of the Central Section is an area with a fenced-off row of holes in the ground. If you've used the Bat effect in the Shadowy Caves to fly up the southern exit, you can use the third hole from the left to return there. The other three pits lead to inescapable dead ends where you'll be attacked by wireframe [[Yume 2kki:Chasers|Chasers]]. From this area the path continues north to the Tower Area or east to the Sandbox Area. | |||
====Tower Area==== | |||
The path north is seemingly endless — you'll need the Penguin effect to break through the looping barrier. This leads to a small section with towers, cubes, and a black giraffe behind some pillars. The cube-like NPCs respond with a different sound to the [[Yume 2kki:Effects|Dice]] effect and change form when the [[Yume 2kki:Effects|Chainsaw]] is equipped. | |||
=== | The towers here hold a puzzle to [[Yume 2kki:Dream Park#Risa|Risa's temple]]. | ||
There's also a hole with white dots in the top-left corner. The [[Yume 2kki:Effects#Child|Child]] or [[Yume 2kki:Effects#Fairy.2FYousei|Fairy]] effects can be used to access a small room here. | |||
====Sandbox Area==== | |||
This area is almost entirely taken up by a giant sandbox. Near the top is a door in a mound of sand leading to [[Yume 2kki:Tribe Settlement|Tribe Settlement]]. The two sand sculptures on either side of it react to the [[Yume 2kki:Effects|Haniwa]] effect. | |||
====Pit Area==== | |||
South of the Sandbox Area is a field of fenced-off pits. The largest pit is a one-way path to [[Yume 2kki:Underground Passage|Underground Passage]], though it is only accessible if you have already obtained [[Yume 2kki:Menu Themes|Menu Theme #21]]. There is a black bird-like NPC to the left of this pit that will open or close its eyes in response to equipping ([[Yume 2kki:Effects|Fairy, Rainbow, Penguin,]] etc.) or using ([[Yume 2kki:Effects|Telephone, Maiko, Drum]], etc.) many effects. It will also react uniquely to equipping the [[Yume 2kki:Effects|Chainsaw]], [[Yume 2kki:Effects|Plaster Cast]], or [[Yume 2kki:Effects|Grave]]. | |||
===Terminal Room=== | ===Terminal Room=== | ||
The terminal room is accessed through the door in the room which leads to Boogie Street or through the door in the big house in the northern section. To unlock the doors to this area, you must perform the following: | The terminal room is accessed through the door in the room which leads to Boogie Street or through the door in the big house in the northern section. To unlock the doors to this area, you must perform the following: | ||
*Enter [[Dizzy Spirals World]] from the [[Dream Park]]. | *Enter [[Yume 2kki:Dizzy Spirals World|Dizzy Spirals World]] from the [[Yume 2kki:Dream Park|Dream Park]]. | ||
*Enter the [[Dream Park]] from the [[Tribe Settlement]]. | *Enter the [[Yume 2kki:Dream Park|Dream Park]] from the [[Yume 2kki:Tribe Settlement|Tribe Settlement]]. | ||
*Enter the [[Dream Park]] from the [[Apartments]]. | *Enter the [[Yume 2kki:Dream Park|Dream Park]] from the [[Yume 2kki:Apartments|Apartments]]. | ||
*Enter the [[Boogie Street]] from the [[Dream Park]]. | *Enter the [[Yume 2kki:Boogie Street|Boogie Street]] from the [[Yume 2kki:Dream Park|Dream Park]]. | ||
*Enter the [[Broken Faces Area]] from the [[Dream Park]]. | *Enter the [[Yume 2kki:Broken Faces Area|Broken Faces Area]] from the [[Yume 2kki:Dream Park|Dream Park]]. | ||
*Chainsaw the door found in the passage between the [[Dream Park]] and the [[Boogie Street]]. | *Chainsaw the door found in the passage between the [[Yume 2kki:Dream Park|Dream Park]] and the [[Yume 2kki:Boogie Street|Boogie Street]]. | ||
*Chainsaw the bars off the door in the northern section's house. | *Chainsaw the bars off the door in the northern section's house. | ||
After doing all of this, the lights above the two doors will begin to blink and the doors will be unlocked, and going through them will lead to the terminal room. Each corner of the room has a Shirube-chan with a different eye color. Items collected from the Park's vending machines will appear on the blue display board. In the center of the room is a large interface. The top section consists of three screens connected by wires, where each screen contains a Puni. If a normal effect is equipped, then the Puni in the center will take on an appearance related to that effect, and the two on the side will be deflated. A mixed effect will result in the two Puni on the sides taking on appearances based on the effects that make up the effect in question, with the Puni on the center deflated. | After doing all of this, the lights above the two doors will begin to blink and the doors will be unlocked, and going through them will lead to the terminal room. Each corner of the room has a Shirube-chan with a different eye color. Items collected from the Park's vending machines will appear on the blue display board. In the center of the room is a large interface. The top section consists of three screens connected by wires, where each screen contains a Puni. If a normal effect is equipped, then the Puni in the center will take on an appearance related to that effect, and the two on the side will be deflated. A mixed effect will result in the two Puni on the sides taking on appearances based on the effects that make up the effect in question, with the Puni on the center deflated. | ||
The lower section consists of a map of Dream Park. Depending on what effect is equipped, different parts of the map will have a red dot on them. Some effects also create a dot with a red circle around it | The lower section consists of a map of Dream Park. Depending on what effect is equipped, different parts of the map will have a red dot on them. Some effects also create a dot with a red circle around it. These dots represent the quantity of these specific types of favorite effect punis that can be found in that area of Dream Park; with the dot and red circle being guaranteed chances of finding it. Effect Mixes can always be found in Puni houses. | ||
===Entering the Guardians' Realm=== | ===Entering the Guardians' Realm=== | ||
The gates to the [[Guardians' Realm]] are the Dream Park's most well-kept secret, where the Five Guardians, Koro, Kuta, Nie, Nome, and Risa, are situated in that area. Locating these gates may entail certain conditions, in which a hint to their whereabouts is given by red poles. Common to each entrance are peeping stones, where the left shows full-screen illustrations of the respective Guardians' appearances, and the right shows adages written in the cipher used in one of the books of the [[Library]]. Deciphered versions of these messages are shown in the photo captions of the succeeding sections. | The gates to the [[Yume 2kki:Guardians' Realm|Guardians' Realm]] are the Dream Park's most well-kept secret, where the Five Guardians, Koro, Kuta, Nie, Nome, and Risa, are situated in that area. Locating these gates may entail certain conditions, in which a hint to their whereabouts is given by red poles. Common to each entrance are peeping stones, where the left shows full-screen illustrations of the respective Guardians' appearances, and the right shows adages written in the cipher used in one of the books of the [[Yume 2kki:Library|Library]]. Deciphered versions of these messages are shown in the photo captions of the succeeding sections. | ||
In each part of the Guardians' Realm, you will encounter a straight path of pillars, ending in the temple of each Guardian. Entering these temples, Urotsuki will then unequip any effect in use, with the menu disabled. Taking the exit to the right in these areas leads back to the respective realm's gate. This will also place two poles connected horizontally across the poles between each respective Guardian's peeping stone in the park's southern section, forming a Torii gate. This indicates that the Guardian in question has been encountered. | In each part of the Guardians' Realm, you will encounter a straight path of pillars, ending in the temple of each Guardian. Entering these temples, Urotsuki will then unequip any effect in use, with the menu disabled. Taking the exit to the right in these areas leads back to the respective realm's gate. This will also place two poles connected horizontally across the poles between each respective Guardian's peeping stone in the park's southern section, forming a Torii gate. This indicates that the Guardian in question has been encountered. | ||
Furthermore, with the Child or Glasses effects equipped, their shadows will be visible in the park's central section, as well as in the locations of their respective symbols. Entering the Treetops and finding at least one Guardian unlocks [[Wallpaper Guide|Wallpaper #384]]. | Furthermore, with the Child or Glasses effects equipped, their shadows will be visible in the park's central section, as well as in the locations of their respective symbols. Entering the Treetops and finding at least one Guardian unlocks [[Yume 2kki:Wallpaper Guide|Wallpaper #384]]. | ||
Upon locating all five of the Guardians in their respective realms, heading over to the back of the building in the park's southern section with the Child effect will lead to the [[Guardians' Temple]]. | Upon locating all five of the Guardians in their respective realms, heading over to the back of the building in the park's southern section with the Child effect will lead to the [[Yume 2kki:Guardians' Temple|Guardians' Temple]]. | ||
====Koro==== | ====Koro==== | ||
[[File:guardians_realm_koro_entrance.png|thumb|If you cannot beat them, join them.]] | [[File:guardians_realm_koro_entrance.png|thumb|If you cannot beat them, join them.]] | ||
In the northwestern part of the [[Shadowy Caves]], there is a platform connected by two ladders, ending in a seemingly-unreachable ladder accessible with the [[Effects#Fairy|Fairy]] effect. Going through the door from there leads to a small room with a traffic cone, which transforms into a creature resembling the rest of the cave's chasers when the [[Effects#Chainsaw|Chainsaw]] is equipped. Chainsawing it will clear the way to the door to a passageway filled with Puni, where the upper-right corner has two red poles. Equipping the Glasses will reveal a staircase and using them will reveal the hidden path to Koro's realm: the Dull Dream. | In the northwestern part of the [[Yume 2kki:Shadowy Caves|Shadowy Caves]], there is a platform connected by two ladders, ending in a seemingly-unreachable ladder accessible with the [[Yume 2kki:Effects#Fairy.2FYousei|Fairy]] effect. Going through the door from there leads to a small room with a traffic cone, which transforms into a creature resembling the rest of the cave's chasers when the [[Yume 2kki:Effects#Chainsaw|Chainsaw]] is equipped. Chainsawing it will clear the way to the door to a passageway filled with Puni, where the upper-right corner has two red poles. Equipping the Glasses will reveal a staircase and using them will reveal the hidden path to Koro's realm: the Dull Dream. | ||
====Kuta==== | ====Kuta==== | ||
[[File:guardians_realm_kuta_entrance.png|thumb|If you run after two hares, you will catch neither.]] | [[File:guardians_realm_kuta_entrance.png|thumb|If you run after two hares, you will catch neither.]] | ||
In | In the park's northern section, there is a gray house with three doors. Taking the third door will lead to a labyrinthine complex. Going through the left door will lead to a branching path of five exits, where the northern and southern exits are locked. If you have chainsawed the painted-over door in the tan building outside the gray house, chainsawing the barricaded door here will unlock a connection between the two. In this hallway, equipping the [[Yume 2kki:Effects#Child|Child]] effect will give a hint as to the puzzle, which is shown by the red eyes on the wall. Knocking on any of the locked doors for a total of at least 16 times (a clue to this puzzle is shown by the number of statues present in one of the rooms here), you will find that the doorway guarded by the red eyes is now locked. The correct path is shown by the map in the statue room: from said room, walking right all the way back to the bigger room, then taking the lower right door, going up, then right will take you to a room with two red poles that will lead to Kuta's realm, the Fleeting Dream. | ||
====Nie==== | ====Nie==== | ||
[[File:guardians_realm_nie_entrance.png|thumb|Out of the mouth comes evil.]] | [[File:guardians_realm_nie_entrance.png|thumb|Out of the mouth comes evil.]] | ||
You can find Nie's realm, known as the Hellish Dream in the statue right of the Art Gallery entrance in the park's southern section by either chainsawing the statue twice or kicking the statue twice with the [[Yume 2kki:Effects#Twintails|Twintails]] effect, and interacting with it. A hint to its whereabouts can be revealed with the Glasses effect. | |||
====Nome==== | ====Nome==== | ||
[[File:guardians_realm_nome_entrance.png|thumb|It is no use crying over spilt milk.]] | [[File:guardians_realm_nome_entrance.png|thumb|It is no use crying over spilt milk.]] | ||
From the [[Apartments]] entrance, instead of taking the stairs to the Dream Park proper, interacting with the rightmost wall will lead to a small room with an opening accessible with the [[Effects#Child|Child]] effect. From here, entering the second, first, and second passages consecutively, then taking the rightmost wall takes you to a staircase with two red poles, leading to Nome's realm, the Pestilent Dream. | From the [[Yume 2kki:Apartments|Apartments]] entrance, instead of taking the stairs to the Dream Park proper, interacting with the rightmost wall will lead to a small room with an opening accessible with the [[Yume 2kki:Effects#Child|Child]] effect. From here, if you at the sewer-like waterway, Enter the sewers by taking down the steps and entering either left or right then equip the [[Yume 2kki:Effects#Chainsaw|chainsaw]] effect and use it on the sewer gate that sewage is coming out off after that use a [[Yume 2kki:Effects#Child|child]] effect to enter the second area then walk down all the way at the end and use the sewer at the end, entering the second, first, and second passages consecutively, then taking the rightmost wall takes you to a staircase with two red poles, leading to Nome's realm, the Pestilent Dream. | ||
====Risa==== | ====Risa==== | ||
[[File:guardians_realm_risa_entrance.png|thumb|Let sleeping dogs lie.]] | [[File:guardians_realm_risa_entrance.png|thumb|Let sleeping dogs lie.]] | ||
From the pathway accessible with the Penguin effect in the eastern section, you will encounter some towers, where entering the lone tower and interacting with the water will unlock the barricaded section on the right, where the passages of the neighboring, interconnected towers can be entered with the [[Effects#Stretch|Stretch]] and [[Effects#Child|Child]] effects, respectively. Here, shedding a tear at the end of the left tower using the Stretch effect will make toxic water flow into the chamber, and jumping on the floating block on the right tower with the Child effect will raise the block. By doing these and entering the outer tower from the back, you will enter a straightforward corridor, where the obstacles have already been removed. Taking the rightmost exit here will then lead to the Escherian building, | From the pathway accessible with the Penguin effect in the eastern section, you will encounter some towers, where entering the lone tower and interacting with the water will unlock the barricaded section on the right, where the passages of the neighboring, interconnected towers can be entered with the [[Yume 2kki:Effects#Stretch|Stretch]] and [[Yume 2kki:Effects#Child|Child]] effects, respectively. Here, shedding a tear at the end of the left tower using the Stretch effect will make toxic water flow into the chamber, and jumping on the floating block on the right tower with the Child effect will raise the block. By doing these and entering the outer tower from the back, you will enter a straightforward corridor, where the obstacles have already been removed. Taking the rightmost exit here will then lead to the Escherian building, where the building's entrance will lead to Risa's shrine, which is the Boundless Dream. Otherwise, the entrance will just loop back. | ||
==Directions== | ==Directions== | ||
After using the [[Yume 2kki:Effects#Twintails|Twintails]] effect once to unlock the connection between this area and [[Yume 2kki:Tribe Settlement|Tribe Settlement]]: | |||
*Nexus → [[Marijuana Goddess World]] → [[Dark Room]] → [[Tribe Settlement]] → Dream Park | *The Nexus → [[Yume 2kki:Marijuana Goddess World|Marijuana Goddess World]] → [[Yume 2kki:Dark Room|Dark Room]] → [[Yume 2kki:Tribe Settlement|Tribe Settlement]] → '''Dream Park''' | ||
With Child: | |||
*Nexus → [[Garden World]] → [[Blue Forest]] → [[Art Gallery]] → Dream Park | With the [[Yume 2kki:Effects#Haniwa|Haniwa]] effect: | ||
With Chainsaw, Child, and Spring: | *The Nexus → [[Yume 2kki:Mushroom World|Mushroom World]] → [[Yume 2kki:Bug Maze|Bug Maze]] → [[Yume 2kki:Sign World|Sign World]] → [[Yume 2kki:Haniwa Temple|Haniwa Temple]] → '''Dream Park''' | ||
*Nexus → [[Graveyard World]] → Dream Park | |||
With the [[Yume 2kki:Effects#Child|Child]] effect: | |||
*The Nexus → [[Yume 2kki:Toy World|Toy World]] → [[Yume 2kki:Art Gallery|Art Gallery]] → '''Dream Park''' | |||
*The Nexus → [[Yume 2kki:Garden World|Garden World]] → [[Yume 2kki:Blue Forest|Blue Forest]] → [[Yume 2kki:Art Gallery|Art Gallery]] → '''Dream Park''' | |||
With the [[Yume 2kki:Effects#Chainsaw|Chainsaw]], [[Yume 2kki:Effects#Child|Child]], and [[Yume 2kki:Effects#Spring|Spring]] effects: | |||
*The Nexus → [[Yume 2kki:Graveyard World|Graveyard World]] → '''Dream Park''' | |||
With the [[Yume 2kki:Effects#Chainsaw|Chainsaw]], [[Yume 2kki:Effects#Child|Child]], and [[Yume 2kki:Effects#Penguin|Penguin]] effects, after visiting the [[Yume 2kki:Apartments|Apartments]] at least once: | |||
*The Nexus → [[Yume 2kki:Library|Library]] → [[Yume 2kki:Apartments|Apartments]] → '''Dream Park''' | |||
With the [[Yume 2kki:Effects#Marginal|Marginal]] effect, after unlocking the connection between this area and [[Yume 2kki:Broken Faces Area|Broken Faces Area]]: | |||
*The Nexus → [[Yume 2kki:Library|Library]] → [[Yume 2kki:Broken Faces Area|Broken Faces Area]] → '''Dream Park''' | |||
With the [[Yume 2kki:Effects#Bat|Bat]] effect, after unlocking the connection between this area and [[Yume 2kki:Jigsaw Puzzle World|Jigsaw Puzzle World]]: | |||
*The Nexus → [[Yume 2kki:Forest World|Forest World]] → [[Yume 2kki:Underground TV Complex|Underground TV Complex]] → [[Yume 2kki:Jigsaw Puzzle World|Jigsaw Puzzle World]] → '''Dream Park''' | |||
With [[Yume 2kki:Effects#Fairy/Yousei|Fairy]] or [[Yume 2kki:Effects#Spacesuit|Spacesuit]] effect, after unlocking the connection between this area and [[Yume 2kki:Boogie Street|Boogie Street]]: | |||
*The Nexus → [[Yume 2kki:Red Streetlight World|Red Streetlight World]] → [[Yume 2kki:Gray Road|Gray Road]] → [[Yume 2kki:Boogie Street|Boogie Street]] → '''Dream Park''' | |||
==Trivia== | ==Trivia== | ||
* | *According to the author, the Dream Park's overall structure was designed to resemble one of the patterns in [[Yume 2kki:Sepia Clouds World|Sepia Clouds World]].<ref>https://twitter.com/Yume2kki_MAP/status/1192114953093705728</ref> | ||
==Gallery== | ==Gallery== | ||
<gallery | <gallery> | ||
Dream park giraffe.png|My, what long neck you have! | Dream park giraffe.png|My, what long neck you have! | ||
Dream park yellow building.png|Hey, we've got a little surprise over here. | Dream park yellow building.png|Hey, we've got a little surprise over here. | ||
| Line 143: | Line 229: | ||
Dream park maze.png|A maze of fences. | Dream park maze.png|A maze of fences. | ||
Dream park treetop.png|Hanging around in the treetop. | Dream park treetop.png|Hanging around in the treetop. | ||
Dream park sandbox.png|Entrance from [[Tribe Settlement]] | Dream park sandbox.png|Entrance from [[Yume 2kki:Tribe Settlement|Tribe Settlement]] | ||
Dream park wooden house.png|They're watching... | Dream park wooden house.png|They're watching... | ||
Dreampark_hint.png | |||
Dream park guardians temple.png|The temple, home to the park's greatest secret. | Dream park guardians temple.png|The temple, home to the park's greatest secret. | ||
Dream park egg house.png|Inside the egg. | Dream park egg house.png|Inside the egg. | ||
Guardian china.png | Guardian china.png | ||
Thewaytodiceworld.PNG|To [[Dice World]] | Thewaytodiceworld.PNG|To [[Yume 2kki:Dice World|Dice World]] | ||
Dreampark_treetop_room1.png|Treetop room after interacting with the Pink Puni | |||
Dreampark_treetop_room2.png|Transformed into a Puni | |||
Dreampark treetop cloth.png|At the base of the tree, a familiar cloth. | |||
Unlocked_subarea_of_shadowy_caves.png | |||
</gallery> | </gallery> | ||
==References== | |||
[[Category:Hub Worlds]] | [[Category:Yume 2kki Hub Worlds]] | ||
<references /> | |||
Latest revision as of 22:02, 8 March 2025
| This page is missing information. You can help YumeWiki by expanding it. Details: 0.124f changes |
| This article may require cleanup to meet minimum quality standards. You can help YumeWiki by correcting typos, grammar and adding missing details. Details: Page needs to be rewritten in accordance to the style guide. Dream Guardians section likely needs a full rewrite. See if this page can be rewritten in a more coherent ordering as well. |
| Dream Park | |||||||||||||||
|---|---|---|---|---|---|---|---|---|---|---|---|---|---|---|---|
 Bench near the Shadowy Caves entrance. | |||||||||||||||
| Basic Info | |||||||||||||||
| Regional Name(s) |
夢想公園 | ||||||||||||||
| Effects | None | ||||||||||||||
| Collectibles |
WP #288 | ||||||||||||||
| Masks | Puni | ||||||||||||||
| Events | None | ||||||||||||||
| Notable NPCs | Puni, The Five Guardians, Shirube-chan | ||||||||||||||
| Other | |||||||||||||||
| Connecting Areas | Art Gallery 🔒 Shadowy Caves Haniwa Temple ✨ Sixth Terminal ✨ Jigsaw Puzzle World 🔑 ✨ Boogie Street 🔑 ✨ Broken Faces Area 🔑 ✨ Theatre World ✨ ➡️ Guts World 🔐 ✨ ➡️ Dizzy Spirals World 🍀 ➡️ Apartments 🔒 ✨ Tribe Settlement 🔒 Guardians' Temple 🔐 ✨ Scrambled Egg Zone 🔐 ✨ ➡️ Birthday Tower ✨ Dice World ✨ Guardians' Realm 🔐 Underground Passage 🔐 ➡️ Graveyard World ⛔ Abyss of Farewells ⛔ | ||||||||||||||
| BGM | 🔊 オルゴール (No. 346A and 346B) 🔊 2_19 – Wooden Maze (No. 421A) 🔊 ねおん@ネコノハ – Gray house trap (No. 216B) 🔊 風化 – Five Guardians' shrines (No. 250C) 🔊 spelude-40 – Egg House (No. 348B) 🔊 RIMA-bgm-recorder001 – Puni Homes (No. 423A) 🔊 yukihi1 – Eastern section towers (No. 164B) 🔊 e4b – Guessing Maze Game (No. 085D) | ||||||||||||||
| Map ID | 1061, 1062, 1063, 1064, 1065, 1066, 1067, 1069, 1070 | ||||||||||||||
| Map Type | Large, Multiple | ||||||||||||||
| Version Added | 0.110a | ||||||||||||||
| Last Updated | 0.124g patch 1 | ||||||||||||||
| Author | maptsuki | ||||||||||||||
| |||||||||||||||

Dream Park is a large and expansive area accessible from several worlds, including Graveyard World, the Apartments, the Art Gallery, the Tribe Settlement, and others.

Features
The Dream Park has 17 fenced "acres" comprising 5 sections.
Some vending machines can be found throughout the Park, but they will be empty until you've visited all 5 sections.
The Park's main inhabitants are the Puni, round, usually pitch-black creatures with bright eyes that communicate in squeaks. Various Puni have favorite and least-favorite effects. Equipping a Puni's favorite effect will make them change appearance accordingly:
- Bike - The Puni will be wearing a bike helmet much like Urotsuki's.
- Boy - The Puni will have an arrow on its head. The shape of the Puni resembles a male gender sign.
- Chainsaw - The Puni will become spiky.
- Lantern - The Puni will have a candle on its head.
- Bat - Bat wings will be on the Puni's back.
- Drum - The Puni will have an outline of a drum around it.
- Bunny Ears - The Puni will have bunny ears.
- Fairy - Fairy wings will be on the Puni's back.
- Maiko - The Puni will have a hairbun with a kanzashi in it.
- Penguin - The Puni will have a penguin beak and flippers.
- Child - The Puni will have lines on its face to resemble blushing and will be slightly smaller.
- Stretch - The Puni will be slightly bigger and have wrinkles on its face.
- Invisible - The Puni will turn transparent and will go invisible if Urotsuki does so too.
- Wolf - The Puni will have wolf ears and a wolf tail and will follow the player.
- Insect - The Puni will have insect wings and an antenna on its head.
- Spacesuit - The Puni change its shape to look like a UFO.
- Crossing - The Puni will have crossing pieces stuck on it.
- Eyeball bomb - The Puni will have a fuse on its head and an eye drawn on its back.
- Tissue - The Puni will have a chonmage.
- Telephone - The Puni will have a telephone on its head.
- Teru Teru Bōzu - The Puni will have an umbrella and wings on its sides.
- Marginal - The Puni will have a cross on its back, an extra eye, and tears coming out of its eyes.
- Rainbow - The Puni will have bigger eyes and will sparkle.
- Plaster Cast - The Puni will have scratches all over it and the eyes will be partially closed.
- Trombone - The Puni will change its shape to resemble an eighth note.
- Dice - The Puni will become square-shaped and have dots floating above it representing the number on the front face of the die. When the front face shows the red eye, there will be no dots nor will there be any patterns on the Puni itself.
The other prominent NPCs here are creatures that resemble arrows and serve as hints to certain secrets.
As you explore the park, there is a random chance to encounter certain unique creatures, including a helicopter with flapping wings, a pair of eyestalks sticking out of the water, and a nautilus with a long neck.
After sleeping many times and visiting all of the Park's sections at least once, you will be able to interact with Shirube-chan, an NPC that can teleport you across the Park. There will also be stone tiles with enciphered letters symbolizing the section that you're in.
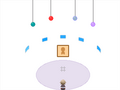
Central Section
At the center of the park is a large egg patterned after Urotsuki's sweater. Ending -1 must be done to enter the egg. Also, the egg-hatching event in the Guardians' Temple must be done each time before entering the area. By getting all of the orbs on each of the pillars to show up by burning some of the wooden poles of the area's fence with the Lantern, the door can be opened, assuming that the conditions to having the door appear have been met. The exact poles to be burned can be found by using the Lantern in the purple temple's location, as some of the Puni there will face those poles, with fins on their heads. Inside the egg is a small room with a frame showing Urotsuki as a child, as well as a symbol right in front of it. Interacting with the symbol with the Child effect will change the portrait into an egg, and exiting the room will now lead to Scrambled Egg Zone.
Northern Section
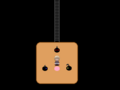
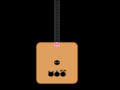
Going north from the Central Section leads to an area two stone buildings, a vending machine, and a strange yellow box with a face on it. The box makes a strange sound when interacted with or attacked and grants Wallpaper #288 upon interaction. It cannot be killed with the Chainsaw effect. There are three arrow NPCs pointing to the back of the box, but investigating there merely makes one of the sign NPCs laugh.
This area has a path going west to the House Area and one going north to the Stone Platform Area.
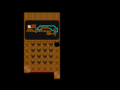
House Area
In this part of the park, there are some vending machines and two houses with tiled roofs. The lower house leads to a corridor with a large gap in the floor that can be crossed with the Fairy or Spacesuit effects. The door on the other side unlocks a two-way connection through the second house on Boogie Street.
To the west is a blue panel on the ground surrounded by four white structures. Walking across this panel will eventually cause it to break, sending Urotsuki to the Shadowy Caves below.
To the north is a house with several doors, though only the door on the right opens from the outside.
Inside the house are many small corridors, including a room with a wireframe chaser that requires interacting with the exit multiple times to escape. Getting caught will send you to an empty version of that same room. The door will be locked from the outside, but if you use the Fairy effect, you'll be able to escape out the broken window on the left and find yourself back outside behind the house.
A door blocked with horizontal iron bars can also be found somewhere inside the house. Chainsawing the bars is a condition for unlocking the Terminal Room. If you have completed the other requirements, you will then be able to access the room through this door.
If you go all the way left through the corridors, you'll find yourself outside the building out a hidden exit on the left wall, though this door will lock behind you.
Stone Platform Area
Going further north from the entrance, there are two circular, fenced stone platforms with symbols inscribed on them. On the top one is a shape resembling a tori gate. Interacting with it with the Haniwa effect equipped will take you to Haniwa Temple. In addition, using the Spacesuit effect on the X between four UFO Puni on either platform will take you to the topmost layer of Sixth Terminal.
Treetops Area
East of the Stone Platform Area is an area with a large tree. In front of it is a fenced-off set of footprints with two white arrow creatures pointing at it. Using the Bat or Spring here will take you to the Treetops, though you will need the Bat to explore this section fully.
There are three Puni with distinct eye colors on the tree canopy. The red Puni reacts to the Bug effect, the yellow reacts to the Bunny Ears effect, and the blue reacts to the Wolf effect.
On the left-hand side in the sky above the treetops is a large puzzle piece that unlocks a two-way connection to Jigsaw Puzzle World when accessed with the Bat effect (the puzzle piece will not spawn unless you have visited the Jigsaw Puzzle World first). There's also a chance a moon will appear in the sky, serving as a one-way connection to Theatre World.
To the bottom-right of this screen is a smaller tree platform that can also be accessed with the Bat effect. The ladder here leads down to a small Puni room that will be empty unless you have unlocked seven specific entrances to Dream Park: the Apartments, Boogie Street, Broken Faces Area, Graveyard World, Jigsaw Puzzle World, Stone World (via Shadowy Caves), and Tribe Settlement.
If this condition is met, there will be a pink Puni here. Interacting with it will cause the three Puni from the big treetop to appear and transform Urotsuki into a Puni herself. Upon transformation, you will be sent in front of the Tribe Settlement entrance, and by returning to the section leading to the treetops, you can change your appearance by interacting with the pink Puni by the tree or the Puni statues.
In this same area you can find a blue panel on the ground similar to the one from the Northern section. Walking across this panel will eventually cause it to break, sending Urotsuki to an isolated area of the Shadowy Caves. The panel is initally blocked by three white puni statues, but they will disappear once you complete the Sacred Crypt event.
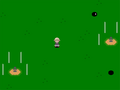
Western Section
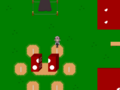
West of the Central Section is an acre with a small lake and a few vending machines. Equipping the Marginal effect will fill the water with blood and reveal a stone path across the lake to the center island. Crossing and interacting with the red dot here unlocks a two-way connection to Broken Faces Area.
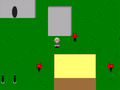
Playground
South of the lake is some kind of playground and a rectangular gray building. Equipping the Marginal effect will reveal the building is haunted. Interacting with it in this state from the back wall will send you on a one-way trip to Guts World if the player has been to the area with the woman on the balcony in said world.
The entrance from Graveyard World is also around here, but trying to return by using the Child effect will lead to a passage, which has a 1/10 chance every time you enter the path to be unblocked and connect with Dizzy Spirals World.
Faucet Area
West of the lake, you can find seven pillars and a floating faucet. Using the Rainbow effect will give the pillars color. The faucet can be opened and leads to the Apartments provided you've unlocked this connection from that side.
Dice World Entrance
The northwesternmost area contains six red dice sculptures surrounding a smaller die sculpture in the center. Filling in the missing white marks on the six sculptures with the Tissue effect will cause the smaller sculpture to split in half, creating an entrance to Dice World.
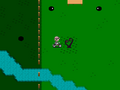
Southern Section
The area south of the Central Section holds a river and various Puni, but not much else of interest. Directly east of this is the Maze Area, while the path to the south leads to the Gallery Area.
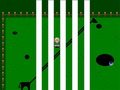
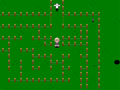
Maze Area
This area holds a maze made out of fences and a giant slice of cake in each corner. Solving the maze will net you 100夢. The ropes within the maze can be chainsawed. The logs blocking off the path beyond the ropes can be removed by entering the Shadowy Caves at least once, but traversing those paths has a chance of a wireframe hand popping out of the ground here, taking you to an isolated section of the Shadowy Caves.
A pink teleport pad may activate in the middle of the maze taking you to a guessing game. The key to solving the game is to look for the white arrow NPC that is different than the others and go on that path. Failure to do so will result in all your money being taken. Upon successful completion of this game, you will receive a random snack from the Dream Park vending machines and 750夢. Afterwards, you will be teleported back into the normal maze.
If Urotsuki enters the cake in the lower-right corner with a visible entrance, she will find a room with four Puni, two of whom will move toward her if she equips the Cake effect. There is also a back door leading outside again. However, if Urotsuki equips the Cake effect and enters the cake from the back door, she will instead find a room with four pieces of cake on plates and one empty plate in the middle. Interacting with the middle plate with the Cake effect will cause the piece of cake on Urotsuki's head to fall onto the plate. Leaving through the front door will take Urotsuki to a beach by a pink sea with several Puni wandering around and a few cake-shaped structures. The orange cake will take Urotsuki back to Dream Park, and the brown one contains a room of Puni. Urotsuki can also find a cake-shaped tower much taller than the other two structures. Entering it will lead to the Birthday Tower.
Gallery Area
A painting here serves as a connection to Art Gallery provided you've entered at least once from the opposite side. If it is interacted with before it is unlocked, Urotsuki will make a refusal sound. Scattered about are statues that make bell sounds when interacted with. One of them can be chainsawed, as part of the way to enter Nie's shrine. West of here is the entrance to the Guardian's Temple.
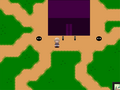
Guardian's Temple Entrance
West of the Gallery Area is a purple building surrounded by five peeping stones between two red pillars next to stone tablets. The red pillars will turn into a torii gate after their corresponding Guardian's Realm is entered. The purpose of these structures is explained in Entering the Guardians' Realm.
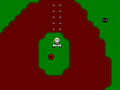
Eastern Section
East of the Central Section is an area with a fenced-off row of holes in the ground. If you've used the Bat effect in the Shadowy Caves to fly up the southern exit, you can use the third hole from the left to return there. The other three pits lead to inescapable dead ends where you'll be attacked by wireframe Chasers. From this area the path continues north to the Tower Area or east to the Sandbox Area.
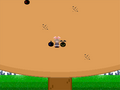
Tower Area
The path north is seemingly endless — you'll need the Penguin effect to break through the looping barrier. This leads to a small section with towers, cubes, and a black giraffe behind some pillars. The cube-like NPCs respond with a different sound to the Dice effect and change form when the Chainsaw is equipped.
The towers here hold a puzzle to Risa's temple.
There's also a hole with white dots in the top-left corner. The Child or Fairy effects can be used to access a small room here.
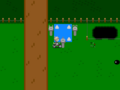
Sandbox Area
This area is almost entirely taken up by a giant sandbox. Near the top is a door in a mound of sand leading to Tribe Settlement. The two sand sculptures on either side of it react to the Haniwa effect.
Pit Area
South of the Sandbox Area is a field of fenced-off pits. The largest pit is a one-way path to Underground Passage, though it is only accessible if you have already obtained Menu Theme #21. There is a black bird-like NPC to the left of this pit that will open or close its eyes in response to equipping (Fairy, Rainbow, Penguin, etc.) or using (Telephone, Maiko, Drum, etc.) many effects. It will also react uniquely to equipping the Chainsaw, Plaster Cast, or Grave.
Terminal Room
The terminal room is accessed through the door in the room which leads to Boogie Street or through the door in the big house in the northern section. To unlock the doors to this area, you must perform the following:
- Enter Dizzy Spirals World from the Dream Park.
- Enter the Dream Park from the Tribe Settlement.
- Enter the Dream Park from the Apartments.
- Enter the Boogie Street from the Dream Park.
- Enter the Broken Faces Area from the Dream Park.
- Chainsaw the door found in the passage between the Dream Park and the Boogie Street.
- Chainsaw the bars off the door in the northern section's house.
After doing all of this, the lights above the two doors will begin to blink and the doors will be unlocked, and going through them will lead to the terminal room. Each corner of the room has a Shirube-chan with a different eye color. Items collected from the Park's vending machines will appear on the blue display board. In the center of the room is a large interface. The top section consists of three screens connected by wires, where each screen contains a Puni. If a normal effect is equipped, then the Puni in the center will take on an appearance related to that effect, and the two on the side will be deflated. A mixed effect will result in the two Puni on the sides taking on appearances based on the effects that make up the effect in question, with the Puni on the center deflated.
The lower section consists of a map of Dream Park. Depending on what effect is equipped, different parts of the map will have a red dot on them. Some effects also create a dot with a red circle around it. These dots represent the quantity of these specific types of favorite effect punis that can be found in that area of Dream Park; with the dot and red circle being guaranteed chances of finding it. Effect Mixes can always be found in Puni houses.
Entering the Guardians' Realm
The gates to the Guardians' Realm are the Dream Park's most well-kept secret, where the Five Guardians, Koro, Kuta, Nie, Nome, and Risa, are situated in that area. Locating these gates may entail certain conditions, in which a hint to their whereabouts is given by red poles. Common to each entrance are peeping stones, where the left shows full-screen illustrations of the respective Guardians' appearances, and the right shows adages written in the cipher used in one of the books of the Library. Deciphered versions of these messages are shown in the photo captions of the succeeding sections.
In each part of the Guardians' Realm, you will encounter a straight path of pillars, ending in the temple of each Guardian. Entering these temples, Urotsuki will then unequip any effect in use, with the menu disabled. Taking the exit to the right in these areas leads back to the respective realm's gate. This will also place two poles connected horizontally across the poles between each respective Guardian's peeping stone in the park's southern section, forming a Torii gate. This indicates that the Guardian in question has been encountered.
Furthermore, with the Child or Glasses effects equipped, their shadows will be visible in the park's central section, as well as in the locations of their respective symbols. Entering the Treetops and finding at least one Guardian unlocks Wallpaper #384.
Upon locating all five of the Guardians in their respective realms, heading over to the back of the building in the park's southern section with the Child effect will lead to the Guardians' Temple.
Koro

In the northwestern part of the Shadowy Caves, there is a platform connected by two ladders, ending in a seemingly-unreachable ladder accessible with the Fairy effect. Going through the door from there leads to a small room with a traffic cone, which transforms into a creature resembling the rest of the cave's chasers when the Chainsaw is equipped. Chainsawing it will clear the way to the door to a passageway filled with Puni, where the upper-right corner has two red poles. Equipping the Glasses will reveal a staircase and using them will reveal the hidden path to Koro's realm: the Dull Dream.
Kuta

In the park's northern section, there is a gray house with three doors. Taking the third door will lead to a labyrinthine complex. Going through the left door will lead to a branching path of five exits, where the northern and southern exits are locked. If you have chainsawed the painted-over door in the tan building outside the gray house, chainsawing the barricaded door here will unlock a connection between the two. In this hallway, equipping the Child effect will give a hint as to the puzzle, which is shown by the red eyes on the wall. Knocking on any of the locked doors for a total of at least 16 times (a clue to this puzzle is shown by the number of statues present in one of the rooms here), you will find that the doorway guarded by the red eyes is now locked. The correct path is shown by the map in the statue room: from said room, walking right all the way back to the bigger room, then taking the lower right door, going up, then right will take you to a room with two red poles that will lead to Kuta's realm, the Fleeting Dream.
Nie

You can find Nie's realm, known as the Hellish Dream in the statue right of the Art Gallery entrance in the park's southern section by either chainsawing the statue twice or kicking the statue twice with the Twintails effect, and interacting with it. A hint to its whereabouts can be revealed with the Glasses effect.
Nome

From the Apartments entrance, instead of taking the stairs to the Dream Park proper, interacting with the rightmost wall will lead to a small room with an opening accessible with the Child effect. From here, if you at the sewer-like waterway, Enter the sewers by taking down the steps and entering either left or right then equip the chainsaw effect and use it on the sewer gate that sewage is coming out off after that use a child effect to enter the second area then walk down all the way at the end and use the sewer at the end, entering the second, first, and second passages consecutively, then taking the rightmost wall takes you to a staircase with two red poles, leading to Nome's realm, the Pestilent Dream.
Risa

From the pathway accessible with the Penguin effect in the eastern section, you will encounter some towers, where entering the lone tower and interacting with the water will unlock the barricaded section on the right, where the passages of the neighboring, interconnected towers can be entered with the Stretch and Child effects, respectively. Here, shedding a tear at the end of the left tower using the Stretch effect will make toxic water flow into the chamber, and jumping on the floating block on the right tower with the Child effect will raise the block. By doing these and entering the outer tower from the back, you will enter a straightforward corridor, where the obstacles have already been removed. Taking the rightmost exit here will then lead to the Escherian building, where the building's entrance will lead to Risa's shrine, which is the Boundless Dream. Otherwise, the entrance will just loop back.
Directions
After using the Twintails effect once to unlock the connection between this area and Tribe Settlement:
- The Nexus → Marijuana Goddess World → Dark Room → Tribe Settlement → Dream Park
With the Haniwa effect:
- The Nexus → Mushroom World → Bug Maze → Sign World → Haniwa Temple → Dream Park
With the Child effect:
- The Nexus → Toy World → Art Gallery → Dream Park
- The Nexus → Garden World → Blue Forest → Art Gallery → Dream Park
With the Chainsaw, Child, and Spring effects:
- The Nexus → Graveyard World → Dream Park
With the Chainsaw, Child, and Penguin effects, after visiting the Apartments at least once:
- The Nexus → Library → Apartments → Dream Park
With the Marginal effect, after unlocking the connection between this area and Broken Faces Area:
- The Nexus → Library → Broken Faces Area → Dream Park
With the Bat effect, after unlocking the connection between this area and Jigsaw Puzzle World:
- The Nexus → Forest World → Underground TV Complex → Jigsaw Puzzle World → Dream Park
With Fairy or Spacesuit effect, after unlocking the connection between this area and Boogie Street:
- The Nexus → Red Streetlight World → Gray Road → Boogie Street → Dream Park
Trivia
- According to the author, the Dream Park's overall structure was designed to resemble one of the patterns in Sepia Clouds World.[1]
Gallery
My, what long neck you have!
Hey, we've got a little surprise over here.
The lake, in all its crimson glory.
The field of statues in the southern section.
A maze of fences.
Hanging around in the treetop.
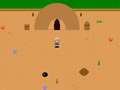
Entrance from Tribe Settlement
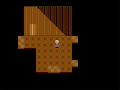
They're watching...
The temple, home to the park's greatest secret.
Inside the egg.
To Dice World
Treetop room after interacting with the Pink Puni
Transformed into a Puni
At the base of the tree, a familiar cloth.


References
- 007D00
- DE9E5A