Cjdgus1782 (talk | contribs) No edit summary |
m (removed space before colon) |
||
| (20 intermediate revisions by 6 users not shown) | |||
| Line 2: | Line 2: | ||
!width="15%"|[[Yume 2kki:Vending_Machine|Vending Machines]] | !width="15%"|[[Yume 2kki:Vending_Machine|Vending Machines]] | ||
!width="15%"|[[Yume 2kki:Vending_Machine/Snacks|Snacks]] | !width="15%"|[[Yume 2kki:Vending_Machine/Snacks|Snacks]] | ||
!width="15%"|[[Yume 2kki:Vending_Machine/Unique | !width="15%"|[[Yume 2kki:Vending_Machine/Unique Snack Pools|Unique Snack Pools]] | ||
|} | |} | ||
The following article | Some vending machines have a narrower pool of snacks compared to most vending machines which have a random chance of getting any snack that isn't exclusive to a [[Yume 2kki:Vending_Machine/Snacks#Unique_Snacks|specific area]]. The following article is a list of vending machines with unique snack pools. It details availability, the odds and required actions for getting certain snacks in them. | ||
==[[Yume 2kki:Adabana Gardens|Adabana Gardens]]== | ==[[Yume 2kki:Adabana Gardens|Adabana Gardens]]== | ||
| Line 68: | Line 67: | ||
!#072<br>(13,3%) | !#072<br>(13,3%) | ||
!#075<br>(13,3%) | !#075<br>(13,3%) | ||
|} | |||
==[[Yume 2kki:Archeology Dunes|Archeology Dunes]]== | |||
{| class="wikitable" style="text-align: center;" | |||
! rowspan="2" |[[File:ArcheologyDunesVM1.png]] | |||
|Random<br>Snack | |||
|[[File:Snack 64.png]] | |||
|[[File:Snack 66.png]] | |||
|- | |||
!(69%) | |||
!#064<br>(20%) | |||
!#066<br>(11%) | |||
|} | |} | ||
| Line 137: | Line 148: | ||
|} | |} | ||
==[[Yume 2kki:Auburn Villa|Auburn Villa : Grape Plaza]]== | ==[[Yume 2kki:Auburn Villa|Auburn Villa: Grape Plaza]]== | ||
{| class="wikitable" style="text-align: center;" | {| class="wikitable" style="text-align: center;" | ||
! rowspan="2" |[[File:AuburnVillaVM1.png]] | ! rowspan="2" |[[File:AuburnVillaVM1.png]] | ||
| Line 547: | Line 558: | ||
|[[File:Snack 13.png]] | |[[File:Snack 13.png]] | ||
|[[File:Snack 17.png]] | |[[File:Snack 17.png]] | ||
|[[File:Snack 18.png]] | |[[File:Snack 18.png]] | ||
|[[File:Snack 20.png]] | |[[File:Snack 20.png]] | ||
| Line 792: | Line 804: | ||
!#183 | !#183 | ||
|} | |} | ||
==[[Yume 2kki:Donut Hole World|Donut Hole World]]== | ==[[Yume 2kki:Donut Hole World|Donut Hole World]]== | ||
| Line 1,068: | Line 1,067: | ||
|} | |} | ||
==[[Yume 2kki:Graffiti City|Graffiti City : Clothes Shop]]== | ==[[Yume 2kki:Graffiti City|Graffiti City: Clothes Shop]]== | ||
{| class="wikitable" style="text-align: center;" | {| class="wikitable" style="text-align: center;" | ||
! rowspan="6" |[[File:Jihanki graffiti city.png]] | ! rowspan="6" |[[File:Jihanki graffiti city.png]] | ||
| Line 1,122: | Line 1,121: | ||
!#166<br>(29,9%) | !#166<br>(29,9%) | ||
|} | |} | ||
==[[Yume 2kki:Green Tile Room|Green Tile Room]]== | |||
{| class="wikitable" style="text-align: center;" | |||
! rowspan="2" |[[File:Dojo question mark.png|link=Special:FilePath/Dojo_question_mark.png]] | |||
|[[File:Snack 158.png|link=Special:FilePath/Snack_158.png]] | |||
|[[File:Snack 160.png|link=Special:FilePath/Snack_160.png]] | |||
|[[File:Snack 162.png|link=Special:FilePath/Snack_162.png]] | |||
|- | |||
!#158 | |||
! #160 | |||
!#162 | |||
|} | |||
*Randomly costs between 50夢 and 150夢. | |||
==[[Yume 2kki:Humanity World#Pink Haven|Humanity World: Pink Haven]]== | ==[[Yume 2kki:Humanity World#Pink Haven|Humanity World: Pink Haven]]== | ||
| Line 1,134: | Line 1,146: | ||
! rowspan="2" |'''Random<Br> Snacks''' | ! rowspan="2" |'''Random<Br> Snacks''' | ||
! rowspan="2" |'''No Snack<Br> (-3000夢)''' | ! rowspan="2" |'''No Snack<Br> (-3000夢)''' | ||
|[[File:Snack 68.png]] | |[[File:Snack 68.png|80x80px]] | ||
|[[File:Snack 84.png]] | |[[File:Snack 84.png]] | ||
!Random<Br> Snacks | !Random<Br> Snacks | ||
|[[File:Snack 111.png]] | |[[File:Snack 111.png|80x80px]] | ||
|[[File:Snack 112.png]] | |[[File:Snack 112.png]] | ||
|[[File:Snack 113.png]] | |[[File:Snack 113.png]] | ||
| Line 1,228: | Line 1,240: | ||
|} | |} | ||
==[[Yume 2kki: | ==[[Yume 2kki:Kitsune Residence|Kitsune Residence]]== | ||
*'''Note that items purchased here will not be displayed in the [[Yume 2kki:Snack Gallery|Snack Gallery]].''' | |||
{| class="wikitable" style="text-align: center;" | {| class="wikitable" style="text-align: center;" | ||
! rowspan=" | !rowspan="20" |[[File: Y2 Kitsune Residence VM.png]] | ||
|- | |||
! colspan="3" |'''No Effect, Crossing''' | |||
! colspan="10" |'''Fairy''' | |||
|- | |||
|[[File:Snack 1.png]] | |[[File:Snack 1.png]] | ||
|[[File:Snack 2.png]] | |[[File:Snack 2.png]] | ||
|[[File:Snack 3.png]] | |[[File:Snack 3.png]] | ||
|[[File:Snack 16.png]] | |||
|[[File:Snack 24.png]] | |||
|[[File:Snack 30.png]] | |||
|[[File:Snack 44.png]] | |||
|[[File:Snack 60.png]] | |||
|[[File:Snack 65.png]] | |||
|[[File:Snack 67.png|70x70px]] | |||
|[[File:Snack 77.png]] | |||
|[[File:Snack 151.png|70x70px]] | |||
|[[File:Snack 169.png]] | |||
|- | |- | ||
!#001 | !#001 | ||
!#002 | !#002 | ||
!#003 | !#003 | ||
!#016 | |||
!#024 | |||
!#030 | |||
!#044 | |||
! | !#060 | ||
!#065 | |||
!#067 | |||
!#077 | |||
!#151 | |||
!#169 | |||
|- | |||
! colspan="13" |'''Cake''' | |||
|- | |- | ||
|[[File:Snack 8.png]] | |||
| | |[[File:Snack 9.png]] | ||
|[[File:Snack 28.png]] | |||
|[[File:Snack 29.png]] | |||
|[[File:Snack 39.png]] | |||
|[[File:Snack 55.png]] | |||
|[[File:Snack | |[[File:Snack 56.png]] | ||
|[[File:Snack 57.png]] | |||
|[[File:Snack 95.png]] | |||
|[[File:Snack 96.png]] | |||
|[[File:Snack 97.png]] | |||
|[[File:Snack 98.png]] | |||
|[[File:Snack 108.png]] | |||
|- | |- | ||
!# | !#008 | ||
!#009 | |||
!#028 | |||
!#029 | |||
!#039 | |||
! | !#055 | ||
!#056 | |||
!#057 | |||
!#095 | |||
!#096 | |||
!#097 | |||
!#098 | |||
!#108 | |||
|- | |- | ||
|[[File:Snack 109.png]] | |||
| | |[[File:Snack 112.png|70x70px]] | ||
| | |[[File:Snack 113.png|70x70px]] | ||
|[[File:Snack 114.png|70x70px]] | |||
|[[File:Snack 153.png|70x70px]] | |||
|[[File:Snack 164.png]] | |||
|[[File:Snack 165.png]] | |||
|[[File:Snack 166.png]] | |||
|[[File: | |[[File:Snack 167.png]] | ||
|[[File: | |[[File:Snack 171.png]] | ||
|[[File:Snack 176.png]] | |||
|[[File:Snack 180.png|70x70px]] | |||
|- | |- | ||
! | !#109 | ||
!#112 | |||
!#113 | |||
!#114 | |||
!#153 | |||
!#164 | |||
! | !#165 | ||
! | !#166 | ||
! | !#167 | ||
!#171 | |||
!#176 | |||
!#180 | |||
|- | |- | ||
! | ! colspan="11" |'''Child, Boy, Penguin''' | ||
|[[File:Snack | |- | ||
|[[File:Snack 84.png]] | |||
|[[File:Snack 85.png]] | |||
|[[File:Snack 86.png]] | |||
|[[File:Snack 87.png]] | |||
|[[File:Snack 88.png]] | |||
|[[File:Snack 89.png]] | |||
|[[File:Snack 90.png]] | |||
|[[File:Snack 91.png]] | |||
|[[File:Snack 92.png]] | |||
|[[File:Snack 93.png]] | |||
|[[File:Snack 94.png]] | |||
|- | |||
!#084 | |||
!#085 | |||
!#086 | |||
!#087 | |||
!#088 | |||
!#089 | |||
!#090 | |||
!#091 | |||
!#092 | |||
!#093 | |||
!#094 | |||
|- | |||
! colspan="3" |'''Chainsaw''' | |||
! colspan="4" |'''Yukata Mask, Painter-kun Mask,<Br> Ninetails Mask''' | |||
|- | |||
|[[File:Snack 69.png|70x70px]] | |||
|[[File:Snack 83.png]] | |||
|[[File:Snack 111.png|70x70px]] | |||
| colspan="2" |[[File:Snack 100.png]] | |||
| colspan="2" |[[File:Snack 101.png]] | |||
|- | |||
!#069 | |||
!#083 | |||
!#111 | |||
! colspan="2" |#100 | |||
! colspan="2" |#101 | |||
|- | |||
! colspan="3" |'''Glasses''' | |||
|- | |||
|[[File:FUMO Snack 1.png]] | |||
|[[File:FUMO Snack 2.png]] | |||
|[[File:FUMO Snack 3.png]] | |||
|- | |||
!(42,8%) | |||
!(14,3%) | |||
!(14,3%) | |||
|- | |||
! colspan="3" |'''Fallen Leaves, not using ids''' | |||
|- | |- | ||
|} | |} | ||
*If you use Child / Boy / Penguin effect, you can always get Snack #086 and #087 at the same time. | |||
*If you use Glasses effect, Vending Machine turnes into yellow fox. | |||
==[[Yume 2kki: | ==[[Yume 2kki:Litter Heaven|Litter Heaven]]== | ||
{| class="wikitable" style="text-align: center;" | {| class="wikitable" style="text-align: center;" | ||
! rowspan=" | ! rowspan="2" |[[File:Jihanki litter heaven.png]] | ||
|[[File:Snack | |[[File:Snack 1.png]] | ||
|[[File:Snack | |[[File:Snack 2.png]] | ||
|[[File:Snack | |[[File:Snack 3.png]] | ||
|- | |- | ||
!# | !#001 | ||
!# | !#002 | ||
!# | !#003 | ||
|} | |||
! | ==[[Yume 2kki:Lonely Home#Sunset Sanctum|Lonely Home: Sunset Sanctum]]== | ||
{| class="wikitable" style="text-align: center;" | |||
! rowspan="2" |[[File:Y2 Lonely Home VM2.png]] | |||
|[[File:Snack 102.png]] | |||
|- | |- | ||
|[[ | !#102 | ||
| | |} | ||
| | |||
|[[File: | ==[[Yume 2kki:Lonely Mint Cemetery|Lonely Mint Cemetery]]== | ||
| | {| class="wikitable" style="text-align: center;" | ||
|[[File:Snack | ! rowspan="2" |[[File:Y2 Lonely Mint Cemetery VM.png]] | ||
|[[File:Snack | |Random<br>Snack | ||
|[[File:Snack 65.png]] | |||
|[[File:Snack 67.png]] | |||
|- | |- | ||
! | !(32%) | ||
!#065<Br> (34%) | |||
!#067<Br> (34%) | |||
!# | |||
!# | |||
|} | |} | ||
==[[Yume 2kki: | ==[[Yume 2kki:Lotus Park|Lotus Park]]== | ||
{| class="wikitable" style="text-align: center;" | {| class="wikitable" style="text-align: center;" | ||
! rowspan=" | ! rowspan="2" |[[File:Jihanki lotus park.png]] | ||
|[[File:Snack 157.png]] | |||
|[[File:Snack | |||
|- | |- | ||
!# | !#157 | ||
! | |} | ||
!# | |||
==[[Yume 2kki:Maple Shrine|Maple Shrine: Teleport Maze]]== | |||
{| class="wikitable" style="text-align: center;" | |||
! rowspan="2" |[[File:Jihanki maple shrine.png]] | |||
! | |[[File:Snack 19.png]] | ||
|- | |||
!#019 | |||
|- #019 | |||
|} | |||
*Costs 70夢. | |||
==[[Yume 2kki:Miso Soup Dungeon|Miso Soup Dungeon]]== | |||
{| class="wikitable" style="text-align: center;" | |||
! rowspan="2" |[[File:Y2 Miso Soup Dungeon VM.png]] | |||
|[[File:21keb snack 1.png]] | |||
|[[File:21keb snack 2.png]] | |||
|- | |- | ||
| | ! colspan="2" |'''Miso Soups, not using ids''' | ||
|- | |- | ||
|} | |||
==[[Yume 2kki:Mixed Beach|Mixed Beach]]== | |||
{| class="wikitable" style="text-align: center;" | |||
! rowspan="3" |[[File:Y2 Mixed Beach VM1.png]] | |||
! | ! colspan="1" |'''Vending Machine''' | ||
! | ! colspan="1" |'''Trash Can''' | ||
! | |||
|- | |- | ||
| | ! rowspan="2"|Random<br>Snack | ||
|[[File:Snack 82.png]] | |||
|[[File:Snack | |||
|- | |- | ||
!# | !#082 | ||
|} | |||
*You can buy Empty Can using trash can. Trash can Costs 1夢. | |||
==[[Yume 2kki:Nazca Valley#Red-green_Stone|Nazca Valley: Stove]]== | |||
{| class="wikitable" style="text-align: center;" | |||
! | ! rowspan="2" |[[File:Jihanki nazca valley stove.png]] | ||
|[[File:Snack 117.png]] | |||
|- | |- | ||
!#117 | |||
!# | |||
|} | |} | ||
==[[Yume 2kki: | ==[[Yume 2kki:Neon Caves|Neon Caves]]== | ||
{| class="wikitable" style="text-align: center;" | {| class="wikitable" style="text-align: center;" | ||
! rowspan=" | ! rowspan="5" |[[File:Jihanki neon caves.png]] | ||
|[[File:Snack 77.png]] | |[[File:Snack 8.png]] | ||
|- | |[[File:Snack 18.png]] | ||
!# | |[[File:Snack 24.png]] | ||
| [[File:Snack 25.png]] | |||
|[[File:Snack 28.png]] | |||
|[[File:Snack 29.png]] | |||
|[[File:Snack 30.png]] | |||
|[[File:Snack 95.png]] | |||
|- | |||
!#008<br>(6.66%) | |||
!#018<br>(10.22%) | |||
!#024<br>(12.88%) | |||
!#025<br>(3.11%) | |||
!#028<br>(5.77%) | |||
!#029<br>(9.33%) | |||
!#030<br>(12%) | |||
!#095<br>(1.33%) | |||
|- | |||
|[[File:Snack 96.png]] | |||
|[[File:Snack 97.png]] | |||
|[[File:Snack 98.png]] | |||
|[[File:Snack 99.png]] | |||
|[[File:Snack 107.png]] | |||
|[[File:Snack 108.png]] | |||
|[[File:Snack 109.png]] | |||
|- | |||
!#096<br>(0.44%) | |||
!#097<br>(2.22%) | |||
!#098<br>(4.88%) | |||
!#099<br>(4%) | |||
!#107<br>(11.11%) | |||
!#108<br>(8.44%) | |||
!#109<br>(7.55%) | |||
|} | |} | ||
==[[Yume 2kki: | ==[[Yume 2kki:Ocean Storehouse|Ocean Storehouse]]== | ||
{| class="wikitable" style="text-align: center;" | {| class="wikitable" style="text-align: center;" | ||
! rowspan=" | ! rowspan="8" |[[File:Jihanki ocean storehouse.PNG]] | ||
|[[File:Snack | |[[File:Snack 8.png]] | ||
|[[File:Snack | |[[File:Snack 9.png]] | ||
|[[File:Snack 14.png]] | |||
|[[File:Snack 18.png]] | |||
|[[File:Snack 23.png]] | |||
|[[File:Snack 24.png]] | |||
|[[File:Snack 29.png]] | |||
|[[File:Snack 30.png]] | |||
|- | |||
!#008<br>(3,17%) | |||
! #009<br>(3,17%) | |||
!#014<br>(3,17%) | |||
!#018<br>(3,17%) | |||
!#023<br>(3,17%) | |||
!#024<br>(3,17%) | |||
!#029<br>(3,17%) | |||
!#030<br>(1,61%) | |||
|- | |||
|[[File:Snack 40.png]] | |||
|[[File:Snack 43.png]] | |||
|[[File:Snack 46.png]] | |||
| [[File:Snack 55.png]] | |||
|[[File:Snack 56.png]] | |||
|[[File:Snack 57.png]] | |||
|[[File:Snack 61.png]] | |[[File:Snack 61.png]] | ||
|[[File:Snack | |[[File:Snack 95.png]] | ||
|- | |- | ||
!# | !#040<br>(3,17%) | ||
!# | !#043<br>(3,17%) | ||
!# | !#046<br>(3,17%) | ||
!# | !#055<br>(3,17%) | ||
!# | !#056<br>(3,17%) | ||
!#057<br>(3,17%) | |||
!#061<br>(3,17%) | |||
!#095<br>(3,17%) | |||
! | |||
|- | |- | ||
!# | |[[File:Snack 96.png]] | ||
!# | |[[File:Snack 97.png]] | ||
!# | |[[File:Snack 98.png]] | ||
!# | |[[File:Snack 99.png]] | ||
!# | |[[File:Snack 103.png]] | ||
|[[File:Snack 104.png]] | |||
|[[File:Snack 105.png]] | |||
|[[File:Snack 108.png]] | |||
|- | |||
!#096<br>(3,17%) | |||
!#097<br>(3,17%) | |||
!#098<br>(3,17%) | |||
! #099<br>(3,17%) | |||
!#103<br>(3,17%) | |||
!#104<br>(3,17%) | |||
!#105<br>(3,17%) | |||
!#108<br>(1,61%) | |||
|- | |||
|[[File:Snack 109.png]] | |||
|[[File:Snack 134.png]] | |||
|[[File:Snack 135.png]] | |||
|[[File:Snack 136.png]] | |||
|[[File:Snack 137.png]] | |||
| [[File:Snack 138.png]] | |||
|[[File:Snack 139.png]] | |||
|[[File:Snack 140.png]] | |||
|- | |||
!#109<br>(1,61%) | |||
!#134<br>(3,17%) | |||
!#135<br>(3,17%) | |||
!#136<br>(3,17%) | |||
!#137<br>(3,17%) | |||
! #138<br>(3,17%) | |||
!#139<br>(3,17%) | |||
!#140<br>(3,17%) | |||
|} | |} | ||
==[[Yume 2kki: | ==[[Yume 2kki:Omurice Labyrinth#Vending_Machine_Isle|Omurice Labyrinth: Vending Machine Isle]] == | ||
{| class="wikitable" style="text-align: center;" | {| class="wikitable" style="text-align: center;" | ||
! rowspan="2" | [[File: | ! rowspan="2" |[[File:Jihanki vending machine isle.png]] | ||
|[[File:Snack | |[[File:Snack 77.png]] | ||
|- | |- | ||
!# | !#077 | ||
|} | |} | ||
==[[Yume 2kki: | ==[[Yume 2kki:Oriental Pub|Oriental Pub]]== | ||
{| class="wikitable" style="text-align: center;" | {| class="wikitable" style="text-align: center;" | ||
! rowspan="2" | [[File: | ! rowspan="2" |[[File:Vendor oriental pub.png|link=Special:FilePath/Vendor_oriental_pub.png|129x129px]] | ||
|[[File:Snack | |[[File:Snack 10.png]] | ||
|[[File:Snack 36.png]] | |||
|[[File:Snack 61.png]] | |||
|[[File:Snack 102.png]] | |||
|[[File:Snack 110.png]] | |||
|- | |- | ||
!# | !#010<br>(12,5%) | ||
!#036<br>(12,5%) | |||
!#061<br>(12,5%) | |||
!#102<br>(50%) | |||
!#110<br>(12,5%) | |||
|} | |} | ||
==[[Yume 2kki: | ==[[Yume 2kki:Overgrown Condominium|Overgrown Condominium: Lobby]]== | ||
{| class="wikitable" style="text-align: center;" | {| class="wikitable" style="text-align: center;" | ||
! rowspan="2" |[[File:Jihanki | ! rowspan="2" |[[File:Jihanki overgrown condominium.png]] | ||
|[[File:Snack 74.png]] | |||
|[[File:Snack | |[[File:Snack 76.png]] | ||
| [[File:Snack | |[[File:Snack 78.png]] | ||
|[[File:Snack | |[[File:Snack 79.png]] | ||
|[[File:Snack | |[[File:Snack 80.png]] | ||
|[[File:Snack | |||
|- | |- | ||
!#074<br>(12,5%) | |||
!# | !#076<br>(21,87%) | ||
!# | !#078<br>(21,87%) | ||
!# | !#079<br>(21,87%) | ||
!# | !#080<br>(21,87%) | ||
! # | |||
|} | |} | ||
==[[Yume 2kki: | ==[[Yume 2kki:Pollution District|Pollution District]]== | ||
{| class="wikitable" style="text-align: center;" | {| class="wikitable" style="text-align: center;" | ||
! rowspan=" | ! rowspan="2" | [[File:Y2 Pollution District VM1.png]] | ||
|[[File:Snack 82.png]] | |||
|- | |- | ||
!#082 | |||
!# | |||
|} | |} | ||
* | *Costs 50夢. | ||
==[[Yume 2kki: | ==[[Yume 2kki:Pudding World|Pudding World]]== | ||
{| class="wikitable" style="text-align: center;" | {| class="wikitable" style="text-align: center;" | ||
! rowspan="2" |[[File:Jihanki | ! rowspan="2" | [[File:Jihanki pudding world.png]] | ||
|[[File:Snack | |[[File:Snack 28.png]] | ||
|- | |- | ||
!# | !#028 | ||
|} | |} | ||
*Costs 200夢. | |||
==[[Yume 2kki: | ==[[Yume 2kki:Bright Forest#Rainbow_Ruins|Rainbow Ruins]]== | ||
{| class="wikitable" style="text-align: center;" | {| class="wikitable" style="text-align: center;" | ||
! rowspan=" | ! rowspan="2" |[[File:Jihanki bright forest.png]] | ||
|Random<br>Snack | |||
|[[File:Snack 147.png]] | |||
| [[File:Snack 148.png]] | |||
|[[File:Snack 149.png]] | |||
|[[File:Snack 150.png]] | |||
|[[File:Snack 151.png]] | |||
|- | |- | ||
!(40%) | |||
!#147<br>(12%) | |||
!#148<br>(12%) | |||
|[[ | !#149<br>(12%) | ||
| | !#150<br>(12%) | ||
|[[File: | ! #151<br>(12%) | ||
| | |} | ||
| | |||
==[[Yume 2kki:Sakura Ruins|Sakura Ruins]]== | |||
{| class="wikitable" style="text-align: center;" | |||
! rowspan="3" |[[File:Y2 Sakura Ruins VM.png]] | |||
! colspan="2" |'''No Effect / Bunny Ears''' | |||
! colspan="2" |'''Paper Doll''' | |||
|- | |- | ||
|[[File:Snack 95.png]] | |||
| [[File:Snack 96.png]] | |||
|[[File:Snack 157.png]] | |||
|- | |- | ||
! | !#095 | ||
!#096 | |||
!#157 | |||
! | |} | ||
*If you equip Bunny Ears, you can buy snacks with 50夢. | |||
*You can't buy snacks while you equip Chainsaw. | |||
==[[Yume 2kki:Sanctuary|Sanctuary]]== | |||
{| class="wikitable" style="text-align: center;" | |||
! rowspan="2" |[[File:Jihanki sanctuary.png]] | |||
|[[File:Snack 127.png]] | |||
|- | |- | ||
|[[ | !#127 | ||
| | |} | ||
| | |||
|[[File: | ==[[Yume 2kki:Sandstone Brick Maze|Sandstone Brick Maze]]== | ||
| | {| class="wikitable" style="text-align: center;" | ||
| | ! rowspan="9" |[[File:Y2 Sandstone Brick Maze VM.png]] | ||
| | ! colspan="2" |'''Spacesuit''' | ||
| | ! colspan="2" |'''Spring''' | ||
! colspan="2" |'''Stretch''' | |||
! colspan="2" |Rainbow | |||
|- | |- | ||
!#026 | |[[File:Snack 125.png]] | ||
!#064 | |[[File:Snack 184.png]] | ||
!#011 | |[[File:Snack 12.png]] | ||
|[[File:Snack 14.png]] | |||
|[[File:Snack 20.png]] | |||
|[[File:Snack 38.png|frameless]] | |||
|[[File:Snack 23.png|frameless]] | |||
|[[File:Snack 35.png|frameless]] | |||
|- | |||
!#125 | |||
!#184 | |||
!#012 | |||
!#014 | |||
!#020 | |||
!#038 | |||
!#023 | |||
!#035 | |||
|- | |||
! colspan="2" |'''Haniwa''' | |||
! colspan="2" |'''Plaster Cast''' | |||
! colspan="2" |Penguin | |||
! colspan="2" |'''Child''' | |||
|- | |||
|[[File:Snack 26.png]] | |||
|[[File:Snack 64.png]] | |||
|[[File:Snack 11.png]] | |||
|[[File:Snack 66.png]] | |||
|[[File:Snack 21.png]] | |||
|[[File:Snack 110.png]] | |||
|[[File:Snack 29.png]] | |||
|[[File:Snack 45.png]] | |||
|- | |||
!#026 | |||
!#064 | |||
!#011 | |||
!#066 | !#066 | ||
!#021 | !#021 | ||
| Line 1,666: | Line 1,839: | ||
!#011 | !#011 | ||
|} | |} | ||
==[[Yume 2kki:Scattered Sky Fields|Scattered Sky Fields]]== | ==[[Yume 2kki:Scattered Sky Fields|Scattered Sky Fields]]== | ||
| Line 1,719: | Line 1,884: | ||
|} | |} | ||
==[[Yume 2kki:Spaceship|Spaceship: Bar]]== | |||
==[[Yume 2kki:Spaceship|Spaceship : Bar]]== | |||
{| class="wikitable" style="text-align: center;" | {| class="wikitable" style="text-align: center;" | ||
! rowspan="7" |[[File:Jihanki spaceship.png]] | ! rowspan="7" |[[File:Jihanki spaceship.png]] | ||
| Line 1,829: | Line 1,993: | ||
!#113<br>(19,4%) | !#113<br>(19,4%) | ||
!#114<br>(19,4%) | !#114<br>(19,4%) | ||
|} | |||
==[[Yume 2kki:Sushi Belt World|Sushi Belt World]]== | |||
{| class="wikitable" style="text-align: center;" | |||
! rowspan="2" |[[File:Y2 Sushi Belt World VM.png]] | |||
|[[File:Snack 19.png]] | |||
|- | |||
!#019 | |||
|} | |} | ||
| Line 1,863: | Line 2,035: | ||
|} | |} | ||
==[[Yume 2kki:Totem Hotel#First Floor|Totem Hotel : Cafe]]== | ==[[Yume 2kki:Totem Hotel#First Floor|Totem Hotel: Cafe]]== | ||
{| class="wikitable" style="text-align: center;" | {| class="wikitable" style="text-align: center;" | ||
! rowspan="3" |[[File:Vendor totem hotel cafe.png]] | ! rowspan="3" |[[File:Vendor totem hotel cafe.png]] | ||
| Line 1,881: | Line 2,053: | ||
*Gives different snacks when certain effects equipped. | *Gives different snacks when certain effects equipped. | ||
==[[Yume 2kki:Toy World|Toy World : Mini Area]] == | ==[[Yume 2kki:Toy World|Toy World: Mini Area]] == | ||
{| class="wikitable" style="text-align: center;" | {| class="wikitable" style="text-align: center;" | ||
! rowspan="2" |[[File:Jihanki toy world 2.PNG]] | ! rowspan="2" |[[File:Jihanki toy world 2.PNG]] | ||
| Line 2,066: | Line 2,238: | ||
|} | |} | ||
== [[Yume 2kki:Urban Underworld|Urban Underworld : Coffee Shop]]== | == [[Yume 2kki:Urban Underworld|Urban Underworld: Coffee Shop]]== | ||
{| class="wikitable" style="text-align: center;" | {| class="wikitable" style="text-align: center;" | ||
! rowspan="3" |[[File:Y2 Urban Underworld VM.png]] | ! rowspan="3" |[[File:Y2 Urban Underworld VM.png]] | ||
| Line 2,128: | Line 2,300: | ||
|} | |} | ||
==[[Yume 2kki:Virtual City|Virtual City : Karaoke Lounge]]== | |||
==[[Yume 2kki:Virtual City|Virtual City: Karaoke Lounge]]== | |||
{| class="wikitable" style="text-align: center;" | {| class="wikitable" style="text-align: center;" | ||
! rowspan="2" |[[File:Jihanki virtual city karaoke.png]] | ! rowspan="2" |[[File:Jihanki virtual city karaoke.png]] | ||
| Line 2,142: | Line 2,315: | ||
|- | |- | ||
!#121 | !#121 | ||
|} | |||
==[[Yume 2kki:Watching Waters|Watching Waters]]== | |||
{| class="wikitable" style="text-align: center;" | |||
! rowspan="4" |[[File:Y2 Watching Waters VM1.png]] | |||
|[[File:Snack 3.png]] | |||
|[[File:Snack 12.png]] | |||
|[[File:Snack 20.png]] | |||
|[[File:Snack 30.png]] | |||
|[[File:Snack 42.png]] | |||
|[[File:Snack 44.png]] | |||
|[[File:Snack 45.png]] | |||
|[[File:Snack 52.png]] | |||
|- | |||
!#003<Br> (17,7%) | |||
!#012<Br> (8,06%) | |||
!#020<Br> (9,68%) | |||
!#030<Br> (4,84%) | |||
!#042<Br> (4,84%) | |||
!#044<Br> (1,61%) | |||
!#045<Br> (1,61%) | |||
!#052<Br> (8,06%) | |||
|- | |||
|[[File:Snack 55.png]] | |||
|[[File:Snack 58.png]] | |||
|[[File:Snack 68.png]] | |||
|[[File:Snack 78.png]] | |||
|[[File:Snack 87.png]] | |||
|[[File:Snack 129.png]] | |||
|[[File:Snack 141.png]] | |||
|- | |||
!#055<Br> (4,84%) | |||
!#058<Br> (8,06%) | |||
!#068<Br> (1,61%) | |||
!#078<Br> (12,9%) | |||
!#087<Br> (4,84%) | |||
!#129<Br> (8,06%) | |||
!#141<Br> (4,84%) | |||
|} | |} | ||
| Line 2,163: | Line 2,374: | ||
==[[Yume 2kki:Wooden Polycube Ruins|Wooden Polycube Ruins]]== | ==[[Yume 2kki:Wooden Polycube Ruins|Wooden Polycube Ruins]]== | ||
=== Wooden Area === | |||
{| class="wikitable" style="text-align: center;" | {| class="wikitable" style="text-align: center;" | ||
! rowspan="2" |[[File:Jihanki wooden polycube ruins.PNG]] | ! rowspan="2" |[[File:Jihanki wooden polycube ruins.PNG]] | ||
| Line 2,170: | Line 2,383: | ||
!#018<br>(87,5%) | !#018<br>(87,5%) | ||
!#083<br>(12,5%) | !#083<br>(12,5%) | ||
|} | |||
*Costs 120夢. | |||
=== Ice Area === | |||
{| class="wikitable" style="text-align: center;" | |||
! rowspan="2" |[[File:Jihanki_wooden_polycube_ruins_ice.png]] | |||
|[[File:Snack 146.png]] | |||
|- | |||
!#146 | |||
|} | |} | ||
*Costs 120夢. | *Costs 120夢. | ||
[[Category:Yume 2kki Guides]] | [[Category:Yume 2kki Guides]] | ||
Latest revision as of 07:00, 4 March 2025
| Vending Machines | Snacks | Unique Snack Pools |
|---|
Some vending machines have a narrower pool of snacks compared to most vending machines which have a random chance of getting any snack that isn't exclusive to a specific area. The following article is a list of vending machines with unique snack pools. It details availability, the odds and required actions for getting certain snacks in them.
Adabana Gardens

|
||||||||||
|---|---|---|---|---|---|---|---|---|---|---|
| #001 (22,2%) |
#002 (22,2%) |
#003 (22,2%) |
#048 (4,76%) |
#049 (4,76%) |
#052 (4,76%) |
#053 (4,76%) |
#054 (4,76%) |
#058 (4,76%) |
#059 (4,76%) |
Aquatic Cafe
|

|

|

|

| ||
|---|---|---|---|---|---|---|
| #046 | #064 | #069 | #071 | #113 | #114 |
Aquatic Cube City

|
Random Snack |
|||||
|---|---|---|---|---|---|---|
| (33,3%) | #006 (13,3%) |
#007 (13,3%) |
#062 (13,3%) |
#072 (13,3%) |
#075 (13,3%) |
Archeology Dunes

|
Random Snack |
|

|
|---|---|---|---|
| (69%) | #064 (20%) |
#066 (11%) |
Art Exposition
Main Area
 
|
|
|---|---|
| #087 |
- Costs 150夢.

|
|
|---|---|
| #045 |
- Costs 150夢.
Urotsuki Portrait Room

|
|
|---|---|
| #045 |
- Costs 150夢.
Tilescape

|

|
|---|---|
| #180 |
- Costs 111夢.
Cyberpunk City

|
|
|---|---|
| #151 |
- Costs 151夢.
ASCII Symbol Zone

|
||||||||||
|---|---|---|---|---|---|---|---|---|---|---|
| #015 | #037 | #047 | #051 | #073 | #075 | #123 | #124 | #127 | #129 |
Auburn Villa: Grape Plaza

|
|||
|---|---|---|---|
| #053 | #129 | #141 |

|

|

| ||
|---|---|---|---|---|
| #012 | #024 | #057 | #177 |
Aurora Lake

|
Random Snack |

|

|

|

| |
|---|---|---|---|---|---|---|
| (33,3%) | #016 (14,6%) |
#035 (8,3%) |
#068 (14,6%) |
#077 (14,6%) |
#080 (14,6%) |
Bathhouse

|
|||
|---|---|---|---|
| #143 | #144 | #145 |
- Only available after exiting the bathhouse.
Bloom 99

|
|||
|---|---|---|---|
| #076 | #082 | #125 |
Boogie Street

|
Random Snack |
|||||||
|---|---|---|---|---|---|---|---|---|
| (25%) | #048 (10,7%) |
#049 (10,7%) |
#052 (10,7%) |
#053 (10,7%) |
#054 (10,7%) |
#058 (10,7%) |
#059 (10,7%) |
Burgundy Flats

|
Random Snack |

|

|
||
|---|---|---|---|---|---|
| (0,50%) | #104 (39,3%) |
#049 (20,4%) |
#052 (19.9%) |
#053 (19,9%) |
Cactus Desert
|
|
|---|---|
| #126 |
Calcarina Sea
|
||||
|---|---|---|---|---|
| Sells shaved ice, not using ids | ||||
Cherry Willow Path

|
||
|---|---|---|
| #019
(50%) |
#095
(50%) |
City of Liars

|

|

| ||
|---|---|---|---|---|
| #048 | #075 | #083 | #152 |
- Costs 200夢.
City of Revival

|

|
Random Snack |
|||||||
|---|---|---|---|---|---|---|---|---|---|
| (25%) | #048 (10,7%) |
#049 (10,7%) |
#052 (10,7%) |
#053 (10,7%) |
#054 (10,7%) |
#058 (10,7%) |
#059 (10,7%) |
Coffee Cup World
.png)
|
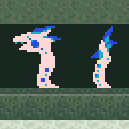
No effect | Telephone | Boy | Chainsaw | Lantern | Fairy | Space suit | Glasses |
|---|---|---|---|---|---|---|---|---|

|

|
|||||||
| #082 | #097 | #026 | #022 | #011 | #044 | #013 | #046 | |
| Rainbow | Wolf | Eyeball bomb | Bike | Maiko | Twintails | Insect | Spring | |
|
|
||||||||
| #059 | #009 | #043 | #047 | #019 | #042 | #064 | #079 | |
| Invisible | Plaster cast | Stretch | Gakuran | Haniwa | Trombone | Child | Red riding hood | |
| Nothing | 
|
|
||||||
| #-1 | #100 | #033 | #045 | #066 | #036 | #051 | #030 | |
| Tissue | Bat | Polygon | Paper doll | Marginal | Drum | Grave | ||
|
|

|
|

|
|||||
| #106 | #068 | #035 | #067 | #080 | #074 | #017 | ||
| Crossing | Bunny ears | Dice | ||||||
|
|

|

|

| |||||
| #098 | #099 | #095 | #096 | #177 (Eye) | #181 | #182 | #183 | |
| Cake | ||||||||
| #108 | #109 | |||||||
| Penguin | ||||||||
| #084 | #085 | #086 | #087 | #088 | #089 | #090 | #091 | |
| #092 | #093 | #094 | ||||||
- Gives different snacks depending on the effect currently equipped, as indicated on the table.
- Interacting without an effect gives an empty can at the cost of 1夢.
Constellation World
Main Area

|

| |
|---|---|---|
| #013 | #023 |
- Only costs 50夢.
Star Building
  
|
| |
|---|---|---|
| #013 | #023 |
- Costs 50夢.
Cookie Haven

|
| ||||
|---|---|---|---|---|---|
| #018 (11,1%) |
#137 (11,1%) |
#139 (11,1%) |
#144 (11,1%) |
#180 (55,6%) |
Cotton Candy Haven

|
||||||
|---|---|---|---|---|---|---|
| #039 (12,5%) |
#055 (12,5%) |
#056 (12,5%) |
#057 (12,5%) |
#108 (25%) |
#109 (25%) |
Crossing Forest

|
| |||||||
|---|---|---|---|---|---|---|---|---|
| #002 | #005 | #011 | #013 | #017 | #018 | #020 | #026 | |
|
|
|
|
||||||
| #043 | #061 | #068 | #074 | #076 | #079 | #083 | #088 | |

|

|
|||||||
| #104 | #115 | #116 | #125 | #128 | #137 | #141 | #142 | |

| ||||||||
| #143 | #144 | #184 |
Dango World

|
||
|---|---|---|
| #019 | #036 |
Deluxe Mask Shop

|
Random Snack |
|||||||
|---|---|---|---|---|---|---|---|---|
| (25%) | #048 (10,7%) |
#049 (10,7%) |
#052 (10,7%) |
#053 (10,7%) |
#054 (10,7%) |
#058 (10,7%) |
#059 (10,7%) |
Dessert Fields

|

|
|

|
|||||
|---|---|---|---|---|---|---|---|---|
| #009 | #014 | #018 | #024 | #025 | #028 | #029 | #030 | |

|
||||||||
| #034 | #039 | #042 | #055 | #056 | #057 | #084 | #085 | |
| #086 | #087 | #088 | #089 | #090 | #091 | #092 | #093 | |
| #094 | #095 | #096 | #097 | #098 | #099 | #108 | #109 | |

|

|
|
|

|

|
|||
| #111 | #112 | #113 | #114 | #121 | #134 | #135 | #136 | |

|

| |||||||
| #137 | #138 | #139 | #140 | #141 | #142 | #153 | #164 | |

|

|

|

|

| ||||
| #165 | #166 | #167 | #169 | #171 | #172 | #173 | #174 | |

|

|
|
|
|
| |||
| #175 | #176 | #177 | #178 | #179 | #180 | #181 | #182 | |
|
|
||||||||
| #183 | ||||||||
Donut Hole World

|
|
|||||||
|---|---|---|---|---|---|---|---|---|
| #008 (50%) |
#014 (3,33%) |
#032 (3,33%) |
#039 (3,33%) |
#046 (3,33%) |
#055 (3,33%) |
#056 (3,33%) |
#057 (3,33%) | |
|
|
|
|||||||
| #071 (3,33%) |
#108 (3,33%) |
#109 (3,33%) |
#112 (3,33%) |
#113 (3,33%) |
#124 (3,33%) |
#132 (3,33%) |
- Costs 110夢.
Dream Park

|
Left | 
|

|

|

|

|

|
|
|
|---|---|---|---|---|---|---|---|---|---|
| (35%) | (11%) | (11%) | (11%) | (2%) | (5%) | (5%) | (5%) | ||

|

|
||||||||
| (5%) | (5%) | (5%) | |||||||
| Dream Park themed snacks, not using ids | |||||||||
| Right | |||||||||
| (15%) | (8%) | (8%) | (8%) | (8%) | (8%) | (8%) | (8%) | ||

|
|||||||||
| (8%) | (5%) | (5%) | (5%) | (3%) | (3%) | ||||
| Dream Park themed plushies, not using ids | |||||||||
- Only available after visiting the main sections of the Dream Park (North, West, East and South), plus the treetops located at the north section.
Dream Tropics: Dungeon

|
Left | |||||||||||
|---|---|---|---|---|---|---|---|---|---|---|---|---|
|
|
||||||||||||
| #034 | #084 | #085 | #086 | #087 | #088 | #089 | #090 | #091 | #092 | #093 | #094 | |
| Middle | Right | |||||||||||
|
|
|
|
|
|||||||||
| #177 | #181 | #182 | #183 | #001 | #002 | #003 | #037 | |||||
Erratic Pillar Lands

|
|
|---|---|
| #007 |
- The machine gets stuck after the first purchase. Kick the machine using the Twintails effect to get your money back.
Everblue City

|
|||||
|---|---|---|---|---|---|
| #003 | #013 | #038 | #053 | #055 |
Flooded Dungeon

|

|
|---|---|
| #021 |
Forest Cavern

|
|
|---|---|
| #067 |
French Street

| |||||||
|---|---|---|---|---|---|---|---|
| Normal | If variable 44 is a multiple of 64 | ||||||
|
|

|
|
|||||
| #001 | #002 | #003 | #020 | #021 | #040 | #064 | #067 |
GALAXY Town

|
Random Snack |
|||
|---|---|---|---|---|
| (33,3%) | #032 (22,2%) |
#046 (22,2%) |
#071 (22,2%) |
Garden Festival

|

|

|

|

|

|

|

|

|

| |
|---|---|---|---|---|---|---|---|---|---|---|
| Garden Festival Goods, not using ids | ||||||||||
Graffiti City: Clothes Shop

|
|
|
|

|
|
|
| |||
|---|---|---|---|---|---|---|---|---|---|---|
| #022 (9%) |
#035 (9%) |
#040 (18,2%) |
#044 (9%) |
#045 (9%) |
#064 (9%) |
#065 (9%) |
#067 (9%) |
#068 (9%) |
#074 (9%) |
Grayscale Bookshelves
 
|

| ||
|---|---|---|---|
| #004 | #005 | #146 |
Graveyard of Repentance

|
|
|
|
| |
|---|---|---|---|---|---|
| #028 (19,9%) |
#111 (0,50%) |
#112 (20,4%) |
#165 (39,3%) |
#166 (29,9%) |
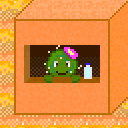
Green Tile Room
|

|

|

|
|---|---|---|---|
| #158 | #160 | #162 |
- Randomly costs between 50夢 and 150夢.
Humanity World: Pink Haven
 
|
Other Effects | Chainsaw | Crossing | Marginal | Cake | |||||||||
|---|---|---|---|---|---|---|---|---|---|---|---|---|---|---|
| Random Snacks |
No Snack (-3000夢) |
|
Random Snacks |
|
|
|
| |||||||
| #068 | #084 | (66,7%) | #111 (4,17%) |
#112 (9,72%) |
#113 (9,72%) |
#114 (9,72%) | ||||||||
| Child | ||||||||||||||
|
|
||||||||||||||
| #022 (33,3%) |
#084 (3,03%) |
#085 (3,03%) |
#086 (3,03%) |
#087 (3,03%) |
#088 (3,03%) |
#089 (3,03%) |
#090 (3,03%) |
#091 (3,03%) |
#092 (3,03%) |
#093 (3,03%) |
#094 (3,03%) | |||
|
|
|
|||||||||||||
| #134 (11,1%) |
#135 (11,1%) |
#136 (11,1%) | ||||||||||||
- If you equip Chainsaw, Vending Machine Take 3000夢.
- If you equip Invisible, Vending Machine also become invisible.
- If you equip Child, snacks will cost 1夢.
Hydrangea Waters

| |||||
|---|---|---|---|---|---|
| Left | |||||
|
|
|
|
|
| |
| #022 | #040 | #044 | #064 | #066 | #083 |
| Right | |||||
| Random Snack |
|||||
| (16,7%) | #017 (16,7%) |
#041 (16,7%) |
#070 (16,7%) |
#121 (16,7%) |
#131 (16,7%) |
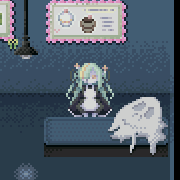
Kitsune Residence
- Note that items purchased here will not be displayed in the Snack Gallery.

| ||||||||||||
|---|---|---|---|---|---|---|---|---|---|---|---|---|
| No Effect, Crossing | Fairy | |||||||||||
|
|
|
|
|
|||||||||
| #001 | #002 | #003 | #016 | #024 | #030 | #044 | #060 | #065 | #067 | #077 | #151 | #169 |
| Cake | ||||||||||||
|
|
||||||||||||
| #008 | #009 | #028 | #029 | #039 | #055 | #056 | #057 | #095 | #096 | #097 | #098 | #108 |
|
|
|
|
|
|
|
|
||||||
| #109 | #112 | #113 | #114 | #153 | #164 | #165 | #166 | #167 | #171 | #176 | #180 | |
| Child, Boy, Penguin | ||||||||||||
| #084 | #085 | #086 | #087 | #088 | #089 | #090 | #091 | #092 | #093 | #094 | ||
| Chainsaw | Yukata Mask, Painter-kun Mask, Ninetails Mask | |||||||||||
|
|
|
|

| |||||||||
| #069 | #083 | #111 | #100 | #101 | ||||||||
| Glasses | ||||||||||||
| (42,8%) | (14,3%) | (14,3%) | ||||||||||
| Fallen Leaves, not using ids | ||||||||||||
- If you use Child / Boy / Penguin effect, you can always get Snack #086 and #087 at the same time.
- If you use Glasses effect, Vending Machine turnes into yellow fox.
Litter Heaven

|
|||
|---|---|---|---|
| #001 | #002 | #003 |
Lonely Home: Sunset Sanctum

|

|
|---|---|
| #102 |
Lonely Mint Cemetery

|
Random Snack |
|
|
|---|---|---|---|
| (32%) | #065 (34%) |
#067 (34%) |
Lotus Park

|

|
|---|---|
| #157 |
Maple Shrine: Teleport Maze

|
|
|---|---|
| #019 |
- Costs 70夢.
Miso Soup Dungeon

|

|

|
|---|---|---|
| Miso Soups, not using ids | ||
Mixed Beach

|
Vending Machine | Trash Can |
|---|---|---|
| Random Snack |
||
| #082 |
- You can buy Empty Can using trash can. Trash can Costs 1夢.
Nazca Valley: Stove

|

|
|---|---|
| #117 |
Neon Caves

|
|
|
||||||
|---|---|---|---|---|---|---|---|---|
| #008 (6.66%) |
#018 (10.22%) |
#024 (12.88%) |
#025 (3.11%) |
#028 (5.77%) |
#029 (9.33%) |
#030 (12%) |
#095 (1.33%) | |

|
||||||||
| #096 (0.44%) |
#097 (2.22%) |
#098 (4.88%) |
#099 (4%) |
#107 (11.11%) |
#108 (8.44%) |
#109 (7.55%) |
Ocean Storehouse

|
|
|
|
|
||||
|---|---|---|---|---|---|---|---|---|
| #008 (3,17%) |
#009 (3,17%) |
#014 (3,17%) |
#018 (3,17%) |
#023 (3,17%) |
#024 (3,17%) |
#029 (3,17%) |
#030 (1,61%) | |
|
|
||||||||
| #040 (3,17%) |
#043 (3,17%) |
#046 (3,17%) |
#055 (3,17%) |
#056 (3,17%) |
#057 (3,17%) |
#061 (3,17%) |
#095 (3,17%) | |
|
|
||||||||
| #096 (3,17%) |
#097 (3,17%) |
#098 (3,17%) |
#099 (3,17%) |
#103 (3,17%) |
#104 (3,17%) |
#105 (3,17%) |
#108 (1,61%) | |
|
|
|
|||||||
| #109 (1,61%) |
#134 (3,17%) |
#135 (3,17%) |
#136 (3,17%) |
#137 (3,17%) |
#138 (3,17%) |
#139 (3,17%) |
#140 (3,17%) |
Omurice Labyrinth: Vending Machine Isle

|
|
|---|---|
| #077 |
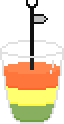
Oriental Pub

|
|

| |||
|---|---|---|---|---|---|
| #010 (12,5%) |
#036 (12,5%) |
#061 (12,5%) |
#102 (50%) |
#110 (12,5%) |
Overgrown Condominium: Lobby

|
|

|
| ||
|---|---|---|---|---|---|
| #074 (12,5%) |
#076 (21,87%) |
#078 (21,87%) |
#079 (21,87%) |
#080 (21,87%) |
Pollution District

|
|
|---|---|
| #082 |
- Costs 50夢.
Pudding World

|
|
|---|---|
| #028 |
- Costs 200夢.
Rainbow Ruins

|
Random Snack |

|

|

|
||
|---|---|---|---|---|---|---|
| (40%) | #147 (12%) |
#148 (12%) |
#149 (12%) |
#150 (12%) |
#151 (12%) |
Sakura Ruins

|
No Effect / Bunny Ears | Paper Doll | ||
|---|---|---|---|---|
|
| ||||
| #095 | #096 | #157 | ||
- If you equip Bunny Ears, you can buy snacks with 50夢.
- You can't buy snacks while you equip Chainsaw.
Sanctuary

|
|
|---|---|
| #127 |
Sandstone Brick Maze

|
Spacesuit | Spring | Stretch | Rainbow | ||||
|---|---|---|---|---|---|---|---|---|
|
|
|
|
||||||
| #125 | #184 | #012 | #014 | #020 | #038 | #023 | #035 | |
| Haniwa | Plaster Cast | Penguin | Child | |||||
|
|
|
|
|
|
|
|||
| #026 | #064 | #011 | #066 | #021 | #110 | #029 | #045 | |
| Glasses | Drum | Marginal | Insect | |||||
|
|
|
|
|
|
| |||
| #065 | #107 | #070 | #074 | #078 | #080 | #044 | #157 | |
- Interacting with the vending machine on the island with the Blob of Good Fortune has a 1/4 chance of giving a rare snack when a certain effect is equipped. This is rerolled each time you interact with the vending machine.
Scorched Wasteland

|
|
|---|---|
| #082 |
- Costs 10夢.
Shallows of Deceit

|
|
| ||
|---|---|---|---|---|
| #048 | #075 | #083 | #152 |
- Costs 200夢.
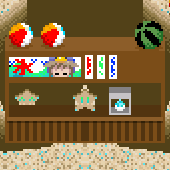
Shop Ruins
|

|

|

|

|

|

|
|---|---|---|---|---|---|---|
| Sells special cakes, not using ids | ||||||
Snack Gallery

|
Random from #001 to #145 |
|---|
Snowy Forest
Main Area

|
|
|||||||||||
|---|---|---|---|---|---|---|---|---|---|---|---|---|
| #034 | #084 | #085 | #086 | #087 | #088 | #089 | #090 | #091 | #092 | #093 | #094 |
Winter Path

|
|
|---|---|
| #011 |
Scattered Sky Fields

|
||||||||||
|---|---|---|---|---|---|---|---|---|---|---|
| #001 (7,4%) |
#002 (7,4%) |
#003 (7,4%) |
#037 (11,1%) |
#048 (3,7%) |
#052 (3,7%) |
#053 (3,7%) |
#054 (3,7%) |
#058 (3,7%) |
#063 (3,7%) | |
| #122 (7,4%) |
#123 (3,7%) |
#124 (3,7%) |
#126 (3,7%) |
#128 (3,7%) |
#129 (3,7%) |
#130 (3,7%) |
#132 (14,8%) |
Spaceship: Bar

|
|||||||||||
|---|---|---|---|---|---|---|---|---|---|---|---|
| #006 | #011 | #017 | #027 | #032 | #033 | #036 | #046 | #047 | #060 | #071 |
- Can't be used if the Crossing effect is active.
Stereo Station

|
|||
|---|---|---|---|
| #076 | #082 | #125 |
Subterranean Research Center

|
|
|
|
|
|
| ||
|---|---|---|---|---|---|---|---|---|
| #100 | #101 | #102 | #103 | #104 | #105 | #115 | #116 | |
|
|

|
|
|
|||||
| #117 | #118 | #133 | #134 | #135 | #136 | #137 | #138 | |
| #139 | #140 | #141 | #142 | |||||
- Costs 230夢.
Sugar World

|
Random Snack |
|
|
|
|
|---|---|---|---|---|---|
| (33,3%) | #111 (8,3%) |
#112 (19,4%) |
#113 (19,4%) |
#114 (19,4%) |
Sushi Belt World

|
|
|---|---|
| #019 |
The Baddies Bar

|
Random Snack |
|
|||||
|---|---|---|---|---|---|---|---|
| (33,3%) | #027 (8,3%) |
#031 (11,67%) |
#047 (11,67%) |
#060 (11,67%) |
#069 (11,67%) |
#073 (11,67%) |
Theatre World

|

|
||
|---|---|---|---|
| #081 | #159 | #161 |
Totem Hotel: Cafe

|
Drum | Default | Glasses | Grave |
|---|---|---|---|---|
| #019 | #027 | #071 | ||
- Gives different snacks when certain effects equipped.
Toy World: Mini Area

|
|
|---|---|
| #041 |
- Makes Urotsuki smaller, allowing access to the Zodiac Fortress.
- There's 100夢 hidden behind the vending machine, obtainable when Urotsuki is smaller.
Travel Hotel

| |||||||||
|---|---|---|---|---|---|---|---|---|---|
| #001 (11,1%) |
#002 (11,1%) |
#003 (11,1%) |
#048 (9,5%) |
#049 (9,5%) |
#052 (9,5%) |
#053 (9,5%) |
#054 (9,5%) |
#058 (9,5%) |
#059 (9,5%) |

|
||
|---|---|---|
| #123 | #124 |

|
||
|---|---|---|
| #037 | #063 |

|
Left | Middle | Right |
|---|---|---|---|
| #071 | #120 | #133 |

|
Left | Middle | Right | |
|---|---|---|---|---|
|
|
|
| ||
| #103 | #105 | #100 | #101 | |

|
Left | Middle | Right | |||
|---|---|---|---|---|---|---|
|
|
|
|||||
| #100 | #102 | #001 | #002 | #003 | #072 | |
Underground Garage

|
Left | Right | ||
|---|---|---|---|---|
| Random | ||||
| #001 | #002 | #003 | ||

|
Left | Middle | Right | ||||||||
|---|---|---|---|---|---|---|---|---|---|---|---|
|
|
|
||||||||||
| #004 (50%) | #005 (25%) | #038 (25%) | #008 | #029 | #050 | #061 | #018 | #025 | #034 | #042 | |

| |||
|---|---|---|---|
| #039 | #055 | #056 | #057 |

| |||
|---|---|---|---|
|
|
|||
| #008 | #029 | #050 | #061 |
Urban Underworld: Coffee Shop

| ||||
|---|---|---|---|---|

| ||||
| #019 | #122 | #132 | #143 | #163 |
- Costs 200夢.
Vending Machine Factory
Before Elevator

|
|
|
||||||
|---|---|---|---|---|---|---|---|---|
| #126 | #127 | #131 | #132 | #134 | #135 | #136 | #137 | |
| #138 | #139 | #140 | #141 | #142 |
After Elevator

|
|
|---|---|
| #133 |
Virtual City: Karaoke Lounge

|
|
|---|---|
| #119 |
Wan Lotus Docks

|
|
|---|---|
| #121 |
Watching Waters

|
||||||||
|---|---|---|---|---|---|---|---|---|
| #003 (17,7%) |
#012 (8,06%) |
#020 (9,68%) |
#030 (4,84%) |
#042 (4,84%) |
#044 (1,61%) |
#045 (1,61%) |
#052 (8,06%) | |
|
|
|
|||||||
| #055 (4,84%) |
#058 (8,06%) |
#068 (1,61%) |
#078 (12,9%) |
#087 (4,84%) |
#129 (8,06%) |
#141 (4,84%) |
Waterlogged Flats

|
|
| ||||
|---|---|---|---|---|---|---|
| #037 | #043 | #082 | #088 | #102 | #119 |
Wooden Polycube Ruins
Wooden Area

|
| |
|---|---|---|
| #018 (87,5%) |
#083 (12,5%) |
- Costs 120夢.
Ice Area

|
|
|---|---|
| #146 |
- Costs 120夢.