m (Yume 2kki Explorer admin update for version 0.117f patch 1 on behalf of サムエル) |
mNo edit summary |
||
| (192 intermediate revisions by 41 users not shown) | |||
| Line 1: | Line 1: | ||
{{MissingInfo|Add conditions for the new Twintails Room content (balcony's appearance likely changes based on Variable #44)}} | |||
{{Locationbox | {{Locationbox | ||
|headercolor = #9c828c | |headercolor = #9c828c | ||
|headerfontcolor = #524939 | |headerfontcolor = #524939 | ||
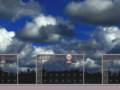
|image = Dream_House.png | |image = Dream_House.png | ||
|Effects = [[Effects#Penguin|Penguin]] | |Effects = [[Yume 2kki:Effects#Penguin|Penguin]] | ||
|EffectName = Penguin | |EffectName = Penguin | ||
|Wallpapers = WP #37, #86, #105, #112, #182, #303 | |Wallpapers = WP #37, WP #86, WP #105, WP #112, WP #182, WP #303, WP #309, WP #440, WP #566, Kura Puzzle #29, #38, #41, #42 | ||
|Menu = [[Menu Themes|Menu Theme #6]] | |Menu = [[Yume 2kki:Menu Themes|Menu Theme #6, Menu Theme #7]] | ||
|Events = [[Events# | |Masks = [[Yume 2kki:Masks/Dream Wardrobe|Dream Wardrobe Masks]], [[Yume 2kki:Masks/Others#Other Masks|Sliced, Airplane]] | ||
|NPCS = [[Seishonen]], [[ | |Events = [[Yume 2kki:Events#Chasers in Urotsuki's Room|Chasers in Urotsuki's Room]], [[Yume 2kki:Events#Penguin GB Game|Penguin GB Game]], [[Yume 2kki:Events#Seishonen's Glitched Room|Seishonen's Glitched Room]], [[Yume 2kki:Events#Flight|Flight]], [[Yume 2kki:Events#Seishonen's Painting|Seishonen's Painting]] | ||
|Connections = | |NPCS = [[Yume 2kki:Seishonen|Seishonen]], [[Yume 2kki:Minor Characters#Mother|Mother]], [[Yume 2kki:Minor Characters#Apartment Amoeba|Apartment Amoeba]], various [[Yume 2kki:Chasers|Chasers]] | ||
|RemovedConnections = | |Connections = {{Connection|The Nexus}}, | ||
|BGM = | {{Connection|Dressing Room}}, {{Connection|Simple Street}}, | ||
|Map ID = 0171, 0173, 0174, 0175, 0177, 0178, 0192, 0193, | {{Connection|Magnet Room}}, {{Connection|Butcher Hollow}}, | ||
|Primary = | {{Connection|Check-Disk Nexus}}, {{Connection|Unending River}}, | ||
|Contributing = | {{Connection|Trophy Room|isolation_type=Return}}, | ||
{{Connection|Portrait Collection|chance_description=45% chance|chance_percentage=45%}}, | |||
{{Connection|Stone Maze|unlock_type=LockedCondition|unlock_conditions=Leads to an isolated section unless the player has the Penguin and Fairy or Spacesuit effects}}, | |||
{{Connection|Megalith Grove|unlock_type=LockedCondition|unlock_conditions=Enter Megalith Grove at least once}}, | |||
{{Connection|Forest Pier|one_way_type=NoReturn|unlock_type=LockedCondition|unlock_conditions=Enter the Forest Pier from the Cog Maze at least once}}, | |||
{{Connection|Silent Sewers|one_way_type=NoReturn|unlock_type=LockedCondition|unlock_conditions=Enter the Silent Sewers at least once}}, | |||
{{Connection|Solstice Forest|unlock_type=LockedCondition|unlock_conditions=Enter the Rainbow Ruins at least once}}, | |||
{{Connection|Ethnic World|effects_needed=Chainsaw|one_way_type=NoReturn|isolation_type=Return|chance_description=3.6% chance|chance_percentage=3.6%|unlock_type=LockedCondition|unlock_conditions=Enter the Rainbow Ruins at least once}}, | |||
{{Connection|Sugar Road|phonebooth_type=ExitPoint}}, | |||
{{Connection|Underground Garage|phonebooth_type=ExitPoint}}, | |||
{{Connection|Water Reclamation Facility|phonebooth_type=ExitPoint}}, | |||
{{Connection|Eyeberry Orchard|phonebooth_type=ExitPoint}}, | |||
{{Connection|Aquatic Cube City|phonebooth_type=ExitPoint}}, | |||
{{Connection|Fossil Lake|phonebooth_type=ExitPoint}}, | |||
{{Connection|Dark Museum|phonebooth_type=ExitPoint}}, | |||
{{Connection|Dark Warehouse|phonebooth_type=ExitPoint}}, | |||
{{Connection|Parking Zone|phonebooth_type=ExitPoint}}, | |||
{{Connection|Legacy Nexus|phonebooth_type=ExitPoint}}, | |||
{{Connection|Lemonade Edifice|phonebooth_type=ExitPoint}}, | |||
{{Connection|RGB Spectral Passage|phonebooth_type=ExitPoint}}, | |||
{{Connection|Apartments|one_way_type=NoEntry}}, | |||
{{Connection|School|one_way_type=NoEntry}}, | |||
{{Connection|Amorphous Maroon Space|chaser_type=Trap}} | |||
|RemovedConnections = {{Connection|Mini-Maze|one_way_type=NoEntry|is_removed=true}}, {{Connection|Sofa Room|one_way_type=NoReturn|unlock_type=LockedCondition|unlock_instruction_link=Yume 2kki:Sofa_Room#Unlock_Conditions|unlock_conditions=Visit certain areas|is_removed=true}}, {{Connection|Mini-Nexus|phonebooth_type=ExitPoint|is_removed=true}}, {{Connection|Tricolor Room|is_removed=true}} | |||
|BGM = {{BGM|title=zaza|filename=Zaza.ogg|label=Main Area|speed=100}}, | |||
{{BGM|title=kura_title|filename=Kura_title.ogg|label=Penguin GB Game intro|soundroom=052A|speed=100}}, | |||
{{BGM|title=kura_title2|filename=Kura_title2.ogg|label=Penguin GB Game intro - glitched|speed=100}}, | |||
{{BGM|title=7|filename=7.ogg|label=Penguin GB Game|soundroom=075A|speed=100}}, | |||
{{BGM|title=dedp_932氏スクラップ|filename=Dedp_932氏スクラップ.ogg|label=Chase event|soundroom=065B|speed=50}}, | |||
{{BGM|title=sound5g|filename=Y2 sound5g 35.ogg|label=Dream Wardrobe|speed=35}}, | |||
{{BGM|title=heart beat|filename=Heart_beatslow.ogg|label=Mother's Room|soundroom=031B|speed=70}}, | |||
{{BGM|title=ヴォー|filename=ヴォー.ogg|label=Seishonen's Room|soundroom=195A|speed=100}}, | |||
{{BGM|title=626-ryukyu|filename=Y2_626-ryukyu_50.ogg|label=Twintails Room|soundroom=004B|speed=50}}, | |||
{{BGM|title=雨のパッド|filename=雨のパッド 50.ogg|label=Twintails Room Balcony|speed=50}}, | |||
{{BGM|title=parallel|filename=Parallel.ogg|label=Apartment Amoeba's Room|soundroom=201|speed=70}}, | |||
{{BGM|title=tech3|filename=Tech3_slowest.ogg|label=Rooftop|soundroom=214A|speed=50}}, | |||
{{BGM|title=ループ「空中飛行」By音師竹内※ほうき・乗り物等のエフェクト時|filename=ループ「空中飛行」By音師竹内※ほうき・乗り物等のエフェクト時_.ogg|label=Flight Event|soundroom=061|speed=100}}, | |||
{{BGM|title=2_24|speed=70|filename=2_24_slow.ogg|label=Bleak Future (Prelude)|soundroom=211B}}, | |||
{{BGM|title=bgm075|speed=70|filename=Bgm075slow70.ogg|label=Bleak Future (Beginning)|soundroom=066C}}, | |||
{{BGM|title=yumeorugo_arr2|speed=50|filename=Yumeorugo_arr2-slow.ogg|label=Bleak Future|soundroom=003C}} | |||
|Map ID = 0171, 0172, 0173, 0174, 0175, 0177, 0178, 0192, 0193, 0422, 0423, 0425, 0471, 0472, 0473, 0474, 0475, 0476, 0563, 0801, 0955, 1071, 1461, 2164 | |||
|Primary = kuraud | |||
|Contributing = HAL, Zenmaigahara, Oudn, Pinu, Bokun, 20, Uwonozoki, Sabamiso, wataru, qxy, spelude, Kontentsu, Nuaah, Kurokagi, kappa, 21keb, Yumebako, 2i9, Bean, Takikomi, oneirokamara, Horatsuki, PGray, 1247 | |||
|JapaneseName = うろつき邸 | |JapaneseName = うろつき邸 | ||
|Name = | |Name = ''Urotsuki-tei'', Urotsuki's House | ||
|VersionAdded = 0.084 | |VersionAdded = 0.084 | ||
|VersionsUpdated = 0.086--,0.086b-c,0.087b-a+,0.087d-++,0.089-++,0.090-++,0.090b-c+,0.090d-++,0.090f-++,0.090g-c+,0.111h patch 1,0.112f patch 1,0.112i,0.113-c-,0.113 patch 0---,0.113a-c+,0.113b-c+,0.115b-b,0.115h patch 2-c+,0.115i patch 2--,0.115i patch 3--,0.116d-c+,0.117a-b,0.117f patch 1-ef | |VersionsUpdated = 0.086--, 0.086b-c, 0.087b-a+, 0.087d-++, 0.089-++, 0.090-++, 0.090b-c+, 0.090d-++, 0.090f-++, 0.090g-c+, 0.111h patch 1, 0.112f patch 1, 0.112i, 0.113-c-, 0.113 patch 0---, 0.113a-c+, 0.113b-c+,0.115b-b, 0.115h patch 2-c+, 0.115i patch 2--, 0.115i patch 3--, 0.116d-c+, 0.117a-b, 0.117f patch 1-ef, 0.118c patch 3--, 0.118d-b, 0.118d patch 2-b, 0.118d patch 5--, 0.118f-b, 0.118i patch 1-+, 0.119d patch 1-+, 0.119e patch 3-c-, 0.119e patch 5-c+, 0.119i patch 3-c+, 0.119 patch 6-c+, 0.120h, 0.121b, 0.121c patch 5, 0.121d patch 2, 0.121f patch 3, 0.121g, 0.121g patch 1, 0.121h patch 2, 0.122c, 0.122d patch 2, 0.122e, 0.122f, 0.122f patch 2, 0.122h patch 2, 0.122i, 0.123e, 0.124, 0.124a, 0.125, 0.125 patch 3 | ||
}} | }} | ||
'''Urotsuki's Dream Apartments ''' is one of the main areas accessible from [[The Nexus]] by going through the door between [[Toy World]] and | '''Urotsuki's Dream Apartments''' is one of the main areas accessible from [[Yume 2kki:The Nexus|The Nexus]] by going through the darker version of the [[Yume 2kki:Urotsuki's Room|Urotsuki's Room]] door, which is between [[Yume 2kki:Toy World|Toy World]] and [[Yume 2kki:Deep Red Wilds|Deep Red Wilds]]. | ||
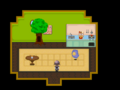
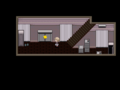
{{LocationMap|filename=urotsuki's_dream_apartments_map.png|caption=Map of Urotsuki's Dream Apartments.}} | |||
[[ | ==Features== | ||
[[ | Urotsuki's Dream Apartments are a large house or apartment complex decorated in the style of [[Yume 2kki:Urotsuki's Room|Urotsuki's Room]] that is home to various NPCs and, under certain conditions, also acts as a gateway to some of the deeper worlds. | ||
[[ | |||
===Upstairs=== | |||
Entering from The Nexus, you will be placed in a room nearly identical to [[Yume 2kki:Urotsuki|Urotsuki's]] Room, except the curtains are drawn and the [[Yume 2kki:Computer|computer]] is gone. The [[Yume 2kki:Events/Variable 44 Events#Nexus Background|background of The Nexus]] can be seen through the curtains. One can return to The Nexus by leaving through the balcony door. Sleeping in the bed will wake Urotsuki up, and pressing the interact key or left movement key will return Urotsuki to her Dream Apartments. Pressing the cancel key or right movement key will make Urotsuki get out of bed instead. | |||
If you have visited the boy from [[Yume 2kki:Endings#Glitch Ending|Bleak Future]] at least once, an envelope with a heart sticker will be displayed on the desk. Interacting with the TV will overlay the screen with scanlines, with a green "5" in the corner, and makes a [[Yume 2kki:Chasers#Shadow Ladies|Shadow Lady]] appear behind Urotsuki. | |||
She doesn't move, and turning off the TV will make her vanish and unlock a [[Yume 2kki:Wallpapers|wallpaper]]. Occasionally, the Shadow Lady will decide to stick around instead of disappearing, inviting some of her [[Yume 2kki:Chasers|chaser]] buddies, and [[Yume 2kki:Events#Chasers in Urotsuki's Room|throw a monster party]]. If you manage to flee the room when this happens, outside awaits a flat, immobile Shadow Lady in front of first doorway and a masked man in front of the second. The masked miscreant will tackle Urotsuki if she tries to go downstairs, jolting her awake. | |||
Interacting with the [[Yume 2kki:Console|game console]] transports you into the [[Yume 2kki:Events#Penguin GB Game|Penguin GB Game]], which will immediately grant you the [[Yume 2kki:Effects#Penguin|Penguin]] effect. Going through the open door will take you to the hallway outside the room, instead of ending up back at The Nexus. | |||
Just outside Urotsuki's room, there are two doors that lead to a small annex, which is lilac-tinted and is filled with stacks of furniture. There is also an intriguing door with Urotsuki's shirt design on it, as well as a giant keyhole. However, it is only accessible from the real world, from Urotsuki's room, after the four main [[Yume 2kki:Endings|endings]] have been unlocked. It leads to the [[Yume 2kki:Developer Room|Developer Room]]. If you have visited the [[Yume 2kki:Bright Forest#Rainbow Ruins|Rainbow Ruins]] at least once, there will be a closet that you can enter, just left of the doors to the aforementioned annex, that serves as a shortcut to a small section of [[Yume 2kki:Solstice Forest|Solstice Forest]] that contains one-way connections to [[Yume 2kki:Winter Valley|Winter Valley]] and [[Yume 2kki:Bright Forest|Bright Forest]]. Exiting to Solstice Forest and returning will allow Urotsuki to leave the closet room. The room itself has chairs and wardrobes, some of the chairs resembling eyes. One of the wardrobes has a creature in it, and it can be [[Yume 2kki:Effects#Chainsaw|chainsawed]] for a small chance to be sent to an isolated section of [[Yume 2kki:Ethnic World|Ethnic World]]. | |||
== | <gallery> | ||
Urotsuki's | Dream_apartments_envelope.png|Envelope on the desk | ||
1.png|Monster party event | |||
Game2.png|Penguin GB Game | |||
1319669958521.png|The Furniture Room. Note the door with the keyhole. | |||
Todeveloperroom.png|The Furniture Room accessed through [[Yume 2kki:Urotsuki's Room|Urotsuki's Room]] | |||
Closet_to_solstice_forest.png|Closet to [[Yume 2kki:Solstice Forest|Solstice Forest]] | |||
</gallery> | |||
====Dream Wardrobe==== | |||
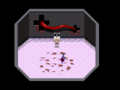
Interacting with the wardrobe sends Urotsuki to the Dream Wardrobe, a tiny looping area featuring many additional wardrobes, a giant hand, and red lampposts. If a [[Yume 2kki:Teleport Rune|Teleport Rune]] mask has been gotten from a payphone in [[Yume 2kki:Parking Garage|Parking Garage]] in saves of version 0.120f and beyond (as the switch detecting it did not exist before), any of the 7 variants can be acquired for free from a closet in the center of the world with a ghost of the matching color sitting on top of it. The [[Yume 2kki:Masks#Non-Effect Masks|purple variant from the Mask Shop]] does not count, does not unlock the other closets, and must be purchased from either the [[Yume 2kki:Mask Shop|normal]] or [[Yume 2kki:Deluxe Mask Shop|deluxe]] locations every time. There's also a closet that lets Urotsuki get the enraged Shadow Lady mask if you brought the regular Shadow Lady mask into the mirror room in [[Yume 2kki:Day and Night Towers|Day and Night Towers]] and interacted with your reflection before. Another pair of closets let Urotsuki access the Fish Person masks from [[Yume 2kki:Flamelit Wasteland|Flamelit Wasteland]] after fishing up an NPC in the bear's room and interacting with the one that appears outside. These can only be obtained after viewing the event in [[Yume 2kki:Candlelit Factory|Candlelit Factory]] then entering the area with the clover and getting [[Yume 2kki:Menu Themes|Menu Theme #56]]. Near the Fish People is a closet upon which a blue slime sits, only if Urotsuki has transformed into it at least once in [[Yume 2kki:Blue Eyes World|Blue Eyes World]] by interacting with the Teleport Rune with [[Yume 2kki:Computer#Tools|text events]] disabled. If Urotsuki has got the Rock Salt mask from a blue tentacle in [[Yume 2kki:Himalayan Salt Shoal|Himalayan Salt Shoal's]] Salt Pools, it will be available here as well. The [[Yume 2kki:Minor Characters#Black Hole Girls|Black Hole Girl]] masks will also be obtainable here after collecting their corresponding Menu Themes. | |||
Details about the Dream Wardrobe masks can also be found at [[Yume 2kki:Masks/Dream Wardrobe|Dream Wardrobe]]. | |||
<gallery> | |||
Dream_wardrobe1.png | |||
2i9 0120h preview.png|The 7 [[Yume 2kki:Teleport Rune|Teleport Rune]] mask closets | |||
Dream wardrobe3.png|The Enraged Shadow Lady mask | |||
Dream wardrobe2.png|The blue slime and Fish Person masks | |||
Dream wardrobe4.png|The Rock Salt mask | |||
Dream wardrobe5.png|The Black Hole Girl masks | |||
</gallery> | |||
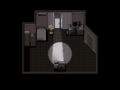
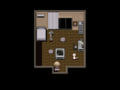
===Downstairs=== | |||
Downstairs, the front door is directly south of you after descending the stairs. This leads back to The Nexus. | |||
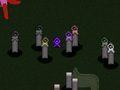
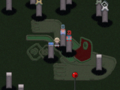
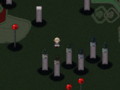
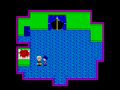
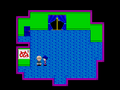
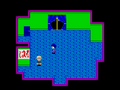
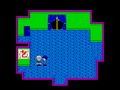
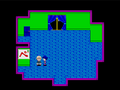
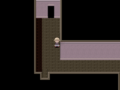
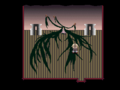
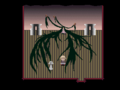
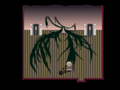
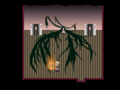
The hallway on the right has several doors along the walls. The first door can be opened with the [[Yume 2kki:Effects#Twintails|Twintails]] effect equipped, and leads to an empty room with see-through floorboards, where you can find a red-haired NPC who will disappear if you equip the [[Yume 2kki:Effects#Chainsaw|Chainsaw]] effect. The balcony in the Twintails Room can be accessed sometimes. The second door is locked; inside is [[Yume 2kki:Minor Characters#Bane Jack|Bane Jack]] who will give you the [[Yume 2kki:Effects#Spring|Spring]] effect, but this room can only be accessed from the other side in the [[Yume 2kki:Apartments|Apartments]]. There is a set of portraits, which only appears if Variable #44 is greater or equal to 140, taking you to the [[Yume 2kki:Portrait Collection|Portrait Collection]]. | |||
The first door on the lower side of the hallway leads to the [[Yume 2kki:Trophy Room|Trophy Room]], a place with small trophies for each effect you've collected thus far. The second door on the lower side of the hallway leads to a small room filled with pink water where you can find the [[Yume 2kki:Minor Characters#Mother|Mother]] NPC. Interacting with her using the [[Yume 2kki:Effects#Insect|Insect]] effect causes the baby to enlarge inside her womb and she will move towards you. The third upper door at the end of the hallway leads to the [[Yume 2kki:Dressing Room|Dressing Room]]. | |||
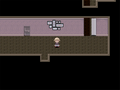
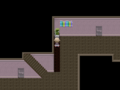
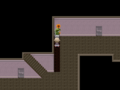
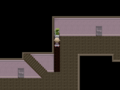
The hallway directly to the left leads to a brightly colored room under the stairs where [[Yume 2kki:Seishonen|Seishonen]] resides, and more stairs leading to the '''Basement'''. In Seishonen's room, there is a blue door in the corner that will take you to a sectioned off area in the [[Yume 2kki:Stone Maze|Stone Maze]] where there is a red tile that will teleport you to the [[Yume 2kki:Magnet Room|Magnet Room]]. Using the Penguin effect to slide over the red tile and either the [[Yume 2kki:Effects#Fairy|Fairy]] or [[Yume 2kki:Effects#Spacesuit|Spacesuit]] effect to fly across the gap will lead Urotsuki to the main area of Stone Maze. The painting on Seishonen's wall can help determine the current value of [[Yume 2kki:Events#Seishonen's Painting|Variable #44]]. The door next to Seishonen's room serves as a passage to a blocked elevator door, which connects to [[Yume 2kki:Megalith Grove|Megalith Grove]] if that area has been visited before. The door southwest of there leads to a place similar to [[Yume 2kki:Urotsuki's Room#Urotsuki's Balcony|Urotsuki's Balcony]], with a ladder to a mirror that connects to [[Yume 2kki:Butcher Hollow|Butcher Hollow]]. The doorway at the back leads to a staircase that serves as a passage to the [[Yume 2kki:Silent Sewers|Silent Sewers]] if that area has been visited before. In the hallway leading to the Silent Sewers connection is a door to [[Yume 2kki:Check-Disk Nexus|Check-Disk Nexus]], which also leads to [[Yume 2kki:Numeral Hallways|a method to help determine the current value of Variable #44]]. | |||
<gallery> | |||
Seish061.png|Seishonen's Painting with variable #44 between 0 and 61 | |||
Seish62.png|Seishonen's Painting with variable #44 equal to 62 | |||
Seish63126.png|Seishonen's Painting with variable #44 between 63 and 126 | |||
Seish127191.png|Seishonen's Painting with variable #44 between 127 and 191 | |||
Seish192236.png|Seishonen's Painting with variable #44 between 192 and 236 | |||
Seish237255.png|Seishonen's Painting with variable #44 between 237 and 255 | |||
Lsd.png|Seishonen's room à la phencyclidine.|Seishonen room event | |||
Twintails_door_with_glasses.png|Twintails door when using [[Yume 2kki:Effects#Glasses|Glasses]] effect | |||
Oah.png|Twintails Room | |||
Twintails_room_balcony.png|Twintails Room balcony variant 1 | |||
Twintails_room_balcony2.png|Twintails Room balcony variant 2 | |||
Twintails_room_balcony3.png|Twintails Room balcony variant 3 | |||
Twintails_room_balcony4.png|Twintails Room balcony variant 4 | |||
2kki-portraits.png|How did these portraits get here? | |||
Woman.png|Mother's Room | |||
Dream_apts_downstairs1.png | |||
Dream_apts_balcony_to_Butcher_Hollow.png|To [[Yume 2kki:Butcher Hollow|Butcher Hollow]] | |||
Dream_apts_downstairs_to_check_disk_nexus.png|To [[Yume 2kki:Check-Disk Nexus|Check-Disk Nexus]] | |||
Dream_apts_downstairs_to_silent_sewers.png|To [[Yume 2kki:Silent Sewers|Silent Sewers]] | |||
Dream Apartments to Megalith Grove.png|To [[Yume 2kki:Megalith Grove|Megalith Grove]] | |||
</gallery> | |||
====Telephone==== | |||
There is also a green telephone that serves as a shortcut to [[Yume 2kki:Underground Garage|Underground Garage]], [[Yume 2kki:Sugar Road|Sugar Road]], [[Yume 2kki:Water Reclamation Facility|Water Reclamation Facility]], [[Yume 2kki:Aquatic Cube City|Aquatic Cube City]], [[Yume 2kki:Fossil Lake|Fossil Lake]], [[Yume 2kki:Eyeberry Orchard|Eyeberry Orchard]], [[Yume 2kki:Dark Museum|Dark Museum]], [[Yume 2kki:Dark Warehouse|Dark Warehouse]], [[Yume 2kki:Parking Zone|Parking Zone]], [[Yume 2kki:Legacy Nexus|Legacy Nexus]], [[Yume 2kki:Lemonade Edifice|Lemonade Edifice]], or [[Yume 2kki:RGB Spectral Passage|RGB Spectral Passage]] if you have used the telephone from the opposite area. Keep in mind that activating a shortcut with the telephone WILL override another, if one is currently active. | |||
<gallery> | |||
Phonetosugarroad.png|To [[Yume 2kki:Sugar Road|Sugar Road]] | |||
Phonetolemonadeediffice.png|To [[Yume 2kki:Lemonade Edifice|Lemonade Edifice]] | |||
Phonetolegacynexus.png|To [[Yume 2kki:Legacy Nexus|Legacy Nexus]] | |||
Phonetoundergroundgarage.png|To [[Yume 2kki:Underground Garage|Underground Garage]] | |||
Phonetodarkwarehouse.png|To [[Yume 2kki:Dark Warehouse|Dark Warehouse]] | |||
Phonetorgbspectralpassage.png|To [[Yume 2kki:RGB Spectral Passage|RGB Spectral Passage]] | |||
Phonetoaquatic.png|The default appearance | |||
</gallery> | |||
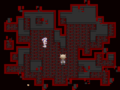
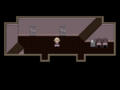
===Basement=== | |||
The | The basement is rather simple, only having two pairs of upper and lower doors. | ||
The | The door on the upper right leads to a room with the [[Yume 2kki:Minor Characters#Apartment Amoeba|Apartment Amoeba]], a small kitchen to the right, and a tree that has a 1 in 8 chance of appearing (determined on room entry). If you equip the [[Yume 2kki:Effects#Telephone|Telephone]] effect and use it, it will cause the Apartment Amoeba to split into pieces for the duration the effect is used. Interacting with the tree causes an [[Yume 2kki:Events#Flight|event]] similar to the [[Yume Nikki:Events#Witch's Flight|Witch's Flight in Yume Nikki]], except Urotsuki gets in a [[Yume 2kki:Masks/Others|plane]]. Pressing Esc will cause Urotsuki to return to the top of the building where the plane is. | ||
the | |||
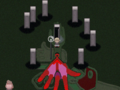
The | The door on the upper left is a room with a small girl sitting down with very, very long hair, some of it being pinned to the wall. She doesn't seem to react to anything. Interacting with the side of one of the large razors on either side of her will cause Urotsuki to walk through it, splitting her in two. Leaving the room or equipping an effect will cause her to return to normal. Sometimes another character will be in the room, a woman who wears a white dress and a white hat with spots on it. Using the [[Yume 2kki:Effects#Lantern|Lantern]] effect causes her to catch on fire and burn up. | ||
If you go through the lower right door, you will come to [[Yume 2kki:Simple Street|Simple Street]], while the lower left door next to the staircase leads to a room with a TV set at the lower-middle portion, and a dresser that leads to the [[Yume 2kki:Unending River|Unending River]]. | |||
A staircase blocked by a cone can be found in this section. Entering the [[Yume 2kki:Forest Pier|Forest Pier]] from the [[Yume 2kki:Cog Maze|Cog Maze]] will remove this cone, allowing the access to a small, dark room with a single chair and a door. Entering this door will lead to the [[Yume 2kki:Forest Pier|Forest Pier]]. | |||
<gallery> | |||
Dream_apts_basement1.png|Basement | |||
2kki-treekitchen.png|A questionable gardening decision | |||
Amoebaplaneevent1.png|To Plane event | |||
Amoebaplaneevent2.png|Rooftop to Plane event | |||
2kki-plane.png|It's a bird! It's a plane! It ''is'' a plane! | |||
Razorgirl_split.png|The razors flanking the girl will slice you in half | |||
Razorgirl_ghost.png|Woman in white dress | |||
Razorgirl_ghost_glasses.png|Woman in white dress when you use [[Yume 2kki:Effects#Glasses|Glasses]] effect | |||
Razorgirl_ghost_burning.png|Woman in white dress when you use [[Yume 2kki:Effects#Lantern|Lantern]] effect | |||
Razorgirl_gone.png | |||
2kki-room3.png|To [[Yume 2kki:Unending River|Unending River]] | |||
dream_apts_deep_basement1.png|To [[Yume 2kki:Forest Pier|Forest Pier]] | |||
</gallery> | |||
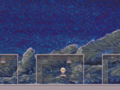
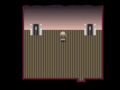
=== | ===[[Yume 2kki:Endings#Glitch Ending|Bleak Future]]=== | ||
Going to sleep on the bed in the '''Upstairs''' bedroom has a 1 in 64 chance of taking you to Bleak Future. | |||
Going to sleep on the bed in the bedroom has a 1 in 64 chance of taking you to | |||
{{SpoilerSectionStart}} | |||
This is a bleak, desaturated version of the bedroom, apparently set sometime in the future. The TV seems to be inoperative and Urotsuki will refuse to leave the room through the front door or use the computer, although the balcony is still accessible. | |||
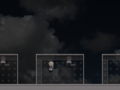
[[ | Despite Urotsuki's reaction, interacting with the computer has a 1 in 10 chance of taking her to a smaller bedroom, similar in appearance to her own. Interacting with the NPC in this room will unlock two [[Yume 2kki:Menu Themes|Menu Themes]] on the in-game computer. Equipping the Chainsaw effect in this room will make the boy flash red and force Urotsuki to put away the chainsaw. The doors at the back of the room lead to a balcony similar to Urotsuki's, while the doors at the front will take you back to Urotsuki's bedroom, bleak edition. | ||
Sleeping again on the bed will lead you to an even more desolate version of Urotsuki's bedroom; this version appears utterly abandoned and ravaged by time. The balcony is inaccessible, the TV and computer are broken, but the front door is now unlocked and leads to a forked hallway. The southern corridor exits onto an odd balcony with the sun setting in the background and a colorless image of Urotsuki standing upon a floating platform. The eastern corridor will take you to a dark, sinister room with many beds. Sleeping on the bed in the middle will trigger a "fake" ending sequence, with a credits roll riddled with graphical artifacts and glitchy, dissonant music. Afterwards, Urotsuki will wake up next to her bed in her real bedroom. | Sleeping again on the bed will lead you to an even more desolate version of Urotsuki's bedroom; this version appears utterly abandoned and ravaged by time. The balcony is inaccessible, the TV and computer are broken, but the front door is now unlocked and leads to a forked hallway. The southern corridor exits onto an odd balcony with the sun setting in the background and a colorless image of Urotsuki standing upon a floating platform. The eastern corridor will take you to a dark, sinister room with many beds. Sleeping on the bed in the middle will trigger a "fake" ending sequence, with a credits roll riddled with graphical artifacts and glitchy, dissonant music. Afterwards, Urotsuki will wake up next to her bed in her real bedroom. | ||
Also, if you killed [[ | Also, if you killed [[Yume 2kki:Megusuri Uri|Megusuri Uri]] and [[Yume 2kki:Hakoko|Hakoko]] in [[Yume 2kki:Visine World|Visine World]], you can revive them (and also unlock the Eye Shop) by interacting with the boy in the computer. | ||
<gallery> | |||
2kki-room2.png|A bit melancholy | |||
Bleak_Future_uro_balcony.png | |||
2kki-comproom.png|Interact with the kid to unlock two new [[Yume 2kki:Menu Themes|Menu Themes]] | |||
Bleak_Future_boy_balcony.png | |||
2kki-desolate1.png|Downright forlorn | |||
Bleak_Future_exit_desolate_room.png | |||
2kki-desolate-sunset.png|A somewhat pixelated sunset | |||
Bleak_Future_before_many_beds.png | |||
2kki-bedroom.png | |||
</gallery> | |||
{{SpoilerSectionEnd}} | |||
==Directions== | ==Directions== | ||
Nexus → Urotsuki's Dream Apartments | *The Nexus → '''Urotsuki's Dream Apartments''' | ||
==Trivia== | ==Trivia== | ||
[[File:0113aScreenshot1.png|thumb|right|The gift box that temporarily held Menu Theme #12.]] | |||
*After the removal of [[:Category:wataru|wataru]]'s areas, going downstairs would lead to a dark storage area, where you could use the Lantern effect to light things up. Here, you could find a gift box that would grant you [[Yume 2kki:Menu Themes|Menu Theme #12]]. It was added as a replacement for its previous location in the [[Yume 2kki:Rose Church|Rose Church]] when the area was removed. Interestingly, this map was not removed from the game and is still accessible through [[Yume 2kki:Debug Mode|Debug Mode]], though the Menu Theme is no longer there. | |||
*In version 0.113g patch 2, a blue creature was found at the bottom corner of [[Yume 2kki:Urotsuki's Room#Dream Room|Urotsuki's Dream Room]], which would take her to [[Yume 2kki:Flower Scent World|Flower Scent World]]. This was a personal shortcut to the world for the developer, but they forgot to delete it. This was fixed in later patches. | |||
*The chair right next to the drawers in the bottom hallway used to lead to the [[Yume 2kki:Sofa Room|Sofa Room]] prior to version 0.119e patch 3. | |||
*In version 0.113g | *You could unlock a phone connection between [[Yume 2kki:Mini-Nexus|Mini-Nexus]] and Urotsuki's Dream Apartments in version 0.119i patch 6. This was removed in the subsequent patch. | ||
*In version 0.121g, the bed was changed to allow one to choose waking up or going back to sleep. | |||
*In version 0.121d patch 2, a closet was replaced by a closet room, which now leads the Winter Valley and Bright Forest shortcuts. | |||
*Before version 0.122i, there was a door to the left of Seishonen's Room that led to the [[Yume 2kki:Tricolor Room|Tricolor Room]]. | |||
*In version 0.125, the ability to return to The Nexus by leaving through the balcony door was added. | |||
*This is the most complex world in the game, with a grand total of twenty four maps used in its creation. | |||
*The shortcut to the Silent Sewers is heavily similar to the shortcut to the Forest Pier. | |||
*This is one of three worlds in the game where you can find a wallpaper, Menu Theme, and [[Yume 2kki:Console#Kura Puzzle|Kura Puzzle]] in one world. | |||
==Gallery== | ==Gallery== | ||
<gallery | <gallery> | ||
Dream_apts_isolated_from_amorphous_maroon.png|Isolated Area from [[Yume 2kki:Amorphous Maroon Space|Amorphous Maroon Space]] | |||
Dream_apts_forest_pier_locked.png|Basement if you haven't visited [[Yume 2kki:Forest Pier|Forest Pier]] yet | |||
File:Dream_apartments_to_megalith_locked.png|Connection to [[Yume 2kki:Megalith Grove|Megalith Grove]] if you haven't visited that world yet | |||
2kki | |||
2kki | |||
2kki | |||
</gallery> | </gallery> | ||
[[Category: | |||
[[Category: | [[Category:Yume 2kki Nexus Worlds]] | ||
[[Category: | [[Category:Yume 2kki In Development]] | ||
[[Category:Yume 2kki Locations with Wake-Up Events]] | |||
Latest revision as of 08:33, 26 September 2024
| This page is missing information. You can help YumeWiki by expanding it. Details: Add conditions for the new Twintails Room content (balcony's appearance likely changes based on Variable #44) |
| Urotsuki's Dream Apartments | |||||||||||||||
|---|---|---|---|---|---|---|---|---|---|---|---|---|---|---|---|

| |||||||||||||||
| Basic Info | |||||||||||||||
| Japanese Name(s) |
うろつき邸 | ||||||||||||||
| Effects | Penguin | ||||||||||||||
| Collectibles |
WP #37 | ||||||||||||||
| Masks | Dream Wardrobe Masks, Sliced, Airplane | ||||||||||||||
| Events | Chasers in Urotsuki's Room, Penguin GB Game, Seishonen's Glitched Room, Flight, Seishonen's Painting | ||||||||||||||
| Notable NPCs | Seishonen, Mother, Apartment Amoeba, various Chasers | ||||||||||||||
| Other | |||||||||||||||
| Connecting Areas | The Nexus Dressing Room Simple Street Magnet Room Butcher Hollow Check-Disk Nexus Unending River Trophy Room 🚩 Portrait Collection 🍀 Stone Maze 🔐 Megalith Grove 🔐 Forest Pier 🔐 ➡️ Silent Sewers 🔐 ➡️ Solstice Forest 🔐 Ethnic World 🔐 🍀 ✨ 🚩 ➡️ Sugar Road ☎️ Underground Garage ☎️ Water Reclamation Facility ☎️ Eyeberry Orchard ☎️ Aquatic Cube City ☎️ Fossil Lake ☎️ Dark Museum ☎️ Dark Warehouse ☎️ Parking Zone ☎️ Legacy Nexus ☎️ Lemonade Edifice ☎️ RGB Spectral Passage ☎️ Apartments ⛔ School ⛔ Amorphous Maroon Space 🚷 | ||||||||||||||
| Removed Connections | Mini-Maze ⛔ Sofa Room 🔐+ ➡️ Mini-Nexus ☎️ Tricolor Room | ||||||||||||||
| BGM | 🔊 zaza – Main Area 🔊 kura_title – Penguin GB Game intro (No. 052A) 🔊 kura_title2 – Penguin GB Game intro - glitched 🔊 7 – Penguin GB Game (No. 075A) 🔊 dedp_932氏スクラップ – Chase event (No. 065B) 🔊 sound5g – Dream Wardrobe 🔊 heart beat – Mother's Room (No. 031B) 🔊 ヴォー – Seishonen's Room (No. 195A) 🔊 626-ryukyu – Twintails Room (No. 004B) 🔊 雨のパッド – Twintails Room Balcony 🔊 parallel – Apartment Amoeba's Room (No. 201) 🔊 tech3 – Rooftop (No. 214A) 🔊 ループ「空中飛行」By音師竹内※ほうき・乗り物等のエフェクト時 – Flight Event (No. 061) 🔊 2_24 – Bleak Future (Prelude) (No. 211B) 🔊 bgm075 – Bleak Future (Beginning) (No. 066C) 🔊 yumeorugo_arr2 – Bleak Future (No. 003C) | ||||||||||||||
| Map ID | 0171, 0172, 0173, 0174, 0175, 0177, 0178, 0192, 0193, 0422, 0423, 0425, 0471, 0472, 0473, 0474, 0475, 0476, 0563, 0801, 0955, 1071, 1461, 2164 | ||||||||||||||
| Version Added | 0.084 | ||||||||||||||
| Last Updated | 0.125 patch 3 | ||||||||||||||
| Primary Author | kuraud | ||||||||||||||
| Contributing Author(s) | HAL, Zenmaigahara, Oudn, Pinu, Bokun, 20, Uwonozoki, Sabamiso, wataru, qxy, spelude, Kontentsu, Nuaah, Kurokagi, kappa, 21keb, Yumebako, 2i9, Bean, Takikomi, oneirokamara, Horatsuki, PGray, 1247 | ||||||||||||||
| |||||||||||||||
Urotsuki's Dream Apartments is one of the main areas accessible from The Nexus by going through the darker version of the Urotsuki's Room door, which is between Toy World and Deep Red Wilds.
Features
Urotsuki's Dream Apartments are a large house or apartment complex decorated in the style of Urotsuki's Room that is home to various NPCs and, under certain conditions, also acts as a gateway to some of the deeper worlds.
Upstairs
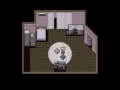
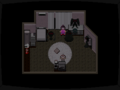
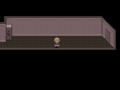
Entering from The Nexus, you will be placed in a room nearly identical to Urotsuki's Room, except the curtains are drawn and the computer is gone. The background of The Nexus can be seen through the curtains. One can return to The Nexus by leaving through the balcony door. Sleeping in the bed will wake Urotsuki up, and pressing the interact key or left movement key will return Urotsuki to her Dream Apartments. Pressing the cancel key or right movement key will make Urotsuki get out of bed instead.
If you have visited the boy from Bleak Future at least once, an envelope with a heart sticker will be displayed on the desk. Interacting with the TV will overlay the screen with scanlines, with a green "5" in the corner, and makes a Shadow Lady appear behind Urotsuki.
She doesn't move, and turning off the TV will make her vanish and unlock a wallpaper. Occasionally, the Shadow Lady will decide to stick around instead of disappearing, inviting some of her chaser buddies, and throw a monster party. If you manage to flee the room when this happens, outside awaits a flat, immobile Shadow Lady in front of first doorway and a masked man in front of the second. The masked miscreant will tackle Urotsuki if she tries to go downstairs, jolting her awake.
Interacting with the game console transports you into the Penguin GB Game, which will immediately grant you the Penguin effect. Going through the open door will take you to the hallway outside the room, instead of ending up back at The Nexus.
Just outside Urotsuki's room, there are two doors that lead to a small annex, which is lilac-tinted and is filled with stacks of furniture. There is also an intriguing door with Urotsuki's shirt design on it, as well as a giant keyhole. However, it is only accessible from the real world, from Urotsuki's room, after the four main endings have been unlocked. It leads to the Developer Room. If you have visited the Rainbow Ruins at least once, there will be a closet that you can enter, just left of the doors to the aforementioned annex, that serves as a shortcut to a small section of Solstice Forest that contains one-way connections to Winter Valley and Bright Forest. Exiting to Solstice Forest and returning will allow Urotsuki to leave the closet room. The room itself has chairs and wardrobes, some of the chairs resembling eyes. One of the wardrobes has a creature in it, and it can be chainsawed for a small chance to be sent to an isolated section of Ethnic World.
Envelope on the desk
Monster party event
Penguin GB Game

The Furniture Room. Note the door with the keyhole.
The Furniture Room accessed through Urotsuki's Room
Closet to Solstice Forest


Dream Wardrobe
Interacting with the wardrobe sends Urotsuki to the Dream Wardrobe, a tiny looping area featuring many additional wardrobes, a giant hand, and red lampposts. If a Teleport Rune mask has been gotten from a payphone in Parking Garage in saves of version 0.120f and beyond (as the switch detecting it did not exist before), any of the 7 variants can be acquired for free from a closet in the center of the world with a ghost of the matching color sitting on top of it. The purple variant from the Mask Shop does not count, does not unlock the other closets, and must be purchased from either the normal or deluxe locations every time. There's also a closet that lets Urotsuki get the enraged Shadow Lady mask if you brought the regular Shadow Lady mask into the mirror room in Day and Night Towers and interacted with your reflection before. Another pair of closets let Urotsuki access the Fish Person masks from Flamelit Wasteland after fishing up an NPC in the bear's room and interacting with the one that appears outside. These can only be obtained after viewing the event in Candlelit Factory then entering the area with the clover and getting Menu Theme #56. Near the Fish People is a closet upon which a blue slime sits, only if Urotsuki has transformed into it at least once in Blue Eyes World by interacting with the Teleport Rune with text events disabled. If Urotsuki has got the Rock Salt mask from a blue tentacle in Himalayan Salt Shoal's Salt Pools, it will be available here as well. The Black Hole Girl masks will also be obtainable here after collecting their corresponding Menu Themes.
Details about the Dream Wardrobe masks can also be found at Dream Wardrobe.
The 7 Teleport Rune mask closets
The Enraged Shadow Lady mask
The blue slime and Fish Person masks
The Rock Salt mask
The Black Hole Girl masks


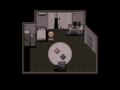
Downstairs
Downstairs, the front door is directly south of you after descending the stairs. This leads back to The Nexus.
The hallway on the right has several doors along the walls. The first door can be opened with the Twintails effect equipped, and leads to an empty room with see-through floorboards, where you can find a red-haired NPC who will disappear if you equip the Chainsaw effect. The balcony in the Twintails Room can be accessed sometimes. The second door is locked; inside is Bane Jack who will give you the Spring effect, but this room can only be accessed from the other side in the Apartments. There is a set of portraits, which only appears if Variable #44 is greater or equal to 140, taking you to the Portrait Collection.
The first door on the lower side of the hallway leads to the Trophy Room, a place with small trophies for each effect you've collected thus far. The second door on the lower side of the hallway leads to a small room filled with pink water where you can find the Mother NPC. Interacting with her using the Insect effect causes the baby to enlarge inside her womb and she will move towards you. The third upper door at the end of the hallway leads to the Dressing Room.
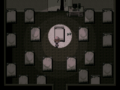
The hallway directly to the left leads to a brightly colored room under the stairs where Seishonen resides, and more stairs leading to the Basement. In Seishonen's room, there is a blue door in the corner that will take you to a sectioned off area in the Stone Maze where there is a red tile that will teleport you to the Magnet Room. Using the Penguin effect to slide over the red tile and either the Fairy or Spacesuit effect to fly across the gap will lead Urotsuki to the main area of Stone Maze. The painting on Seishonen's wall can help determine the current value of Variable #44. The door next to Seishonen's room serves as a passage to a blocked elevator door, which connects to Megalith Grove if that area has been visited before. The door southwest of there leads to a place similar to Urotsuki's Balcony, with a ladder to a mirror that connects to Butcher Hollow. The doorway at the back leads to a staircase that serves as a passage to the Silent Sewers if that area has been visited before. In the hallway leading to the Silent Sewers connection is a door to Check-Disk Nexus, which also leads to a method to help determine the current value of Variable #44.
Seishonen's Painting with variable #44 between 0 and 61
Seishonen's Painting with variable #44 equal to 62
Seishonen's Painting with variable #44 between 63 and 126
Seishonen's Painting with variable #44 between 127 and 191
Seishonen's Painting with variable #44 between 192 and 236
Seishonen's Painting with variable #44 between 237 and 255
Seishonen room event

Twintails door when using Glasses effect

Twintails Room
Twintails Room balcony variant 1
Twintails Room balcony variant 2

Twintails Room balcony variant 3
Twintails Room balcony variant 4
How did these portraits get here?
Mother's Room


Telephone
There is also a green telephone that serves as a shortcut to Underground Garage, Sugar Road, Water Reclamation Facility, Aquatic Cube City, Fossil Lake, Eyeberry Orchard, Dark Museum, Dark Warehouse, Parking Zone, Legacy Nexus, Lemonade Edifice, or RGB Spectral Passage if you have used the telephone from the opposite area. Keep in mind that activating a shortcut with the telephone WILL override another, if one is currently active.
To Sugar Road
To Legacy Nexus
The default appearance


Basement
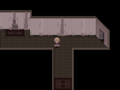
The basement is rather simple, only having two pairs of upper and lower doors.
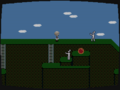
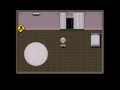
The door on the upper right leads to a room with the Apartment Amoeba, a small kitchen to the right, and a tree that has a 1 in 8 chance of appearing (determined on room entry). If you equip the Telephone effect and use it, it will cause the Apartment Amoeba to split into pieces for the duration the effect is used. Interacting with the tree causes an event similar to the Witch's Flight in Yume Nikki, except Urotsuki gets in a plane. Pressing Esc will cause Urotsuki to return to the top of the building where the plane is.
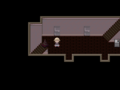
The door on the upper left is a room with a small girl sitting down with very, very long hair, some of it being pinned to the wall. She doesn't seem to react to anything. Interacting with the side of one of the large razors on either side of her will cause Urotsuki to walk through it, splitting her in two. Leaving the room or equipping an effect will cause her to return to normal. Sometimes another character will be in the room, a woman who wears a white dress and a white hat with spots on it. Using the Lantern effect causes her to catch on fire and burn up.
If you go through the lower right door, you will come to Simple Street, while the lower left door next to the staircase leads to a room with a TV set at the lower-middle portion, and a dresser that leads to the Unending River.
A staircase blocked by a cone can be found in this section. Entering the Forest Pier from the Cog Maze will remove this cone, allowing the access to a small, dark room with a single chair and a door. Entering this door will lead to the Forest Pier.
Basement
A questionable gardening decision
To Plane event
Rooftop to Plane event
It's a bird! It's a plane! It is a plane!
The razors flanking the girl will slice you in half
Woman in white dress
Woman in white dress when you use Glasses effect
Woman in white dress when you use Lantern effect

To Forest Pier


Bleak Future
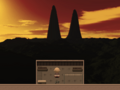
Going to sleep on the bed in the Upstairs bedroom has a 1 in 64 chance of taking you to Bleak Future.
Spoilers:
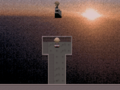
This is a bleak, desaturated version of the bedroom, apparently set sometime in the future. The TV seems to be inoperative and Urotsuki will refuse to leave the room through the front door or use the computer, although the balcony is still accessible.
Despite Urotsuki's reaction, interacting with the computer has a 1 in 10 chance of taking her to a smaller bedroom, similar in appearance to her own. Interacting with the NPC in this room will unlock two Menu Themes on the in-game computer. Equipping the Chainsaw effect in this room will make the boy flash red and force Urotsuki to put away the chainsaw. The doors at the back of the room lead to a balcony similar to Urotsuki's, while the doors at the front will take you back to Urotsuki's bedroom, bleak edition.
Sleeping again on the bed will lead you to an even more desolate version of Urotsuki's bedroom; this version appears utterly abandoned and ravaged by time. The balcony is inaccessible, the TV and computer are broken, but the front door is now unlocked and leads to a forked hallway. The southern corridor exits onto an odd balcony with the sun setting in the background and a colorless image of Urotsuki standing upon a floating platform. The eastern corridor will take you to a dark, sinister room with many beds. Sleeping on the bed in the middle will trigger a "fake" ending sequence, with a credits roll riddled with graphical artifacts and glitchy, dissonant music. Afterwards, Urotsuki will wake up next to her bed in her real bedroom.
Also, if you killed Megusuri Uri and Hakoko in Visine World, you can revive them (and also unlock the Eye Shop) by interacting with the boy in the computer.
A bit melancholy
Interact with the kid to unlock two new Menu Themes
Downright forlorn
A somewhat pixelated sunset


Directions
- The Nexus → Urotsuki's Dream Apartments
Trivia

- After the removal of wataru's areas, going downstairs would lead to a dark storage area, where you could use the Lantern effect to light things up. Here, you could find a gift box that would grant you Menu Theme #12. It was added as a replacement for its previous location in the Rose Church when the area was removed. Interestingly, this map was not removed from the game and is still accessible through Debug Mode, though the Menu Theme is no longer there.
- In version 0.113g patch 2, a blue creature was found at the bottom corner of Urotsuki's Dream Room, which would take her to Flower Scent World. This was a personal shortcut to the world for the developer, but they forgot to delete it. This was fixed in later patches.
- The chair right next to the drawers in the bottom hallway used to lead to the Sofa Room prior to version 0.119e patch 3.
- You could unlock a phone connection between Mini-Nexus and Urotsuki's Dream Apartments in version 0.119i patch 6. This was removed in the subsequent patch.
- In version 0.121g, the bed was changed to allow one to choose waking up or going back to sleep.
- In version 0.121d patch 2, a closet was replaced by a closet room, which now leads the Winter Valley and Bright Forest shortcuts.
- Before version 0.122i, there was a door to the left of Seishonen's Room that led to the Tricolor Room.
- In version 0.125, the ability to return to The Nexus by leaving through the balcony door was added.
- This is the most complex world in the game, with a grand total of twenty four maps used in its creation.
- The shortcut to the Silent Sewers is heavily similar to the shortcut to the Forest Pier.
- This is one of three worlds in the game where you can find a wallpaper, Menu Theme, and Kura Puzzle in one world.
Gallery
Isolated Area from Amorphous Maroon Space
Basement if you haven't visited Forest Pier yet
Connection to Megalith Grove if you haven't visited that world yet


 (Map of Urotsuki's Dream Apartments., https://yume.wiki/images/a/ad/Urotsuki's dream apartments map.png) +
- 9c828c
- 524939