No edit summary |
Tag: Undo |
||
| (26 intermediate revisions by 5 users not shown) | |||
| Line 1: | Line 1: | ||
When exploring the dream world, [[Yume Nikki:Madotsuki|Madotsuki]] will occasionally come across strange | When exploring the dream world, [[Yume Nikki:Madotsuki|Madotsuki]] will occasionally come across strange, noteworthy '''events'''. These make up most of the memorable content of the game and provide intriguing perspectives of the many [[Yume Nikki:List of Locations|dream worlds]]. Many [[Yume Nikki:Theories|theories]] have been developed to attempt to explain what the events represent, if anything. | ||
Some events happen as a result of a specific trigger (e.g. Madotsuki interacting with an object, such as the TV in her [[Yume Nikki:Madotsuki's Room#Dream Representation|dream bedroom]]), whereas others (such as | Some events happen as a result of a specific trigger (e.g. Madotsuki interacting with an object, such as the TV in her [[Yume Nikki:Madotsuki's Room#Dream Representation|dream bedroom]]), whereas others (such as [[Yume Nikki:Takofuusen|Takofuusen]]) are not directly caused by the player. | ||
= | ==ああああああああ<span id="AAAAAAAA"></span>== | ||
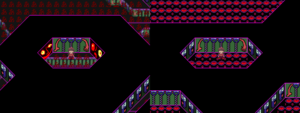
= | [[File:AAAAA_Trap.png|thumb|The Number World variant (left) and the Lamp World variant (right).]] | ||
'''Location:''' [[Yume Nikki:Number World|Number World]] | '''Location:''' [[Yume Nikki:Number World|Number World]] | ||
'''Prompt:' | '''Prompt:''' Stab the [[Yume Nikki:Toriningen|Toriningen]] in the bed room with the [[Yume Nikki:Effects#Knife|Knife]] effect to turn her 'lunatic', then allow her to catch you. You will be randomly transported to one of two different enclosed spaces where the event occurs, with an equal chance of either. | ||
'''Description:''' The enclosed area that Madotsuki is taken to will have a different unique tile on the floor depending on where she is trapped. In the Number World trap, a tile depicting a red 'あ' character (the [[wikipedia:Hiragana|hiragana]] character for "A") can be stepped on to fill all of the area's empty tiles with the character, hence the event's name. In the Lamp World trap, a tile depicting a pink, bloodshot eye can be stepped on to fill all of the area's empty tiles with the eye, partially forming what appear to be faces. | |||
{{clear}} | |||
==[[Yume Nikki:Aztec Rave Monkey|Aztec Rave Monkey]]== | |||
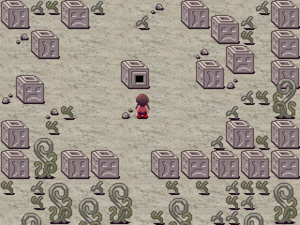
[[File:theboxwiththerave.png|thumb|I wonder what's inside...]] | |||
'''Location:''' [[Yume Nikki:Wilderness#Aztec Rave Monkey Route|The Rave Box]] in the Wilderness | |||
'''Prompt:''' Interact with the hollow Rave Box near the western area of the Wilderness. | |||
'''Description:''' Upon interacting with the Rave Box, the screen will fade to black before the Aztec Rave Monkey suddenly flashes onscreen, rapidly flashing through various states and appearances as upbeat music plays. The player can dismiss this event by pressing the interact button, returning to the Wilderness. | |||
{{clear}} | |||
==Crick in the Neck== | ==Crick in the Neck== | ||
[[File:Crick_in_the_neck.PNG|thumb|Ouch...must've slept wrong.]] | |||
'''Location:''' [[Yume Nikki:Madotsuki's Room|Madotsuki's Room]] | '''Location:''' [[Yume Nikki:Madotsuki's Room|Madotsuki's Room]] | ||
'''Prompt:''' | '''Prompt:''' A 1/64 chance of occurring when Madotsuki wakes up. | ||
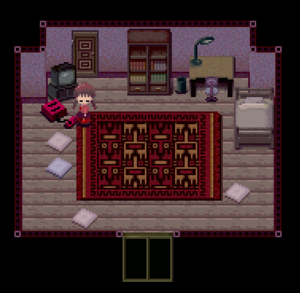
'''Description:''' Occasionally, when Madotsuki gets out of [[Yume Nikki:Beds|bed]] she will have a 'crick' in her neck, causing her head to be constantly turned to the left. In this state, she is unable to write in her diary or play ''[[Yume Nikki:NASU|NASU]]'', and has no choice but to go back to sleep. The effect will wear off when she falls asleep again. | '''Description:''' Occasionally, when Madotsuki gets out of [[Yume Nikki:Beds|bed]] she will have a 'crick' in her neck, causing her head to be constantly turned to the left. In this state, she is unable to write in her diary or play ''[[Yume Nikki:NASU|NASU]]'', and has no choice but to go back to sleep. The effect will wear off when she falls asleep again. | ||
This event does not activate if all of the effects have been left in [[Yume Nikki: | This event does not activate if all of the effects have been left in the [[Yume Nikki:Nexus|Nexus]], making it impossible to perform [[Yume Nikki:Ending|the ending sequence]] with a cricked neck. | ||
{{clear}} | |||
==[[Yume Nikki:Ending|Ending]]== | |||
'''Location:''' [[Yume Nikki:Madotsuki's Room|Madotsuki's Balcony]] | |||
'''Prompt:''' Drop all 24 of the [[Yume Nikki:Effects|effects]] in the [[Yume Nikki:Nexus|Nexus]]. | |||
'''Description:''' ''See [[Yume Nikki:Ending|Ending]] for details. '''Contains spoilers.''''' | |||
{{clear}} | |||
==[[Yume Nikki:FACE|FACE]]== | |||
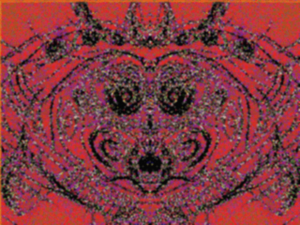
[[File:YN FACE.png|thumb|A frame from the FACE animation.]] | |||
'''Location:''' [[Yume Nikki:Number World#Stairway|The Stairway in Number World]] | |||
'''Prompt:''' There is a 1/4 chance per dream session that a [[Yume Nikki:Zippertile|Zippertile]] in the southeastern corner of Number World will have a sad expression with an open mouth instead of a smiling expression. Stabbing the Zippertile with the [[Yume Nikki:Effects#Knife|Knife]] will cause it to bleed and rip open, leading to the Stairway. Upon heading right in this new area, Madotsuki will encounter [[Yume Nikki:KyuuKyuu-kun|KyuuKyuu-kun]] and a door that is identical to the one in her room. Open the door to trigger the event. | |||
'''Description:''' Upon opening the door, the screen will slowly fade to black and FACE will slowly begin fading in as a loud droning noise plays. FACE rapidly flashes between multiple different colors as the droning noise gets longer. They can not be dismissed until watched for a full ten seconds, to which then a rushing noise plays as Madotsuki suddenly awakens and leaves her bed. | |||
{{clear}} | |||
==[[Yume Nikki:Falling Men|Falling Men]]<span id="Falling Man"></span>== | |||
[[File:Lucky.png|thumb|Two simultaneous falling men.]] | |||
'''Location:''' The Stairway to the Sky in the [[Yume Nikki:Wilderness#Northern Wilderness|Wilderness]] that leads to the [[Yume Nikki:Sky Garden|Sky Garden]] | |||
'''Prompt:''' Determined when Madotsuki sets foot on two specific points on the Stairway to the Sky. There is a 1/4 chance of the first man appearing and a 1/4 chance of a second one appearing if the first one did. | |||
'''Description:''' An object resembling a person appears in the sky in the distance. It spins as if falling downward, however, the figure moves in a circular motion and never actually hits the ground. The chance of witnessing two at once is 1/16. | |||
{{clear}} | |||
==Famicom Glitch== | ==Famicom Glitch== | ||
[[File:Yn-famicon.png|thumb|The dire consequences of mingling with a wall.]] | |||
'''Location:''' One of the rooms in the [[Yume Nikki:FC Dungeon|FC Dungeon]] | |||
[[File:Yn-famicon.png| | |||
[[ | |||
'''Prompt:''' A 1/3 chance of availability, determined when Madotsuki falls asleep. In the FC Dungeon, travel to the deepest room. Unlike the others, this room is fully lit and will not require the [[Yume Nikki:Effects#Lamp|Lamp]] effect to be equipped. Stand in the top-left corner of the room and interact with the west wall. | |||
'''Description:''' When interacted with, and if the chance is successful, the wall tile produces a text box with a 'typing' sound like the [[Yume Nikki:Lizardman|Lizardmen]], but no text is shown. Doing this repeatedly gradually causes the room to corrupt until the game eventually 'crashes' with a nasty stuttering sound. This causes Madotsuki to wake up. | |||
Note that despite the event name, this is not an actual glitch and is intentionally programmed to happen. This event is possibly a homage to [https://wikibound.info/wiki/Check_Area_glitch two] [http://www.youtube.com/watch?v=B8OtuYtI9Rg glitches] found in ''Earthbound''. | |||
{{clear}} | |||
==KALIMBA TV Channel== | |||
[[File:KALIMBA_Still.png|thumb|My favorite show!]] | |||
'''Location:''' [[Yume Nikki:Madotsuki's Room#Dream Representation|Madotsuki's Dream Room]] | |||
'''Prompt:''' 1/8 chance of appearing whenever the TV is switched on in Madotsuki's Dream Room. | |||
'''Description:''' When the event has been activated, the TV will show the face of one of the [[Yume Nikki:KALIMBA|KALIMBA]]. The screen then fades to black and two oppositely-scrolling rows of KALIMBA appear across the screen while a tribal/electronic rhythm plays on a short loop. Upon dismissing the event, the KALIMBA fade away and the TV automatically turns off. | |||
{{clear}} | |||
==Melting Madotsuki== | ==Melting Madotsuki== | ||
[[File: | [[File:YN Melting Madotsuki.png|thumb|Madotsuki melts down.]] | ||
'''Location:''' The Blazing Corridor, in [[Yume Nikki:Underground World|Underground World]] | '''Location:''' The Blazing Corridor, in [[Yume Nikki:Underground World|Underground World]] | ||
'''Prompt: | '''Prompt:''' 1/5 for each [[Yume Nikki:Beds|bed]] that takes you to [[Yume Nikki:Staircase of Hands|Staircase of Hands]]. | ||
While in [[Yume Nikki:Snow World|Snow World]], turn into a snowman by using the [[Yume Nikki:Effects#Hat and Scarf|Hat and Scarf]] effect. As a snowman, sleep in a bed (the Snow World bed being the closest) and, if the chance is successful, Madotsuki will be taken to Staircase of Hands. Walk down the staircase and continue left in Underground World. Once you have reached the flames of the Blazing Corridor, stand as close to the flames as possible. ''The snow of the [[Yume Nikki:Effects#Yuki-onna|Yuki-onna]] effect cannot be used as it will stay active and put out the fire''. | |||
'''Description:''' After some time, the heat from the flames will begin to melt Madotsuki. First, she will turn short and still be allowed to move around, although standing there for longer will turn her into a puddle of water with the Hat and Scarf sitting on top. After turning into a puddle, Madotsuki will simply turn back to normal while wearing the Hat and Scarf effect. | |||
==[[Yume Nikki:Monoe|Monoe]]== | |||
[[File:YN Monoe Closeup.png|thumb|Um...a little too close.]] | |||
'''Location:''' [[Yume Nikki:White Desert A#Monoe's Tunnel|White Desert A]] | |||
'''Prompt:''' Using the [[Yume Nikki:Effects#Knife|Knife]] effect, stab the [[Yume Nikki:Dave Spector|Dave Spector]] standing near the looping tunnel in the southwest portion of White Desert A. After doing so, enter the looping tunnel from the left. This will teleport Madotsuki to a dark void where she must find Monoe. | |||
'''Description:''' Upon interacting with Monoe, a detailed close-up image of her appears onscreen. When the image fades out, it is revealed that Monoe has teleported elsewhere in the void she inhabits. The player is able to find her again after teleporting and activate the close-up again upon interaction. | |||
{{clear}} | |||
==[[Yume Nikki:Monoko|Monoko]]== | |||
[[File:YN Monoko Dance.png|thumb|Red lights and drum beats.]] | |||
'''Location:''' [[Yume Nikki:White Desert A#Monoko's Tunnel|White Desert A]] | |||
'''Prompt: ''' Near the northern side of the White Desert A is a tunnel which has Monoko inside. To activate the event, Madotsuki must use the [[Yume Nikki:Effects#Stoplight|Stoplight]] effect and then interact with Monoko. | |||
'''Description:''' Upon using the Stoplight effect, Monoko will transform into a malformed state. Interacting with her will cause a drum beat to start playing as a detailed image of her begins spinning onscreen, constantly moving away and towards the screen. | |||
{{clear}} | |||
==[[Yume Nikki:Severed Heads|Severed Heads]] in the Sky== | ==[[Yume Nikki:Severed Heads|Severed Heads]] in the Sky== | ||
'''Location:''' [[Yume Nikki:White Desert A| | [[File:YN Severed Head Female.png|thumb|One of the severed heads flying by.]] | ||
'''Location:''' [[Yume Nikki:White Desert A#White Desert Path|White Desert A]] | |||
'''Prompt:''' | '''Prompt:''' Using the [[Yume Nikki:Effects#Knife|Knife]] effect, stab the [[Yume Nikki:Dave Spector|Dave Spector]] standing near the looping tunnel in the southwest portion of White Desert A. After doing so, enter the looping tunnel from the right. This will teleport Madotsuki to a pathway where she must travel all the way to the left. A small building lies at the end of the path. | ||
'''Description:''' | '''Description:''' Upon entering the building at the end of the path, one of two severed heads will fly in and start spinning in the sky above. One possible severed heads resembles a woman while the other resembles a man. If Madotsuki exits the building, the severed head above her will quickly fly away. | ||
{{clear}} | |||
[[File: | ==[[Yume Nikki:Sewers#Sewer Drawings|Sewer Drawings]]== | ||
[[ | [[File:YN Sewer Drawing.png|thumb|One of the nine Sewer Drawings.]] | ||
'''Location:''' [[Yume Nikki:Sewers|Sewers]] | |||
'''Prompt:''' There are several black apertures in the walls of the Sewers that can be interacted with. There are two in the room with the [[Yume Nikki:Nopperabou Ghost|Nopperabou Ghost]], five in the second sewer tunnel leading to [[Yume Nikki:Big Red|Big Red]], and two in the third tunnel with the staircase to the [[Yume Nikki:Docks A|Docks A]]. | |||
'''Description:''' Upon interacting with any of the black frames, the drawing will pop out towards the screen and quickly fade away. Each hole has a unique drawing, with varying size and style. | |||
{{clear}} | |||
==Spaceship Crash== | |||
[[File:YN Spaceship Alert.png|thumb|LOSING ALTITUDE!!]] | |||
'''Location:''' The [[Yume Nikki:Spaceship|Spaceship]] | |||
'''Prompt:''' When Madotsuki gets into the bed on the Spaceship, there is a 1/6 chance she will fall asleep and the event will occur. | |||
'''Description:''' Madotsuki awakens to the sound of an alarm going off. When she gets out of bed, the red emergency lights are flashing and the Spaceship is losing altitude. [[Yume Nikki:Seccom Masada-sensei|Seccom Masada-sensei]] will be panicking at the organ, and after about 15 seconds a cutscene of the ship crashing on [[Yume Nikki:Mars|Mars]] will play. | |||
{{clear}} | |||
==[[Yume Nikki:Takofuusen|Takofuusen]]== | |||
[[File:YN Takofuusen.png|thumb|Takofuusen floats on by.]] | |||
'''Location:''' [[Yume Nikki:White Desert A|White Desert A]] | |||
'''Prompt:''' 1/3600 chance of appearing in every 0.5-second interval when Madotsuki stays in the main area of White Desert A, moving or not. It does not appear in any of the tunnels or other maps associated with the White Desert. By probability, it is expected to appear once every half hour. | |||
'''Description:''' Takofuusen appears, floating past the screen in a straight line while making an odd sound that is similar to a drum beat. It is not possible to interact with it, even with effects. | |||
{{clear}} | |||
==Toriningen Party== | |||
[[File:Toriningenparty.png|thumb|Dance like nobody's watching!]] | |||
'''Location:''' The far left end of the [[Yume Nikki:Wilderness|Wilderness]] | |||
'''Prompt:''' After arriving at the Wilderness from [[Yume Nikki:Dark World|Dark World]], weave through the plants until you are reach a clearing on the left side of the room. Madotsuki will be greeted with a short pathway clearing in the plants, which leads to the event. | |||
'''Description:''' The player is greeted by a small, non-looping screen where there are three [[Yume Nikki:Toriningen|Toriningen]] (one of each hairstyle) having a party, complete with upbeat music and picnic cloths with food on them. The Toriningen even laugh and spin on the spot, simulating dancing. The player is blocked behind some plants and therefore cannot enter the party, but can still use the [[Yume Nikki:Effects#Cat|Cat]] and [[Yume Nikki:Effects#Stoplight|Stoplight]] effects to mess around with the Toriningen. | |||
==[[Yume Nikki: | ==[[Yume Nikki:Uboa|Uboa]]== | ||
[[File: | [[File:Uboaroom.jpg|thumb|OH MY GOSH CAN I GET AN AUTOGRAPH?]] | ||
'''Location:''' | '''Location:''' [[Yume Nikki:Poniko's House|Poniko's House]], in the [[Yume Nikki:Pink Sea|Pink Sea]] | ||
'''Prompt: | '''Prompt:''' 1/64 chance of occurring when Madotsuki switches off the lights in Poniko's House, with a 5-second cooldown which may be circumvented by leaving and re-entering the room. | ||
'''Description:''' | '''Description:''' When the event is triggered, there will be a brief flash of light. Uboa will replace [[Yume Nikki:Poniko|Poniko's]] sprite, and the entire house will shake and completely change its form. Madotsuki will be unable to turn the light back on or leave Poniko's house. By walking up to Uboa, Madotsuki will be transported in a [[Yume Nikki:Poniko's House#Uboa's Trap|looping world]] with a [[Yume Nikki:Bloody Touching Monster|bleeding creature]] in the background and the music from the White Desert playing. The only way to get out of this room is to pinch yourself awake or use the [[Yume Nikki:Effects#Medamaude|Medamaude]] effect. | ||
If Poniko is killed before the event is triggered, Uboa will not appear, trapping Madotsuki in the shaking reformed house. This will also require waking up or using the Medamaude effect to escape. | |||
{{ | {{clear}} | ||
}} | |||
==[[Yume Nikki:UFO|UFOs]] on Mars== | ==[[Yume Nikki:UFO|UFOs]] on Mars== | ||
[[File:YN Mars UFOs.png|thumb|Six UFOs attracted to the summit.]] | |||
'''Location:''' The [[Yume Nikki:Mars|Martian Summit]] on Mars | '''Location:''' The [[Yume Nikki:Mars|Martian Summit]] on Mars | ||
'''Prompt: | '''Prompt:''' 1/4 chance of appearing when Madotsuki meows with the [[Yume Nikki:Effects#Cat|Cat]] effect on the Martian Summit. | ||
'''Description:''' | '''Description:''' Small objects will zoom onto the scene from the distant sky and hover in the air when called repeatedly with the Cat effect. The player has 35 attempts to attract the Mars UFOs before they stop appearing. By the probability, an average of eight UFOs can be summoned each time you enter the screen. If the summit is exited, the UFOs will disappear. | ||
{{clear}} | |||
[[File: | ==Witch's Flight== | ||
[[ | [[File:Yn-flight.png|thumb|Soaring through the sky.]] | ||
'''Location:''' The [[Yume Nikki:Mall#Mall Rooftop|Mall Rooftop]] | |||
'''Prompt:''' Equip the [[Yume Nikki:Effects#Witch|Witch]] effect, mount the broom, and fly off the edge of the roof. | |||
'''Description:''' Using the Witch effect and flying to the right side of the building will yield a flash. After the flash, you are able to control Madotsuki flying through the clouds, in the style of a 2D arcade game. Pressing the interact button lets the player return back to the rooftop. Pressing 1 causes the broom to disappear mid-flight, causing the screen to black out. The dream then ends prematurely with Madotsuki lying on the floor. | |||
{{clear}} | |||
==Trivia== | |||
*[[Yume Nikki:Old Versions|Old versions]] of the game feature some [[Yume Nikki:Old Versions#Removed Events|removed events]] that are unavailable in 0.10. | |||
**The first removed event, NASU Link, may have been removed as the area it would lead to, [[Yume Nikki:FC World C|FC World C]], is lacking content. | |||
**The other removed event, the Toriningen's Bed, was probably removed as it was replaced with a portal to a then-new area, the White Desert. | |||
[[Category:Yume Nikki Guides]] | |||
[[Category:Yume Nikki Events]] | [[Category:Yume Nikki Events]] | ||
[[Category: | [[Category:Game Collectables]] | ||
Latest revision as of 18:02, 19 November 2024
When exploring the dream world, Madotsuki will occasionally come across strange, noteworthy events. These make up most of the memorable content of the game and provide intriguing perspectives of the many dream worlds. Many theories have been developed to attempt to explain what the events represent, if anything.
Some events happen as a result of a specific trigger (e.g. Madotsuki interacting with an object, such as the TV in her dream bedroom), whereas others (such as Takofuusen) are not directly caused by the player.
ああああああああ
Location: Number World
Prompt: Stab the Toriningen in the bed room with the Knife effect to turn her 'lunatic', then allow her to catch you. You will be randomly transported to one of two different enclosed spaces where the event occurs, with an equal chance of either.
Description: The enclosed area that Madotsuki is taken to will have a different unique tile on the floor depending on where she is trapped. In the Number World trap, a tile depicting a red 'あ' character (the hiragana character for "A") can be stepped on to fill all of the area's empty tiles with the character, hence the event's name. In the Lamp World trap, a tile depicting a pink, bloodshot eye can be stepped on to fill all of the area's empty tiles with the eye, partially forming what appear to be faces.
Aztec Rave Monkey
Location: The Rave Box in the Wilderness
Prompt: Interact with the hollow Rave Box near the western area of the Wilderness.
Description: Upon interacting with the Rave Box, the screen will fade to black before the Aztec Rave Monkey suddenly flashes onscreen, rapidly flashing through various states and appearances as upbeat music plays. The player can dismiss this event by pressing the interact button, returning to the Wilderness.
Crick in the Neck
Location: Madotsuki's Room
Prompt: A 1/64 chance of occurring when Madotsuki wakes up.
Description: Occasionally, when Madotsuki gets out of bed she will have a 'crick' in her neck, causing her head to be constantly turned to the left. In this state, she is unable to write in her diary or play NASU, and has no choice but to go back to sleep. The effect will wear off when she falls asleep again.
This event does not activate if all of the effects have been left in the Nexus, making it impossible to perform the ending sequence with a cricked neck.
Ending
Location: Madotsuki's Balcony
Prompt: Drop all 24 of the effects in the Nexus.
Description: See Ending for details. Contains spoilers.
FACE
Location: The Stairway in Number World
Prompt: There is a 1/4 chance per dream session that a Zippertile in the southeastern corner of Number World will have a sad expression with an open mouth instead of a smiling expression. Stabbing the Zippertile with the Knife will cause it to bleed and rip open, leading to the Stairway. Upon heading right in this new area, Madotsuki will encounter KyuuKyuu-kun and a door that is identical to the one in her room. Open the door to trigger the event.
Description: Upon opening the door, the screen will slowly fade to black and FACE will slowly begin fading in as a loud droning noise plays. FACE rapidly flashes between multiple different colors as the droning noise gets longer. They can not be dismissed until watched for a full ten seconds, to which then a rushing noise plays as Madotsuki suddenly awakens and leaves her bed.
Falling Men
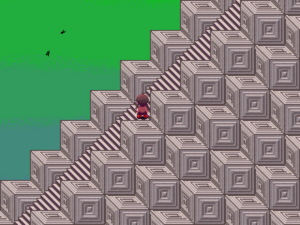
Location: The Stairway to the Sky in the Wilderness that leads to the Sky Garden
Prompt: Determined when Madotsuki sets foot on two specific points on the Stairway to the Sky. There is a 1/4 chance of the first man appearing and a 1/4 chance of a second one appearing if the first one did.
Description: An object resembling a person appears in the sky in the distance. It spins as if falling downward, however, the figure moves in a circular motion and never actually hits the ground. The chance of witnessing two at once is 1/16.
Famicom Glitch
Location: One of the rooms in the FC Dungeon
Prompt: A 1/3 chance of availability, determined when Madotsuki falls asleep. In the FC Dungeon, travel to the deepest room. Unlike the others, this room is fully lit and will not require the Lamp effect to be equipped. Stand in the top-left corner of the room and interact with the west wall.
Description: When interacted with, and if the chance is successful, the wall tile produces a text box with a 'typing' sound like the Lizardmen, but no text is shown. Doing this repeatedly gradually causes the room to corrupt until the game eventually 'crashes' with a nasty stuttering sound. This causes Madotsuki to wake up.
Note that despite the event name, this is not an actual glitch and is intentionally programmed to happen. This event is possibly a homage to two glitches found in Earthbound.
KALIMBA TV Channel
Location: Madotsuki's Dream Room
Prompt: 1/8 chance of appearing whenever the TV is switched on in Madotsuki's Dream Room.
Description: When the event has been activated, the TV will show the face of one of the KALIMBA. The screen then fades to black and two oppositely-scrolling rows of KALIMBA appear across the screen while a tribal/electronic rhythm plays on a short loop. Upon dismissing the event, the KALIMBA fade away and the TV automatically turns off.
Melting Madotsuki
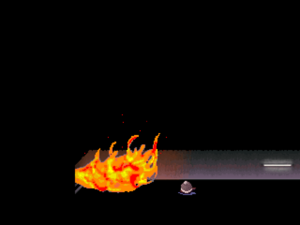
Location: The Blazing Corridor, in Underground World
Prompt: 1/5 for each bed that takes you to Staircase of Hands.
While in Snow World, turn into a snowman by using the Hat and Scarf effect. As a snowman, sleep in a bed (the Snow World bed being the closest) and, if the chance is successful, Madotsuki will be taken to Staircase of Hands. Walk down the staircase and continue left in Underground World. Once you have reached the flames of the Blazing Corridor, stand as close to the flames as possible. The snow of the Yuki-onna effect cannot be used as it will stay active and put out the fire.
Description: After some time, the heat from the flames will begin to melt Madotsuki. First, she will turn short and still be allowed to move around, although standing there for longer will turn her into a puddle of water with the Hat and Scarf sitting on top. After turning into a puddle, Madotsuki will simply turn back to normal while wearing the Hat and Scarf effect.
Monoe
Location: White Desert A
Prompt: Using the Knife effect, stab the Dave Spector standing near the looping tunnel in the southwest portion of White Desert A. After doing so, enter the looping tunnel from the left. This will teleport Madotsuki to a dark void where she must find Monoe.
Description: Upon interacting with Monoe, a detailed close-up image of her appears onscreen. When the image fades out, it is revealed that Monoe has teleported elsewhere in the void she inhabits. The player is able to find her again after teleporting and activate the close-up again upon interaction.
Monoko
Location: White Desert A
Prompt: Near the northern side of the White Desert A is a tunnel which has Monoko inside. To activate the event, Madotsuki must use the Stoplight effect and then interact with Monoko.
Description: Upon using the Stoplight effect, Monoko will transform into a malformed state. Interacting with her will cause a drum beat to start playing as a detailed image of her begins spinning onscreen, constantly moving away and towards the screen.
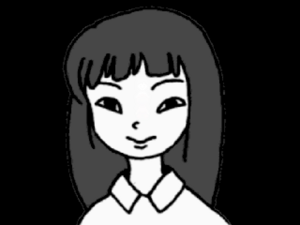
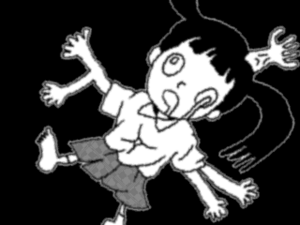
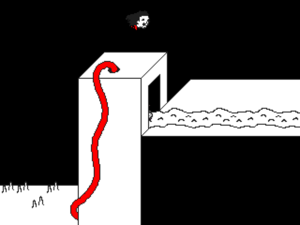
Severed Heads in the Sky
Location: White Desert A
Prompt: Using the Knife effect, stab the Dave Spector standing near the looping tunnel in the southwest portion of White Desert A. After doing so, enter the looping tunnel from the right. This will teleport Madotsuki to a pathway where she must travel all the way to the left. A small building lies at the end of the path.
Description: Upon entering the building at the end of the path, one of two severed heads will fly in and start spinning in the sky above. One possible severed heads resembles a woman while the other resembles a man. If Madotsuki exits the building, the severed head above her will quickly fly away.
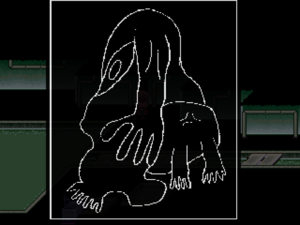
Sewer Drawings
Location: Sewers
Prompt: There are several black apertures in the walls of the Sewers that can be interacted with. There are two in the room with the Nopperabou Ghost, five in the second sewer tunnel leading to Big Red, and two in the third tunnel with the staircase to the Docks A.
Description: Upon interacting with any of the black frames, the drawing will pop out towards the screen and quickly fade away. Each hole has a unique drawing, with varying size and style.
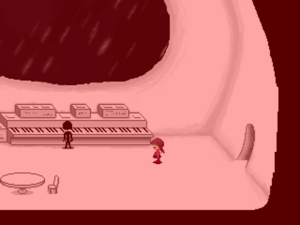
Spaceship Crash
Location: The Spaceship
Prompt: When Madotsuki gets into the bed on the Spaceship, there is a 1/6 chance she will fall asleep and the event will occur.
Description: Madotsuki awakens to the sound of an alarm going off. When she gets out of bed, the red emergency lights are flashing and the Spaceship is losing altitude. Seccom Masada-sensei will be panicking at the organ, and after about 15 seconds a cutscene of the ship crashing on Mars will play.
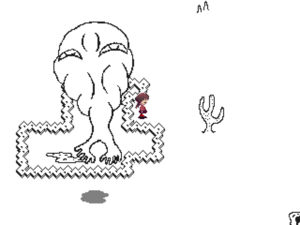
Takofuusen
Location: White Desert A
Prompt: 1/3600 chance of appearing in every 0.5-second interval when Madotsuki stays in the main area of White Desert A, moving or not. It does not appear in any of the tunnels or other maps associated with the White Desert. By probability, it is expected to appear once every half hour.
Description: Takofuusen appears, floating past the screen in a straight line while making an odd sound that is similar to a drum beat. It is not possible to interact with it, even with effects.
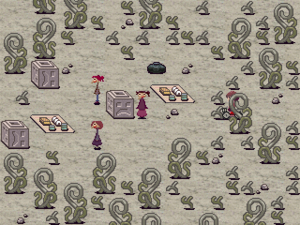
Toriningen Party
Location: The far left end of the Wilderness
Prompt: After arriving at the Wilderness from Dark World, weave through the plants until you are reach a clearing on the left side of the room. Madotsuki will be greeted with a short pathway clearing in the plants, which leads to the event.
Description: The player is greeted by a small, non-looping screen where there are three Toriningen (one of each hairstyle) having a party, complete with upbeat music and picnic cloths with food on them. The Toriningen even laugh and spin on the spot, simulating dancing. The player is blocked behind some plants and therefore cannot enter the party, but can still use the Cat and Stoplight effects to mess around with the Toriningen.
Uboa
Location: Poniko's House, in the Pink Sea
Prompt: 1/64 chance of occurring when Madotsuki switches off the lights in Poniko's House, with a 5-second cooldown which may be circumvented by leaving and re-entering the room.
Description: When the event is triggered, there will be a brief flash of light. Uboa will replace Poniko's sprite, and the entire house will shake and completely change its form. Madotsuki will be unable to turn the light back on or leave Poniko's house. By walking up to Uboa, Madotsuki will be transported in a looping world with a bleeding creature in the background and the music from the White Desert playing. The only way to get out of this room is to pinch yourself awake or use the Medamaude effect.
If Poniko is killed before the event is triggered, Uboa will not appear, trapping Madotsuki in the shaking reformed house. This will also require waking up or using the Medamaude effect to escape.
UFOs on Mars
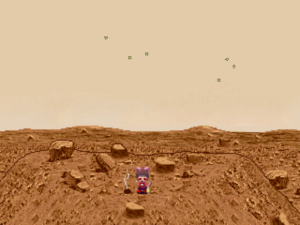
Location: The Martian Summit on Mars
Prompt: 1/4 chance of appearing when Madotsuki meows with the Cat effect on the Martian Summit.
Description: Small objects will zoom onto the scene from the distant sky and hover in the air when called repeatedly with the Cat effect. The player has 35 attempts to attract the Mars UFOs before they stop appearing. By the probability, an average of eight UFOs can be summoned each time you enter the screen. If the summit is exited, the UFOs will disappear.
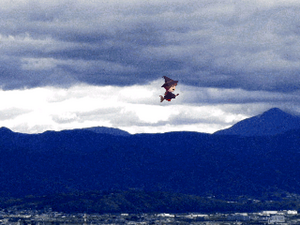
Witch's Flight
Location: The Mall Rooftop
Prompt: Equip the Witch effect, mount the broom, and fly off the edge of the roof.
Description: Using the Witch effect and flying to the right side of the building will yield a flash. After the flash, you are able to control Madotsuki flying through the clouds, in the style of a 2D arcade game. Pressing the interact button lets the player return back to the rooftop. Pressing 1 causes the broom to disappear mid-flight, causing the screen to black out. The dream then ends prematurely with Madotsuki lying on the floor.
Trivia
- Old versions of the game feature some removed events that are unavailable in 0.10.
- The first removed event, NASU Link, may have been removed as the area it would lead to, FC World C, is lacking content.
- The other removed event, the Toriningen's Bed, was probably removed as it was replaced with a portal to a then-new area, the White Desert.

