No edit summary |
m (add category) |
||
| (68 intermediate revisions by 23 users not shown) | |||
| Line 1: | Line 1: | ||
[[File:Yumemap.png|thumb|Flowchart of all the locations | [[File:Yumemap.png|thumb|Flowchart of all the locations.]] | ||
Yume Nikki | ''[[Yume Nikki:Yume Nikki|Yume Nikki]]'' has many interconnected locations that vary wildly in theme and size. Some locations also house collectible [[Yume Nikki:Effects|effects]] and may also contain [[Yume Nikki:Events|events]]. This is a list of all the worlds of ''Yume Nikki''. | ||
The dream world is an intricate labyrinth of openly looping regions and obscure pathways, but | The dream world is an intricate labyrinth of openly looping regions and obscure pathways, but features distinct locations that each have a unique identity. Locations wildly range from small linear paths to large mazes that are a challenge to navigate even with a [[Yume Nikki:World Maps|world map]]. | ||
__TOC__ | |||
<center> | |||
<h2 style="background:#101010; border:5px solid #181C29; color:#FFFFFF; font-weight:bold; padding:1px;">Real World</h2><span id="The Real World"></span> | |||
The only location in the game that actually exists, though a dream version of it is present as well. | |||
{{Listloc | |||
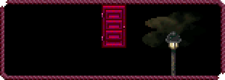
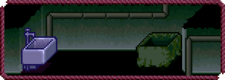
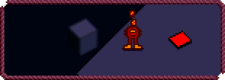
|name = Madotsuki's Room | |||
|image = Yn_card_madoroom.png | |||
|link = Madotsuki's Room | |||
|aka = 現実の部屋 | |||
|description = The place Madotsuki starts, both in the real world and the dream world. In the real world, she can't leave her room, but she can play ''[[Yume Nikki:NASU|NASU]]'' and save the game.}} | |||
<h2 style="background:#101010; border:5px solid #181C29; color:#FFFFFF; font-weight:bold; padding:1px;">Original Locations</h2><span id="The Original Locations"></span> | |||
These are the places in the dream world that are accessible to the player from the very start of the dream, most of which have floating backgrounds and objects plastered around seemingly randomly. They lead to all of the deeper locations, and contain half of all of the [[Yume Nikki:Effects|effects]]. | |||
{{Listloc | |||
|name = Nexus | |||
|image = Yn_card_nexus_t.png | |||
|link = Nexus | |||
|aka = 扉部屋 | |||
|description = A hub containing doors leading to the dream version of Madotsuki's Room and the twelve original locations. It is one of the few places to not have any music, making it suspenseful.}} | |||
{{Listloc | |||
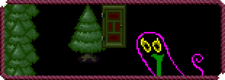
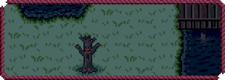
|name = Forest World | |||
|image = Yn_card_forest_t.png | |||
|link = Forest World | |||
|aka = 森の世界 | |||
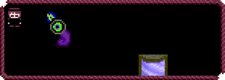
|description = An eerie forested area filled with clumps of trees. Many [[Yume Nikki:Namekuji|ghost-like creatures]] inhabit the area and the [[Yume Nikki:Aztec Rave Monkey|Aztec Rave Monkey]] can be seen in the world's background. The [[Yume Nikki:Effects#Frog|Frog]] effect can also be found here.}} | |||
{{Listloc | |||
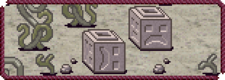
|name = Block World | |||
|image = Yn_card_block_t.png | |||
|link = Block World | |||
|aka = ブロックの世界 | |||
|description = A world full of blocks of varying shapes and sizes with an isometric perspective, almost like a maze. The [[Yume Nikki:Effects#Hat and Scarf|Hat & Scarf]] effect lies inside, with a similar hat and scarf being worn by [[Yume Nikki:Mafurako|Mafurako]], this world's only inhabitant.}} | |||
{{Listloc | |||
|name = Puddle World | |||
|image = Yn_card_puddle_t.png | |||
|link = Puddle World | |||
|aka = 水溜りの世界 | |||
|description = A dark world filled with puddles reflecting a dark sky, lamp posts that can be turned on and off, and a flight of stairs leading downwards to the [[Yume Nikki:Dense Woods A|Dense Woods A]]. The [[Yume Nikki:Effects#Umbrella|Umbrella]] effect can be found here.}} | |||
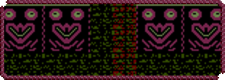
{{Listloc | |||
|name = Dark World | |||
|image = Yn_card_dark_t.png | |||
|link = Dark World | |||
|aka = 暗闇の世界 | |||
|description = A pitch-black world with tribal patterns on the ground. The [[Yume Nikki:Effects#Knife|Knife]] effect is found here. Creatures known as [[Yume Nikki:Pissipissini|Pissipissini]] wander here while a ghost-like entity named [[Yume Nikki:Follony|Follony]] may follow Madotsuki.}} | |||
{{Listloc | |||
|name = Snow World | |||
|image = Yn_card_snow_t.png | |||
|link = Snow World | |||
|aka = 雪の世界 | |||
|description = A snowy world with evergreen trees, igloos, and a [[Yume Nikki:Beds|bed]]. One of the igloos contains a portal to the Pink Sea while another has a [[Yume Nikki:Kamakurako|sleeping girl]]. A wandering [[Yume Nikki:Yuki-onna|Yuki-onna]] is found here, which gives Madotsuki the [[Yume Nikki:Effects#Yuki-onna|Yuki-onna]] effect.}} | |||
{{Listloc | |||
|name = Mural World | |||
|image = Yn_card_mural_t.png | |||
|link = Mural World | |||
|aka = 壁画の世界 | |||
|description = A world filled with large murals depicting strange creatures. A manhole that leads to the Sewers can be found here. Two [[Yume Nikki:Mouth Monster|Mouth Monsters]] can be found near pools of blood, giving Madotsuki the [[Yume Nikki:Effects#Long Hair|Long Hair]] and [[Yume Nikki:Effects#Blonde Hair|Blonde Hair]] effects.}} | |||
{{Listloc | |||
|name = Graffiti World | |||
|image = Yn_card_graffiti_t.png | |||
|link = Graffiti World | |||
|aka = 落書きの世界 | |||
|description = A colorful world with noisy tiles that form a large mosaic featuring two odd creatures. An elevator to the Mall, a women's restroom, and the [[Yume Nikki:Effects#Bicycle|Bicycle]] effect can all be found here, with the latter being directly west of the Nexus door.}} | |||
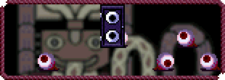
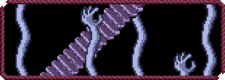
{{Listloc | |||
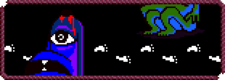
|name = Eyeball World | |||
|image = Yn_card_eyeball_t.png | |||
|link = Eyeball World | |||
|aka = 目玉の世界 | |||
|description = A world filled with grasping arms, gouged eyeballs, and bouncing legs. One of the arms has an eye embedded in its palm, which gives the [[Yume Nikki:Effects#Medamaude|Medamaude]] effect upon interaction. A [[Yume Nikki:Severed Blue Head|blue head]] here takes the player to the Footprint Path.}} | |||
{{Listloc | |||
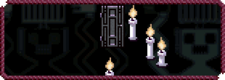
|name = Candle World | |||
|image = Yn_card_candle_t.png | |||
|link = Candle World | |||
|aka = 蝋燭の世界 | |||
|description = A world filled with many lit candles, some even [[Yume Nikki:Walking Candles|walking]]. A [[Yume Nikki:Dwarf|dwarf]] runs across this world, which will reward Madotsuki with the [[Yume Nikki:Effects#Midget|Midget]] effect if she can catch him. An incredibly fast [[Yume Nikki:Toriningen|Toriningen]] also lives here, able to outspeed Madotsuki easily.}} | |||
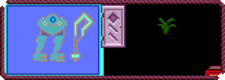
{{Listloc | |||
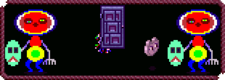
|name = Shield-folk World | |||
|image = Yn_card_shieldfolk_t.png | |||
|link = Shield-folk World | |||
|aka = 盾民族の世界 | |||
|description = The home of the rather lethargic and immobile [[Yume Nikki:Shield-Folk|Shield-Folk]], as well as many odd tiles resembling eyes. A spinning [[Yume Nikki:Nekoin|Nekoin]] can be found here, which gives the [[Yume Nikki:Effects#Cat|Cat]] effect upon finding them. There is also a gate leading to the Static Maze here.}} | |||
{{Listloc | |||
|name = Neon World | |||
|image = Yn_card_neon_t.png | |||
|link = Neon World | |||
|aka = ネオンの世界 | |||
|description = A labyrinthine area inhabited by many [[Yume Nikki:Neon Creatures|colorful creatures]], making it slightly difficult to navigate. The [[Yume Nikki:Effects#Neon|Neon]] effect, obtained from the [[Yume Nikki:Neon Parrot|Neon Parrot]], can be found here. A doorway to the [[Yume Nikki:Neon Tile Path|Neon Tile Path]] is also found here.}} | |||
{{Listloc | |||
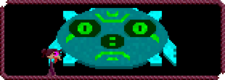
|name = Number World | |||
|image = Yn_card_numb_t.png | |||
|link = Number World | |||
|aka = 数字の世界 | |||
|description = An unsettling area adorned with numbers on the ground and many odd characters. [[Yume Nikki:Zippertile|Zippertiles]] cover the walls, one of which can lead to [[Yume Nikki:KyuuKyuu-kun|KyuuKyuu-kun]] and the [[Yume Nikki:Events#FACE|FACE]] event. [[Yume Nikki:Number World#Stabbing Room|One room]] in this world is filled with over one hundred [[Yume Nikki:Wheelies|Wheelies]].}} | |||
== The | <h2 style="background:#101010; border:5px solid #181C29; color:#FFFFFF; font-weight:bold; padding:1px;">Deeper Locations</h2> | ||
=== [[Madotsuki's | These worlds are accessed from the original locations and have more depth and personality to them, containing more than simple backgrounds and random objects. The remaining half of the effects that the player must get are found within some of these places. | ||
{{Listloc | |||
|name = Face Carpet Plaza | |||
|image = Yn_card_facecarpet_t.png | |||
|link = Face Carpet Plaza | |||
|aka = 顔絨毯広場 | |||
|description = A small area filled with carpets resembling masks. Found in-between a pair of pillars in the Forest World, this area connects to Hell. There is a lunatic Toriningen here.}} | |||
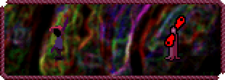
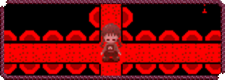
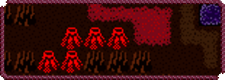
{{Listloc | |||
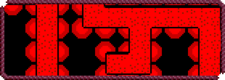
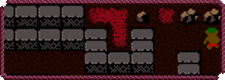
|name = Hell | |||
|image = Yn_card_hell_t.png | |||
|link = Hell | |||
|aka = 地獄 | |||
|description = A massive, bright red labyrinth with many branching pathways filled with lunatic Toriningen. There are many dead ends and connections to other areas.}} | |||
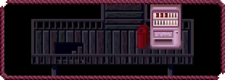
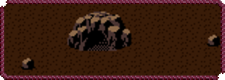
{{Listloc | |||
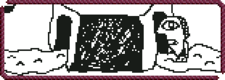
|name = White Desert | |||
|image = Yn_card_desert_t.png | |||
|link = White Desert | |||
|aka = 白黒世界 | |||
|description = The second largest area in the game: a monochrome land notable for its unnerving art style and sheer amount of strange characters and events found within, but not a single effect.}} | |||
{{Listloc | |||
|name = Dense Woods | |||
|image = Yn_card_woods_t.png | |||
|link = Dense Woods | |||
|aka = 樹海 | |||
|description = A rather large area full of trees that connects to various other locations. Rain falls heavily, and a few [[Yume Nikki:Jellyfish|Jellyfish]] populate the area. The [[Yume Nikki:Effects#Stoplight|Stoplight]] effect can be found here.}} | |||
{{Listloc | |||
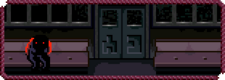
|name = Traincar | |||
|image = Yn_card_traincar_t.png | |||
|link = Traincar | |||
|aka = 樹海の電車 | |||
|description = A seemingly normal train car that has [[Yume Nikki:Train Passengers|a few monsters]] sitting inside. Sitting on one of the seats for approximately seven seconds leads Madotsuki to the Witch's Island.}} | |||
{{Listloc | |||
|name = Witch's Island | |||
|image = Yn_card_witchisland_t.png | |||
|link = Witch's Island | |||
|aka = 樹海の島 | |||
|description = A forest beside a lake of some sort. It appears to be windy, as the [[Yume Nikki:Nopperabou Witches|Nopperabou Witches]]' dresses wiggle slightly. A long bridge crossing the lake leads to the [[Yume Nikki:Effects#Witch|Witch]] effect. }} | |||
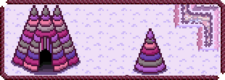
{{Listloc | |||
|name = The Wilderness | |||
|image = Yn_card_wilderness_t.png | |||
|link = The Wilderness | |||
|aka = ゼンマイ荒野 | |||
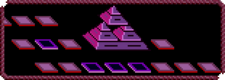
|description = A vast expanse of curly plants and arid soil, reviled for being difficult to navigate. Many events and the [[Yume Nikki:Effects#Towel|Towel]] effect hide inside. There is also a giant pyramid with a long staircase.}} | |||
{{Listloc | |||
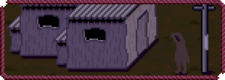
|name = Barracks Settlement | |||
|image = Yn_card_barracks_t.png | |||
|link = Barracks Settlement | |||
|aka = バラック集落 | |||
|description = A small village located past a fence in the Wilderness. It is filled with shacks and telephone poles, and [[Yume Nikki:Pirori|Pirori]] wander the streets. One shack houses a [[Yume Nikki:Seahorse|seahorse]] head.}} | |||
{{Listloc | |||
|name = FC World B | |||
|image = Yn_card_fcworldb_t.png | |||
|link = FC World B | |||
|aka = FC世界(右手側) | |||
|description = One of the few FC worlds, accessed after interacting with a random Pirori. The [[Yume Nikki:Effects#Buyo Buyo|Buyo Buyo]] effect can be found here, as well as some wandering [[Yume Nikki:Lizardman|Lizardmen]].}} | |||
{{Listloc | |||
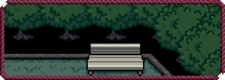
|name = Sky Garden | |||
|image = Yn_card_skygarden_t.png | |||
|link = Sky Garden | |||
|aka = 空中庭園 | |||
|description = A small park at the top of the Wilderness pyramid. It features a prominent background of a beautiful city night. The [[Yume Nikki:Maussan Bros|Maussan Bros]] and [[Yume Nikki:Organoid|Organoid]] can be found here.}} | |||
{{Listloc | |||
|name = Ghost World | |||
|image = Yn_card_ghost_t.png | |||
|link = Ghost World | |||
|aka = コンクリ廃墟 | |||
|description = Accessed through the flowery tunnel in the Sky Garden, this bleak, featureless area houses the [[Yume Nikki:Effects#Triangle Kerchief|Triangle Kerchief]] effect and three [[Yume Nikki:Ghostmen|floating chromosome-like creatures]].}} | |||
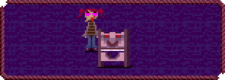
{{Listloc | |||
|name = Pink Sea | |||
|image = Yn_card_shoal_t.png | |||
|link = Pink Sea | |||
|aka = 浅瀬 | |||
|description = Found through one of the igloos in Snow World, this area houses [[Yume Nikki:Poniko|Poniko]] in her house. The area is filled with little islands and colored balloons that teleport Madotsuki.}} | |||
{{Listloc | |||
|name = Sewers | |||
|image = Yn_card_sewers_t.png | |||
|link = Sewers | |||
|aka = 下水道美術館 | |||
|description = A gloomy sewer system where the [[Yume Nikki:Effects#Nopperabou|Nopperabou]] effect and a large creature named [[Yume Nikki:Big Red|Big Red]] wait. Holes in the wall show images of cartoonish but disturbing entities.}} | |||
{{Listloc | |||
|name = Windmill World | |||
|image = Yn_card_windmill_t.png | |||
|link = Windmill World | |||
|aka = 腹の中 | |||
|description = An empty, looping area reached via Big Red's gaping maw. There are a few windmills and the [[Yume Nikki:Fisherman|Fisherman]] which leads to the Docks.}} | |||
{{Listloc | |||
|name = Docks | |||
|image = Yn_card_docks_t.png | |||
|link = Docks | |||
|aka = 湖回廊 | |||
|description = This area is divided | |||
into two sections, one accessible from Hell, the other from Windmill World. The [[Yume Nikki:Effects#Fat|Fat]] effect can be found in the former section.}} | |||
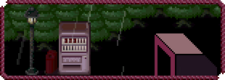
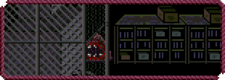
{{Listloc | |||
|name = Mall | |||
|image = Yn_card_mall_t.png | |||
|link = Mall | |||
|aka = デパート | |||
|description = A slightly gloomy complex, vaguely resembling a shopping mall. Escalators lead to the area's different floors. The [[Yume Nikki:Effects#Flute|Flute]] effect can be found in one of the rooms.}} | |||
{{Listloc | |||
|name = Footprint Path | |||
|image = Yn_card_footprint_t.png | |||
|link = Footprint Path | |||
|aka = 足跡通路 | |||
|description = A dark road marked by white footprints and riddled with the multicolored [[Yume Nikki:Henkei Shita|Henkei Shita]] and [[Yume Nikki:Goppa|Goppa]] creatures. It connects Eyeball World to Hell.}} | |||
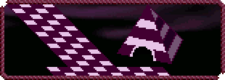
{{Listloc | |||
|name = Checkered Tile Path | |||
|image = Yn_card_checkered_t.png | |||
|link = Checkered Tile Path | |||
|aka = タイル通路 | |||
|description = A narrow, checkered path with an abstract background. A hard-to-evade lunatic Toriningen patrols the area.}} | |||
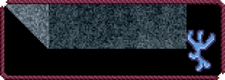
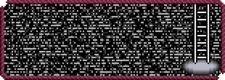
{{Listloc | |||
|name = Static Maze | |||
|image = Yn_card_static_t.png | |||
|link = Static Maze | |||
|aka = ノイズ部屋 | |||
|description = A small, invisible maze that leads to the FC House. Static flashes in the background periodically. A non-maze section of it is accessible before entering FC World A.}} | |||
{{Listloc | |||
|name = FC House | |||
|image = Yn_card_FC_t.png | |||
|link = FC House | |||
|aka = FC小屋 | |||
|description = The most easily accessible FC World that resembles the beginning of the game ''Mother''. Inside, the [[Yume Nikki:Effects#Demon|Demon]] effect is obtained, and there's a long stairway leading to the [[Yume Nikki:Goblins|Goblins]].}} | |||
{{Listloc | |||
|name = Neon Tile Path | |||
|image = Yn_card_neontile_t.png | |||
|link = Neon Tile Path | |||
|aka = ネオン通路 | |||
|description = A narrow passage of noisy red and purple neon tiles in front of a dark background. It connects Neon World to Hell.}} | |||
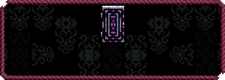
{{Listloc | |||
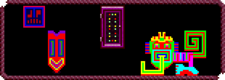
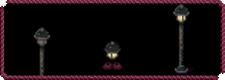
|name = Lamp World | |||
|image = Yn_card_lampworld_t.png | |||
|link = Lamp World | |||
|aka = 電燈の世界 | |||
|description = A moderately-sized world with many lamps. The smallest lamp takes Madotsuki to a sectioned off part of the Checkered Tile Path. The [[Yume Nikki:Effects#Lamp|Lamp]] effect is found here. | |||
}} | |||
{{Listloc | |||
|name = Guillotine World | |||
|image = Yn_card_guillotine_t.png | |||
|link = Guillotine World | |||
|aka = ギロチン部屋 | |||
|description = A small, looping area that houses the [[Yume Nikki:Effects#Severed Head|Severed Head]] effect and numerous lunatic Toriningen. There is also a larger version of this area with eight lunatic Toriningen chasing after you.}} | |||
{{Listloc | |||
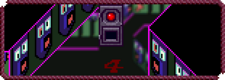
|name = Mini Hell | |||
|image = Yn_card_minihell_t.png | |||
|link = Mini Hell | |||
|aka = 地獄の十字路 | |||
|description = A much smaller and linear version of Hell, resembling a crossroad with closets on each end. In the very middle is [[Yume Nikki:Madotsuki's Ghost|Madotsuki's Ghost]], who is a minor source of [[Yume Nikki:Theories|speculation]] by fans.}} | |||
{{Listloc | |||
|name = Teleport Maze | |||
|image = Yn_card_telmaze_t.png | |||
|link = Teleport Maze | |||
|aka = ブロック大空洞 | |||
|description = A large area full of floating platforms with interconnecting teleporters, the Teleport Maze can be accessed via the [[Yume Nikki:Dense Woods B|Dense Woods B]]. Completing the maze takes Madotsuki to FC World A.}} | |||
{{Listloc | |||
|name = FC World A | |||
|image = Yn_card_fcworlda_t.png | |||
|link = FC World A | |||
|aka = FC世界(小大陸側) | |||
|description = This FC World is a little less open-ended, with a smaller overworld section. After crossing a tiny bridge, Madotsuki is taken to a small castle with an entrance to the [[Yume Nikki:FC Dungeon|FC Dungeon]].}} | |||
{{Listloc | |||
|name = FC Dungeon | |||
|image = Yn_card_fcdungeon_t.png | |||
|link = FC Dungeon | |||
|aka = FC地下遺跡 | |||
|description = This giant maze is very dark, requiring the Lamp effect. The walls are decorated with odd-looking faces. The [[Yume Nikki:Events#Famicom Glitch|Famicom Glitch]] event can be found here.}} | |||
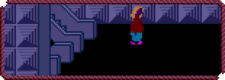
{{Listloc | |||
|name = Staircase of Hands | |||
|image = Yn_card_manosthehandsoffate_t.png | |||
|link = Staircase of Hands | |||
|aka = ベッドの中の階段 | |||
|description = A diagonal staircase found by sleeping in one of five random beds in the dream world. Going downstairs will lead to a corridor with an elevator and a large fire.}} | |||
{{Listloc | |||
|name = Underground World | |||
|image = Yn_card_underground_t.png | |||
|link = Underground World | |||
|aka = 倉庫 | |||
|description = An obscure area accessed through Staircase of Hands by using the Umbrella or Yuki-onna effects on the flames that block your path. The [[Yume Nikki:Effects#Poop Hair|Poop Hair]] effect is found here.}} | |||
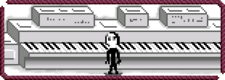
{{Listloc | |||
|name = Spaceship | |||
|image = Yn_card_ship_t.png | |||
|link = Spaceship | |||
|aka = 宇宙船 | |||
|description = A monochrome spaceship, complete with an organ and a nice view of space. It is owned by an alien known as [[Yume Nikki:Seccom Masada-sensei|Seccom Masada-sensei]] by fans. There is also a bed here.}} | |||
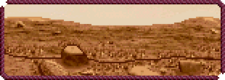
{{Listloc | |||
|name = Mars | |||
|image = Yn_card_mars_t.png | |||
|link = Mars | |||
|aka = 火星 | |||
|description = A rocky wasteland reached after the Spaceship has crashed. There is a steaming vent on top of a summit, accessible by using the Midget effect to go inside.}} | |||
= | <h2 style="background:#101010; border:5px solid #181C29; color:#FFFFFF; font-weight:bold; padding:1px;">Inaccessible Locations</h2> | ||
=== | These are the only locations that are inaccessible to the player without some means of hacking, although [[Yume Nikki:FC World C|FC World C]] was planned to be a full location according to an unused event dubbed [[Yume Nikki:Events#NASU Link|NASU Link]] in [[Yume Nikki:Old Versions|version 0.09]]. | ||
{{Listloc | |||
|name = FC World C | |||
|image = Yn_card_fcworldc_t.png | |||
|link = FC World C | |||
|aka = FC世界 | |||
|description = A fairly large portion of the main FC overworld map that goes completely unused. There even exists another small map that could connect to here.}} | |||
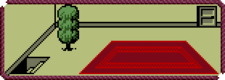
{{Listloc | |||
|name = Debug Room | |||
|image = Yn_card_debug_t.png | |||
|link = Debug Room | |||
|aka = テストマップ | |||
|description = A small room used to test out different features of the game, such as the mirror that used to give the Fat effect or the [[Yume Nikki:Events#Witch's Flight|Witch's Flight]] event. Only reachable by hacking.}} | |||
</center> | |||
[[Category:Yume Nikki Guides]] | |||
[[Category:Yume Nikki Locations|*]] | |||
[[Category:Pages using HTML]] | |||
[[Category: | |||
Latest revision as of 23:12, 11 August 2024

Yume Nikki has many interconnected locations that vary wildly in theme and size. Some locations also house collectible effects and may also contain events. This is a list of all the worlds of Yume Nikki.
The dream world is an intricate labyrinth of openly looping regions and obscure pathways, but features distinct locations that each have a unique identity. Locations wildly range from small linear paths to large mazes that are a challenge to navigate even with a world map.
Real World
The only location in the game that actually exists, though a dream version of it is present as well.
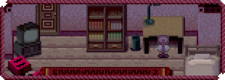
Madotsuki's Room
Original Locations
These are the places in the dream world that are accessible to the player from the very start of the dream, most of which have floating backgrounds and objects plastered around seemingly randomly. They lead to all of the deeper locations, and contain half of all of the effects.
Nexus
Forest World
Block World

Puddle World
Dark World
Snow World

Mural World
Graffiti World

Candle World
Shield-folk World
Neon World
Number World
Deeper Locations
These worlds are accessed from the original locations and have more depth and personality to them, containing more than simple backgrounds and random objects. The remaining half of the effects that the player must get are found within some of these places.
Face Carpet Plaza
Hell
White Desert
Traincar
Witch's Island
The Wilderness
Sky Garden
Ghost World
Pink Sea
Sewers
Windmill World
Docks
Mall
Footprint Path
Checkered Tile Path
Static Maze
Neon Tile Path
Lamp World
Guillotine World
Mini Hell
Teleport Maze
FC World A
FC Dungeon
Staircase of Hands
Underground World
Spaceship
Mars
Inaccessible Locations
These are the only locations that are inaccessible to the player without some means of hacking, although FC World C was planned to be a full location according to an unused event dubbed NASU Link in version 0.09.
FC World C
Debug Room