(→Trivia) |
|||
| Line 549: | Line 549: | ||
*The Frog effect is the only effect that can be found in two separate locations: Forest World and Dense Woods B. | *The Frog effect is the only effect that can be found in two separate locations: Forest World and Dense Woods B. | ||
**The Severed Head effect can technically also be obtained in two different areas, albeit they are variants of one world, them being the normal and big variants of Guillotine World. | **The Severed Head effect can technically also be obtained in two different areas, albeit they are variants of one world, them being the normal and big variants of Guillotine World. | ||
**Before version 0.09, both the Frog and Severed Head effects were still only obtainable in one location, as the Frog in Dense Woods B did not give the Frog effect until version 0.10, and the bigger Guillotine World variant was not added until 0.09. | |||
*There are some [[Yume Nikki:Unused Content#Unused Effects|unused effects]] that remain in the files of the game, despite never being implemented in any version. | *There are some [[Yume Nikki:Unused Content#Unused Effects|unused effects]] that remain in the files of the game, despite never being implemented in any version. | ||
*The Midget effect has an unused graphic for eight midgets. This graphic also has an FC World counterpart. | *The Midget effect has an unused graphic for eight midgets. This graphic also has an FC World counterpart. | ||
| Line 554: | Line 555: | ||
*When the English Steam release of ''Yume Nikki'' first came out, the translation used different names for the Fat, Flute, Severed Head, and Demon effects as well as the Instructions, respectively dubbing them "Get Fat", "Whistle", "Talking Head", "Devil", and "Game Info". This was changed 12 days after the original release; the update additionally touched up the descriptions for many effects (including those that were not renamed), ranging from minor grammatical fixes to changing the tone of the text. | *When the English Steam release of ''Yume Nikki'' first came out, the translation used different names for the Fat, Flute, Severed Head, and Demon effects as well as the Instructions, respectively dubbing them "Get Fat", "Whistle", "Talking Head", "Devil", and "Game Info". This was changed 12 days after the original release; the update additionally touched up the descriptions for many effects (including those that were not renamed), ranging from minor grammatical fixes to changing the tone of the text. | ||
**Some of these incorrect names still appear in the [[Yume Nikki:FC Worlds|FC World]] menu and when picking up dropped effect eggs in the Nexus. Curiously, the incomplete version of the FC World menu only contains the incorrect names for the Fat effect and the Instructions. Additionally, the FC World menu misspells Midget as "Miget" when all 24 effects have been collected. | **Some of these incorrect names still appear in the [[Yume Nikki:FC Worlds|FC World]] menu and when picking up dropped effect eggs in the Nexus. Curiously, the incomplete version of the FC World menu only contains the incorrect names for the Fat effect and the Instructions. Additionally, the FC World menu misspells Midget as "Miget" when all 24 effects have been collected. | ||
*Throughout the game's versions, several effects had their locations moved: | |||
**Before 0.07, the Severed Head effect was obtained in Block World, as the Guillotine was located there. In 0.07, the Guillotine was moved to Guillotine World. | |||
**Before 0.08, the Buyo Buyo effect was found inside a shack in the [[Yume Nikki:Barracks Settlement|Barracks Settlement]]. In 0.08, Buyo Buyo was moved to FC World B, with the original Buyo Buyo NPC now being killed by the Seahorse. | |||
**Before 0.09, the Triangle Kerchief effect was obtained in Dark World, as Fleebie was located there. In 0.09, Fleebie was moved to Ghost World. | |||
**Before 0.10, the Fat effect was obtained by interacting with a funhouse mirror located in [[Yume Nikki:Hell|Hell]]. In version 0.10, the mirror was removed and the Fat effect was moved to the Docks B, obtainable from Strober. | |||
**Before 0.10, the Poop Hair effect was located in Mural World alongside the other hair effects. In 0.10, the Mouth Monster granting the Poop Hair effect was moved to Underground World. | |||
***Additionally, the Nopperabou, Towel, and Lamp effects had their positions changed, although their respective effect NPCs stayed within the same worlds they were originally located in. | |||
*In 0.10 and 0.10a, the Witch effect has a bug where, if the player floats with the broom in the Pink Sea, the [[Yume Nikki:Number World#Bed Room|Number World Bed Room]], or the second [[Yume Nikki:Neon Tile Path|Neon Tile Path]] area, the player's footsteps can still be heard while moving around. | *In 0.10 and 0.10a, the Witch effect has a bug where, if the player floats with the broom in the Pink Sea, the [[Yume Nikki:Number World#Bed Room|Number World Bed Room]], or the second [[Yume Nikki:Neon Tile Path|Neon Tile Path]] area, the player's footsteps can still be heard while moving around. | ||
**This is due to the fact that every map contains two copies of the same tileset: one for the regular footstep sound effect and one for the broom. 0.09 included the full code for switching between the two tilesets in every map. This was simplified in 0.10, but the three aforementioned maps were not updated. | **This is due to the fact that every map contains two copies of the same tileset: one for the regular footstep sound effect and one for the broom. 0.09 included the full code for switching between the two tilesets in every map. This was simplified in 0.10, but the three aforementioned maps were not updated. | ||
Revision as of 06:33, 25 December 2024
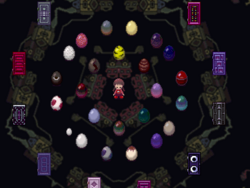
The main objective in Yume Nikki is to collect the 24 effects found throughout the dream world. Some effects grant unique abilities that can be used to access certain events or locations; the rest are mostly cosmetic.
Effects are found by interacting with objects or certain characters. All effect-givers are unique from the other characters in the game. They can be collected in any order, except for the Poop Hair effect, which requires either the Yuki-onna or Umbrella effect first. It is also recommended to get the Lamp effect early, as a couple other effects require passing through dark areas.
Effects can be dropped in the Nexus by pressing 5. They appear as eggs and are removed from the menu. Once all 24 effects are dropped, the player can access the ending.
The name of each effect may be different between translations. The names used by the Uboachan fan translation are preferred due to its historic use by most (English-speaking) players. The names of the English Steam translation and mobile release translation are stated below each header, as well as the original Japanese. The effect descriptions are written with Uboachan first, Steam second, and mobile last (only if it differs from Steam).
Effects
Frog
(かえる)
Become a frog / Transform into a frog.
Appearance: Madotsuki transforms into a humanoid frog, walking with a hunched-over back.
Passive Effect: Madotsuki walks at normal speed through water.
Action: (1) Madotsuki hops in place like a frog.
Location: Either Forest World or Dense Woods B (Frog Path) - Interact with the Frog.
Practical Uses: Walking through the Pink Sea and Uboa's Trap is much faster, although the Bicycle does the same thing.
Umbrella
(かさ)
Open an umbrella / Use an umbrella.
Appearance: Madotsuki holds a red umbrella.
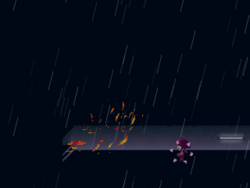
Passive Effect: It rains, which continues until Madotsuki unequips the umbrella into her normal form. The rain also enables the Demon effect to produce a clap of thunder and lightning. She is unable to enter the restrooms in Block World and Graffiti World and cannot enter beds when it is equipped.
Action: (1) Madotsuki spins the umbrella.
Location: Puddle World - Pick it up off the ground.
Practical Uses: Can be used to douse the fire in the Blazing Corridor of Underground World, although the Yuki-onna effect does the same thing. Can be used to stop the rain in the Dense Woods A if the effect is equipped and then unequipped.
Hat and Scarf
Hat & Scarf(ぼうしとマフラー)
Wear a hat and scarf / Don a hat & scarf. / Put on a hat and scarf.
Appearance: Madotsuki wears a hat and scarf.
Passive Effect: In the snowman form, Madotsuki cannot pinch herself awake due to her lack of arms, and she walks twice as slow.
Action: (1) When snowing, Madotsuki transforms into a snowman.
Location: Block World - Pick it up off the ground.
Practical Uses: Interacting with Mafurako in Block World as a snowman will always teleport you back by her side when returning from an upper area. In the Blazing Corridor, standing next to the fire as a snowman will cause Madotsuki to slowly melt and become immobile.
Yuki-onna
Snow Woman(ゆきおんな)
Become the snow woman / Morph into a Snow Woman. / Transform into a snow woman.
Appearance: Madotsuki transforms into a Yuki-onna.
Passive Effect: It snows, which continues until Madotsuki unequips the Yuki-onna effect into her normal form. This enables you to use the Hat and Scarf effect's transformation in any area.
Action: None.
Location: Snow World - Interact with the Yuki-onna.
Practical Uses: Can be used to douse the fire in the Blazing Corridor, although the Umbrella does the same thing. Can be used to stop the snow in Snow World if the effect is equipped and then unequipped.
Knife
Kitchen Knife(ほうちょう)
Wield a kitchen knife / Equip a kitchen knife.
Appearance: Madotsuki holds a knife.
Passive Effect: Mobile NPCs will run away from her. Most characters that can't move will animate faster, as if in panic.
Action:
- (1) Madotsuki switches the knife between her hands.
- (Interact) Madotsuki stabs with the knife, killing or wounding characters. Some characters and objects react strangely or cause something to occur after being stabbed, including:
- Toriningen - Will turn into their lunatic form if they weren't already, and will begin chasing Madotsuki.
- Mars-san - Its eye changes color and a small wound appears on its foot.
- Onsen-san - It completely changes color and stops drinking its water.
- Pain Blob - Shows its face.
- Arms and Legs in the White Desert Path - They twitch.
- Eye Box - Has a 1 in 30 chance of taking you to the Eye People section of the White Desert. The same condition and chance applies to going back to White Desert A.
- Dave Spector - Stabbing the southwest one grants access to other White Desert areas in the tunnel it wanders by.
- Henkei Shita - The one in Hell has a 1 in 256 chance of transporting you to the Footprint Path A.
- Extinguishes candles in Candle World.
- Makes the eyeballs change color in Eyeball World.
Location: Dark World - Pick it up off the ground.
Practical Uses:
- Killing/wounding NPCs.
- Scaring NPCs away from you - can be used to move NPCs that block your way.
- Interacting with the environment.
- Obtaining money by killing NPCs.
- Accessing new areas.
Medamaude
Eye Palm / Evil Hand(めだまうで)
Become Medamaude / Warp into an Eye Palm. / Transform into a evil hand.
Appearance: Madotsuki's head becomes a giant hand with an eye in its palm.
Passive Effect: None.
Action: (1) Madotsuki closes her palm and teleports to the center of the Nexus.
Location: Eyeball World - Interact with Medamaude.
Practical Uses: Can be used to teleport back to the Nexus quickly and escape from traps (such as being caught by a Toriningen or Uboa) without having to pinch yourself awake.
Notes: When Madotsuki pinches herself, you can notice a little teardrop.
Fat
Fatten / Get Fat(ふとる)
Get fat / Balloon in size. / Get fat.
Appearance: Madotsuki becomes fatter.
Passive Effect: None.
Action: (1) Madotsuki's belly rumbles and an emote appears.
Location: Docks B - Interact with Strober.
Practical Uses: None.
Midget
Dwarf(こびと)
Become small / Shrink in size. / Transform into a dwarf
Appearance: Madotsuki becomes very small.
Passive Effect: Madotsuki can fit through certain small entrances.
Action:
- (1) Madotsuki produces another midget which walks in sync with her. She can produce up to 7 midgets at once.
- (3) One of the cloned midgets will scream and burst in a small spray of blood.
Location: Candle World – Catch and interact with the Dwarf.
Practical Uses:
- Getting in and out of the stairwell on Mars.
- In the Sewers, going through the blocked entrance in the first tunnel to enter the tunnel with the stairs to the Docks A.
- Viewing Closet Madotsuki in the Checkered Tile Path, as Madotsuki's normal height blocks the view.
- Going under the large pipes in Underground World.
Flute
(ふえ)
Play a flute / Brandish a flute. / Equip a flute.
Appearance: Madotsuki holds a flute to her lips.
Passive Effect: None.
Action: (1) Madotsuki plays a short, four-note tune. There are five different tunes that are chosen randomly.
Location: The music room in the Mall - Pick it up off the floor.
Practical Uses: None.
Neon
Neon Light(ネオン)
Become a neon light / Glow like a neon sign. / Transform into a neon light.
Appearance: Madotsuki glows in neon colors.
Passive Effect: None.
Action: (1) Tints the screen with a bright color. The tint is removed when the effect is unequipped or changed. Repeating the action cycles the color between red, blue, yellow, and violet.
Location: Neon World - Interact with the Neon Parrot.
Practical Uses: None.
Nopperabou
Faceless Ghost / Faceless(のっぺらぼう)
Become the faceless ghost / Materialize as a faceless ghost. / Transform into a faceless.
Appearance: Madotsuki becomes a Noppera-bō.
Passive Effect: None.
Action: (1) Madotsuki's head jumps off her shoulders and spins around.
Location: The dead-end of the Sewers - Interact with the Nopperabou Ghost.
Practical Uses: None.
Severed Head
Chopped Head(なまくび)
Become a severed head / Be reduced to a severed head. / Transform into a chopped head.
Appearance: Madotsuki becomes a severed head.
Passive Effect: Madotsuki's height and speed decrease. She is unable to pinch herself awake, enter the restrooms in Block World and Graffiti World, and cannot enter beds when it is equipped due to her lack of arms.
Action: None.
Location: Guillotine World - Interact with the Guillotine.
Practical Uses:
- Viewing Closet Madotsuki in the Checkered Tile Path, as Madotsuki's normal height blocks the view.
- Going under the large pipes in Underground World.
Towel
(タオル)
Wrap up in a towel / Wrap yourself in a towel. / Equip a towel.
Appearance: Madotsuki has a towel wrapped around her.
Passive Effect: None.
Action: (1) Madotsuki sneezes.
Location: Infinite Wilderness - Interact with Ittan-momen.
Practical Uses: None.
Cat
(ねこ)
Grow ears and a tail / Sprout cat-ears and a tail. / Equip a cat ear and tail.
Appearance: Madotsuki grows cat ears and a tail.
Passive Effect: None.
Action: (1) Madotsuki faces downwards and meows like a cat, with large red eyes. She paws the air with her right hand and holds a koban coin in her left, resembling a Maneki-neko.
Location: Shield-Folk World - Interact with Nekoin.
Practical Uses:
- Attract NPCs - Can be used to move NPCs that block your way or find NPCs hidden in the area.
- Provoking a reaction from certain NPCs and the environment.
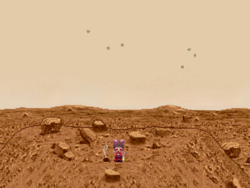
- Summons UFOs at the top of Mars.
Notes: In most cases, this allows you to move characters out of your way without using the Knife effect to kill them. This may be in tune with the Maneki-neko being loosely associated with Guanyin, who is revered in Japan as Kannon (観音), the goddess of mercy and compassion. Maneki-neko with their left paw raised are also said to bring in people or customers, thus why it attracts certain NPCs.
Lamp
(でんとう)
Become a lamp / Change into a lamp. / Transform into a lamp.
Appearance: Madotsuki's head transforms into a lamp.
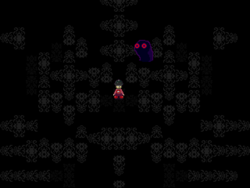
Passive Effect: When the light is on, dark areas are fully lit, improving visibility.
Action: (1) Switches the light on and off.
Location: Lamp World - Interact with the Walking Lamp.
Practical Uses:
- Can be used to navigate Dark World, the Dark Woods, and the FC Dungeon more easily, though it is not required to get through them.
- Can be used to light up the inside of the hot spring house in the Wilderness.
- In previous versions, it was needed to light up the deeper part of FC World B where Buyo Buyo was found.
Bicycle
(じてんしゃ)
Ride a bicycle / Mount a bicycle. / Ride a bicycle.
Appearance: Madotsuki rides a bicycle.
Passive Effect: Madotsuki's speed is doubled. She is unable to enter the restrooms in Block World and Graffiti World and cannot enter beds when it is equipped.
Action: (1) Madotsuki rings the bicycle's bell.
Location: Graffiti World - Pick it up off the floor.
Practical Uses: Can be used to travel through the dream world much faster than by walking, catch fast-moving characters like the Dwarf and Nekoin, and escape from lunatic Toriningen.
Long Hair
(ロングヘアー)
Grow long hair / Grow long hair. / Get long hair.
Appearance: Madotsuki's hair becomes longer.
Passive Effect: None.
Action: (1) Madotsuki sits down (same as default).
Location: Mural World - Interact with the long-haired Mouth Monster.
Practical Uses: None.
Poop Hair
Poo Hair(ウンコヘアー)
I certainly hope it's hair / Grow poo hair. / Get poop hair.
Appearance: Madotsuki's hairstyle is done up to resemble poop. At least we hope so.
Passive Effect: None.
Action: (1) Madotsuki drops a fly which buzzes around in place.
Location: Underground World Storage Room - Interact with the poop-haired Mouth Monster.
Practical Uses: Can be used to mark locations for a short time, though only in the same room/area.
Blonde Hair
Blonde(ブロンド)
Grow long, golden hair / Glow long blonde hair. / Get blonde hair.
Appearance: Madotsuki's hair becomes long and blonde.
Passive Effect: None.
Action: (1) Madotsuki sits down (same as default).
Location: Mural World - Interact with the blond-haired Mouth Monster.
Practical Uses: None.
Triangle Kerchief
Spirit Headband / Ghost Hair Band(△ずきん)
Wear triangle kerchief / Put on a Spirit Headband. / Equip a ghost hair band.
Appearance: Madotsuki wears a triangle kerchief as a tiara, symbolizing death in Japanese culture.
Passive Effect: In the 'ghost form', Madotsuki is invisible to NPCs.
Action: (1) Madotsuki transforms into an 'invisible' ghost and becomes translucent.
Location: Ghost World - Catch and interact with Fleebie.
Practical Uses: When in 'ghost form', lunatic Toriningen can be avoided as Madotsuki is invisible to them, but they will trap her if she interacts with them intentionally.
Witch
(まじょ)
Become a witch / Become a witch incarnate. / Transform into a witch.
Appearance: Madotsuki becomes dressed like a witch, with a pointed hat and robe.
Passive Effect: None.
Action: (1) Madotsuki mounts a broom and floats a short distance from the ground.
Location: Witch's Island - Interact with Kimajo.
Practical Uses: Can be used to fly off the Mall Rooftop. Pressing Z returns to the rooftop, and pressing 1 dismounts the broom in midair, causing Madotsuki to fall out of bed and wake up.
Demon
Oni(おに)
Become a demon / Reconstitute as an oni. / Transform into a demon.
Appearance: Madotsuki transforms into a Demon. Her skin turns red, horns appear on her head and she wears some sort of animal skin.
Passive Effect: None.
Action: (1) When it's raining, a clap of thunder and lightning can be produced.
Location: FC Basement - Interact with the FC Demon.
Practical Uses: Can be used to summon the FC Demon in the Pyramids area of FC World B any time the area is entered with the effect equipped, giving a warp to the FC Demon's room in FC House. Without the effect, it is normally a 1 in 8 chance.
Buyo Buyo
Squish-Squish / Jelly Body(ぶよぶよ)
Body becomes soft and squishy / Change into a squishy blob. / Get a jelly body.
Appearance: When Madotsuki walks, she wobbles around like jelly.
Passive Effect: None.
Action: (1) Madotsuki wobbles up and down.
Location: FC World B - Interact with Buyo Buyo.
Practical Uses: None.
Stoplight
Traffic Light(しんごう)
Become a stoplight / Change into a traffic light. / Transform into a traffic light.
Appearance: Madotsuki transforms into a stoplight.
Passive Effect: Madotsuki cannot pinch herself awake due to her lack of arms.
Action: (1) Switches stoplight between green and red.
Location: Dense Woods B (Road) - Interact with Shitai-san.
Practical Uses: When the light is red, all NPCs will freeze in place, which is useful for avoiding Toriningen or catching fast-moving characters. The appearances of some characters also change, for example:
- Monoko: Transforms into her five-armed state. Interacting with her triggers her full-screen event.
- Mafurako: Becomes fully visible.
- Steve 'Leif' Kareha: Closes his eyes.
- Wheelies: Transforms in appearance.
- Thing with the Quivering Jaw: Its jaw stops quivering.
- KyuuKyuu-kun: It stops rubbing the stairway baluster.
Video Guides
This is a playlist of effect guides created by BuyoBuyo on YouTube.
Pseudo-effects
These are actions that work like effects, but are not counted as a collectible effect and are not required to finish the game.
Instructions
Tutorial(ゲームのせつめい)
See the instructions again / Review the game's tutorial. / Open the tutorial.
The instructions appear as a menu item like the 24 effects. Using it displays a basic tutorial on how to play the game. Madotsuki starts with this effect and can use it in any area, including the real world.
Chair
The chair in Madotsuki's dream room can be ridden when Madotsuki sits on it. Instead of writing in her diary, sitting at the desk and pressing Z (facing the desk) will let Madotsuki scoot the chair around her bedroom. She can ride the chair almost anywhere in the dream world (albeit very slowly), but will not be able to get off it until she returns it to her desk. Some areas are also inaccessible with the chair:
- FC Worlds. Pirori in the Barracks Settlement will not teleport you, and the Static Maze and Static Tunnel warps both do not function. Due to this, the main area of White Desert B is also inaccessible.
- Sky Garden, as she can not go up the Stairway to the Sky. This also makes Ghost World inaccessible.
- Windmill World and the Docks A, as the slope into Big Red is not traversable.
- Staircase of Hands, as she can not sleep in any of the dream world's beds. Thus, she is also unable to reach Underground World, the Spaceship, and Mars.
- Witch's Island, as she can not sit on the Traincar seat to travel there.
- Number World's stairway, as she can not go up the stairs there. The path can still be entered by using the Knife effect on the Zippertile prior to getting to it with the chair.
- Mini Hell can also still be entered with the chair despite requiring the Knife effect if the Toriningen is stabbed prior to using the chair. However, this may be difficult, as the now-hostile Toriningen may be tricky to outrun with the chair's slow speed.
- The White Desert A areas containing Monoe, the Eye People, or the Severed Heads, as using the Knife effect is required to get to all of them.
Effects can be equipped when sitting on the chair while at the desk, a main cause of glitches. Equipping an effect while in the chair and then riding it will cause the effect to stack with the chair. This results in the passive effect functioning and any effect action (besides sitting down) working as normal. The aforementioned areas remain inaccessible as Madotsuki is technically still in the chair, with the exception of Docks A, which can be entered from the Sewers if the Midget effect is equipped while in the chair.
Crick in the Neck
The only involuntary effect. Madotsuki has a 1 in 64 chance of waking up with a crick in her neck, constantly looking left. She can still sit down on the floor or the chair, but she is unable to write in her diary or play NASU. Going back to sleep and waking up again should solve the problem. If all 24 effect eggs have been dropped in the Nexus to trigger the game's ending, the neck crick will not occur.
Although Madotsuki will not dream that she has a crick in her neck, there is a matching FC World sprite that is unused, suggesting that it could have been an actual effect at some point.
Trivia
- The Frog effect is the only effect that can be found in two separate locations: Forest World and Dense Woods B.
- The Severed Head effect can technically also be obtained in two different areas, albeit they are variants of one world, them being the normal and big variants of Guillotine World.
- Before version 0.09, both the Frog and Severed Head effects were still only obtainable in one location, as the Frog in Dense Woods B did not give the Frog effect until version 0.10, and the bigger Guillotine World variant was not added until 0.09.
- There are some unused effects that remain in the files of the game, despite never being implemented in any version.
- The Midget effect has an unused graphic for eight midgets. This graphic also has an FC World counterpart.
- All the effect names in Japanese are written in kana, even if the words are usually or only written in kanji. Such effects are written in kanji within the game's database.
- When the English Steam release of Yume Nikki first came out, the translation used different names for the Fat, Flute, Severed Head, and Demon effects as well as the Instructions, respectively dubbing them "Get Fat", "Whistle", "Talking Head", "Devil", and "Game Info". This was changed 12 days after the original release; the update additionally touched up the descriptions for many effects (including those that were not renamed), ranging from minor grammatical fixes to changing the tone of the text.
- Some of these incorrect names still appear in the FC World menu and when picking up dropped effect eggs in the Nexus. Curiously, the incomplete version of the FC World menu only contains the incorrect names for the Fat effect and the Instructions. Additionally, the FC World menu misspells Midget as "Miget" when all 24 effects have been collected.
- Throughout the game's versions, several effects had their locations moved:
- Before 0.07, the Severed Head effect was obtained in Block World, as the Guillotine was located there. In 0.07, the Guillotine was moved to Guillotine World.
- Before 0.08, the Buyo Buyo effect was found inside a shack in the Barracks Settlement. In 0.08, Buyo Buyo was moved to FC World B, with the original Buyo Buyo NPC now being killed by the Seahorse.
- Before 0.09, the Triangle Kerchief effect was obtained in Dark World, as Fleebie was located there. In 0.09, Fleebie was moved to Ghost World.
- Before 0.10, the Fat effect was obtained by interacting with a funhouse mirror located in Hell. In version 0.10, the mirror was removed and the Fat effect was moved to the Docks B, obtainable from Strober.
- Before 0.10, the Poop Hair effect was located in Mural World alongside the other hair effects. In 0.10, the Mouth Monster granting the Poop Hair effect was moved to Underground World.
- Additionally, the Nopperabou, Towel, and Lamp effects had their positions changed, although their respective effect NPCs stayed within the same worlds they were originally located in.
- In 0.10 and 0.10a, the Witch effect has a bug where, if the player floats with the broom in the Pink Sea, the Number World Bed Room, or the second Neon Tile Path area, the player's footsteps can still be heard while moving around.
- This is due to the fact that every map contains two copies of the same tileset: one for the regular footstep sound effect and one for the broom. 0.09 included the full code for switching between the two tilesets in every map. This was simplified in 0.10, but the three aforementioned maps were not updated.
- The maps still contain leftover data for 0.09's method, and attempting to trigger them with cheats instead corrupts the graphics to the tileset indices changing between builds: the second Neon Tile Path area replaces the pyramids with Henkei Shita heads from Footprint Path A (with the full tileset changing to that of Snow World when sitting down), the Number World Bed Room's tiles are replaced with those of Forest World (except when sitting), and the Pink Sea turns completely invisible due to the game attempting to call blank divider tiles, leaving only a black void.
- In 0.10, the Triangle Kerchief effect's cheek pinch animation always uses the graphic for the invisible state, even if you wake up while visible.
- The animation for waking up in this state also lacks the sprite transparency that the effect's invisible state typically has.
- In versions before 0.10, some effects had different 1-key actions:
- The Knife effect originally had Madotsuki stab the air instead of switching which hand the knife was in. Despite this action sharing its animation with the effect's actual function, it does not affect NPCs as if they have been stabbed.
- The Triangle Kerchief originally made Madotsuki progressively more transparent when the 1 key was pressed, and less transparent when the 3 key was pressed. Toriningen could also still see and trap Madotsuki if she became fully transparent with the effect.
- In 0.04, the Umbrella and Blonde Hair effects lacked 1-key actions altogether, though they gained their respective actions in 0.06.


